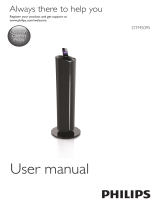
Philips NTX400/12 User manual

Type
User manual

This manual is also suitable for

Philips NTX400/12 is a versatile Hi-Fi system that lets you enjoy music from various sources and offers features to enhance your listening experience. Play your favorite CDs, connect a USB drive, or stream music wirelessly via Bluetooth. Tune in to FM/AM radio stations or connect external devices through the AUX input. Enhance the sound with preset equalizer settings, dynamic bass boost, or NX Bass effect. Record your favorite tracks from CDs to USB, set the sleep timer for a relaxing bedtime routine, or use the clock and timer features for added convenience.

Philips NTX400/12 is a versatile Hi-Fi system that lets you enjoy music from various sources and offers features to enhance your listening experience. Play your favorite CDs, connect a USB drive, or stream music wirelessly via Bluetooth. Tune in to FM/AM radio stations or connect external devices through the AUX input. Enhance the sound with preset equalizer settings, dynamic bass boost, or NX Bass effect. Record your favorite tracks from CDs to USB, set the sleep timer for a relaxing bedtime routine, or use the clock and timer features for added convenience.

www.philips.com/support
User manual
Always there to help you
Register your product and get support at
NTX400
Question?
Contact
Philips
1EN
Contents
1 Important 2
Safety 2
2 Your Mini Hi-Fi System 4
Introduction 4
What's in the box 4
Overview of the main unit 5
Overview of the remote control 6
3 Get started 8
Connect 8
Prepare the remote control 8
Connect power 9
Set clock 9
Turn on 9
4 Play from a disc or USB 10
Play a disc 10
Play from a USB storage device 10
Control play 10
Program tracks 11
View play information 11
5 Play audio through Bluetooth 12
Connect a device 12
Play from Bluetooth device 12
Disconnect a device 13
6 Listen to radio 14
Store radio stations automatically 14
Tune to a radio station 14
Store radio stations manually 14
Select a preset radio station 14
7 Adjust sound 15
Adjust volume 15
Mute sound 15
Select a preset sound effect 15
Enhance bass 15
Apply NX Bass effect 15
8 Other features 16
Listen to an external device 16
Record to a USB device 16
Set the timer 17
Set sleep timer 17
Turn decorative light on or off 18
Listen through a headphone 18
9 Product information 19
Specications 19
USB playability information 20
Supported MP3 disc formats 20
Maintenance 20
10 Troubleshooting 21
About Bluetooth device 21
11 Notice 22
Compliance 22
Care of the environment 22
Trademark notice 22
2 EN
1 Important
Safety
Know these safety symbols
This 'bolt of lightning' indicates uninsulated material
within your unit may cause an electrical shock. For
the safety of everyone in your household, please do
not remove product covering.
The 'exclamation point' calls attention to
features for which you should read the enclosed
literature closely to prevent operating and
maintenance problems.
WARNING:Toreducetheriskofreorelectric
shock, this apparatus should not be exposed to
rainormoistureandobjectslledwithliquids,
such as vases, should not be placed on this
apparatus.
CAUTION: To prevent electric shock, match
wide blade of plug to wide slot, fully insert.
Warning
Never remove the casing of this device.
Never lubricate any part of this device.
Neverplacethisdeviceonotherelectricalequipment.
Keep this device away from direct sunlight, naked
amesorheat.
Never look into the laser beam inside this device.
Ensure that you always have easy access to the power
cord, plug, or adaptor to disconnect this device from
the power.
Do not use this apparatus near water.
Install in accordance with the
manufacturer's instructions.
Do not install near any heat sources such
as radiators, heat registers, stoves, or
otherapparatus(includingampliers)that
produce heat.
Protect the power cord from being
walked on or pinched, particularly at plugs,
convenience receptacles, and the point
where they exit from the apparatus.
Onlyuseattachments/accessoriesspecied
by the manufacturer.
Use only with the cart, stand, tripod,
bracket,ortablespeciedbythe
manufacturer or sold with the apparatus.
When a cart is used, use caution when
moving the cart/apparatus combination to
avoid injury from tip-over.
Unplug this apparatus during lightning
storms or when unused for long periods
of time.
Referallservicingtoqualiedservice
personnel.Servicingisrequiredwhen
the apparatus has been damaged in any
way, such as power-supply cord or plug
isdamaged,liquidhasbeenspilledor
objects have fallen into the apparatus, the
apparatus has been exposed to rain or
moisture, does not operate normally, or
has been dropped.
Battery usage CAUTION – To prevent
battery leakage which may result in bodily
injury, property damage, or damage to the
remote control:
Install the battery correctly, + and - as
marked on the remote control.
Do not mix batteries (old and new or
carbonandalkaline,etc.).
Remove the battery when the remote
control is not used for a long time.
The battery shall not be exposed to excessive
heatsuchassunshine,reorthelike.
Apparatus shall not be exposed to
dripping or splashing.
Do not place any sources of danger on the
apparatus(e.g.liquidlledobjects,lighted
candles).
3EN
Where the MAINS plug or an appliance
coupler is used as the disconnect device,
the disconnect device shall remain readily
operable.
Caution
Use of controls or adjustments or performance of
procedures other than herein may result in hazardous
laser exposure or other unsafe operation.
Hearing safety
Listen at a moderate volume.
Using headphones at a high volume can
impair your hearing. This product can
produce sounds in decibel ranges that may
cause hearing loss for a normal person,
even for exposure less than a minute. The
higher decibel ranges are offered for those
that may have already experienced some
hearing loss.
Sound can be deceiving. Over time your
hearing 'comfort level' adapts to higher
volumes of sound. So after prolonged
listening, what sounds 'normal' can actually
be loud and harmful to your hearing. To
guard against this, set your volume to a safe
level before your hearing adapts and leave
it there.
To establish a safe volume level:
Set your volume control at a low setting.
Slowly increase the sound until you can
hear it comfortably and clearly, without
distortion.
Listen for reasonable periods of time:
Prolonged exposure to sound, even
at normally 'safe' levels, can also cause
hearing loss.
Besuretouseyourequipmentreasonably
and take appropriate breaks.
Be sure to observe the following guidelines
when using your headphones.
Listen at reasonable volumes for
reasonable periods of time.
Be careful not to adjust the volume as your
hearing adapts.
Do not turn up the volume so high that
you can't hear what's around you.
You should use caution or temporarily
discontinue use in potentially hazardous
situations.
Note
The type plate is located on the back of the unit.
4 EN
2 Your Mini Hi-Fi
System
Congratulations on your purchase, and
welcometoPhilips!Tofullybenetfromthe
support that Philips offers, register your product
at www.Philips.com/welcome.
Introduction
With this product, you can
enjoy audio from discs, USB storage
devices, Bluetooth enabled devices, or
other external devices;
listen to FM and AM radio stations; and
record from a disc to a USB storage
device.
To enrich sound, this product offers you these
sound effects:
PresetEqualizer(EQ)Settings
DynamicBassBoost(DBB)
NX Bass Enhancement
What's in the box
Check and identify the contents of your
package:
Main unit x 1
Remotecontrol(withoneAAAbattery)
FM wire antenna x 1
AM loop antenna x 1
Printed materials
5EN
Overview of the main unit
a
Turn on the product.
Switch to standby or Eco power
standby mode.
b /
In Disc or USB mode, skip to the
previous or next album.
In FM or AM tuner mode, select a
preset radio station.
In standby mode, adjust hour and
minute during clock/timer setting.
adef gh
i
j
k
lmnop
q
r
s
cb
c /OK
Pause or resume play.
Conrmaselection.
d
Stop play or erase programmed list.
Exit clock/timer setting mode.
Exit the recording process.
6 EN
e /
In tuner mode, tune to radio stations.
In DISC or USB mode, skip to the
previous or next track.
In DISC or USB mode, search within
a track.
f NX BASS
Turn bass effect on.
g Volume knob
Adjust volume.
h
Enable or diable the speaker lighting
effect.
i NFC
Connect a NFC compatible device
through Bluetooth.
j AUDIO IN
Connect an external audio device.
k Display panel
Show current status.
l
Open or close the disc tray.
m DBB
Turn dynamic bass enhancement on
or off.
n MODE
Selectarepeatorshufeplaymode.
o EQ
Selectapresetequalizer(EQ)setting.
p SOURCE
Select an audio source.
q
Connect a headphone.
r USB socket
Connect a USB mass storage device.
s REC
Record to a USB device.
Overview of the remote
control
a
Turn on the product.
Switch to standby or Eco power
standby mode.
b
Open or close the disc tray.
c SOURCE
Select an audio source.
d MODE
Selectarepeatorshufeplaymode.
e /
In Disc or USB mode, skip to the
previous or next album.
In FM or AM tuner mode, select a
preset radio station.
In standby mode, adjust hour and
minute during clock/timer setting.
a
d
e
f
g
h
i
j
k
l
m
n
o
p
q
r
c
b
7EN
f /
In FM or AM tuner mode, tune to
radio stations.
In DISC or USB mode, skip to the
previous or next track.
In DISC or USB mode, search within
a track.
g
Pause or resume play.
Conrmaselection.
h
Mute or resume sound.
i
Stop play or erase programmed list.
Exit clock/timer setting mode.
Exit the recording process.
j USB REC
Record to a USB device.
k CLOCK
Set clock.
l EQ
Selectapresetequalizer(EQ)setting.
m DBB
Turn dynamic bass enhancement on
or off.
n LIGHT
Enable or diable the speaker lighting
effect.
o TIMER
Set the timer.
p SLEEP
Set sleep timer.
q + VOL -
Adjust volume.
r PROG
Program tracks.
Program radio stations.
8 EN
3 Get started
Caution
Use of controls or adjustments or performance of
procedures other than herein may result in hazardous
laser exposure or other unsafe operation.
Always follow the instructions in this chapter in
sequence.
If you contact Philips, you will be asked for the
model and serial number of this apparatus. The
model number and serial number are on the
back of the apparatus. Write the numbers here:
Model No. __________________________
Serial No. ___________________________
Connect
Connect FM antenna
Note
For better reception, fully extend and adjust the
position of the FM antenna.
Connect the supplied FM antenna to the FM
jack on the back of the main unit.
Connect AM antenna
Note
For better reception, adjust the position of the AM
antenna.
1 Assemble the AM loop antenna.
2 Connect the AM loop antenna to the AM
jack on the back of the main unit.
Prepare the remote control
Note
Danger of explosion if battery is incorrectly replaced.
Replaceonlywiththesameorequivalenttype.
Batteries contain chemical substances, so they should
be disposed of properly.
9EN
1 Open the battery compartment.
2 Insert one AAA battery with correct
polarity(+/-)asindicated.
3 Close the battery compartment.
Connect power
Caution
Risk of product damage! Make sure that the power
supply voltage corresponds to the voltage printed on
the back or the underside of the product.
Risk of electric shock! When you unplug the power
cord, always pull the plug from the socket. Never pull
the cord.
Note
Before connecting to AC power, make sure that you
have completed all other connections.
Connect the AC power plug to the power
outlet.
Set clock
1 In standby mode, press and hold CLOCK
for two seconds.
» [CLOCK SET] appears, then [12H] or
[24H] is displayed.
2 Press / repeatedly to select 12 hour
or 24 hour format.
3 Press CLOCKtoconrm.
» Thehourdigitashes.
4 Repeat steps 2 to 3 to set the hour and
minute.
Note
To cancel clock setting, press .
During clock setting, if no action is taken within
90 seconds, the product exits clock setting mode
automatically.
The clock is displayed in standby mode. To view the
clock in working or ECO power standby mode, press
and hold CLOCK for two seconds.
Turn on
Press .
» The product switches to the last
selected source.
Switch to standby mode
Press again to switch the product to standby
mode.
» Theclock(ifset)isdisplayed.
To switch between standby mode and Eco
power standby mode:
Press and hold for two seconds.
» In Eco power standby mode, the
button lights up red, and the display
backlight is off.
Tip
The product switches to Eco power standby mode
automatically after 10 minutes in standby mode.
10 EN
4 Play from a disc
or USB
Play a disc
Note
Make sure that the disc contains playable audio
contents.
1 Press SOURCE repeatedly to select the
disc source.
2 Press to open the disc tray.
3 Insert a disc into the disc tray, with the
printed side facing up.
4 Press again to close the disc tray.
» Play starts automatically.
Play from a USB storage
device
Note
Make sure that the USB device contains playable audio
contents in supported formats.
1 Press SOURCE repeatedly to select the
USB source.
2 Insert the USB plug of the device into the
socket.
DISC
3 Press / to select a folder.
4 Press / toselectanaudiole.
» Play starts automatically.
Control play
In DISC or USB mode, follow the instructions
below to control play.
Button Action
/ Press to skip to the previous or next
track.
Press and hold to fast forward or fast
reverse the track during playback,
then release to resume play.
/ Press to select an album.
Press to pause or resume play.
Press to stop play.
MODE Press repeatedly to select a play mode:
[OFF]: return to normal play mode.
[REPEAT ONE]: play the current
track repeatedly.
[REPEAT ALL]: play all tracks
repeatedly.
[SHUFFLE]: play all tracks randomly.
Note
Random play cannot be selected when you play the
programmed tracks.
11EN
Program tracks
You can program a maximum of 20 tracks.
1 In DISC or USB mode, press to stop
playing.
2 Press PROG to activate the program
mode.
» Anumberashesonthescreen.
3 For MP3 tracks, press or to select an
album.
4 Press or to select a track number,
then press PROGtoconrmselection.
5 Repeat steps 3 to 4 to program other
tracks.
6 Press to play the programmed track.
To erase the program, press twice.
View play information
Note
You can only view the play information in DISC or USB
mode.
During play, press CLOCK repeatedly to view
different play information:
Track number and play time
Title
Artist
Album
12 EN
5 Play audio
through
Bluetooth
The product can stream music from your
Bluetooth device to the system through
Bluetooth.
Connect a device
Note
Before pairing a device with this product, read its user
manual for Bluetooth compatibility.
The product can memorize a maximum of eight paired
devices.Theninthpaireddevicewillreplacetherst
one.
Any obstacle between this product and a Bluetooth
device can reduce the operational range. Keep away
from any other electronic device that may cause
interference.
The operational range between this product and a
Bluetoothdeviceisapproximately10meters(30feet).
Option 1: Connect a device through
NFC
NearFieldCommunication(NFC)isa
technology that enables short-range wireless
communication between various NFC
compatible devices, such as mobile phones and
IC tags.
If your Bluetooth device supports NFC, you can
connect it with this product easily.
1 Enable the NFC feature on your Bluetooth
device(refertoitsusermanual).
2 Tap the NFC tag on the top of the product
with the NFC area of your Bluetooth
device until you hear a beep.
3 On your Bluetooth device, accept the
pairingrequestwith"PhilipsNX4".
4 Follow the on-screen instructions to
complete the pairing and connection.
» After successful connection, [BT
CONNECTED] (BTconnected)
scrolls on the screen, and the product
beeps twice.
Option 2: Connect a device manually
1 Press SOURCE repeatedly to select [BT]
source.
2 On your Bluetooth device, enable
Bluetooth and search for Bluetooth devices
that can be paired (see the user manual of
thedevice).
3 Select [Philips NX4] displayed on your
device for pairing.
» After successful connection, [BT
connected] (BTconnected)scrolls
on the screen, and the product beeps
twice.
Play from Bluetooth device
After successful Bluetooth connection, play
audio on the Bluetooth device.
» Audio streams from your Bluetooth
device to this product.
13EN
Disconnect a device
Press and hold for three seconds;
Disable Bluetooth on your device; or
Move the device beyond the
communication range.
» The product beeps twice.
Note
Before connecting another Bluetooth device, disconnect
thecurrentdevicerst.
14 EN
6 Listen to radio
Store radio stations
automatically
Note
You can program a maximum of 20 FM and 10 AM
radio stations.
WhenenteringFMorAMmodefortherst
time, the product prompts you to search and
store all the available radio stations.
1 Press SOURCE repeatedly to select FM or
AM tuner mode.
» [AUTO INSTALL-PRESS PLAY-STOP
CANCEL] (auto install-press play-stop
cancel)isdisplayed.
2 Press to start full scan.
» [AUTO] is displayed.
» The product stores all the available
radio stations automatically, and then
broadcaststherstavailablestation.
» The station list is memorized in the
product. When you enter the radio
mode next time, the station scan does
not take place.
Note
If you press , the product will not perform full scan,
and the same message will pop up when you enters FM
or AM mode next time.
You can also press and hold PROG for two
seconds to activate automatic programming.
» [AUTO](auto)isdisplayed.
» The product stores radio stations with
sufcientsignalstrengthautomatically.
» Therststoredradiostationis
broadcast automatically.
Tune to a radio station
Tip
Keep the product away from other electronic devices
to avoid radio interference.
For better reception, fully extend and adjust the
position of the antenna.
1 Press SOURCE repeatedly to select FM or
AM tuner.
2 Press and hold / for two seconds.
» [SEARCH] is displayed.
» The radio tunes to a station with
strong signal automatically .
3 Repeat step 2 to tune to more stations.
To tune to a station with weak signal,
press / repeatedlyuntilyound
better reception.
Store radio stations manually
Note
You can program a maximum of 20 FM and 10 AM
radio stations.
1 Tune to a radio station.
2 Press PROG to activate the program mode.
» A position number is displayed.
3 Press / to allocate a number to this
radio station, then press PROGtoconrm.
4 Repeat steps 1 to 3 to program other stations.
Tip
To overwrite a programmed station, store another
station in its place.
Select a preset radio station
In tuner mode, press / to select a preset
number.
15EN
7 Adjust sound
Adjust volume
During play, press + VOL - to increase or
decrease volume.
Mute sound
During play, press to mute or resume sound.
Select a preset sound effect
During play, press EQ repeatedly to select
special sound effects:
[POP] (pop)
[SAMBA](samba)
[ROCK](rock)
[TECHNO](techno)
[JAZZ](jazz)
Enhance bass
ThebestDynamicBassEnhancement(DBB)
setting is generated automatically for each
EQselection.Youcanmanuallyselectthe
DBB setting that best suits your listening
environment.
During play, press DBB repeatedly to
select:
DBB 1
DBB 2
DBB 3
DBB OFF
Apply NX Bass effect
NX Bass effect adds clean and lively
characteristics to your music with rather low
background noise.
During play, press NX BASS. The sound will
change in 3 stages:
Stage 1: The sound volume increases to
a higher level and stays at this level for
5 seconds.
» [FIRING](ring)isdisplayed.
Stage 2: The sound volume gradually
decreases to its original level in 10
seconds.
» [DISCHARGING](discharging)is
displayed.
Stage 3: The sound volume keeps at
normal level for 40 seconds.
» [RECHARGING](recharging)is
displayed.
Note
To reactivate the NX bass effect, press NX BASS again
after the 3 stages are completed.
16 EN
8 Other features
Listen to an external device
With this product, you can listen to an external
audio device such as an MP3 player.
Play from an MP3 player
1 Press SOURCE repeatedly to select the
AUDIO IN source.
2 Connect an audio input cable (not
supplied)witha3.5mmconnectoron
both ends to:
the AUDIO IN socket on the product,
and
the headphone socket on the MP3 player.
3 Play audio on the MP3 player (refer to its
usermanual).
Play from other audio device
You can also play audio from a TV or DVD player.
1 Press SOURCE repeatedly to select AUX
DVD or AUX TV source.
AUDIO IN
2 Connect the white and red audio cables
(notsupplied)to:
the AUX IN sockets on the back of
the product.
the AUDIO OUT socket on a TV or
DVD player.
3 Play audio on the external audio device
(refertotheusermanualofthedevice).
Record to a USB device
AudioCDtracksandMP3lesarerecordedin
.mp3 format.
ThersttimeyourecordtoaUSBdevice,
a folder is automatically created in the USB
device. Each time you record to a USB device,
therecordedlesarestoredinasub-folder.
Files and subfolders are named numerically in
the order by which they are created.
1 Plug a USB device into the socket.
2 Select the disc source and load a disc.
To record one track in a disc: select a
track to play, then press USB REC.
To record all tracks in a disc: press to
stop play, then press USB REC.
» Play starts automatically from the
beginning of the disc or the selected
track, and the recording starts.
To stop recording, press .
DVD
L
R
17EN
Note
If the USB device does not have enough memory to
storetheaudioles,amessageaboutafullmemoryis
displayed.
With MP3-CD playback, you can only record all tracks
in the current folder.
Set the timer
If a timer is set, the product will be turned on
automatically after a preset time.
Note
Make sure that clock is set correctly.
1 In standby mode, press and hold TIMER
for two seconds.
» [TIMER SET] is displayed, then a
prompt to select the sound source is
displayed.
2 Press / repeatedly to select a sound
source: DISC, USB, FM, or AM.
3 Press TIMERtoconrm.
» [12H] or [24H] is displayed.
4 Press / to select 12 hour or 24 hour
format.
5 Press TIMERtoconrm.
» In 12 hour format, [AM] or [PM] is
displayed. Repeat steps 4 to 5 to select
AM or PM. Then the hour digits begin
toash.
» In 24 hour format, the hour digits begin
toash.
6 Repeat steps 4 to 5 to set the hour,
minute, and the volume of the sound
source.
» If the product is in standby or Eco
power standby mode, the selected
sound source will be activated when
the preset time comes.
Note
To cancel timer setting, press .
During timer setting, if no action is taken within
90 seconds, the product exits timer setting mode
automatically.
Activate or deactivate the timer
In standby mode, press TIMER repeatedly
to activate or deactivate the timer.
» If the alarm timer is activated, [TIMER
ON] is displayed.
» If the alarm timer is deactivated,
[TIMER OFF] is displayed.
Set sleep timer
When the product is turned on, press SLEEP
repeatedly to select a period of time (in
minutes).
» The product switches to standby
mode automatically after the preset
time period.
» When [SLEEP OFF] (sleepoff)
is displayed, the sleep timer is
deactivated.
18 EN
Turn decorative light on or
off
In power-on mode, press LIGHT repeatedly to
select a speaker light color or turn the light off:
[PEACE] (peace)
[POWERFUL] (peace)
[PASSION] (passion)
[SAMBA] (samba)
[FIESTA](esta)
[CIELO](cielo)
[CUSTOM] (custom)
[OFF](off)
Listen through a headphone
Plug a headphone into the socket on
the product.
  • Page 1 1
  • Page 2 2
  • Page 3 3
  • Page 4 4
  • Page 5 5
  • Page 6 6
  • Page 7 7
  • Page 8 8
  • Page 9 9
  • Page 10 10
  • Page 11 11
  • Page 12 12
  • Page 13 13
  • Page 14 14
  • Page 15 15
  • Page 16 16
  • Page 17 17
  • Page 18 18
  • Page 19 19
  • Page 20 20
  • Page 21 21
  • Page 22 22
  • Page 23 23
  • Page 24 24
  • Page 25 25
  • Page 26 26

Philips NTX400/12 User manual

Type
User manual
This manual is also suitable for

Philips NTX400/12 is a versatile Hi-Fi system that lets you enjoy music from various sources and offers features to enhance your listening experience. Play your favorite CDs, connect a USB drive, or stream music wirelessly via Bluetooth. Tune in to FM/AM radio stations or connect external devices through the AUX input. Enhance the sound with preset equalizer settings, dynamic bass boost, or NX Bass effect. Record your favorite tracks from CDs to USB, set the sleep timer for a relaxing bedtime routine, or use the clock and timer features for added convenience.

Ask a question and I''ll find the answer in the document

Finding information in a document is now easier with AI