Page is loading ...

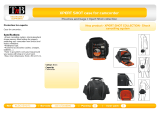
User manual Power Xpert
®
UX
Power Xpert
®
UX with W-VACi circuit breaker (up to 24 kV)
Air Insulated Medium-voltage switchgear

Table of contents
Power Xpert
®
UX with W-VACi circuit breaker 6063308 G01 01 14 July 2011 www.eaton.com
2

Table of contents
Power Xpert
®
UX with W-VACi circuit breaker 6063308 G01 01 14 July 2011 www.eaton.com
3
Table of contents
1 Introduction 6
1.1 General system description 6
1.1.1 System type 6
1.1.2 System construction 6
1.2 Using the manual 6
1.2.1 Target group 6
1.2.2 Notation guide 6
1.2.3 Structure of the manual 6
1.3 Safety instructions 7
1.3.1 General instructions 7
1.3.2 Safety of the Switchroom 8
1.3.3 What to do in the event of a fire 11
1.4 Product information 12
1.4.1 Product Rating Plate 12
2 Product description 13
2.1 The system 13
2.1.1 Panels 13
2.1.2 Circuit Breaker or Contactor unit 13
2.1.3 Circuit Breaker or Contactor Unit Positions 14
2.1.4 Cable connections 14
2.1.5 Voltage transformers 15
2.1.6 Current transformers 15
2.1.7 Auxiliary equipment 15
2.1.8 Earthing 16
2.1.9 Withdrawable units 17
2.1.10 Interlocks 18
2.2 Panel types 18
2.2.1 Circuit-breaker panel 18
2.2.2 Bus-section panel (connecting panel) 19
2.2.3 Incoming panel 20
2.2.4 Outgoing panel 20
2.2.5 Metering panel 20
2.2.6 Contactor panel 20
2.3 Equipment safety 20
2.3.1 Safe operation 20
2.3.2 Safety features 20
2.3.3 Execution of work 21
2.3.4 Safety markings 21
2.4 General technical data 22
2.4.1 Electrical data 22
2.4.2 Environmental conditions 23
2.4.3 Dimensions and weights 23
3 System assembly 25
3.1 Environmental requirements 25
3.1.1 Climate 25
3.1.2 Room for extension 25
3.1.3 Floor 25
3.1.4 Floor plan 25
3.1.5 During transport and storage 25
3.2 System transport 27
3.2.1 Delivery inspection 27

Table of contents
4
Power Xpert
®
UX with W-VACi circuit breaker 6063308 G01 01 14 July 2011 www.eaton.com
3.2.2 Instructions for transport 27
3.2.3 Transport in the operating area 28
3.3 System assembly 28
3.3.1 Foundation on site 28
3.3.2 Unpacking the delivery 28
3.3.3 Inspection of the floor 28
3.3.4 Preparations 29
3.3.5 Installation of the switchgear 32
3.4 Busbar coupling 33
3.4.1 Main busbar 33
3.4.2 Earthing busbars 34
3.5 Connection of wiring and cables 35
3.5.1 Connecting a main cable 36
3.5.2 Connection of secondary wiring 36
3.5.3 Connecting the auxiliary cables 37
3.5.4 Inter-panel connection of auxiliary cables 37
4 System operation 38
4.1 Operation - General 38
4.1.1 Mechanical operation door open 39
4.1.2 Charging the closing spring 39
4.1.3 Mechanical operation door closed 40
4.1.4 Electrical operation 40
4.2 Unit insertion and withdrawal 41
4.2.1 Standard interlocking 41
4.2.2 Inserting a unit 42
4.2.3 Door interlock mechanism 43
4.2.4 Withdrawing a unit 43
4.2.5 Locking the shutters 44
4.3 Earthing 45
4.3.1 Cable door interlock mechanism 45
4.3.3 Switching on/off the earthing switch 46
4.3.4 Earthing busbar/cable using withdrawable earthing unit 46
4.4 Checks 47
4.4.1 Shutter lifter truck 47
4.4.2 Optional Voltage Detection System VDS 49
5 System commisioning and decommisioning 50
5.1 Commissioning 50
5.1.1 Acceptance testing 50
5.1.2 Inspections 50
5.1.3 Handover 50
5.2 Decommissioning 50
5.2.1 Dismantling 50
5.2.2 Disposal 50
6 System inspection, maintenance and repair 52
6.1 Logbook 52
6.2 Inspection and maintenance, general 52
6.2.1 Periodic check 52
6.2.2 Maintenance 52
6.3 Fault diagnosis 53
6.3.1 What to do in the event of a fault 53
6.3.2 Troubleshooting table 53

Table of contents
Power Xpert
®
UX with W-VACi circuit breaker 6063308 G01 01 14 July 2011 www.eaton.com
5
7 Accessories 55
7.1 List of available accessories 55
7.1.1 Power Xpert
®
UX 55
7.1.2 Optional 55
8 Glossary 56
8.1 Safety and qualification of personnel 56
8.2 Abnormal operating conditions 56
8.3 Equipment and the area around it 57
9 Appendix 58
9.1 General 58
9.2 Floor Plan drawings 59

Introduction
6
Power Xpert
®
UX with W-VACi circuit breaker 6063308 G01 01 14 July 2011 www.eaton.com
1 Introduction
1.1 General system description
The Eaton Power Xpert
®
UX switchgear system is
designed for medium-voltage supply stations such as
main supply stations, distribution sub-stations and
industrial connections. It can also be used in industry and
power plants as motor control centers.
1.1.1 System type
The Eaton Power Xpert
®
UX system is an air-insulated,
medium voltage switchgear system. It is defined as
‘metal enclosed switchgear’ in accordance with
IEC 62271-200 and classified in the
category LSC2B-PM.
1.1.2 System construction
A Power Xpert
®
UX panel is constructed of sheet metal
circuit breaker panels, withdrawable vacuum circuit
breakers and withdrawable contactors.
The main busbar system is located at the top of the
panels. It consists of copper bars which may be
supported by insulator depending on rated short-circuit
current. The bars are provided with an insulation layer
over their entire length.
Pressure relief vents at the top of the circuit breaker
panels provide protection against overpressure in any of
the main compartments (busbar, circuit breaker or cable)
that may be caused if an internal arc occurs.
An additional low-voltage compartment (for secondary
equipment) is fitted to a circuit breaker panel
The installation is divided functionally into panels (such
as circuit breaker panels, a busbar section panel, etc.).
The panel function and the rated current of the panel in
question determine the width of the panel.
Options
The installation may be provided with optional equipment
such as busbar insulating bushings, voltage transformers
etc.
The standard installation supplied is a single busbar
model.
For further details, see technical data.
1.2 Using the manual
1.2.1 Target group
The switchgear is designed for use by personnel who are
expert or adequately trained in using switchgear and/or
carrying out electrical operations.
For definitions of these terms, see chapter 8 – Glossary.
1.2.2 Notation guide
This manual uses warning boxes to alert the user to
possible dangers while operating or maintaining the
equipment:
WARNING
Personal (fatal) danger to personnel and
bystanders.
CAUTION
Danger of damage to equipment.
NOTE
Important note for clarification.
REMARK
Useful advice.
1.2.3 Structure of the manual
The manual contains 9 chapters.
Chapters 1 and 2 contain general information on the
system design and construction and general safety
aspects. The information is presented in the form of
descriptive texts, supported by illustrations as necessary.
Illustrations are numbered consecutively for each
chapter, and are captioned if necessary.
Chapters 3 to 7 consist mainly of procedures. These
procedures contain step-by-step descriptions of actions
in the order in which they should be carried out.
Illustrations are on the same page as the relevant step
and have the same number.
WARNING
Never take any action without knowing what
effect it will have.
REMARK
Read through all actions first, using the relevant
figures. Contact Eaton if you do not understand what
you have to do.

Introduction
Power Xpert
®
UX with W-VACi circuit breaker 6063308 G01 01 14 July 2011 www.eaton.com
7
Further information regarding chapters 3 to 7 is given
below.
Chapter 3 – Setting up the system
This chapter contains instructions on transport, assembly
and busbar coupling. It also describes what is required
for the operating area and gives an overview of
connection possibilities.
Chapter 4 - System operation
This chapter is aimed at the operator, who is expected to
operate and monitor the system independently. For that
reason, these activities are described in detail.
Chapter 5 - System commissioning and
decommissioning
Chapter 5.1 sets out the actions required before the
system can be commissioned. These actions should be
carried out in conjunction with Eaton.
Chapter 5.2 deals with decommissioning the system. It
also includes recommendations for the safe disposal of
the system or parts of the system.
Chapter 6 – System inspection, maintenance and
repair
This chapter describes only those operations that may be
carried out by the user.
NOTE
Operations not included in the manual must be
carried out by or under the supervision of Eaton.
Chapter 7 - Accessories
This chapter contains a list of accessories that can be
supplied
Chapter 8 - Glossary
This chapter contains clarifications of specific terms used
in the manual but not explained further.
Chapter 9 – Appendix
This chapter shows the structure of all the documentation
supplied with the system.
1.3 Safety instructions
Read this user manual carefully before commissioning
the switchgear. Make sure that you have read and
understood all safety warnings and instructions.
1.3.1 General instructions
Eaton has done its utmost to inform user as accurately
and as fully as possible concerning any dangers involved
in using the system. Users are responsible for
supervising implementation of the instructions contained
in this manual.
Personnel
The user must make sure that personnel are qualified to
carry out the task.
Safety of bystanders
Access to the equipment is to be limited to those directly
involved in operating or maintaining it.
Other persons must not remain in the vicinity of the
equipment.
During switching operations, no personnel must be
behind or above the installation.
Safety plan
It may be necessary to draw up a safety plan.
Comprehensive advice on this should be obtained from
the relevant authorities (fire brigade, local authorities,
occupational health & safety, company safety
department, first aid service etc.).
Safety standards
Power Xpert
®
UX switchgear complies with the following
standards:
●
IEC 62271-200:
AC metal-enclosed switchgear
and controlgear for rated voltages
above 1 kV and up to and
including 52 kV;
●
IEC 60529:
Degrees of protection provided
by enclosures (IP code);
●
IEC 62271-1:
General conditions for high
voltage switchgear and control
gear standards.

Introduction
8
Power Xpert
®
UX with W-VACi circuit breaker 6063308 G01 01 14 July 2011 www.eaton.com
The components used comply with standards:
●
IEC 62271-100:
High-voltage alternating current
circuit breakers
●
IEC 62271-102:
Alternating current
disconnectors and earthing
switches
●
IEC 60044-1:
Instrument transformers – part
1: Current transformers
●
IEC 60044-2:
Instrument transformers – part
2: Voltage transformers
●
IEC 60265:
High-voltage switches – part 1:
Switches for rated voltages
above 1 kV and less than 52 kV
●
IEC 60282-1:
High-voltage fuses – part 1:
Current-limiting fuses
●
IEC 62271-105:
High-voltage alternating current
switch fuse combinations
●
IEC 60470:
High-voltage alternating current
contactors and contactor-based
motor-starters.
Eaton Power Xpert
®
switchgear can be used in areas
under normal conditions as described in IEC 62271-1,
Chapter 2.1.
1.3.2 Safety of the Switchroom
The installation and the switchroom must comply with all
applicable local safety regulations. The switchroom is
the room in which the switchgear has been set up and
must meet at least the following requirements:
- Clear space
NOTE
Operations not included in the manual must be
carried out by or under the supervision of Eaton.
Front Access:
If the switchgear is arranged for Front cable access then
rear or side clear space of at least 0.1 m is required.
However Eaton recommends at least 1 m at one end of
the switchgear and at least 0.5 m to the rear wall are left
to allow for ease of installation.
Rear Access:
If the switchgear is arranged for Rear cable access then
a clear space of 0.8 m is required to the rear wall of the
switchroom, at least 0.1 m space at one end of the
switchboard and 0.5 m space at the other end of the
switchboard to allow for adequate escape routes, and if
switchboard length is more than 10 m, then at least 0.5 m
clear space of both sides is required to allow for
adequate escape routes.
All installations:
Eaton recommends a dimension of at least 1.5 m at the
front of the switchgear to allow for ease of operation,
removal of vacuum circuit breaker from the panel and
adequate escape route. In the case of facing installations
aisle width of 2.5 m is required between the installations.

Introduction
Power Xpert
®
UX with W-VACi circuit breaker 6063308 G01 01 14 July 2011 www.eaton.com
9
Clear space for Power Xpert
®
UX switchgear with front
and rear access
Clear space for Power Xpert
®
UX switchgear with
front access
Fig. 1-1 Clear space for 12 kV and 17.5 kV panel

Introduction
10
Power Xpert
®
UX with W-VACi circuit breaker 6063308 G01 01 14 July 2011 www.eaton.com
Clear space for Power Xpert
®
UX switchgear with front
and rear access
Clear space for Power Xpert
®
UX switchgear with
front access
Fig. 1-2 Clear space for 24 kV panel

Introduction
Power Xpert
®
UX with W-VACi circuit breaker 6063308 G01 01 14 July 2011 www.eaton.com
11
- Escape routes
To the front and rear of the installation, and between two
installations sited opposite each other, an escape route at
least 0.5 m wide and 2 m high must be present over the
entire length of the installation. The width of the escape
route is measured from the part of the installation that
projects furthest. The escape route must be completely
clear and as far as possible in a straight line.
REMARK
The installation may be set up with the back against
a wall. In that case there will be no clear area or
escape route at the rear or sides.
- Entrances
Entrances to the switchroom and escape routes must be
kept clear at all times.
Entrances must be provided at suitable places and must
be at least width of panel plus 0.2 m wide and height of
panel (without arc channel) plus 0.2 m high. For details of
width and height of panel, see chapter 2.4.3. Entrances
must be accessible via the escape routes. It must be
possible to open access doors outwards without the use
of aids.
- Storage of materials
Items not connected with the installation must not be
stored in the switch room. Flammable materials,
combustible gases and dangerous chemicals must not be
stored.
- Availability of extinguishers
Suitable extinguishers must be present in and around the
switch room. Obtain expert advice (fire brigade) on the
best choice and location of the extinguishers.
1.3.3 What to do in the event of a fire
In the event of a fire in the switch room, proceed as
follows:
Evacuate all personnel from the switch room
Call the fire brigade.
Notify specialists who can switch off the installation
completely, i.e. including:
Incoming cables;
Low-voltage cables;
Feedback from the low-voltage side;
Any other power sources.
Follow local fire instructions.
WARNING
NEVER ATTEMPT TO EXTINGUISH THE FIRE
BEFORE THE INSTALLATION IS COMPLETELY
DEAD I.E. ISOLATED FROM THE SUPPLY.
NEVER extinguish with a water jet.
Make sure that no water flows into the
installation.
Keep well clear of the installation while the fire is
extinguished in the area around the installation.
Even using non-conducting extinguishing
materials, a voltage may pass through the
extinguishing equipment.
Putting the fire out:
If possible, leave extinguishing the fire to the fire
brigade.
Use non-conducting extinguishing materials.
If necessary, use extinguishers in the area around the
installation. Never attempt to extinguish the
installation itself, even if it appears to be dead.

Introduction
12
Power Xpert
®
UX with W-VACi circuit breaker 6063308 G01 01 14 July 2011 www.eaton.com
1.4 Product information
The main system specifications are indicated on the
product rating plates. Further information is available from
the information pack that includes this manual.
1.4.1 Product Rating Plate
A complete product rating plate is made up of a main
rating plate with supplementary rating plates if required.
The main product rating plate is headed with the Eaton
logo.
The type of switching system, the type of panel it contains
and the components used determine the complete
product rating plate. Each panel contains a complete
product rating plate. This also applies to the withdrawable
part (i.e. circuit breaker or contactor unit). Fig. 1-3 shows
one example of product rating plate of the fixed part. For
the product rating plate on the withdrawable part, refer to
the manual of the withdrawable part (i.e. circuit breaker or
contactor unit).
Fig. 1-3
Description
Description
Type
Standard
Rated Voltage
Rated current
Rated Frequency
IP coding
Short-time withstand
current
Classification IAC
Duration of short circuit
Internal arc
Lighting impulse
withstand voltage
Serial number
Peak withstand current
Manufacture date
Power frequency
withstand voltage
Manufacture

Product description
Power Xpert
®
UX with W-VACi circuit breaker 6063308 G01 01 14 July 2011 www.eaton.com
13
2 Product description
2.1 The system
This paragraph contains a short description of the most
common system components. Since each Power Xpert
®
switchgear installation is matched to its application, it is
not possible to give a complete and detailed description
here. For further information, refer to the information pack
which includes this manual
2.1.1 Panels
The panels are compartmented according to the type of
function. The compartments are:
I. Low-voltage compartment
II. Busbar compartment
III. Circuit breaker / Contactor compartment
IV. Cable compartment
2.1.2 Circuit Breaker or Contactor unit
The unit is inserted into the panel with the aid of a
transport trolley.
Through the rollers on the carriage the unit is earthed
when it is inserted. Connection to the busbar system is
established via isolating contacts which are cluster type
contacts, the fixed portion being behind automatic
shutters.
Electrical control signals for the unit are routed via a 58-
pole secondary plug.
Fig. 2-1 Panel compartmenting
Fig. 2-2 Circuit Breaker or Contactor Unit on
transport trolley

Product description
14
Power Xpert
®
UX with W-VACi circuit breaker 6063308 G01 01 14 July 2011 www.eaton.com
2.1.3 Circuit Breaker or Contactor Unit Positions
Each unit can be placed in any one of three positions:
Insert / Removed position
The unit is put / placed in the insert /
removed position when:
The compartment door is open
The unit is moved to the front of the
panel ready for insertion, or
The unit is moved completely out of
the panel.
Test position
The unit is put / placed in the test
position, when:
The unit is in the panel but
moved to the front of the
compartment,
The primary contacts are
disconnected, the shutters
are closed and
The 58-pole secondary plug
is connected (control over
the operation of the unit is
now possible )
The compartment door can
be opened.
Service position
The unit is put / placed in the service
position, when:
The unit is fully inserted and
engaged into the compartment.
The primary contacts are
connected and
The 58-pole secondary plug is
connected
The compartment door cannot be
opened.
In emergency situations, the door
interlock can be defeated with the
use of tools.
2.1.4 Cable connections
Cables can be connected in a number of ways.
Connection from the front or rear of the panel with cable
lugs is standard.
Besides primary cables, secondary and auxiliary cables
may also be installed.
1. Spout containing fixed contact, cable side.
2. Current transformer.
3. Earth switch.
4. Power cable
5. Cable glanding plate
Fig. 2-3 Cable connections
3
4
5
1
2

Product description
Power Xpert
®
UX with W-VACi circuit breaker 6063308 G01 01 14 July 2011 www.eaton.com
15
2.1.5 Voltage transformers
The installation may include a number of voltage
transformers to measure the voltage on the cable side.
Voltage transformers are fixed type. Each voltage
transformer is fitted with 3 primary fuses.
Cable side mounting:
Fixed in the cable compartment of a circuit breaker
or contactor panel (to suit client requirements).
Voltage transformers can also be mounted in the
bus-section or the riser panels as required.
For special arrangements, a withdrawable busbar side
voltage transformer truck can be provided.
2.1.6 Current transformers
Power Xpert
®
UX switchgear can be equipped with
current transformers for protection, measuring and
metering.
Current transformers are always fitted in the rear of the
cable compartment or in the riser / sectionaliser panel.
Standard version:
At the cable connection points for the feeder panels
or supply panels.
Customer-specific version:
In the riser or bus-section panel.
2.1.7 Auxiliary equipment
Auxiliary equipment such as relays, position indicators,
meters and instruments are housed in the low-voltage
compartment of each switch panel.
Measuring and indicating equipment is fitted to the door
of the low-voltage compartment. This also includes a
circuit mimic diagram.
Voltage Detection System
The voltage indicator consists of three Light Emitting
Diodes (LEDs) mounted in a small panel on the low-
voltage compartment of a switch panel. Each LED is
connected to a measurement capacitor connected to a
phase of the primary cable. The LEDs light up when the
cable is live. This indicates that the cable is live without
the use of a voltage transformer.
Fig. 2-4 Mimic panel
1. Voltage Detection System
2. Position indicator
3. Status indicator
4. Measuring and selector switch
3
2
4
1

Product description
16
Power Xpert
®
UX with W-VACi circuit breaker 6063308 G01 01 14 July 2011 www.eaton.com
Switch Position Indication
An optional LED flag indicator can be mounted as part of
the mimic diagram to indicate the position (In Service /
Test) of the circuit breaker or contactor unit.
Status Indication
An optional LED flag indicator can be mounted as part of
the mimic diagram to indicate the On / Off status of the
circuit breaker or contactor.
An optional LED flag indicator can also be mounted as
part of the mimic diagram to indicate the On/Off status of
the earth switch.
Measuring
An optional Ammeter / Voltmeter and phase selector
switch can be mounted in the LV compartment to provide
current / Voltage measurement for the circuit. Additional
multi-function measuring meters can also be fitted.
2.1.8 Earthing
Power Xpert
®
UX switchgear offers a number of options
for applying protective earthing.
Earthing busbar
All Power Xpert
®
UX switchgear includes a continuous
short-circuit-proof earthing busbar to which all
components of the installation can be connected.
Fig. 2-5 Earthing busbar

Product description
Power Xpert
®
UX with W-VACi circuit breaker 6063308 G01 01 14 July 2011 www.eaton.com
17
Earthing switch
Each cable panel can be fitted with a short-circuit-proof
earthing switch fitted to the cable side. The earthing
switch connects the connection points of the cable with
the earthing busbar. A mechanical interlock ensures that
the earthing switch is always open when the circuit
breaker or contactor unit is in the connected position.
The earthing switch can be closed only with the circuit
breaker or contact unit is in the Test / Disconnected
position or completely removed.
The earthing switch can be locked with a padlock.
Special locks are used in some installations, e.g. with the
aid of a locking coil.
2.1.9 Withdrawable units
Power Xpert
®
UX switchgear can contain a variety of
switching/measuring equipment in circuit breaker
compartment
Withdrawable circuit breaker unit
The circuit breaker is the W-VACi.
W-VACi circuit breakers are provided with vacuum
interrupters. This assembly is mounted on a switch
cradle and racking mechanism.
Electrical control signals are supplied from the low-
voltage compartment via a 58-pole secondary plug.
Mechanical and electrical interlocks prevent unintentional
switching.
Refer to separate Operations and Maintenance Manual
for the Circuit Breaker.
Withdrawble contactor unit
The vacuum contactor is ideal for controlling applications
requiring a high number and frequency of switching
operations and for AC motors. The contactor basically
consist of a moulded resin monobloc, where the vacuum
interrupters, moving apparatus, control electromagnet,
multi-voltage control feeder and auxiliary accessories are
housed.
Refer to separate Operations and Maintenance Manual
for the Contactor
Withdrawable Voltage Transformer unit
The Voltage transformer mounted on a withdrawable
cradle with integral racking mechanism is used to
measure the voltage of the busbar or cable side
depending on configuration.
Refer to separate Operations and Maintenance Manual
for the Withdrawable Voltage Transformer Unit
Fig. 2-6 Location of the earthing switch at the front side
of the switch panel
Fig. 2-7 Vacuum Circuit Breaker unit
Fig. 2-8 Contactor unit

Product description
18
Power Xpert
®
UX with W-VACi circuit breaker 6063308 G01 01 14 July 2011 www.eaton.com
Withdrawable Isolation unit
The isolation unit is mounted on a cradle with integral
racking mechanism and is used to provide isolation gap
between the busbars and the cable.
Refer to separate Operations and Maintenance Manual
for the Withdrawable Isolation unit
Withdrawable Earthing unit
Earthing truck assembly is mounted on a withdrawable
cradle, with integral racking mechanism used to earth the
busbar or cable depending on the configuration.
Refer to separate Operations and Maintenance Manual
for the Withdrawable Earthing unit
2.1.10 Interlocks
Power Xpert
®
UX switchgear is equipped with interlocks
to prevent undesirable switching operations. For further
information, please see par. 4.3.2.
2.2 Panel types
All Power Xpert
®
UX switchgear is constructed in
modular fashion with a series of panels with different
functions. Each panel is made up of 4 compartments.
Below is a summary of the types of panels fitted as
standard in Power Xpert
®
switchgear. It is possible that
they are not all included in any particular installation; it is
also possible that an installation contains one or more
custom panels.
2.2.1 Circuit-breaker panel
A circuit-breaker panel is a cable panel fitted with a
switch, to provide short-circuit-proof power switching.
1. Arc channel
2. Low voltage wire way
3. Busbar
4. Branch busbar
5. Automatic shutter
6. Fixed Contact Spout
7. Withdrawable circuit-breaker
8. Current transformer
9. Earthing switch
10. Cable connection point
11. Earthing switch operating shaft
12. Earthing busbar
Fig. 2-9 Circuit-breaker panel
1
2
3
4
5
6
7
9
8
10
11
12

Product description
Power Xpert
®
UX with W-VACi circuit breaker 6063308 G01 01 14 July 2011 www.eaton.com
19
2.2.2 Bus-section panel (connecting panel)
The bus-section panel is used to separate or connect
parts of the installation (bus-sections).
The bus-section panel in the illustration consists of two
panels; one panel contains the circuit breaker, the other
panel is the bus riser panel. The Power Xpert
®
UX has
designs that allow for the bus-section to be mounted
either on the Left or the Right of the riser panel. An
additional option with Power Xpert
®
UX Switchgear is
that the bus riser panel can be supplied suitably
equipped with a number of units:
- Circuit Breaker
- Contactor
- Earthing Truck
- Voltage Transformer
- Disconnect/Isolation
Bus sectionaliser + Bus Riser
A. Sectionaliser panel
B. Riser panel right
C. Bus-section circuit breaker
Bus Riser + Bus sectionaliser
A. Riser panel left
B. Sectionaliser panel
C. Bus-section circuit breaker
Fig. 2-10 A bus-section and riser; the bay is two panels wide
A
C
B
A
C
B

Table of contents
Power Xpert
®
UX with W-VACi circuit breaker 6063308 G01 01 14 July 2011 www.eaton.com
20
2.2.3 Incoming panel
The incoming panel is a circuit-breaker panel intended to
provide isolation from the power supply.
2.2.4 Outgoing panel
The outgoing panel is a circuit-breaker panel intended to
provide consumers with energy, offering short-circuit
protection and switching of the circuit.
2.2.5 Metering panel
(Client-specific)
A metering panel allows current and voltage
measurement on the busbar side. The metering panel
may be linked to the bus-section panel.
2.2.6 Contactor panel
The contactor panel provides for motor starting duty. The
contactor can be a latched type for continuous supply to
transformers and or Power Factor Correction Capacitor
unit. The contactor panel includes a withdrawable
contactor unit with main fuses mounted on the
withdrawable cradle.
2.3 Equipment safety
This paragraph contains a description of the safety
provisions on the switchgear and directions on how to
deal with them.
2.3.1 Safe operation
Competence
Only expert personnel and specialist operators must
operate the equipment.
Conditions
The installation may only be operated if the operating area
complies with the requirements of the IEC 62271-1
standard, paragraph 2.1.1.
Additional conditions may also apply. These are laid down
in the operating instructions, which relate specifically to a
particular installation. The operating instructions are
included in the information pack, which includes this
manual
Actions not described in this manual
Operating or maintenance actions not described in this
manual may be required:
Actions, which are specific to a particular installation,
are described in the operating instructions supplied
with it. See the information pack, which includes this
manual
Actions, which are not described at all, must only be
carried out in consultation with an Eaton specialist.
The instructions of this specialist must be followed
exactly.
Special safety measures
In general it will not be necessary to take special safety
measures when operating the switchgear. It is advisable,
however, to wear suitable ear protection when there is
repeated switching.
2.3.2 Safety features
The switchgear may be provided with the following safety
features:
A sheet steel enclosure to protect against contact
with live components.
Compartments with earthed steel walls.
Automatic metallic shutters shielding live parts when
a switch is withdrawn.
Pressure relief valves for the safe discharge of
overpressure inside the enclosure in the event of
arcing.
Internal arc classification testing has been conducted
and an arc channel provided to allow the safe
exhaust of gasses outside of the switchroom.
Mechanical and electrical interlocks to prevent
unintentional switching.
Provision for locating locks on the switches, earthing
switches and automatic shutters.
Visible separation between switch, cable and busbar
(the separation is visible on a withdrawn switch).
Visible direct status indication of the earthing switch
Special equipment intended for the earthing of cables
and busbars.
A continuous earthing busbar extending the full
length of the installation.
Locks on panel doors.
Warnings on equipment to alert personnel to possible
dangers (see also par. 2.3.4).
/