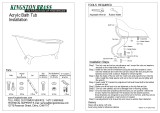
WC-AT102340P11
All information is based on the latest product information available at the time of publication. Product
characteristics, packaging, and availability may change at any time without notice.
Installers, please keep these instructions for the consumer. They contain important information.
ATTENTION
The cartridges in the main body have been tested and adjusted by the factory.
Do not take the cartridges apart.
A platform may be built by the installer. No platform is included.
Clean the water supply pipe before installing to avoid jamming.
Connect the hot water supply on the left and the cold water supply on the right.
Flow pressure: Min: 0.05MPa Max: 1.60MPa
Recommended pressure: 0.1MPa to 0.8MPa (1 to 8 bar)
TO KEEP THE FAUCET LOOKING BEAUTIFUL
FOLLOW THESE SIMPLE CARE INSTRUCTIONS REGULARLY
Rinse the faucet clean with clean water.
Do not use any cleaning agents containing abrasive or coated abrasive ingredients.
Do not use any cleaning agents containing acids, polish abrasives, or harsh cleaner or soaps.
IF HEAVY CLEANING IS REQUIRED, THE FOLLOWING
PROCEDURES ARE RECOMMENDED
Clean the faucet with water.
Remove tough surface lm and build-up with soft liquid cleaning agents, clear liquid glass
cleaners, non-acidic, non-abrasive gentle liquid, fully dissolved powder cleansers mixed
according to manufactures directions, or non-abrasive liquid polishers.
After cleaning, make sure to rinse suciently with clean water in order to completely remove
any remaining cleanser and dry with a soft cotton cloth.
1
1
2
3
2
3
4


