Page is loading ...

1
Keep this Product ID Number and use when contacting Customer Service:
OWNER’S MANUAL
MODEL N° 1529
COPY

2
INSTRUCTION #1067156 J 8/08/2012
Save this owner’s manual for future reference and in the event that
the manufacturer has to be contacted.
**U.S. and Canada customers ONLY**
IF ASSISTANCE IS NEEDED,
DO NOT CONTACT THE STORE!
CALL OUR CUSTOMER SERVICE DEPARTMENT at
1 (800) 225-3865
HOURS: 7:00 a.m. to 5:00 p.m. Monday through Friday (Mountain Standard Time)
**Call us or visit our Web site for Saturday hours**
Lifetime Products, Inc.
10#PYt'SFFQPSU$FOUFS#MEH%$MFBSGJFME6UBI
**For customers outside the U.S. or Canada, please contact the store for assistance.**
REGISTER YOUR PRODUCT ONLINE AT WWW.LIFETIME.COM
At Lifetime, we are committed to providing innovative and quality products. While registering, you will
have the opportunity to give us your feedback. Your input is valuable to us.
Lifetime’s Promise to You:
t:PVDBOBMTPPQUJOUPSFDFJWFOFXQSPEVDUOPUJmDBUJPOTPSQSPNPUJPOT
t*OUIFVOMJLFMZFWFOUPGBQSPEVDUSFDBMMPSTBGFUZNPEJmDBUJPOZPVSSFHJTUSBUJPOQSPWJEFTUIF
JOGPSNBUJPOXFOFFEUPOPUJGZZPVEJSFDUMZ
t3FHJTUSBUJPOJTGBTUFBTZBOEDPNQMFUFMZWPMVOUBSZ
Maintaining your privacy is our long-standing policy at Lifetime. And you can rest assured that
-JGFUJNFXJMMOPUTFMMPSQSPWJEFZPVSQFSTPOBMEBUBUPPUIFSUIJSEQBSUJFTPSBMMPXUIFNUPVTFZPVS
QFSTPOBMEBUBGPSUIFJSPXOQVSQPTFT
REGISTER today!
8FJOWJUFZPVUPSFBEPVSQSJWBDZQPMJDZBUXXXMJGFUJNFDPN
COPY

3
Most injuries are caused by misuse and/or not following instructions. Use caution when using this product.
5PFOTVSFTBGFUZEPOPUBUUFNQUUPBTTFNCMFUIJTQSPEVDUXJUIPVUSFBEJOHBOE
GPMMPXJOHBMMJOTUSVDUJPOTDBSFGVMMZ$IFDLUIFFOUJSFCPYBOEJOTJEFBMMQBDLJOH
materials for parts and/or additional instruction material. Before beginning assembly,
JEFOUJGZBOEJOWFOUPSZBMMQBSUTBOEIBSEXBSFVTJOHUIFQBSUTBOEIBSEXBSFMJTUTBOE
JEFOUJmFSTJOUIJTEPDVNFOU Proper and complete assembly, use and supervision
BSFFTTFOUJBMGPSQSPQFSPSJFOUBUJPOBOEUPSFEVDFUIFSJTLPGBDDJEFOUPSJOKVSZ"
IJHIQSPCBCJMJUZPGTFSJPVTJOKVSZFYJTUTJGUIJTQSPEVDUJTOPUJOTUBMMFENBJOUBJOFE
BOEPSPQFSBUFEQSPQFSMZ'BJMVSFUPDPNQMZXJUIBOZPGUIFXBSOJOHTJOUIJT
JOTUSVDUJPONBOVBMNBZSFTVMUJOTFSJPVTQFSTPOBMJOKVSJFTTVDIBTDVUTCSPLFO
CPOFTOFSWFEBNBHFQBSBMZTJTCSBJOJOKVSZPSEFBUI'BJMVSFUPDPNQMZNBZBMTP
SFTVMUJOQSPQFSUZEBNBHF1MFBTFIFFEBMMXBSOJOHTBOEDBVUJPOT
'"*-63&50'0--085)&4&8"3/*/(4.":3&46-5*/4&3*064*/+63:031301&35:
%"."(&"/%8*--70*%8"33"/5:
t*GVTJOHBMBEEFSEVSJOHBTTFNCMZVTFFYUSFNFDBVUJPO
t5XPDBQBCMFBEVMUTBSFSFDPNNFOEFEGPSUIJTPQFSBUJPO
t$IFDLCBTFEBJMZGPSMFBLBHF-FBLTNBZDBVTFQSPEVDUUPGBMM
t"TTFNCMFUIFQPMFTFDUJPOTQSPQFSMZ'BJMVSFUPEPTPDPVMEDBVTFUIFQPMF
sections to separate during play or transport.
SAFETY INSTRUCTIONS
BEFORE BEGINNING ASSEMBLY
,FFQUIFIBSEXBSFCBHTBOEUIFJSDPOUFOUTTFQBSBUF*GBOZQBSUT
are missing, call our Customer Service Department.
*EFOUJGZBOEJOWFOUPSZBMMQBSUTBOEIBSEXBSFVTJOHUIFQBSUTBOE
IBSEXBSFMJTUTBOEJEFOUJmFSTJOUIJTEPDVNFOU
5FTUmUBMM#PMUTCZJOTFSUJOHUIFNJOUPUIFJSSFTQFDUJWFIPMFT*G
OFDFTTBSZDBSFGVMMZTDSBQFBXBZBOZFYDFTTQPXEFSDPBUJOH
CVJMEVQGSPNJOTJEFUIFIPMFT%POPUTDSBQFBXBZBMMPGUIF
QPXEFSDPBUJOH#BSFNFUBMNBZSVTU:PVNBZOFFEUPQPVOE
TPNF#PMUTJOUPQMBDFXJUIBIBNNFSPSNBMMFU

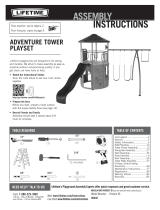
TOOLS AND PARTS REQUIRED FOR THIS ASSEMBLY
*Two adults required to
complete assembly*
Only adults should set up the product. Do not allow children
in the setup area until assembly is complete.
3/16” Allen Wrench
Phillips Screwdriver
(1)
'VOOFM
(1)
7/16” Wrench
(2)
Scrap Wood
(1)
Sand
(362 lb)
(1)
Pliers
Rubber Mallet
(1)
1/2” Wrench
(2)
Water Hose
(1)
(2, included)
9/16” Wrench
(2)
w8SFODI
(2)

5
This area is located at the top,
left-hand corner of the page
and indicates which tools
and hardware are needed to
complete the assembly steps
on a page.
Note:
!
Refer to the following areas throughout the instructions
to assist in the assembly process:
This area is usually located in the
bottom, left-hand corner of a step
and indicates that special attention
is needed to perform a particular
part of a step.
These areas are usually located in
the bottom, right-hand corner of a
step and indicate that damage to
the product or serious injury may
occur if the caution or warning is
not heeded.
8"3/*/(
ASSEMBLY GUIDES
TOOLS AND HARDWARE REQUIRED FOR THIS PAGE
CAUTION

6
AOX Rim Support Channel 1
AOW Spring Retainer Plate 1
"2( -PDL5BC
PARTS LIST
ID Item Description Qty
ALH Top Pole 1
ALF Middle Pole 1
ALE Bottom Pole 1
AJK 3JHIU#BDLCPBSE#SBDLFU 1
AJJ -FGU#BDLCPBSE#SBDLFU 1
AJI #BDLCPBSE 1
ALX Rim 1
AKZ Net 1
"+: Counterbalance Spring 1
AKC 4IPSU&YUFOTJPO"SN 2
AKB -POH&YUFOTJPO"SN 2
ALB Outer Tube 1
AKQ Inner Channel 1
AMN Trigger 1
AKL Left Handle 1
AKN Right Handle 1
ALL 1PMF#SBDLFU 1
AJM Base 1
ALI Pole Brace 2
AMU Wheel 2
AJC wYw"YMF 1
AJE wYw"YMF 1
AEF Base Plug 2
AKP )FJHIU4UJDLFSOPUTIPXO 1
AMT 8BSOJOH4UJDLFS"QQMJFEUP.JEEMF1PMF 1
HARDWARE LIST
ID Item Description Qty
BCO Pole Assembly Hardware
ADS wYw4DSFX 2
ABH wYw)FY#PMU 2
ADA wYw4QBDFS 2
AAF 3/8” Washer 2
ABB w$FOUFSMPDL/VU 2
CIH %PNFE$PVOUFSTJOL8BTIFS 2
BCQ Pole to Base Assembly Hardware
AAO w/ZMPDL/VU 2
ABD 5/16” Washer
AAE wYw)FY#PMU 2
ABN wYw4QBDFS 2
BTS w#BSSFM/VU 1
BZO wYw4IPVMEFS#PMU 1
CCL w"MMFO8SFODIOPUTIPXO 2

7
HARDWARE LIST
ID Item Description Qty
BCS Backboard to Rim Assembly Hardware
""4 wYw)FY#PMU
"#4 wYw(BMWBOJ[FE4QBDFS
"%2 wYw4DSFX
""# w$FOUFSMPDL/VU
""+ w)FY5/VU
ABD 5/16” Washer 2
ABF 7/16” Rubber Washer 2
"#* wYw5BQ#PMU
"#, w/ZMPDL'MBOHF/VU
AJW Compression Spring 2
"06 w6#PMU
AAV 5/16” Jam Nut 2
BCR Backboard to Pole Assembly Hardware
"%( wYw)FY#PMU
""9 w$FOUFSMPDL/VU
"#- wYw#MBDL4QBDFS
"#1 wYw$MFBS1PMZ4QBDFS
BCT Handle Assembly Hardware
AAN 5/16” Cap Nut 1
""- wYw)FY#PMU
"#" wYw)FY#PMU
"". wYw5BQ#PMU
"%( wYw)FY#PMU
""9 w$FOUFSMPDL/VU
"%+ w$BQ/VU
"## w$FOUFSMPDL/VU
"%3 Yw1IJMMJQT1BO)FBE4DSFX
"%5 Yw4DSFX
"$; wYw4QBDFS
AQH Trigger Spring 1

8
Parts shown at 10% of Actual Size
ALHY
Top Pole
"-'Y
Middle Pole
ALEY
Bottom Pole
PARTS IDENTIFIER
AJJY
-FGU#BDLCPBSE#SBDLFU
AJKY
3JHIU#BDLCPBSE#SBDLFU
AJCY
wYw"YMF
15 ”
3/4
7”
AJEY
wYw"YMF
v
v
v
17”
AKCY
4IPSU&YUFOTJPO"SN
*Warning Sticker applied to side not shown
ALIY
Pole Brace
v
AKBY
-POH&YUFOTJPO"SN
v
v
AKQY
Inner Channel
ALBY
Outer Tube

9
AKZY
Net
ALXY
Rim
AJIY
#BDLCPBSE
AJMY
Base
Parts shown at 5% of Actual Size
Parts shown at 10% of Actual Size
PARTS IDENTIFIER
"&'Y
Base Plug
Part shown at Actual Size
"2(Y
-PDL5BC

10
Parts shown at 25% of Actual Size
PARTS IDENTIFIER
AMUY
Wheel
ALLY
1PMF#SBDLFU
AMNY
Trigger
AKLY
Left Handle
AKNY
Right Handle
AJYY
Counterbalance Spring
AOWY
Spring Retainer Plate
AOXY
Rim Support Channel

11
HARDWARE IDENTIFIER
POLE ASSEMBLY HARDWARE
Hardware shown at Actual Size
ABNY
wYw4QBDFS
AAEY
wYw)FY#PMU
AAOY
w/ZMPDL/VU
BTSY
w#BSSFM/VU
ABDY
5/16” Washer
BZOY
wYw4IPVMEFS#PMU
BACKBOARD TO RIM ASSEMBLY HARDWARE
Hardware shown at Actual Size
AASY
wYw)FY#PMU
ABSY
wYw(BMWBOJ[FE4QBDFS
ADQY
wYw4DSFX
AAVY
5/16”Jam Nut
POLE TO BASE ASSEMBLY HARDWARE
Hardware shown at Actual Size
ADSY
wYw4DSFX
""'Y
3/8” Washer
ABBY
w$FOUFSMPDL/VU
ABHY
wYw)FY#PMU
ADAY
wYw4QBDFS
CIHY
Domed Counter-
TJOL8BTIFS

12
HARDWARE IDENTIFIER
AABY
w$FOUFSMPDL/VU
ABIY
wYw5BQ#PMU
BACKBOARD TO RIM ASSEMBLY HARDWARE (CONTINUED)
Hardware shown at Actual Size
Hardware shown at 25% of Actual Size
AJWY
Compression
Spring
AOUY
w6#PMU
BACKBOARD TO POLE ASSEMBLY HARDWARE
Hardware shown at Actual Size
AAXY
w$FOUFSMPDL/VU
ABLY
wYw#MBDL
Spacer
"%(Y
wYw)FY#PMU
ABPY
wYw$MFBS
Poly Spacer
6 5/8”
(Not actual length)
AAJY
w)FY5/VU
ABDY
5/16” Washer
"#'Y
7/16” Rubber Washer
ABKY
w/ZMPDL'MBOHF/VU

13
HARDWARE IDENTIFIER
HANDLE ASSEMBLY HARDWARE
Hardware shown at Actual Size
AANY
5/16” Cap Nut
AALY
wYw)FY#PMU
"%(Y
wYw)FY#PMU
6 5/8”
(Not actual length)
(Not actual length)
6 1/2”
ABAY
wYw)FY#PMU
AAMY
wYw5BQ#PMU
AAXY
w$FOUFSMPDL/VU
ADJY
w$BQ/VU
ABBY
w$FOUFSMPDL/VU
ADRY
Yw1IJMMJQT
1BO)FBE4DSFX
ADTY
Yw4DSFX
ACZY
wYw4QBDFS
AQHY
Trigger Spring

POLE ASSEMBLY
HARDWARE REQUIRED
PARTS REQUIRED
TOOLS REQUIRED
SEC
1
Parts shown at 10% of Actual Size
Phillips Screwdriver
Hardware shown at Actual Size
Scrap Wood
ADSY
wYw4DSFX
ALHY
Top Pole
"-'Y
Middle Pole
ALEY
Bottom Pole
v
v
v
*Warning Sticker applied to side not shown
""'Y
3/8” Washer
ABBY
w$FOUFSMPDL
Nut
ABHY
wYw)FY#PMU
ADAY
wYw4QBDFS
9/16” WrenchY
Part shown at 25% of Actual Size
ALLY
1PMF#SBDLFU
CIHY
%PNFE$PVOUFSTJOL8BTIFS

15
TOOLS AND HARDWARE REQUIRED FOR THIS PAGE
ALH
"-'
ADS
Align the hole in the Top Pole (ALH)XJUIUIFTMPUJOUIF.JEEMF1PMF"-' and
slide the Top Pole over the Middle Pole. Insert a wYw4DSFX"%4
through a Domed Countersink Washer (CIH) and into the small hole in the Top
1PMFBOEJOUPUIFTMPUJOUIF.JEEMF1PMFBTTIPXO
SEC
1.1
ADSY
ALH
"-'
Warning
Sticker
CIHY
CIH
Note: The 1/4” x 3/4” Screw and Domed Countersink Washer
should be fl ush with the Pole, but will spin freely once installed.
Do not jam the Poles together until instructed.
!

16
TOOLS AND HARDWARE REQUIRED FOR THIS PAGE
Align the hole in the .JEEMF1PMF"-'XJUIUIFTMPUJOUIFBottom Pole (ALE)
and slide the Middle Pole over the Bottom Pole. Insert a wYw4DSFX
(ADS) through a Domed Countersink Washer (CIH) and into the small hole in the
.JEEMF1PMFBOEJOUPUIFTMPUJOUIF#PUUPN1PMFBTTIPXO
SEC
1.2
"-'
ALE
ADS
"-'
ALE
ADSY
CIHY
CIH
Note: The 1/4” x 3/4” Screw and Domed Countersink Washer
should be fl ush with the Pole, but will spin freely once installed.
Do not jam the Poles together until instructed.
!

17
TOOLS AND HARDWARE REQUIRED FOR THIS PAGE
Insert the 3/8” x 3 1/2” Hex Bolts (ABH)XJUIUIFw'MBU8BTIFST""' into
the .JEEMF1PMF"-'BTTIPXO5IFOTMJEFUIF1/2” x 2.91” Spacers (ADA)
POUPUIF)FY#PMUT1MBDFUIFPole Bracket (ALL)POUPUIFwYw
)FY#PMUTBOEBUUBDIJUUPUIF.JEEMF1PMF XJUIUIFIBSEXBSFTIPXO
SEC
1.3
"-'
9/16”Y
""'Y
ABBY
ABHY
ADAY
"-'
ABH
ADA
""'
ABB
ALL
Large holes
Small holes

18
TOOLS AND HARDWARE REQUIRED FOR THIS PAGE
8"3/*/(
The Poles must be seated together! Even if the Poles cover
the slots before seating, they must be struck on a hard
surface fi ve to six times! Failure to seat the Poles correctly
could allow the Poles to separate during use, which could
lead to serious personal injuries or property damage.
Note: Do not hit your feet with the Pole sections,
as serious injury could occur.
!
Scrap Wood
If the 5PQBOE.JEEMF1PMFT"-)"-' do not completely cover the slots on the
.JEEMFBOE#PUUPN1PMFT"-'"-& after seating, DO NOT COMPLETE ASSEMBLY.
Call our Customer Service Department.
*OPSEFSUPTFBUUIF1PMFTTUSJLFFBDIFOEPGUIF1PMFWFSZIBSEmWFUPTJY
UJNFTPOBQJFDFPGTDSBQXPPEPSDBSECPBSE5IJTNVTUCFEPOFFWFOJG
the Poles cover the slots before seating has occurred.
SEC
ATTENTION: THIS STEP CANNOT BE REVERSED!
/0)"3%8"3&3&26*3&%'035)*41"(&
"-'
ALE
ALH

19
AJMY
Base
ALIY
Pole Brace
AJCY
wYw"YMF
AMUY
Wheel
15 ”
3/4
7”
AJEY
wYw"YMF
Parts shown at 10% of Actual Size
Part shown at 25% of Actual Size
POLE TO BASE ASSEMBLY
HARDWARE REQUIRED
PARTS REQUIRED
TOOLS REQUIRED
SEC
2
Part shown at 5% of Actual Size
Hardware shown at Actual Size
ABNY
wYw4QBDFS
AAEY
wYw)FY#PMU
AAOY
w/ZMPDL/VU
BTSY
w#BSSFM/VU
ABDY
5/16” Washer
1/2" WrenchY
BZOY
wYw4IPVMEFS#PMU
CCL-3/16” Allen Wrench
YJODMVEFE
Bag BCQ

20
TOOLS AND HARDWARE REQUIRED FOR THIS PAGE
ALI
AAE
ABD
AJM
ABD
AAO
AAEY
ABDY
ABNY
AAOY
/0500-43&26*3&%'035)*41"(&
Attach the fl attened end of the Pole Brace (ALI) to the Base (AJM)XJUI
UIFIBSEXBSFTIPXOOnly fi nger tighten the hardware for now.
Straight End
Curved End
SEC
2.1
Note: Repeat this step to install the other Pole Brace to
the other side of the Base.
!
Slide the wYw"YMF"+$ through the Wheels (AMU) and the holes
at the end of the Bottom Pole (ALE)BTTIPXO4MJEFUIF1/2” x 7” Axle (AJE)
through the second set of holes near the end of the Bottom Pole as
TIPXO5IFOTMJEFUXP1/2” x 1/8” Spacers (ABN)POUPUIFwYw"YMF
and position them against the Wheels.
SEC
2.2
AJC
ABN
ABN
AMU
AMU
AJC
ALE
AJE
/