Page is loading ...

30, 50 & 70 PINT
Before using your dehumidifier,
please read this manual carefully
and keep it for future reference,
along with your receipt.
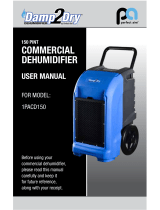
FOR MODELS:
1PED30
1PED50
1PED50S
1PED70
DEHUMIDIFIER
USER MANUAL
Be sure to read the
Quick Start Tips
on Page 1
COMFORT...BUILT TO LAST

Direct Drain
Hose
Washer
It is highly suggested that the manual be read in full before operating the
unit. However, the notes below are especially important in helping you to
properly set up and begin to use your dehumidfiier.
1.
2.
3.
4.
DO NOT REMOVE this foam piece.
6.
The accessories are located in the packaging as follows:
4x Castors
• Found in bucket for Model Numbers
1PED30 & 1PED50S
• Castors are already installed on
Model Numbers 1PED50 & 1PED70
Electrical waste products should not be disposed of with household waste.
Please recycle where facilities exist. Check with your local authority or retailer
for recycling advice.
5. For Model Numbers 1PED50 and 1PED70, when unpacking the dehumidifier,
note that the foam inside the float of the bucket should NOT be removed.
Without this foam piece, the dehumidifier will not operate properly.
(Model Numbers 1PED30 and 1PED50S do not require this foam piece.)
(1PED50 and 1PED70 models only.)
The dehumidifier should be kept upright. If for any reason it has not been
stored upright while in your possession, set the unit in the upright position
for a minimum of 24 hours before initial start.
Press the POWER button to turn the dehumidifier ON.
Using the + and – buttons, set the humidity to 30%RH for the first 24 hours
of operation.
After the 24 hours, set the desired humidity using the + and – buttons.
Recommended humidity is between 45~55%RH.

CONTENTS
6 CAUTION
a
l
NOTE:
844
472
2473
ELE CTRICAL INFORMATION
2
SAFETY PRECAUTIONS
..................................................................................... 3–4
COMPONENTS......................................................................................................... 5
CASTOR INSTALLATION........................................................................................ 5
FUNCTION EXPLANATION ..................................................................................... 6
OPERATING INSTRUCTIONS
................................................................................. 7
CONTINUOUS DRAINAGE
.................................................................................. 8–9
CARE AND MAINTENANCE.................................................................................. 10
TROUBLESHOOTING TIPS................................................................................... 11

WARNING
CA
UTIONS
-3-
● Do not fold the power cord as
shown below!
● Make sure the plug is pushed fully
& firmly into the outlet!
● Do not use an outlet splitter
as shown below!
● Make sure the plug is clean!
● After turning the unit off, please take
the plug out of the socket.
● Do not grab power plug with
wet hands.
● Do not place anything on top
of the control panel!
● Do not place anything over or on
the inlet or outlet of the unit.
● Do not let children play
with or around the unit or
control panel!
● Do not wet the machine or
the control panel!
● Keep flammable gas/oil away from
the machine!
● Ask a professional if
servicing is necessary!
!
!

8"
CAUTIONS (continued)
-4-
● Do not pull from the power cord to avoid
damaging the cord.
● Do not use insect, oil, or paint spray around
the machine as it may cause damage to the
unit or start a fire.
● Always keep the unit 8" away from the wall to
dissipate the heat properly. 8" of space on all
sides is recommended.
● Do not place the unit on an uneven
surface in order to avoid shaking,
excessive noise, and water leakage.
● Do not pour anything into the unit.
● Close all windows and doors in order to
efficiently remove the maximum amount of
moisture.
● Keep the machine away from any type of
heat source and direct sunlight.
● When moving or storing, do not place the
dehumidifier on its side or upside down and
avoid shaking.

ROLL CASTORS
DRAIN BUCKET
MOIST AIR
INTAKE
HANDLE
CONTROL PANEL
CONTINUOUS
DRAINAGE OUTLET
DRY AIR VENT
AIR FILTER
-5-
DESCRIPTION OF COMPONENTS
Located in bucket for
installation.
Located
behind grille.
1. Remove the casto
rs from the bucket of the dehumidifier.
2. Position the dehumidifier on its side.
3. Locate the arrow on the bottom of the dehumidifier and insert the castor
according in the direction of the arrow.
4. Slide the castor in as far as it will go. The castor will snap into place
once secure.
5. Repeat steps 1 through 4 for the remaining 3 castors.
6. To remove castor, press tab down and slide the castor out.
*NOTE: Wait 24 hours before running unit.
CASTOR INSTALLATION
Castor installation is recommended to avoid damage to floors. Model
Numbers 1PED50 and 1PED70 have castors already installed.
However, Model Numbers 1PED30 and 1PED50S require castors to
be installed after unpacking the unit using the instructions below.
Castors for the 1PED30 and 1PED50S Models can be found in the
bucket when unpacking the unit for the first time.

-6-
FUNCTION EXPLANATION
FDQ SSHHG
PRZHU
On/Off
Filter Reset Button
After 250 hours of operations, the filter indicator
light will illuminate to remind you to clean the air
filter. Press this button to reset the air filter timer
and to turn off the "Check Filter" indicator after
cleaning the filter.
High/Low
7LPHr
The timer can be set to run between 1 and
24 hours.
• When unit is in operation, press
"TIMER" and then “+” or “–” to set hours
(TIMER OFF will be illuminated). The
unit will turn off after set hours.
•
•
When the unit is on stand-by, press
"TIMER" and then “+”or “–” to set hours.
The unit will turn on after set hours
(TIMER ON will be illuminated).
To cancel the timer, proceed as above,
but set both TIMER ON and TIMER
OFF to zero hours. Both lights for
TIMER ON and TIMER OFF should be
off.
CXUUHQW HXPLGLW\TLPHU& HXPLGLW\ SHW DLVSOD\
When the unit is running, it displays the current room
humidity. Press "TIMER"; the set hours are displayed
here. 10 seconds after displaying the timer, the display
will change back to the room humidity.
SHW HXPLGLW\/Timer (+/–)
Setting Desired Humidity: When the unit is running, it
displays current room humidity (%RH). Press "+" or "–"
to select desired humidity setting. The humidity is
adjusted in increments of 5% with each press of "+" or
"–". Adjustable range is 30%RH – 90%RH. A few
seconds after setting the desired humidity, the display
will go back to the current humidity.
Setting Timer: To set timer, follow instructions in the
Timer section.
BXFNHW)XOO/LJKW
Bucket is full, and lamp
illuminates.
DHIURVW/LJKW
When low temperature, unit gets into
"Defrosting" mode and lamp
illuminates. When the coils have
accumulated frost, the unit will go into
auto defrost mode.
Display Code
Meaning
E1
E2
E3
Error Code. Room Sensor failure
Error Code. Defroster Sensor failure
Error Code. Humidity Sensor failure

OPERATING INSTRUCTIONS
-7-
Hold bucket with two hands
when emptying.
● DEFROST
When operating in low temperatures (less than 54°F/12°C) the surface of the
evaporator may accumulate frost and effect the efficiency of the dehumidifier.
When this happens, the unit will automatically go into "Defrost" mode. This is
normal and the "Defrost" light will illuminate. Once the unit is done defrosting, it
will resume running as normal. The unit can operate in temperatures down to 41°
F/5°C. Defrost times may vary. If the dehumidifier freezes up, turn the unit off for
a few hours and then restart. It is not recommended to use the dehumidifier in
temperatures below 41°F/5°C.
● Start Operation
1) Ensure that the unit is plugged into a properly designated
power outlet.
2) Insert the plug into a suitable wall outlet. The dehumidifier
is suitable for operation on an electricity supply having the
same voltage as that shown on its rating label.
3) Place the unit in an upright position on a flat, level, steady,
stable, heat-resistant surface. Make sure there is nothing
flammable or heat sensitive within 39 inches
(100 cm) of the unit. Operating the unit in any other
position is hazardous.
4) Make sure the bucket is placed in the proper position.
(After switching the unit on for the first time, the "Bucket
Full" light may illuminate. Pull the bucket out, check that
the "float" lever is able to move freely, then push the
bucket back to the proper position.)
● When Bucket Full Light Is On
When the bucket is full, the unit will stop running, beep 5 times,
and the "Bucket Full" light will illuminate. To empty the bucket,
carefully slide the bucket out from the bottom front of the unit.
Hold the bucket with both hands to avoid spilling. Once the
bucket has been emptied, return the bucket to its proper position
by sliding the empty bucket back into place. The unit will start up
and run normally.

-8-
The "Continuous Drainage" function can be started with the following steps.
Drain hose
Back of the unit
D
r
a
i
n c
over
1. T
o save having to periodically empty the bucket,
this unit can be set for continuous drainage. Use
the supplied drain hoseDQGFonnect LW to the
continuous drainage connector located on the
back righthand side of the unit..
2. Unscrew and remove the drain cover found at the
rear of the unit.
3. Remove the soft rubber stopper. Place it in the
bucket
for safe keeping.
5. Insert the drain hose (provided) through the hole
of the drain cover with the washer portion on the
inside of the cover.
6. Connect the drain hose to the drain port.
7. Tighten the drain cover in clockwise direction
onto the rear of the unit.
4. Return the bucket to its proper position.
Drain cover
Soft rubber
stopper
Drain cover
Drain hose
Drain hose
Drain hose
Bucket
CONTINUOUS DRAIN
AGE
Drain
cover

INSTALLING DRAINAGE GARDEN HOSE
When using the "Continuous Drainage" function, a regular garden hose can be
used in place of the drain hose provided. Avoid uneven ground and folding of
the hose. The hose should go on a downward slope and be free of folds/kinks
in order to properly drain into the drain hole. The hose length should not
exceed 6 ft.
CONTINUOUS DRAINAGE
-9-
6 ft max. regular
garden hose
(continued)

MAINTENANCE
For safety reasons, make sure the dehumidifier is unplugged
before servicing or cleaning.
1) Cleaning the unit:
A. Wipe the unit with a clean, soft cloth.
B. If the dehumidifier is very dirty, use a moist cloth with a mild detergent to clean, then
wipe off the detergent with a semi-dry cloth.
CAUTION: Do not wash the machine with a hose or immerse it in water. This may
result in electrocution.
Cleaning the air filter:
The purpose of the air filter is to filter dust and other materials from the air. If the filter
is blocked with dust, the electricity usage will be higher than normal. For optimal
moisture removal and efficiency, clean the filter every 2 weeks.
● Cleaning Steps:
1. Remove and empty bucket.
2. Pull the air filter out gently from the bottom of the front panel.
3. Clean the filter with a vacuum cleaner or wash it with clean, luke warm water and dry
with a dry cloth.
4. Put the clean air filter back in place and continue to operate the dehumidifier.
EMERGENCY
If a problem occurs, unplug the machine and contact consumer services at 844.472.2473.
Do not disassemble the dehumidifier yourself!
-10-
!
!

1111111.
(
Water on oor
J 1111111.
1
°
°
If these steps do not resolve the issue, call 844-472-2473 for assistance before
returning unit to the store.
11
L _______________________________________________________________ _

COMFORT...BUILT TO LAST
Distributed by:
Perfect Aire, LLC
5151 Belt Line Rd.
Suite 878
Dallas, TX 75254
Specification and performance data is subject to change without notice.
Printed in China
844-472-2473
www.perfectaire.us
/