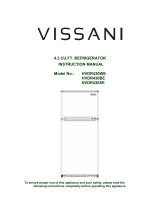
Magic Chef HVDR1040W User manual

Category
Fridges
Type
User manual

This manual is also suitable for

9.9 CU.FT. TOP MOUNT REFRIGERATOR
INSTRUCTION MANUAL
Model No.: HVDR1040W
HVDR1040B
HVDR1040S
To ensure proper use of this appliance and your safety, please read the
following instructions completely before operating this appliance.
1
Product Registration Copy
Thank you for purchasing a Vissani product. The first step in protecting your
new product is to complete the product registration form on our website at
www.mcappliance.com/register .The benefits of registering your product
include the following.
1. Registering your product will allow us to contact you regarding a safety
notification or product update.
2. In the event that warranty service is required, registering your product will
allow for more efficient warranty service processing.
3. In the event of an insurance loss registering your product could act as
your proof of purchase.
Once again thank you for purchasing a Vissani product.
2
TABLE OF CONTENTS
OPERATING YOUR REFRIGERATOR
FREEZER COMPARTMENT OPERATION .
CARE & MAINTENANCE ....
CHANGING THE REVERSIBLE DOOR
....
3
4
5
6-7
7
8
9-10
11
12
3
Structure Illustration
1. Freezer control knob
2. Refrigerator temperature control
3. Refrigerator glass shelf
4. Vegetable bin
5. Adjustable feet
6. Freezer shelf
7. Freezer door rail
8. Bottle rack (Small)
9. Can rack
10. Gallon rack
11
.
Bottle rack (Large)
1
2
4
5
3
6
7
8
9
10
11
4
Important Safety Instructions
To reduce the risk of fire, electrical shock, or injury follow
these basic precautions when using your refrigerator.
13) Do not use an extension cord with this appliance. If the power cord is too short, have a qualified
electrician install an outlet near the appliance. Use of an extension can nega vely aect the
units performance.
risk of re
1) WARNINGKeep ven la on openings, in the appliance enclosure or in the built-in structure,
clear of obstruc on.
2) WARNINGDo not use mechanical devices or other means to accelerate the defros g process,
other than those recommended by the manufacturer.
3) WARNINGDo not damage the refrigerant tubing to increase the risk of a leak when handle, move
4) WARNINGDo not use electrical appliances inside the food storage compartments of the
appliance, unless they are of the type recommended by the manufacturer.
5) WARNINGDANGER: Never allow children to play with, operate, or crawl inside the refrigerator.
Risk of child entrapment. Before you throw away your old refrigerator or freezer:
Take othe doors
Leave the shelves in place so that children may not easily climb inside.
6) The appliance has to be unplugged before carrying out user maintenance on the appliance.
7) This appliance can be used by children age 8 years and above and persons with reduced physical
sensory or mental capabili es or lack of experience and knowledge if they have been given
supervision or ins concerning use of the appliance in a safe way and understand the
hazards involved. Children should not play with the appliance. Cleaning and maintenance should not
be made by children without supervision.
8) If the component part is damaged, it must be replaced by the manufacturer, its service agent or
similar qualified persons in order to avoid a hazard.
9) Please abandon the refrigerator according to local regula as the unit contains ammable
blowing gas and refrigerant.
10) Follow local regula ons regarding disposal of the appliance due to ammable refrigerant and
bl
law must be removed before disposal. It is the consumer's responsibility to comply with federal and
owing gas
11) This appliance is intended to be used in household and similar environments such as
stakitchen areas in shops, oces and other working environments;
farm houses and by clients in hotels, motels and other residen al type environments;
bed and breakfast type environments;
catering and similar non-retail applica
12) Do not store or use gasoline or any inflammable liquors and liquids inside or in the vicinity of refrigerator.
IT IS HAZARDOUS FOR ANYONE OTHER THAN AUTHORIZED SERVICE PERSONNEL TO
CARRY OUT SERVICES OR REPAIRS INVOLVING THE REMOVAL OF COVERS.
TO AVOID THE RISK OF AN ELECTRICAL SHOCK DO NOT ATTEMPT REPAIRS YOURSELF.
and use of refrigerator.
5
Installation Instructions
BeforeUsingUsing YourYour Refrigerator
Remove the exterior and interior packing.
Before connecting the refrigerator to the power source,
let
it
stand upright for
approximately 4 hours.This will reduce the possibility of a malfunction
in
the cooling
system from improper handling during transportation.
Clean the interior surface with lukewarm water using a soft cloth. (Cleaning
instructions on page 7)
Location
Do not recess or build-in. This appliance is designed to be free standing
only.
Allow 5 inches clearancespace between the back and sides of the refrigerator,
which allows the proper air ventilation.
Avoid Installation
oOn weak surfaces unable to support refrigerator when
fully
loaded.
oIn direct sunlight and sources of heat (stove, heater, radiator, etc.). Ambient
temperature below 50°F or above 85°F will hinder the performanceof this
appliance.
oIn moist areas.
oIn garage. This unit is not designed for
any
type of outside installation.
oIn moving vehicle. This unit is not designedto be installed in an RV or
usedwith an inverter. This unit is intendedfor householduse
only.
Installing Your Refrigerator
Adjust the leveling feet to keep the refrigerator level.
Plug the refrigerator into dedicated, properly installed-grounded wall outlet. Do not
under any circumstances cut or remove the third (ground) prong from the power cord.
After plugging the appliance into a wall outlet, turn the unit on and allow the unit to
cool down for 24 hours before placing food
in
the refrigerator or freezer compartment.
6
Electrical Connection Improper use of the grounded plug can result in thethe risk
of electrical shock. If the power cord is damaged, have it
replacedby an authorized service center.
This refrigerator should be properly grounded for your safety. The power cordof this
refrigerator is equipped with a three-prong plug which mates with standard three prong
wall outlets to minimize the possibility of electrical shock.
Do not, under any circumstances,
cut
or remove the third ground prong from the power
cord supplied.
This refrigerator requires a standard 115/120 Volt A.C. ~/60Hz electrical outlet with
three-prong ground.
This refrigerator is not designed to be used with an inverter.
The cord should be secured behind the refrigerator and not
left
exposed or dangling to
prevent accidental injury.
Never unplug the refrigerator
by
pulling the power cord. Always grip the plug firmly and
pull
straight out from the receptacle.
Do not use an extension cord with this appliance.
If
the power cord is too short, have a
qualified electrician or servicetechnician install an outlet near the appliance. Use of an
extension cordcan negatively affect the performance of the unit.
If any problems with the appliance persist, please contact our Customer Service
Department to consult with a representative at (888) 775-0202 or visit our website to
request warranty service at www.mcappliance.com.
Operating Your Refrigerator
The temperature control is located inside the refrigerator and in the freezer
compartment on some models. The temperature is factory preset to provide satisfactory
food storage temperatures. However, the temperature control is adjustable to provide a
range of temperatures for your personal satisfaction.
To adjust the temperature colder in the refrigerator compartment, press the SET button
on the control panel so that the display light shifts to a higher number. “1” is the warmest
setting and “5” is the coldest. To adjust the temperature colder in the freezer compartment,
move the Freezer Control knob towards the maximum setting. After each movement of
either control, allow 24 hours for the unit to adjust. If the unit is still not cold enough, repeat
until desired temperature is achieved.
To adjust the temperature warmer in the refrigerator compartment, press the SET button on
the control panel so that the display light shifts to a lower number. To adjust the temperature
warmer in the freezer compartment, move the Freezer Control knob towards the minimum
setting. After each movement of either control, allow 24 hours for the unit to adjust. If the
unit is still not warm enough, repeat until desired temperature is achieved.
Temperature Control
7
NOTE
If the unit is unplugged or loses power; you must wait 3 to 5 minutes before
restarting the unit. If
you
attempt to restart before this time delay, the
refrigeratormay not start.
Replacing the Interior Light
Before removing the light bulb, turn the refrigerator temperature control to the “1”
position. Then unplug the electrical cord from the wall outlet. Failure to do so may
result in electrical shock or personal injury. Replace the old bulb with a new bulb of
the same wattage and size.
Freezer Compartment Operation
Temperature Control
Ice
Tray
To make ice, pour cool water into ice tray and place
it
in
the freezer
for two hours. To release ice cubes,twist the ice tray and the ice
cubes will separate from the icetray. To shorten the timeof making
ice, you can set the temperature control knob at a colder position.
NOTE
Do not store canned foods or food stored in glass containers in the freezer
compartment.
TheFreezer Compartment
This compartment is designed for the long-term storage of frozen food. The storage
life
of frozen foods varies and the recommended storage time should not be exceeded.
Place frozen food into the freezer as quickly as possible after purchase. If there are
instructions on the packet, carefully follow these instructions regarding storage times.
Your refrigerator has one control for regulating the
temperature in the freezer compartment. The freezer
temperature control is located on the freezer compartment’s
interior back panel. For the best performance, leave the
freezer control at the midpoint and adjust the refrigerator
compartment temperature control. Adjust the freezer control
one increment at a time until the desired temperature is
reached.
8
Care and Maintenance
Cleaning Your Refrigerator
Disconnect the electrical unit from the wall outlet.
Clean interior and parts with a cloth soaked
in
lukewarm water and baking soda
solution.
A
solution of 2 tablespoons baking soda to a quart of water will clean and
neutralize odors.Rinse and wipe dry.
Be sure to keep the door gasket (seal) clean to keep the unit running efficiently.
The outside of the refrigerator should be cleaned with a warm dampcloth and mild
detergent. Do not use harsh or abrasive cleaners.
Never clean refrigerator parts with flammable fluids. The fumes can create a fire
hazard.
Vacation Time
For long vacations, remove
all
food. Then, unplug the electrical cord from the wall
outlet.
Clean the interior and leave doors open to avoid possible odor or mold formation.
Use extreme caution
in
the case of children. The unit should not be accessible to
child
s
play.
MovingYour Refrigerator
Disconnect the electrical cord from the wall outlet.
Remove
all
the food and securely tape down
all
loose items such as shelves,
drawers,and doors.
Be sure the refrigerator stays
in
the upright position during transportation.
Energy Saving Tips
The refrigerator should be located
in
the coolest area of the room,away from heat
producing appliances or heating ducts,and out of the direct sunlight.
Let hot foods cool to room temperature before placing
in
the refrigerator.
Be sure to wrap foods properly, and wipe containers dry before placing them
in
the
refrigerator. This cuts down on frost build-up inside the refrigerator.
Organize and
label
food to reduce door openings and extended searches
9
Changing the Reversible Door
Before reversing the door swing, ensure the appliance is unplugged and empty. Provide
additional support for the doors while hinges are being removed. Do not depend on the door
magnets to hold the door in place. It is recommended that two people perform this task. DO
NOT lay the appliance completely flat as this may damage the coolant system.
Unscrew and remove the middle
hinge and middle hinge washer.
Reserve the screws. Lift the
refrigerator door up and away
from the appliance.
Remove top hinge cover. Unscrew
and remove the top hinge and top
hinge washer. Reserve the screws.
Lift the freezer door up and away
from the appliance.
Included parts
Unscrew and remove the bottom right hinge.
Reserve the screws. Remove screw covers from
opposite corner (left) and cover exposed
holes (right). Attach bottom left hinge with the
reserved screws.
Top hinge
Top hinge washer
Middle hinge washer
Middle hinge
Door parts
Bottom right hinge
Right pin assembly (2)
Screw
Left pin assembly (2)
Bottom left hinge
Step 2
Step 1
Step 4
Step 3
10
Remove right pin assemblies from the bottom
of the freezer and refrigerator doors. On the
opposite side, attach the replacement pin
assemblies (located in the plastic bag with the
Use and Care Manual) with a screwdriver.
Note: You must re-use the screws from the pin
assemblies that are removed in this step when
attaching the new assemblies.
Place the refrigerator door on the bottom left
hinge. Ensure the door is aligned horizontally
and vertically. Attach middle hinge to top (left)
of refrigerator door, attach washer to the back
of hinge, align with holes and affix to middle
beam with reserved screws. Fasten with
screwdriver (not included).
Place the freezer door on the middle
hinge. Ensure that the door is aligned
horizontally and vertically, and that the
gasket seals on all sides before attaching
the top hinge. Attach the top hinge and
replace the hinge cover.
Step 5
Step 7
Step 6
11
Troubleshooting Guide
You can solve manycommon refrigerator problems easily, saving you the cost of a
possible servicecall. Try the suggestions below to see
if
you can solve the problem
before calling for service.
melborP Possible Causes
Refrigerator does not operate Refrigerator is unplugged.
The circuit breaker is tripped/ fuse blown.
Compressor turns on and off The room temperature is warmer than normal
Door is left open or is frequently opened.
The refrigerator does not have the correct
clearances.
The refrigerator has recently been disconnected for
a period of time.
Refrigerator compartments are too
warm Temperature control is not set correctly.
Door is left open or is frequently opened.
The door gasket does not seal properly.
A large amount of warm or hot food was stored
recently. Wait for the refrigerator to reach its
selected temperature.
The refrigerator has recently been disconnected for
a period of time.
Vibrating or rattling (slight vibration
is normal) Leveling legs need adjusting
Refrigerator is placed on an uneven or weak
surface.
The refrigerator is touching the wall. Re-level the
refrigerator and move
it
away from the wall.
Temperatureof externalrefrigerator
surfaceis warm The exterior refrigerator walls can be as much as
30°F warmer than room temperature.
This is normal while the compressor works to
transfer heat from inside the refrigerator cabinet.
Moisturecollectsinsidethe refrigerator Door is left open or is frequently opened.
Moistureformsonoutside of
refrigerator Is normal in hot and humid weather. Air carries
moisture into the refrigerator when doors are
opened.
Bubblingorgurglingsounds(like
boilingwater) This is the normal sound
of
refrigerant (used to cool
refrigerator) circulating throughout the system.
Popping or cracking sounds when
compressor comes on This is normal. Metal parts undergo expansion and
contraction, like hot water pipes. The sound will
level off or disappear as refrigerator runs.
The door will not close properly The refrigerator is not on a level surface.
The gasket is dirty.
The storage basket is out
of
position.
HVDR1040W
HVDR1040B
HVDR1040S
12
  • Page 1 1
  • Page 2 2
  • Page 3 3
  • Page 4 4
  • Page 5 5
  • Page 6 6
  • Page 7 7
  • Page 8 8
  • Page 9 9
  • Page 10 10
  • Page 11 11
  • Page 12 12
  • Page 13 13

Magic Chef HVDR1040W User manual

Category
Fridges
Type
User manual
This manual is also suitable for

Ask a question and I''ll find the answer in the document

Finding information in a document is now easier with AI