Page is loading ...

WARNING
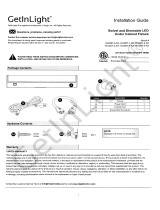
LED Puk Lights
MODEL PUK M
PLEASE READ INSTRUCTION BEFORE COMMENCING INSTALLATION AND RETAIN FOR FUTURE REFERENCES. Electrical
products can cause death or injury, or damage to property.
If in any doubt about the installation or use of this product, consult a competent electrician.
INSTALLATION GUIDE
WARNING — THE INSTALLATION MUST BE CARRIED OUT BY A QUALIFIED ELECTRICIAN.
1. LED Puk Lights are suitable for using in damp location
2. Please keep the LED Puk Light away from any corrosive substance, and please use dry cloth
when you clean it
3. LED Puk Lights can only be installed by a qualified electrician
4. Before installation or maintenance, please disconnect the power to prevent electric shock
Instruction Manual
1-888-543-6473
1-888-541-6474
13376 Comber Way
Surrey BC V3W 5V9
www.ortechindustries.ca
205 Summerlea Rd
Brampton, ON L6T 4E5
Application Notice
1. Puk M is to be used ONLY with listed class 2 power supplies
2. Always consider voltage drop effect when linking fixtures together
3. To extend driver life span, DO NOT exceed 80% of driver rated load
4. For your safety, this fixture MUST be wired in accordance to local electrical codes and ordinances
5. Indoor installation ONLY
Included Components
•1 x Micro LED light
•Mounting hardware
CAUTION
Tools Required
•Power Drill
•Screw Driver
•1-1/8" Forstner Bit
Fig.1 Fig.2
Recessed
Mount 1-1/8" hole
Torsion Clips
(-)
(+)
LED Driver in Hardwire Box LED Driver in Hardwire Box DC 2.1 Connectors
Fig.3A Fig.3B
Assembly Instructions
1. Open packaging and place all components onto a clean surface
2. Turn power OFF from the electrical panel before starting installation
3. For recessed mounting: Remove the Micro LED light completely from surface mounting ring. Drill a 1-1/8" cut hole using a Forstner Bit
(supplied by others) in the desired location. Run the wires through the cut hole and attach the Micro LED light flush to medium (see Fig.1).
4. For Hardwire: Use wire type and gauge suitable for application to connect the fixtures, and twist-on wire connectors (supplied by
others; also see Fig.3A). Ensure correct polarity is followed throughout the line (see Fig.2).
For Plug-in: Make a daisy chain connection with male to female DC 2.1 connectors. Attach DC 2.1 connector to a power feed from the
12V constant voltage driver (see Fig.3B)
5. Rest driver to the desired secured location
6. Once assembly is complete, turn ON power to confirm that fixture is working properly
/