Page is loading ...

Instruction
Manual
Manuel d’instructions
Manual de instrucciones
Model # is located by barcode.
Please write your model # on your sales receipt or below.
Le numéro de modèle se trouve à côté du code-barres.
Veuillez inscrire le numéro de modèle sur votre reçu de vente ou ci-dessous.
El numéro de modelo está ubicado al lado del código de barras.
Sirvase escribir el numéro de modelo en el recibo de compra o debajo.
Model Number:
FN 20022556-F AC
EN FRANÇAIS AU VERSO
ENGLISH
Thank you for purchasing this Waterpik
®
shower head. This booklet
will give you the information to make installation easy and quick. You
are close to enjoying a powerful and invigorating shower experience
with your new Waterpik
®
shower head.
You can access more products and information on your product at
www.waterpik.com.
PRIOR TO INSTALLATION
• Write down your model number in the allotted space above. (model
number is found on the packaging near UPC code).
If you do not have the package you may find the model number on
our website www.waterpik.com.
• Remove old shower head and remove all pipe tape as well.
• Ensure that the washer from the old shower is not connected to the
pipe. Use a thin utensil to check inside the pipe for washers, such
as a pencil or screw driver. Do not use your fingers.
• Gather the tools necessary to install your new shower head.
OR
Adjustable Wrench or Pliers (not included)
FRANÇAIS
Nous vous remercions pour votre acquisition de ce produit de
douchage Waterpik
®
. L’information présentée dans cette brochure
vous permettra d’exécuter facilement et rapidement l’installation du
produit. Vous pourrez dans peu de temps bénéficier de la puissance
et des effets rafraichissants de votre nouveau produit de douchage
Waterpik
®
.
Vous pouvez accéder à plus de produits et d’informations sur votre
produit à www.waterpik.com.
Note: Les illustrations incluses peuvent ne pas représenter
exactement le produit acheté (douchette).
AVANT L’INSTALLATION
• Inscrire dans l’espace ci-dessus le numéro de modèle du produit
(le numéro de modèle du produit figure sur l’emballage, à proximité
du code CUP).
Si l’emballage du produit n’est plus disponible, on peut trouver le
numéro de modèle du produit sur notre site Internet
www.waterpik.com.
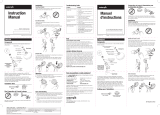
1. Slide the large nut over the pipe so
that it rests on horizontal part of the
pipe and is clear of the threaded
end.
1. Enfiler le gros écrou sur le tube
d’alimentation; placer l’écrou
sur la partie horizontale du
tube d’alimentation, au-delà de
l’extrémité filetée.
2. Hand thread the pivot ball onto the
pipe.
2. Visser manuellement la boule
d’articulation sur le tube
d’alimentation.
3. With an adjustable wrench or pliers,
tighten pivot ball an additional ¼ to
½ turn. Wrap pivot ball with a cloth
if you are using pliers.
3. Avec une clef à molette ou pinces,
effectuer le serrage final de la
boule d’articulation (¼ à ½ tour).
Si on utilise une pince, envelopper
d’abord la boule d’articulation dans
un chiffon.
Loose Shower Head a Check inside the large nut for a large
plastic ring. Note: the ring is tapered.
Make sure the ring is installed correctly.
The smooth surfaced side of the ring
should face towards the pipe inside the
large nut and will snap into place when
properly installed.
LIMITED LIFETIME WARRANTY
Save your receipt. Proof of purchase is required for warranty
action. Water Pik, Inc. warrants to the original purchaser of this
product that it is free from defects in material and workmanship
for as long as the original purchaser owns this product. Water
Pik, Inc. will replace the product which in our opinion is defective,
provided that the product has not been abused, misused, altered or
damaged after purchase. (This includes damage due to use of tools
or harsh chemicals.) In the event an item has been discontinued we
will replace with what we deem to be the closest product. Water
Pik, Inc. is not responsible for labor charges, installation, or other
consequential cost. The responsibility of Water Pik, Inc. shall not
exceed the original purchase price of the product. This warranty gives
you specific legal rights. You may also have other rights that vary
depending on where you reside.
If product malfunctions or becomes damaged, stop use and
contact Water Pik, Inc. for assistance.
Waterpik
®
(stylized) is a trademark of Water Pik, Inc. registered in Australia,
Canada, China, EU, Hong Kong, India, Israel, Japan, Korea, Mexico, Paraguay,
Russian Federation, Switzerland, Taiwan, United States, and Vietnam.
Ecoflow
®
is a trademark of Water Pik, Inc. registered in Australia, Canada, China,
Colombia, EU, Hong Kong, Mexico, and the United States.
EcoRain
®
is a trademark of Water Pik, Inc. registered in Australia, Canada, China,
Mexico, and the United States.
OptiFlow
®
is a trademark of Water Pik, Inc. registered in Australia, Canada, China,
EU, Hong Kong, India, Japan, Korea, Mexico, Taiwan, and the United States.
EasySelect
®
is a trademark of Water Pik, Inc. registered in Australia, Canada,
China, EU, Korea, Mexico, Taiwan and the United States.
Medallion
®
is a trademark of Water Pik, Inc., registered in Australia, EU, Hong Kong
and the United States.
Shower Massage
®
is a trademark of Water Pik, Inc. registered in Canada.
Treat Yourself Better
®
is a trademark of Water Pik, Inc. registered in the
United States.
© 2018 Water Pik, Inc.
Printed in China.
Water Pik, Inc. a subsidiary of Church & Dwight Co., Inc.
1730 East Prospect Road
Fort Collins, CO 80553-0001 U.S.A.
www.waterpik.com
When to use pipe tape:
Pipe tape is used when the connection to the j-pipe is metal. If the
connection to the j-pipe is plastic then pipe tape can cause damage
to your shower head connection. Before applying pipe tape make sure
you know what type of pipe connection you have.
• Retirer la douchette existante; éliminer également les résidus de
composé d’étanchéité des tuyauteries.
• Veiller à ce que le joint de la douchette existante ne reste pas
attaché sur le tube d’alimentation. Utiliser un ustensile mince tel un
crayon ou un tournevis pour vérifier qu’aucun joint ne se trouve à
l’intérieur du tube d’alimentation. Ne pas utiliser les doigts.
• Rassembler les outils nécessaires pour l’installation de la
douchette manuelle.
OU
Clef à molette ou pince (pas inclus)
Quand utiliser le composé d’étanchéité des tuyauteries :
Un composé d’étanchéité des tuyauteries doit être utilisé lorsque
le raccordement au tube d’alimentation courbé est en métal. Si le
raccordement au tube d’alimentation courbé est en plastique, le composé
d’étanchéité des tuyauteries peut endommager le raccordement de votre
douchette. Avant d’appliquer du composé d’étanchéité des tuyauteries,
inspecter le type de raccordement du système.
4. Thread the large nut
to the shower head,
holding shower head in
position. The large nut
tightens when turned
clockwise as viewed
from the front of the
shower head.
4. Amorcer le vissage
du gros écrou sur la
douchette (maintenir
la douchette immobile
à sa position) – faire
pivoter le gros écrou
dans le sens horaire
pour l’observateur qui
fait face à l’avant de la
douchette.
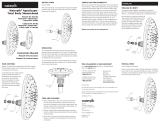
INSTALLATION
Fixed Mount
Shower Head
Douchette fixe
Large Nut
Gros écrou
Washer
Joint
Filter Screen
Tamis de filtration
Pivot Ball
Boule d’articulation
J-pipe
Tube
d’alimentation
(courbé)
Shower head
Douchette
1
1
2
2
4
4
3
3
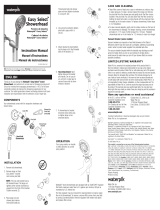
OPERATION
Spray Selector:
Spray Selector allows you to select from
various spray patterns. Spray pattern is
controlled by the small lever that rotates left
and right.
UTILISATION DU PRODUIT
Sélecteur du mode d’aspersion :
Le sélecteur du mode d’aspersion permet de
choisir l’un des modes d’aspersion disponibles
sur la douchette. Le pivotement d’une petite
manette (vers la droite ou vers la gauche)
permet la sélection du mode d’aspersion.
WARNING:
1 To avoid hot water dangers and conserve even more energy, make
sure your water heater is set at 120°F (48.9°C) or below.
2 Test the tub/shower water with your hand before bathing.
3 For additional safety for Ecoflow
®
or high efficiency showerheads,
it is recommended that all homes have installed a pressure balance
tub and shower valve with the rotational limit stops properly set by
a plumber.
4 For external use only. The potentially deadly amoeba, Naegleria
fowleri, may be present in some tap water or unchlorinated well
water.
CARE AND CLEANING
• To maintain proper working conditions cleaning is required when
mineral deposits appear on the spray orifices. To clean mineral
deposits, gently rub the rubber nozzles on the face of the shower
head to dislodge.
• To clean heavier deposits, remove shower head and soak face
down in 1-2 cups of white vinegar (use white vinegar only) for
about 2-3 hours. Replace shower head and run in each mode to
flush out vinegar.
Have any questions or need assistance?
For quick service prior to calling have your model number and receipt
ready.
In the U.S., call our toll-free
Customer Assistance Line
1-800-525-2774.
In Canada, call our toll-free
Customer Assistance Line
1-888-226-3042.
www.waterpik.com
Outside the U.S., write us at
Water Pik, Inc.
1730 East Prospect Road
Fort Collins, CO 80553-0001
U.S.A
BINDING ARBITRATION AND WAIVER OF RIGHT TO ASSERT
MATTERS IN COURT AND RIGHT TO JURY TRIAL
By purchasing, installing, or using this product you agree that any
controversy or claim arising out of or relating to your purchase, use,
modification, installation, or removal of this product shall be settled by
binding arbitration. The arbitrator’s decision will be final and binding.
Judgment on the award rendered by the arbitrator may be entered
in any court having jurisdiction over the matter. Further, you agree
that you will not have the right to litigate any claim arising out of or in
relation to your purchase, use, modification, installation, or removal of
this product in any court or to have a jury trial on that claim.
Arbitration of any matters shall be administered by the American
arbitration association and conducted by one arbitrator in accordance
with the consumer arbitration rules of the American Arbitration
Association in effect at the time of filing of the demand. The venue for
all such arbitrations shall be Colorado and any such arbitration shall
be subject to the Federal Arbitration Act and Colorado law.
WAIVER OF RIGHT TO PARTICIPATE IN CLASS ACTIONS OR
PURSUE CLAIMS IN A REPRESENTATIVE CAPACITY.
Further, by purchasing, installing, or using this product you agree that
arbitration must be on an individual basis. This means neither you,
nor we, may join or consolidate claims in arbitration by or against
other purchasers or users of Water Pik products or the general public.
Additionally, you may not litigate in court or arbitrate any claims as a
representative or member of a class or in a purported representative
capacity on behalf of the general public, other purchasers or users of
this product, other persons or entities similarly situated, or in a private
attorney general capacity.
Waterpik
®
is a trademark of Water Pik, Inc. registered in Argentina, Australia,
Austria, Benelux, Canada, Chile, China, Czech Republic, EU, Finland, France,
Germany, Hong Kong, Hungary, India, Israel, Italy, Japan, Kazakhstan, Korea,
Mexico, Norway, Poland, Russian Federation, South Africa, Spain, Sweden,
Switzerland, Taiwan, Turkey, Ukraine, United States and Vietnam.
• Do not clean or rinse any part with harsh chemicals, heavy duty
cleaners, or abrasives; this may damage parts or finish and will
void warranty.
• Clean filter screen by unscrewing from the pivot ball and rinse
by back flushing to remove particles. Follow steps 1-4 under
installation to reinstall shower head.
TROUBLESHOOTING GUIDE
Problem Solution
No water flow from
installed shower head
a Confirm previous shower washer is not in
the j-pipe.
b Confirm there is only one washer in the
pivot ball.
Low water pressure or
missing spray patterns
a Clean shower head in vinegar/water
solution. (See care & cleaning section).
b Clean filter screen.
Leaking at pipe pivot ball
connection
a Confirm only one washer is seated on top
of the screen.
b Grate bar of soap across the j-pipe threads
to act as a sealant.
Shower head too stiff to
change angle
a Install shower head to provide additional
leverage to change angle of spray (contact
Water Pik for further instructions).
INSTALLATION
AVERTISSEMENT :
1. Afin d’éviter les dangers liés à une eau à forte température et de
conserver davantage d’énergie, vérifier que le chauffe-eau est
réglé à un maximum de 120°F (48,9°C).
2. Tester la température de l’eau de la baignoire/douche avec la main
avant de se baigner.
3. Pour plus de sécurité avec les douchettes Ecoflow
®
ou
douchettes haute efficacité, on recommande l’installation dans
chaque résidence d’un mitigeur à équilibrage des pressions
(pour baignoire/douche), avec butées de limitation de la rotation
adéquatement réglées par un plombier.
4. À usage externe uniquement. L’amib e Naegleria fowleri
potentiellement mortelle peut être présente dans certaines eaux du
robinet ou eaux de puits non chlorées.
ENTRETIEN ET NETTOYAGE
• Pour le maintien du bon fonctionnement de système, on doit
éliminer les dépôts minéraux dès qu’ils apparaissent dans les
orifices d’aspersion. Pour l’élimination des dépôts minéraux,
frotter délicatement les busettes en caoutchouc sur la face de la
douchette pour expulser les dépôts minéraux.
• Pour un nettoyage plus approfondi, démonter la douchette et
placer celle-ci pendant 2 à 3 heures dans un récipient de vinaigre
blanc (utiliser uniquement du vinaigre blanc – 250 à 500 mL).
Réinstaller ensuite la douchette et ouvrir l’arrivée d’eau – laisser
l’eau couler à chaque mode d’aspersion pendant 1 à 2 minutes
pour éliminer tout résidu de vinaigre.
• Ne pas nettoyer ou rincer de pièces de l’appareil avec des produits
chimiques puissants, nettoyants puissants ou produits abrasifs;
cela peut endommager les pièces ou le revêtement et entraînera
l’annulation de la garantie.
• Nettoyer le tamis de filtration : dévisser la boule d’articulation
et effectuer un nettoyage sous pression pour éliminer les
particules qui s’y trouvent. Suivre les étapes 1 à 4 dans la section
d’installation pour réinstaller la douchette.
/


