10 49-1000249 Rev. 0
Installation Instructions
INSTALLING THE WATER LINE (on some models)
BEFORE YOU BEGIN
Recommended copper water supply kits are WX8X2,
WX8X3 or WX8X4, depending on the amount of
tubing you need. Approved plastic water supply
lines are SmartConnect
™
Refrigerator Tubing
(WX08X10006, WX08X10015 and WX08X10025).
When connecting your refrigerator to a GE
Appliances Reverse Osmosis Water System, the only
DSSURYHGLQVWDOODWLRQLVZLWKD*($SSOLDQFHV59.LW
)RURWKHUUHYHUVHRVPRVLVZDWHUV\VWHPVIROORZWKH
manufacturer’s recommendations.
This water line installation is not warranted by the
UHIULJHUDWRURULFHPDNHUPDQXIDFWXUHU)ROORZWKHVH
LQVWUXFWLRQVFDUHIXOO\WRPLQLPL]HWKHULVNRIH[SHQVLYH
water damage.
Water hammer (water banging in the pipes) in house
plumbing can cause damage to refrigerator parts and
lead to water leakage or flooding. Call a qualified
plumber to correct water hammer before installing the
water supply line to the refrigerator.
To prevent burns and product damage, do not hook
up the water line to the hot water line.
,I\RXXVH\RXUUHIULJHUDWRUEHIRUHFRQQHFWLQJWKH
water line, make sure the ice maker power switch
LVLQWKH2))SRVLWLRQRQSRZHUVZLWFKPRGHOVRU
RSHUDWLQJDUPLVLQ2))SRVLWLRQ
'RQRWLQVWDOOWKHLFHPDNHUWXELQJLQDUHDVZKHUH
WHPSHUDWXUHVIDOOEHORZIUHH]LQJ
When using any electrical device (such as a power
drill) during installation, be sure the device is double
insulated or grounded in a manner to prevent the
KD]DUGRIHOHFWULFVKRFNRULVEDWWHU\SRZHUHG
All installations must be in accordance with local
plumbing code requirements.
WARNING
Connect to potable water supply
only.
WHAT YOU WILL NEED
• Copper or SmartConnect™ Refrigerator Tubing kit,
´RXWHUGLDPHWHUWRFRQQHFWWKHUHIULJHUDWRUWRWKH
ZDWHUVXSSO\,IXVLQJFRSSHUEHVXUHERWKHQGVRI
the tubing are cut square.
To determine how much tubing you need: measure
the distance from the water valve on the back of the
refrigerator to the water supply pipe. Then add 6’
(1.8 m). Be sure there is sufficient extra tubing (about
¶>P@FRLOHGLQWRWXUQVRIDERXW´>FP@
diameter) to allow the refrigerator to move out from
the wall after installation.
WHAT YOU WILL NEED (Cont.)
6PDUW&RQQHFW5HIULJHUDWRU7XELQJ.LWVDUHDYDLODEOH
in the following lengths:
8’ (2.4 m) – WX08X10006
15’ (4.6 m) – WX08X10015
25’ (7.6) m) – WX08X10025
Be sure that the kit you select allows at least 6’
(1.8 m) as described above.
NOTE: The only GE Appliances approved plastic
tubing is that supplied in SmartConnect™ Refrigerator
7XELQJNLWV'RQRWXVHDQ\RWKHUSODVWLFZDWHUVXSSO\
line because the line is under pressure at all times.
Certain types of plastic will crack or rupture with age
and cause water damage to your home.
• A GE Appliances water supply kit (containing tubing,
shutoff valve and fittings listed below) is available
at extra cost from your dealer or from Parts and
Accessories, 877.959.8688.
• A cold water supply. The water pressure must be
between 20 and 120 psi (138 – 827 kilopascals) on
models without a water filter and between 40 and
120 psi (275 – 827 kilopascals) on models with a
water filter.
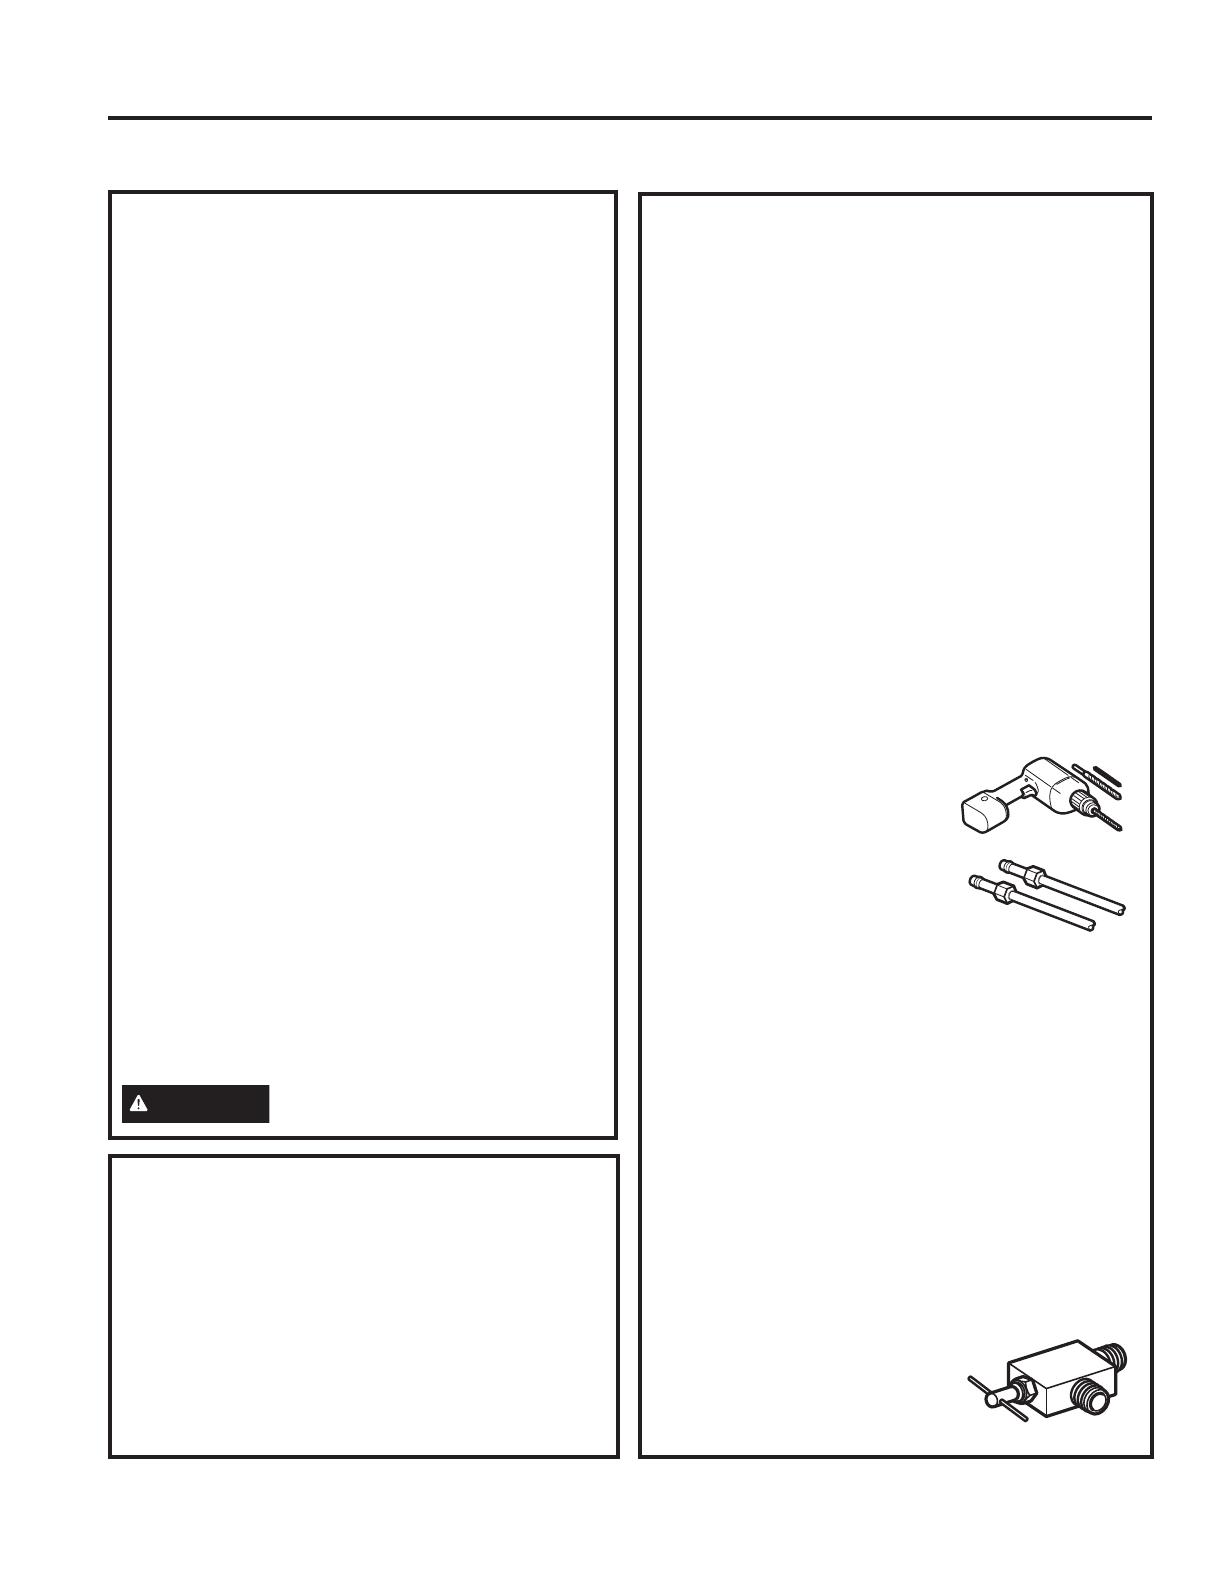
• Power drill.
´RUDGMXVWDEOHZUHQFK
• Straight and Phillips blade
screwdriver.
7ZR´RXWHUGLDPHWHU
compression nuts and 2 ferrules
VOHHYHV²WRFRQQHFWWKHFRSSHU
tubing to the shutoff valve and
the refrigerator water valve.
OR
,I\RXDUHXVLQJD6PDUW&RQQHFW5HIULJHUDWRU
Tubing kit, the necessary fittings are preassembled
to the tubing.
,I\RXUH[LVWLQJFRSSHUZDWHUOLQHKDVDIODUHGILWWLQJ
at the end, you will need an adapter (available at
plumbing supply stores) to connect the water line to
the refrigerator OR you can cut off the flared fitting
with a tube cutter and then use a compression
ILWWLQJ'RQRWFXWIRUPHGHQGIURP6PDUW&RQQHFW
Refrigerator tubing.
• Shutoff valve to connect to the cold water line.
The shutoff valve should have a water inlet with a
PLQLPXPLQVLGHGLDPHWHURI´DWWKHSRLQWRI
FRQQHFWLRQWRWKH&2/':$7(5/,1(6DGGOH
type shutoff valves are included in many water
supply kits. Before purchasing,
make sure a saddle-type valve
complies with your local plumbing
codes.
INSTALLATION INSTRUCTIONS


