Page is loading ...

Please read this user’s manual carefully before use.
CONGRATULATIONS!
Thank you for your purchase of this hipstreet product and we hope you enjoy using it.
Please visit our website at
www.hipstreet.com.
Please ensure that you fully read and understand the information within this user
manual prior to using your product. It is advised that you keep this user manual in a
safe place for future reference. We sincerely hope that this high quality product offers
you endless hours of entertainment.
Important safety precautions
• Always follow these basic safety precautions when using the unit.
This will reduce the risk of product damage and personal injury.
• Do not disassemble, repair or modify the unit by yourself. Refer servicing to
qualified personnel.
• Do not dispose of the unit in extreme heat to avoid explosion.
• Keep the unit away from direct sunlight or heat source.
• Do not expose the unit to rain or moisture to avoid any malfunction.
• Do not use the unit in a rather dry environment to avoid static.
• Never apply heavy impact on the unit like dropping it or placing it on a
magnet.
• Clean only with a dry cloth. Make sure the unit is turned off before cleaning.
Do not use liquid cleanser.
FCC Warning
This device complies with part 15 of the FCC Rules. Operation is subject to the
following two conditions: (1) This device may not cause harmful interference, and (2)
this device must accept any interference received, including interference that may
cause undesired operation.
NOTE 1: This equipment has been tested and found to comply with the limits for a
Class C digital device, pursuant to part 15 of the FCC Rules. These limits are
designed to provide reasonable protection against harmful interference in a
residential installation. This equipment generates, uses and can radiate radio
frequency energy and, if not installed and used in accordance with the instructions,
may cause harmful interference to radio communications. However, there is no
guarantee that interference will not occur in a particular installation. If this
equipment does cause harmful interference to radio or television reception, which
can be determined by turning the equipment off and on, the user is encouraged to try
to correct the interference by one or more of the following measures:

-Reorient or relocate the receiving antenna.
-Increase the separation between the equipment and receiver.
-Connect the equipment into an outlet on a circuit different from that to which the
receiver is connected.
-Consult the dealer or an experienced radio/TV technician for help.
NOTE 2: Any changes or modifications to this unit not expressly approved by the
party responsible for compliance could void the user’s authority to operate the
equipment.
This device complies with Industry Canada licence-exempt RSS standard(s).
Operation is subject to the following two conditions: (1) this device may not cause
interference, and (2) this device must accept any interference, including interference
that may cause undesired operation of the device.
Under Industry Canada regulations, this radio transmitter may only operate using an
antenna of a type and maximum (or lesser) gain approved for the transmitter by
Industry Canada. To reduce potential radio interference to other users, the antenna
type and its gain should be so chosen that the equivalent isotropically radiated power
(e.i.r.p.) is not more than that necessary for successful communication.
This device complies with Canadian ICES-003 and RSS-210

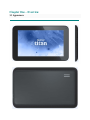
Chapter One – Overview
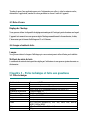
1-1 Appearance

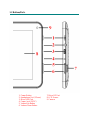
1-2 Buttons/Ports
1. Power Button 7. Micro-SD Port
2. Headphone Port (3.5mm) 8. LCD Screen
3. Micro-USB Port 9. Camera
4. Power Jack (5VDC)
5. Volume Up Button
6. Volume Down Button

1-3 Power ON/OFF and Sleep/Wake mode
Power ON
Long press the power button for about 3-4 seconds to power ON the tablet.
Power OFF (Shut down)
Press and hold the power button for about 3-4 seconds, press OK when prompted to shut down.
1-4 Standby Mode
Standby
Short press the power button to standby the tablet when the tablet is powered ON.
Wake up
Short press the power button to wake the screen up when the tablet is powered ON and in standby
mode.
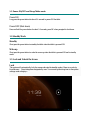
1-5 Lock and Unlock the Screen
Lock
The system will automatically lock the screen and enter the standby mode if there is no activity
from the user. Preset sleep time designated by user. You can set up the sleep time in the system
settings under <display>.

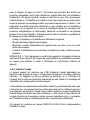
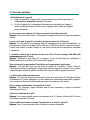
Unlock
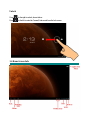
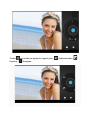
Drag to the right to unlock, shown below.
Drag to the left to enter the Camera/Video mode from the lock screen.
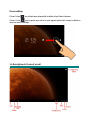
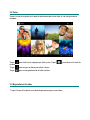
1-6 Home Screen Info

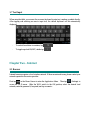
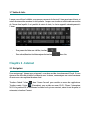
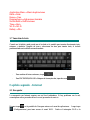
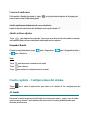
1-7 Text Input
When using the tablet, you can use the on-screen keyboard to enter text, numbers, symbols directly.
After tapping and selecting an area to input text, the default keyboard will be automatically
displayed.
- To switch from letters to numbers, tap
- To toggle caps lock ON/OFF, double tap
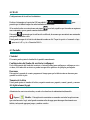
Chapter Two - Internet
2-1 Browser
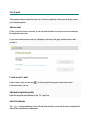
Internet browsing requires a local wireless network. If there are network issues, please contact your
network operator or the service provider.
First tap in the Home Screen to enter the Application Menu. Then tap (Settings) to
access the Wi-Fi menu. Slide the Wi-Fi switch to the ON position, select the desired local
network, enter the password (if required) and tap <connect>

“
Tap the browser icon in the application menu to begin browsing the internet.
To enter in a URL, tap the input area to bring up the soft keyboard, then type in the website.
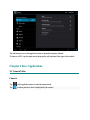
Chapter Three: Applications
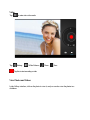
3-1 Camera/Video
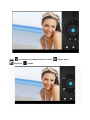
Camera
Tap in the application menu to enter the camera mode.
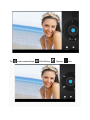
Tap to take a picture of what is displayed by the camera.

“
Tap to enter camera settings: White Balance, Exposure, Save

“
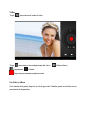
Video
Tap to enter into video mode.
Tap Setting: White Balance, Timer, Save
Tap this to start recording a video
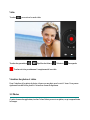
View Photos and Videos
In the Gallery interface, click on the photo to view it, and you can also view the photos in a
slideshow

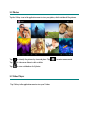
3-2 Photos
Tap the Gallery icon in the application menu to view your photos, which includes all the pictures.
Tap to classify the pictures by time and place. Tap to enter camera mode.
Tap to choose an album to edit or delete.
Tap to view a slideshow of all photos
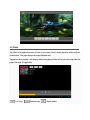
3-3 Video Player
Tap Gallery in the application menu to view your Videos.

3-4 Music
Tap Music in the application menu to listen to your music. Music can be played by artists or album
classification. This page displays the songs alphabetically.
Tapping on <now playing > will display album being played; there will be lyrics showing under the
page to the right. (If applicable)
List View, Random song, Repeat modes

Artists
Under the <artist > tab, it is sorted according to the artist's name. Tap on an artist and you will see
all the related albums/music/song-lists associated with this artist.
Album
Under the <album> tab, this shows all albums. Choose an album to reveal all songs associated
with that album.
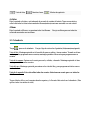
3-5 Calendar
Tap to view the Calendar. Choose type of view from the 4 tabs (Day/Week/Month/Agenda)
Day views: Long press on the time of day to view, edit, and delete events. Tapping on the blank
area can set up new events; long press the blank area, you can set new events.
Week views: Short press the event to view, edit, or delete it. Long press the blank area, to add new
events.
Month view: Long press to enter Day view and to set new calendar items.
Agenda View: This view lists all events. Select an event for all details.
Tapping the <today> button at the top-right corner will bring you to current calendar day. (This
applies for all view modes)

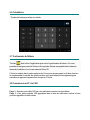
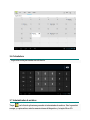
3-6 Calculator
Tap on the keys to enter a calculation.
3-7 File Manager
Tap in the application list to open File Manager. This will let you browse, and copy files
between the device’s internal memory and SD card.
Use the tabs at the top to browse files from all locations and complete actions such
copy/cut/paste/delete/zip/rename by long pressing
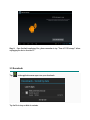
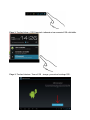
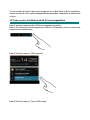
3-8 Connecting to PC via USB
Step 1: Please connect your USB cable from your PC to your Tablet
Step 2: On the notification bar, 2 little USB symbols will appear, please tap on this bar to bring
up the notifications.

Step 3: Please tap on “USB Connected”
Step 4: Please tap on “Turn on USB storage”
Step 5: Please wait a few seconds until the computer connects to your tablet. Once finished,
you will see the Android character turn orange in colour and now “Turn on USB storage” will
change to “Turn off USB storage”

Step 6: Once finished transferring files, please remember to tap “Turn off USB storage” before
unplugging the device from the PC
3-9 Downloads
Tap in the application menu open view your downloads.
Tap the file to stop or delete its contents.

3-10 E-mail
This requires internet connection before use. If there are problems in the network, please contact
your network operator.
Add account
If this is your first time to use email, go into the email interface to set up an account according to
the displayed instructions.
If you want to add more accounts, tap <Settings> on the top of the page, and then select <add
account >.
Create a new E-mail
In the < inbox > tab, you can tap on the top-right of the page to create a new email.
In the new email, you can:
Add mail recipients quickly
Enter the recipients email address in the “To” input box.
Add Attachments
Tap to add an attachment. Once a file has been selected, its name will be shown underneath the
subject; you can add/remove attachments.

Reply/Forward
When an email is open, tap to < reply >, to < reply all > or to < forward >.
Note:
Tap to search your emails for content
Tap to refresh
Tap to change your email settings
Chapter Four: System Settings
Tap in the application menu to enter the system settings interface.
4-1 Sound
This menu allows you to set different volume levels for music and games, ringtones and notifications
and alarms. You can also select the default sounds for different notifications.
4-2 Wi-Fi
Local wireless network settings
Slide the switch to the ON position to allow the tablet to search
for wireless networks in your area.
If the local area networks have this sign beside it, this means the networks do not require a
password, and can be connected to directly.
This sign represents the network has been encrypted, therefore it would require a password
before the connection can be established.
You can choose the network you want from the list by tapping on it. Tapping the < advanced >
option under allows you to view the < IP > and < MAC address >

4-3 Display
Brightness
The user can adjust the brightness of the screen manually.
Wallpaper setting
In the wallpaper setting, the user can set wallpaper or live wallpaper they desire; wallpapers can be
chosen from your gallery or from pre-loaded samples.
Sleep
This option allows the user to set how long it will take before the tablet screen shuts off to save
battery life.
Font size
You can set the font size, respectively they are: Small, Normal, Large, and Huge.
4-4 Application (Apps)
Manage the running services and access rights management/development.
Opera / 1Mobile – These apps provides you with a marketplace for all your
application needs. Here you can find thousands of apps for you to download directly onto your
tablet including gaming and social media.
HS Cloud – This is a cloud service provided free of charge to include 10GB of free storage.
With this app you could upload and share you favorite Audio/Video/Docs/Files and have access to
them anywhere, anytime.
Application Management
In this setting, it is easy to manage and delete some applications that have been installed.
Tap the < Downloaded >, < On SD Card >, < Running > or < All > tabs to scan for programs in that
category.
Tap on an application, to see its information and to clear the cache, uninstall, clear the default value
or force stop.

4-5 Date & Time
Time setting
You can use automatic time settings from the network you are connected to, or you can manually
adjust the time zone, set a specific date and time and display 12/24 hour formats.
4-6 Language and Input
Language
You can choose the language from the many preset languages available
Input method
Input methods can be set by user, and you can add custom words to the dictionary.
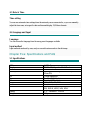
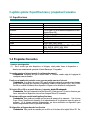
Chapter Five: Specifications and FAQ
5-1 Specifications
CPU
1.2GHz Processor
Display
7” 800x480, Capacitive Multi-Touch
RAM
512MB DDR3
Memory
16GB (plus 32GB Expandable memory via
Micro-SD)
OS
Google Android 4.1
Power
Provided 5VDC Adaptor
PC
Provided USB cable
Image
JPEG, BMP, GIF, PNG
Audio
MP3, M4A, WAV, WMA
Video
AVI (DIVX/XVID/MPEG4), FLV, 3GP, MOV,
RM, RMVB, MPEG, MP4, WMV
Battery
3.7V - 2800mAh – 10.4Wh
Weight
330g
Page is loading ...
Page is loading ...
Page is loading ...
Page is loading ...
Page is loading ...
Page is loading ...
Page is loading ...
Page is loading ...
Page is loading ...
Page is loading ...
Page is loading ...
Page is loading ...
Page is loading ...
Page is loading ...
Page is loading ...
Page is loading ...
Page is loading ...
Page is loading ...
Page is loading ...
Page is loading ...
Page is loading ...
Page is loading ...
Page is loading ...
Page is loading ...
Page is loading ...
Page is loading ...
Page is loading ...
Page is loading ...
Page is loading ...
Page is loading ...
Page is loading ...
Page is loading ...
Page is loading ...
Page is loading ...
Page is loading ...
Page is loading ...
Page is loading ...
Page is loading ...
Page is loading ...
Page is loading ...
Page is loading ...
Page is loading ...
Page is loading ...
Page is loading ...
Page is loading ...
Page is loading ...
Page is loading ...
Page is loading ...
-
 1
1
-
 2
2
-
 3
3
-
 4
4
-
 5
5
-
 6
6
-
 7
7
-
 8
8
-
 9
9
-
 10
10
-
 11
11
-
 12
12
-
 13
13
-
 14
14
-
 15
15
-
 16
16
-
 17
17
-
 18
18
-
 19
19
-
 20
20
-
 21
21
-
 22
22
-
 23
23
-
 24
24
-
 25
25
-
 26
26
-
 27
27
-
 28
28
-
 29
29
-
 30
30
-
 31
31
-
 32
32
-
 33
33
-
 34
34
-
 35
35
-
 36
36
-
 37
37
-
 38
38
-
 39
39
-
 40
40
-
 41
41
-
 42
42
-
 43
43
-
 44
44
-
 45
45
-
 46
46
-
 47
47
-
 48
48
-
 49
49
-
 50
50
-
 51
51
-
 52
52
-
 53
53
-
 54
54
-
 55
55
-
 56
56
-
 57
57
-
 58
58
-
 59
59
-
 60
60
-
 61
61
-
 62
62
-
 63
63
-
 64
64
-
 65
65
-
 66
66
-
 67
67
-
 68
68
-
 69
69


Ask a question and I''ll find the answer in the document
Finding information in a document is now easier with AI
in other languages
- français: Hip Street HS-7DTB4 Manuel utilisateur
- español: Hip Street HS-7DTB4 Manual de usuario
Related papers
-
Hipstreet Aurora User manual
-
-
-
 Hip Street Flare Series Flare User manual
-
-
-
-
Hip Street Aurora 2 User manual
-
-

Other documents
-
LG LGV497.ARGFTK Owner's manual
-
-
-
-
Yi 93002 User manual
-
-
Nextbook Ares 11A Gen 2 User guide
-
Nextbook Ares 11A User guide
-
Fujitsu Stylistic M532 User manual
-