Page is loading ...

Owner’s Manual
Owner's Manual
02900178 ‘03-6-5N
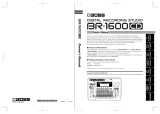
Thank you, and congratulations on your choice of the BOSS
BR-1180/1180CD Digital Recording Studio.
Before using this unit, carefully read the sections entitled:
• USING THE UNIT SAFELY (page 2–3)
• IMPORTANT NOTES (page 4–5)
These sections provide important information concerning
the proper operation of the unit.
Additionally, in order to feel assured that you have gained a
good grasp of every feature provided by your new unit,
Owner’s manual should be read in its entirety. The manual
should be saved and kept on hand as a convenient reference.
Copyright © 2002 BOSS CORPORATION
All rights reserved. No part of this publication may be reproduced in any form
without the written permission of BOSS CORPORATION.
■ Printing Conventions in This Manual
• Text or numerals enclosed in square brackets [ ] indicate buttons.
[PLAY] PLAY button
[REC] REC button
• Reference such as (p. **) indicate pages in this manual to which
you can refer.

IMPORTANT: THE WIRES IN THIS MAINS LEAD ARE COLOURED IN ACCORDANCE WITH THE FOLLOWING CODE.
BLUE:
BROWN:
As the colours of the wires in the mains lead of this apparatus may not correspond with the coloured markings identifying
the terminals in your plug, proceed as follows:
The wire which is coloured BLUE must be connected to the terminal which is marked with the letter N or coloured BLACK.
The wire which is coloured BROWN must be connected to the terminal which is marked with the letter L or coloured RED.
Under no circumstances must either of the above wires be connected to the earth terminal of a three pin plug.
NEUTRAL
LIVE
For the U.K.
This product complies with the requirements of European Directive 89/336/EEC.
For EU Countries
For Canada
This Class B digital apparatus meets all requirements of the Canadian Interference-Causing Equipment Regulations.
Cet appareil numérique de la classe B respecte toutes les exigences du Règlement sur le matériel brouilleur du Canada.
NOTICE
AVIS
For the USA
FEDERAL COMMUNICATIONS COMMISSION
RADIO FREQUENCY INTERFERENCE STATEMENT
This equipment has been tested and found to comply with the limits for a Class B digital device, pursuant to Part 15 of the
FCC Rules. These limits are designed to provide reasonable protection against harmful interference in a residential
installation. This equipment generates, uses, and can radiate radio frequency energy and, if not installed and used in
accordance with the instructions, may cause harmful interference to radio communications. However, there is no guarantee
that interference will not occur in a particular installation. If this equipment does cause harmful interference to radio or
television reception, which can be determined by turning the equipment off and on, the user is encouraged to try to correct the
interference by one or more of the following measures:
– Reorient or relocate the receiving antenna.
– Increase the separation between the equipment and receiver.
– Connect the equipment into an outlet on a circuit different from that to which the receiver is connected.
– Consult the dealer or an experienced radio/TV technician for help.
This device complies with Part 15 of the FCC Rules. Operation is subject to the following two conditions:
(1) This device may not cause harmful interference, and
(2) This device must accept any interference received, including interference that may cause undesired operation.
Unauthorized changes or modification to this system can void the users authority to operate this equipment.
This equipment requires shielded interface cables in order to meet FCC class B Limit.
USING THE UNIT SAFELY
001
• Before using this unit, make sure to read the
instructions below, and the Owner’s Manual.
..........................................................................................................
002d
• Do not open or perform any internal modifica-
tions on the unit or its AC adaptor. (The only
exception would be where this manual provides
specific instructions which should be followed in
order to put in place user-installable options.)
..........................................................................................................
003
• Do not attempt to repair the unit, or replace parts
within it (except when this manual provides
specific instructions directing you to do so). Refer
all servicing to your retailer, the nearest Roland
Service Center, or an authorized Roland
distributor, as listed on the “Information” sheet.
..........................................................................................................
004
• Never use or store the unit in places that are:
• Subject to temperature extremes (e.g., direct
sunlight in an enclosed vehicle, near a heating
duct, on top of heat-generating equipment); or
are
• Damp (e.g., baths, washrooms, on wet floors);
or are
• Humid; or are
• Exposed to rain; or are
• Dusty; or are
• Subject to high levels of vibration.
..........................................................................................................
007
• Make sure you always have the unit placed so it is
level and sure to remain stable. Never place it on
stands that could wobble, or on inclined surfaces.
..........................................................................................................
008c
• Be sure to use only the AC adaptor supplied with
the unit. Also, make sure the line voltage at the
installation matches the input voltage specified on
the AC adaptor’s body. Other AC adaptors may use a
different polarity, or be designed for a different voltage,
so their use could result in damage, malfunction, or
electric shock.
..........................................................................................................
009
• Do not excessively twist or bend the power cord,
nor place heavy objects on it. Doing so can
damage the cord, producing severed elements and
short circuits. Damaged cords are fire and shock
hazards!
..........................................................................................................
010
• This unit, either alone or in combination with an
amplifier and headphones or speakers, may be
capable of producing sound levels that could
cause permanent hearing loss. Do not operate for
a long period of time at a high volume level, or at
a level that is uncomfortable. If you experience
any hearing loss or ringing in the ears, you should
immediately stop using the unit, and consult an
audiologist.
..........................................................................................................
011
• Do not allow any objects (e.g., flammable material,
coins, pins); or liquids of any kind (water, soft
drinks, etc.) to penetrate the unit.
..........................................................................................................
Used for instructions intended to alert
the user to the risk of injury or material
damage should the unit be used
improperly.
* Material damage refers to damage or
other adverse effects caused with
respect to the home and all its
furnishings, as well to domestic
animals or pets.
Used for instructions intended to alert
the user to the risk of death or severe
injury should the unit be used
improperly.
The ● symbol alerts the user to things that must be
carried out. The specific thing that must be done is
indicated by the design contained within the circle. In
the case of the symbol at left, it means that the power-
cord plug must be unplugged from the outlet.
The symbol alerts the user to important instructions
or warnings.The specific meaning of the symbol is
determined by the design contained within the
triangle. In the case of the symbol at left, it is used for
general cautions, warnings, or alerts to danger.
The symbol alerts the user to items that must never
be carried out (are forbidden). The specific thing that
must not be done is indicated by the design contained
within the circle. In the case of the symbol at left, it
means that the unit must never be disassembled.
2

3
012b
• Immediately turn the power off, remove the AC
adaptor from the outlet, and request servicing by
your retailer, the nearest Roland Service Center, or
an authorized Roland distributor, as listed on the
"Information" page when:
• The AC adaptor, the power-supply cord, or the
plug has been damaged; or
• Objects have fallen into, or liquid has been
spilled onto the unit; or
• The unit has been exposed to rain (or otherwise
has become wet); or
• The unit does not appear to operate normally or
exhibits a marked change in performance.
..........................................................................................................
013
• In households with small children, an adult
should provide supervision until the child is
capable of following all the rules essential for the
safe operation of the unit.
..........................................................................................................
014
• Protect the unit from strong impact.
(Do not drop it!)
..........................................................................................................
015
• Do not force the unit’s power-supply cord to share
an outlet with an unreasonable number of other
devices. Be especially careful when using
extension cords—the total power used by all
devices you have connected to the extension
cord’s outlet must never exceed the power rating
(watts/amperes) for the extension cord. Excessive
loads can cause the insulation on the cord to heat
up and eventually melt through.
..........................................................................................................
016
• Before using the unit in a foreign country, consult
with your retailer, the nearest Roland Service
Center, or an authorized Roland distributor, as
listed on the “Information” sheet.
..........................................................................................................
022b
BR-1180
• Always turn the unit off and unplug the AC
adaptor before attempting installation of the CD-
R/RW drive (model no. CDI-BR-1).
..........................................................................................................
023
BR-1180CD
• DO NOT play a CD-ROM disc on a conventional
audio CD player. The resulting sound may be of a
level that could cause permanent hearing loss.
Damage to speakers or other system components
may result.
..........................................................................................................
101b
• The unit and the AC adaptor should be located so
their location or position does not interfere with
their proper ventilation.
..........................................................................................................
102c
• Always grasp only the plug on the AC adaptor
cord when plugging into, or unplugging from, an
outlet or this unit.
..........................................................................................................
103b
• Whenever the unit is to remain unused for an
extended period of time, disconnect the AC
adaptor.
..........................................................................................................
104
• Try to prevent cords and cables from becoming
entangled. Also, all cords and cables should be
placed so they are out of the reach of children.
..........................................................................................................
106
• Never climb on top of, nor place heavy objects on
the unit.
..........................................................................................................
107c
• Never handle the AC adaptor or its plugs with
wet hands when plugging into, or unplugging
from, an outlet or this unit.
..........................................................................................................
108b
• Before moving the unit, disconnect the AC
adaptor and all cords coming from external
devices.
..........................................................................................................
109b
• Before cleaning the unit, turn off the power and
unplug the AC adaptor from the outlet.
..........................................................................................................
110b
• Whenever you suspect the possibility of lightning
in your area, disconnect the AC adaptor from the
outlet.
..........................................................................................................
115a
BR-1180
• Install only the specified CD-R/RW drive (model
no. CDI-BR-1). Remove only the specified screws.
..........................................................................................................
118
• Should you remove the optical connector caps,
make sure to put them in a safe place out of
children's reach, so there is no chance of them
being swallowed accidentally.
..........................................................................................................

4
IMPORTANT NOTES
291a
In addition to the items listed under “USING THE UNIT SAFELY” on page 2–3, please read and observe the following:
Power Supply
301
• Do not use this unit on the same power circuit with any
device that will generate line noise (such as an electric
motor or variable lighting system).
302
• The AC adaptor will begin to generate heat after long
hours of consecutive use. This is normal, and is not a
cause for concern.
307
• Before connecting this unit to other devices, turn off the
power to all units. This will help prevent malfunctions
and/or damage to speakers or other devices.
Placement
351
• Using the unit near power amplifiers (or other equipment
containing large power transformers) may induce hum.
To alleviate the problem, change the orientation of this
unit; or move it farther away from the source of inter-
ference.
352a
• This device may interfere with radio and television
reception. Do not use this device in the vicinity of such
receivers.
352b
• Noise may be produced if wireless communications
devices, such as cell phones, are operated in the vicinity of
this unit. Such noise could occur when receiving or initi-
ating a call, or while conversing. Should you experience
such problems, you should relocate such wireless devices
so they are at a greater distance from this unit, or switch
them off.
353
BR-1180CD
• Observe the following when using the unit’s floppy disk
drive. For further details, refer to “Before Using CD-R/
RW Discs” (p. 24).
• Do not place the unit near devices that produce a
strong magnetic field (e.g., loudspeakers).
• Install the unit on a solid, level surface.
• Do not move the unit or subject it to vibration while
the drive is operating.
354a
• Do not expose the unit to direct sunlight, place it near
devices that radiate heat, leave it inside an enclosed
vehicle, or otherwise subject it to temperature extremes.
Excessive heat can deform or discolor the unit.
355
• To avoid possible breakdown, do not use the unit in a wet
area, such as an area exposed to rain or other moisture.
Maintenance
401a
• For everyday cleaning wipe the unit with a soft, dry cloth
or one that has been slightly dampened with water. To
remove stubborn dirt, use a cloth impregnated with a
mild, non-abrasive detergent. Afterwards, be sure to wipe
the unit thoroughly with a soft, dry cloth.
402
• Never use benzine, thinners, alcohol or solvents of any
kind, to avoid the possibility of discoloration and/or
deformation.
Additional Precautions
552
• Unfortunately, it may be impossible to restore the contents
of data that was stored on a hard disk or CD-R/RW disc
once it has been lost. Roland Corporation assumes no
liability concerning such loss of data.
553
• Use a reasonable amount of care when using the unit’s
buttons, sliders, or other controls; and when using its jacks
and connectors. Rough handling can lead to malfunctions.
554
• Never strike or apply strong pressure to the display.
556
• When connecting / disconnecting all cables, grasp the
connector itself—never pull on the cable. This way you
will avoid causing shorts, or damage to the cable’s
internal elements.
557
•A small amount of heat will radiate from the unit during
normal operation.
558a
• To avoid disturbing your neighbors, try to keep the unit’s
volume at reasonable levels. You may prefer to use
headphones, so you do not need to be concerned about
those around you (especially when it is late at night).
559a
• When you need to transport the unit, package it in the box
(including padding) that it came in, if possible. Otherwise,
you will need to use equivalent packaging materials.
561
• Use only the specified expression pedal (EV-5; sold
separately). By connecting any other expression pedals,
you risk causing malfunction and/or damage to the unit.
562
• Use a cable from Roland to make the connection. If using
some other make of connection cable, please note the
following precautions.
• Some connection cables contain resistors. Do not use
cables that incorporate resistors for connecting to this
unit. The use of such cables can cause the sound level
to be extremely low, or impossible to hear. For infor-
mation on cable specifications, contact the manufac-
turer of the cable.
928
* When turning the unit upside-down, get a bunch of
newspapers or magazines, and place them under the four
corners or at both ends to prevent damage to the buttons
and controls. Also, you should try to orient the unit so no
buttons or controls get damaged.
929
* When turning the unit upside-down, handle with care to
avoid dropping it, or allowing it to fall or tip over.

5
IMPORTANT NOTES
Handling the Internal Hard
Disk Drive
• Please note that the hard disk is a consuming product. To
protect yourself against risk of loosing important data by
accidental disk damage, we recommend that you periodi-
cally save a backup copy on the CD-R/RW disc.
• Before performing any of the following actions, be sure to
perform the shutdown procedure (p. 30). Failure to do so
may result in the loss of song data or damage to the hard
disk.
• Do not turn off the power while the hard disk is operating.
• While using the BR-1180/1180CD, be careful not to subject
the unit to vibration or shock, and avoid moving the unit
while the power is turned on.
602
• Install the unit on a solid, level surface in an area free from
vibration. If the unit must be installed at an angle, be sure
the installation does not exceed the permissible range.
603
• Avoid using the unit immediately after it has been moved
to a location with a level of humidity that is greatly
different than its former location. Rapid changes in the
environment can cause condensation to form inside the
drive, which will adversely affect the operation of the
drive and/or damage CD-R/RW discs. When the unit has
been moved, allow it to become accustomed to the new
environment (allow a few hours) before operating it.
Handling CD-ROMs
801
• Avoid touching or scratching the shiny underside
(encoded surface) of the disc. Damaged or dirty CD-ROM
discs may not be read properly. Keep your discs clean
using a commercially available CD cleaner.
Copyright
851
• Unauthorized recording, distribution, sale, lending, public
performance, broadcasting, or the like, in whole or in part,
of a work (musical composition, video, broadcast, public
performance, or the like) whose copyright is held by a
third party is prohibited by law.
852a
• When exchanging audio signals through a digital
connection with an external instrument, this unit can
perform recording without being subject to the restrictions
of the Serial Copy Management System (SCMS). This is
because the unit is intended solely for musical production,
and is designed not to be subject to restrictions as long as
it is used to record works (such as your own composi-
tions) that do not infringe on the copyrights of others.
(SCMS is a feature that prohibits second-generation and
later copying through a digital connection. It is built into
MD recorders and other consumer digital-audio
equipment as a copyright-protection feature.)
853
• Do not use this unit for purposes that could infringe on a
copyright held by a third party. We assume no responsi-
bility whatsoever with regard to any infringements of
third-party copyrights arising through your use of this
unit.
About the License Agreement
• The BR-1180/1180CD and its CD-R/RW capability are
designed to allow you to reproduce material to which you
have copyright, or material which the copyright owner
has granted you permission to copy. Accordingly, repro-
duction of Music CD or other copyrighted material
without permission of the copyright owner avoiding
technical prohibiting features of second-generation and
later copying like SCMS or others constitutes copyright
infringement and may incur penalties even in case such
reproduction is for your own personal use and enjoyment
(private use). Consult a copyright specialist or special
publications for more detailed infor-mation on obtaining
such permission from copyright holders.
Disclaimer of liability
• BOSS/Roland will take no responsibility for any “direct
damages,” “consequential damages,” or “any other
damages” which may result from your use of the BR-
1180/1180CD. These damages may include but are not
limited to the following events which can occur when
using the BR-1180/1180CD.
• Any loss of profit that may occur to you
• Permanent loss of your music or data
• Inability to continue using the BR-1180/1180CD itself
or a connected device
204
• Windows is registered trademarks of Microsoft Corpo-
ration.
207
• Macintosh is registered trademark of Apple Computer,
Inc.
The explanations in this manual include illustrations that
depict what should typically be shown by the display.
Note, however, that your unit may incorporate a newer,
enhanced version of the system (e.g., includes newer
sounds), so what you actually see in the display may not
always match what appears in the manual.

6
Contents
USING THE UNIT SAFELY......................................................................2
IMPORTANT NOTES ...............................................................................4
Introduction to the BR-1180/BR-1180CD ............................................13
Panel Descriptions................................................................................16
Front Panel.................................................................................................................................................16
CD-R/RW Drive.......................................................................................................................................20
Display.......................................................................................................................................................21
Rear Panel..................................................................................................................................................22
Before Using CD-R/RW Discs..............................................................24
Quick Start...................................25
Listening to the Demo Songs ..............................................................26
(1) Connecting peripheral devices .........................................................................................................26
(2) Turn on the BR-1180/1180CD...........................................................................................................27
(3) Listening to the demo songs .............................................................................................................28
Selecting a song—Song Select .....................................................................................................28
Playing Back a Song......................................................................................................................29
Changing the current position ....................................................................................................29
Changing the song variation.......................................................................................................30
(4) Turning off the power........................................................................................................................30
Recording/playing back a song...........................................................31
(1) Turn on the BR-1180/1180CD...........................................................................................................31
(2) Selecting the song to be recorded.....................................................................................................31
Recording a new song ..................................................................................................................31
(3) Connecting instruments.....................................................................................................................32
Choose which jack you will use to connect your instrument.................................................32
Press the INPUT SELECT button of the instrument that you want to record .....................33
Adjusting the input sensitivity....................................................................................................33
Monitoring the sound...................................................................................................................33
(4) Using insert effects..............................................................................................................................34
Switch effect patches.....................................................................................................................34
Recording without effects............................................................................................................34
(5) About the Rhythm Guide..................................................................................................................35
Playing the rhythm guide............................................................................................................35
Changing the Rhythm Arrangement .........................................................................................35
Changing the Tempo....................................................................................................................35
Tapping to change the tempo......................................................................................................36
(6) Recording.............................................................................................................................................36
Selecting the recording track.......................................................................................................36
Recording operations....................................................................................................................37
(7) Playing back recorded music............................................................................................................38
Playback..........................................................................................................................................38

7
Contents
Adjusting the volume of each track............................................................................................38
Silencing the sound of specific tracks—Mute...........................................................................38
(8)
Recording an additional performance while listening to an existing performance—Overdubbing
.......39
(9) Completing the song—Mixdown.....................................................................................................40
Setting the left-right positioning (pan) of the sound ...............................................................40
Adjusting the tone—Equalizer....................................................................................................40
Adding width to the sound—Loop Effect................................................................................. 40
Mixdown ........................................................................................................................................41
(10) Turning off the power......................................................................................................................41
Advanced Use ..............................43
Re-recording only a mistake—Punch-in/out ......................................44
Manually punching in/out.....................................................................................................................44
Manually punching in and out using [REC].............................................................................44
Manually punching in and out using a foot switch.................................................................45
Auto punching in and out.......................................................................................................................45
Specifying the area for recording................................................................................................45
How to Record...............................................................................................................................46
Repeatedly Recording Over the Same Location (Loop Recording)..................................................46
Setting the portion to be repeated ..............................................................................................46
How to Record...............................................................................................................................47
Utilizing the V-Tracks ...........................................................................48
Changing V-Tracks .......................................................................................................................48
Naming a track (Track Name)................................................................................................................49
Changing the final mastering tracks......................................................................................................49
Putting multiple tracks together—Bouncing......................................50
Using the insert effects ........................................................................51
Effect patches and banks.........................................................................................................................51
Editing insert effect settings....................................................................................................................52
Saving insert effects settings...................................................................................................................53
Copying an effect patch...........................................................................................................................54
Changing the insert effect connections .................................................................................................55
Using the loop effects ..........................................................................56
Modifying the loop effect settings .........................................................................................................56
Chorus/Delay/Doubling.............................................................................................................56
Reverb.............................................................................................................................................57
Reproducing the characteristics of
various monitor speakers (Speaker Modeling)..................................58
Using speaker modeling..........................................................................................................................58
Editing the speaker modeling settings..................................................................................................59
Saving speaker modeling settings..........................................................................................................60
Copying speaker models.........................................................................................................................60

8
Contents
Registering a marker in your song—the Marker function.................61
Registering a marker................................................................................................................................61
Clearing a marker.....................................................................................................................................61
Moving to the location of a marker........................................................................................................61
Editing a marker.......................................................................................................................................61
Changing the location of a marker.............................................................................................61
Naming a marker..........................................................................................................................62
Stopping automatically (Marker Stop)..................................................................................................62
Registering/recalling the current mixer settings—Scenes...............63
Registering/recalling/deleting scenes..................................................................................................63
Recalling a scene without changing the track volumes......................................................................63
Search for the music’s start and end (Scrub/Preview)......................64
Scrubbing to find the music starting point...........................................................................................64
Changing the scrub points......................................................................................................................65
Using Scrub and Preview to find the music ending point .................................................................65
Enabling the Preview Function...................................................................................................65
Using Scrub and Preview.............................................................................................................65
Editing the performance—Track Editing ............................................66
Copying recorded data (Track Copy)....................................................................................................66
Moving recorded data (Track Move).....................................................................................................68
Exchanging recorded data (Track Exchange).......................................................................................70
Inserting blank spaces in recorded data (Track Insert).......................................................................71
Deleting data and reconnecting the remaining data (Track Cut)......................................................72
Erasing performance data—Track Erase...............................................................................................73
Canceling a recording or editing procedure—Undo/Redo ...............75
Reversing the last operation (Undo)......................................................................................................75
Canceling the Undo—Redo ....................................................................................................................75
Organizing the songs you’ve recorded ..............................................76
Displaying song-related information (Song Information)..................................................................76
Copying a Song (Song Copy)..................................................................................................................76
Erasing songs (Song Erase) .....................................................................................................................77
Optimizing hard disk space (Song Optimize)......................................................................................78
Protecting a song (Song Protect) ............................................................................................................78
Protecting a song...........................................................................................................................78
Canceling song protect.................................................................................................................79
Naming songs (Song Name)...................................................................................................................79
Saving a song (Song Store)......................................................................................................................80
Using the Rhythm Guide......................................................................81
Overview of the Rhythm Guide.............................................................................................................81
Selecting rhythm arrangements .............................................................................................................83
Creating rhythm arrangements..............................................................................................................83
Setting rhythm tempos for each measure individually (Tempo Map).............................................84
Copying rhythm arrangements..............................................................................................................85
Deleting rhythm arrangements..............................................................................................................85
Creating rhythm patterns........................................................................................................................86
Recording preparations................................................................................................................86

9
Contents
Creating rhythm patterns using Realtime Recording..............................................................86
Recording with uniform timing (Quantize)..............................................................................87
Creating rhythm patterns using Step Recording......................................................................88
Making corrections in rhythm patterns (Microscope).............................................................89
Changing the amount of bounce in the rhythm patterns (Swing).........................................90
Changing the rhythm pattern name...........................................................................................90
Copying rhythm patterns ............................................................................................................90
Deleting rhythm patterns.............................................................................................................90
Loading rhythm patterns from CD-R/RWs (SMF Import)................................................................91
Using loop phrases...............................................................................92
Creating loop phrases..............................................................................................................................92
Creating a loop phrase from a portion of the audio tracks.....................................................92
Creating a loop phrase by copying waveform data on a computer (Loop Phrase Import)
..............93
Editing the loop phrase settings.............................................................................................................94
Assigning loop phrases to the track buttons........................................................................................95
Erasing loop phrases................................................................................................................................95
Creating rhythm arrangements by arranging loop phases................................................................96
Copying loop phrases arranged in rhythm arrangements to audio tracks......................................97
Copying loop phrases..............................................................................................................................98
Creating audio CDs (BR-1180CD)........................................................99
Mastering...................................................................................................................................................99
Using Auto Fade In/Out............................................................................................................100
Specifying an interval of several seconds between songs (Pre-gap)...............................................102
Writing the song.....................................................................................................................................102
Writing by adding songs one at a time (Track At Once).......................................................102
Writing multiple songs all at one time (Disc At Once)..........................................................104
Playing back Audio CDs .......................................................................................................................105
Enabling playback on ordinary CD players (Finalize)......................................................................106
Importing songs from audio CDs to the audio tracks ......................................................................106
Editing the Mastering Tool Kit settings ..............................................................................................107
Creating a new patch..................................................................................................................107
Saving patch settings..................................................................................................................108
Copying a patch ..........................................................................................................................108
Using the CD-R/RW to exchange data (BR-1180CD) .......................110
Saving recorded songs and data to CD-R/RW discs........................................................................110
Saving songs to CD-R/RW discs (Song Backup) ...................................................................110
Loading saved songs to the BR-1180CD (Song Recover)......................................................111
Saving data on the hard disk to CD-R/RW discs..............................................................................112
Saving data on the hard disk to CD-R/RW discs (User Backup) ........................................112
Loading saved songs to the BR-1180CD (User Recover).......................................................113
Saving the entire content of the hard disk to CD-R/RWs................................................................115
Saving the content of the hard disk to CD-R/RW discs (HDD Backup)............................115
Loading the saved content of the hard disk to the BR-1180CD (HDD Recover)...............116
Copying and writing waveform data..................................................................................................116
Copying waveform data from a computer to the audio tracks (WAV/AIFF Import)
....................116
Copying audio track waveform data to computers (WAV/AIFF Export).........................118
Erasing CD-RW data..............................................................................................................................120

10
Contents
Synchronizing with MIDI devices ......................................................121
MIDI Fundamentals...............................................................................................................................121
Using an external MIDI sound module to play the rhythm guide .................................................121
Synchronizing the performance of an external MIDI sequencer to the BR-1180/1180CD (Master)
...........122
Switching the display of the TIME field..................................................................................123
Operating MMC-compatible devices with the BR-1180/1180CD...................................................124
Receiving MIDI clock and creating the Rhythm Guide Sync Track ...............................................125
Using MIDI to control track volume—MIDI Faders...........................127
Turning MIDI Fader on and off............................................................................................................127
Setting the MIDI Fader Transmit and Receive channels ..................................................................127
Setting the expression pedal MIDI channel........................................................................................128
Confirming the current fader positions ..............................................................................................128
Other Convenient Functions..............................................................129
Changing the position of the input sound..........................................................................................129
Repeating Playback (Repeat)................................................................................................................129
Tuning an instrument (Tuner)..............................................................................................................130
Changing to the tuner.................................................................................................................130
Explanation of the indications that appear while tuning......................................................130
Tuning...........................................................................................................................................130
Setting the reference pitch of the tuner....................................................................................131
Copying difficult songs (Phrase Trainer)............................................................................................131
Slowing down the speed (Time Stretch function)..................................................................131
Canceling the center sound (Center Cancel function)...........................................................132
Creating a master tape that prohibits digital copying ......................................................................132
Switching the signal indicated in the level meter (Pre-/Post-Fader) .............................................133
Initializing the BR-1180/1180CD’s settings (Initialize).....................................................................133
Setting the time before the CD-R/RW drive is stopped (Hold Time)............................................135
Initializing the hard disk (Disk Initialize)...........................................................................................135
Viewing information about the hard disk (Hard Disk Information)..............................................136
Using condenser mics (Phantom Power)............................................................................................137
Mixing the output from an external MIDI device
with the output from your BR-1180/1180CD (Audio Sub Mix)......................................................138
Adjusting the Display Contrast............................................................................................................139
Using an external MIDI sound module to sound the playback of SMFs (SMF Player)...............139
Mixer effect parameter functions ......................................................141
EQ (Equalizer).........................................................................................................................................141
Loop Effect...............................................................................................................................................141
CHORUS/DELAY/DOUBL’N (Chorus/Delay/Doubling) ................................................141
REVERB........................................................................................................................................142
Insert effect algorithm list..................................................................143
BANK: GUITAR .....................................................................................................................................143
1. COSM GUITAR AMP.............................................................................................................143
2. ACOUSTIC SIM ......................................................................................................................143
3. BASS SIM..................................................................................................................................143
4. COSM COMP GUITAR AMP................................................................................................144
5. ACOUSTIC GUITAR..............................................................................................................144
6. BASS MULTI............................................................................................................................144
7. COSM BASS AMP...................................................................................................................144

11
Contents
8. COSM COMP BASS AMP......................................................................................................145
BANK: MIC.............................................................................................................................................145
9. VOCAL MULTI.......................................................................................................................145
10. VOICE TRANSFORMER .....................................................................................................145
11. COSM VOCAL COMP.........................................................................................................146
12. MIC MODELING..................................................................................................................146
BANK: LINE............................................................................................................................................146
13. STEREO MULTI....................................................................................................................146
14. LO-FI BOX..............................................................................................................................146
BANK: SIMUL ........................................................................................................................................147
15. VO+GT.AMP .........................................................................................................................147
16. VO+AC.SIM...........................................................................................................................147
17. VO+ACOUSTIC....................................................................................................................147
Insert effect parameter functions......................................................148
Acoustic Guitar Simulator.....................................................................................................................148
Acoustic Processor..................................................................................................................................148
Bass Simulator.........................................................................................................................................148
Bass Cut Filter.........................................................................................................................................149
Chorus......................................................................................................................................................149
Compressor .............................................................................................................................................149
COSM Comp/Limiter (COSM Compressor/Limiter)......................................................................149
De-esser....................................................................................................................................................150
Defretter...................................................................................................................................................150
Delay.........................................................................................................................................................151
Distance....................................................................................................................................................151
Doubling..................................................................................................................................................151
Enhancer ..................................................................................................................................................151
Equalizer..................................................................................................................................................152
Flanger......................................................................................................................................................152
Foot Volume............................................................................................................................................152
Limiter......................................................................................................................................................153
Lo-Fi Box..................................................................................................................................................153
Mic Converter .........................................................................................................................................154
Noise Suppressor....................................................................................................................................155
Octave.......................................................................................................................................................155
Phaser.......................................................................................................................................................155
Pitch Shifter .............................................................................................................................................155
Preamp.....................................................................................................................................................156
Ring Modulator.......................................................................................................................................157
Slow Attack .............................................................................................................................................157
Speaker Simulator ..................................................................................................................................157
Tremolo/Pan...........................................................................................................................................158
Voice Transformer..................................................................................................................................158
Wah...........................................................................................................................................................158
Speaker Modeling parameter functions............................................160
SP Modeling (speaker modeling).........................................................................................................160
Bass Cut Filter.........................................................................................................................................160
Low Freq Trimmer (low frequency trimmer).....................................................................................161
High Freq Trimmer (high frequency trimmer)..................................................................................161
Limiter......................................................................................................................................................161

12
Contents
How the Mastering Tool Kit Parameters Work.................................162
Equalizer..................................................................................................................................................162
Bass Cut Filter.........................................................................................................................................163
Enhancer ..................................................................................................................................................163
Input.........................................................................................................................................................163
Expander..................................................................................................................................................163
Compressor .............................................................................................................................................164
Mixer ........................................................................................................................................................165
Limiter......................................................................................................................................................165
Output......................................................................................................................................................165
Rhythm Arrangement/Pattern List ....................................................166
Preset Rhythm Arrangement................................................................................................................166
Preset Rhythm Pattern...........................................................................................................................167
Troubleshooting..................................................................................168
Error message list...............................................................................171
Parameter List.....................................................................................174
MIDI Implementation...........................................................................179
MIDI Implementation Chart ................................................................184
Specifications......................................................................................185
Index.....................................................................................................186
Track Sheet..........................................................................................190

13
Introduction to the BR-1180/BR-1180CD
Main Features
Simple operation
The BR-1180/1180CD is designed to be operated as easily as
a cassette tape recorder, even by beginners.
Additionally, the large liquid crystal display allows you to
view and confirm various information in graphic format.
Whether you are simply preparing a demo tape, or are
getting ready to go to master with your first album, the
simple operation of the BR-1180/1180CD allows you to
create digital recordings the very day you take it out of the
box.
Digital audio workstation
All processes are fully digital
In addition to a digital mixer and digital hard disk recorder,
the BR-1180/1180CD also features two internal digital effects
systems.
By connecting a DAT recorder, MD recorder, or other digital
recorder to the DIGITAL OUT jacks, you can perform all the
steps needed for professional-level music recording,
including editing, bouncing tracks, applying effects, and
mixing down, entirely within the digital realm, so there is no
degradation in the signal quality.
Handles uncompressed recording and
playback
The BR-1180/1180CD handles linear 16-bit uncompressed
recording and playback, allowing you to record with the
same sound quality as the original, with no deterioration in
the sound.
Of course, when you want to be economical with your
recording time, yet maintain sound quality, you can still
record and play back using conventional compression
techniques.
Equipped with V-Tracks
The BR-1180/1180CD includes a total of ten recording tracks,
allowing you to record and play back eight independent
tracks with two-track stereo recording and playback, making
it possible to get simultaneous two-track recording or
simultaneous ten-track playback.Moreover, each track
incorporates eight virtual tracks, called “V-Tracks,” for a
total recording capability of 10 x 8 = 80 tracks!
This increased versatility allows you to do things such as
record numerous takes of a guitar solo, which you can later
choose from when putting it all together.
Two versatile digital effects processors
The BR-1180/1180CD contains two types of effect unit. One
type is for recording (insert effect) and the other type is
independent send/return effects (loop effect). These two
types can be used simultaneously. This means that the BR-
1180/1180CD is all you need to produce a sophisticated song
without using external effect devices.
The BR-1180/1180CD has many built-in simulations and
effects, including amp simulation with COSM for a wide
variety of insert effects.
You also get a wide variety of effects, including everything
from the guitar effects you would expect, to vocal and
keyboard multi-effects and mic simulators.
The loop effects include spatial effects such as chorus, delay
and reverb, which are vital for proper stereo mixdown.
By using the insert effects and loop effects together, you can
add both sound and spatial effects to your music at one time.
For a more detailed explanation of insert and loop
effects, refer to “What is an insert effect?” (p. 34) and
“What is a loop effect?” (p. 40) respectively.
Editing Functions
With the BR-1180/1180CD, you can perform editing
operations such as copying, moving, and erasing, previously
unheard of with multitrack recorders that use tapes.
For example, you can have just a four-measure drum pattern
repeated any number of times you want for use with break
beat music, and have the same chorus inserted both at the
beginning and end of a song.
Non-destructive editing
Since this is hard disk recording, you can perform non-
destructive editing.With non-destructive editing, after
performing any editing and recording operations, you can
still return your data to its previous state (undo and redo
functions).
“Canceling a recording or editing procedure” (p. 75)
Saved mixer settings
You can register up to eight different mixer and effect
settings configurations (scenes) for each song.
This allows you to call up previous settings quickly and
easily, which comes in handy when adjusting the balance
during mixdown, or when comparing effects.
“Registering/recalling the current mixer settings” (p. 63)

14
Introduction to the BR-1180/BR-1180CD
Quick movement to a point
You can place markers at up to 100 locations (points) of your
choosing in a song (Marker function).
If you assign markers to locations such as the end of the
opening or the beginning of a solo, you will be able to move
instantly to the point where you wish to begin listening.
“Registering a marker in your song” (p. 61)
You can also name the markers, which can be quite
helpful during the editing process.
PCM Rhythm Guide Function
The BR-1180/1180CD also features a PCM Rhythm Guide
function (p. 81) that comes in handy when you want to
record phrases and ideas for songs that come to mind.
Simply select an appropriate rhythm pattern, and set the
tempo.
Furthermore, by combining one-measure rhythm patterns,
you can then use the Rhythm Guide to convert them into a
single song.
“Creating rhythm arrangements” (p. 83)
By recording using the Rhythm Guide function, editing
one measure at a time is greatly simplified.
Mastering Tool Kit
The BR-1180/1180CD includes a Mastering Tool Kit, which
you can use for making final volume adjustments and other
preparations for the song being mixed down.
Now you can easily maximize compression and carry out
other tasks for creating music CDs.
Burn CDs using just the BR-1180CD
The BR-1180CD is equipped with a CD-R/RW pre-installed.
This lets you burn your recorded songs as is right to CD-R/
RW discs, making it a breeze to create your own music CDs.
You can also use the CD-R/RW to create backups of your
music data.
* To play back on conventional CD players, use CD-R discs.
You cannot play back CD-R/RW discs on such CD players.
However, some CD players may be unable to play even CD-R
discs. Still, you can play both CD-R and CD-R/RW discs on
the BR-1180CD itself.
* You can create music CDs with the BR-1180 by equipping it
with the optional CDI-BR-1 CD-R/RW drive.
Loop Phrase Function
You can import commercially available phrase data via CD-
R/RW, and save the data to the BR-1180CD’s hard disk.
You can freely set the tempo for these phrase loops later on
and play them back in sync with the audio tracks, allowing
you to easily create styled music with performances layered
over break beats.
Equipped with chromatic tuner
(C1 to B6 sound range)
Your BR-1180/1180CD is also equipped with a chromatic
tuner so that you can tune your guitar or bass while it is still
connected to the BR-1180/1180CD (p. 130).
Phrase Trainer Function
When you play back the song you have recorded from the
CD player or the MD player, you can slow down the tempo
without changing the pitch. Also, you can remove the sound
you hear at the center (such as vocals and guitar solo) from
the song (p. 131).
Full complement of connectors
(jacks)
Your BR-1180/1180CD is equipped with the input jacks
shown below.
GUITAR/BASS:
This high-impedance input jack allows you to directly
connect your guitar or bass (accepts 1/4” phone plugs).
MIC 1, MIC 2:
These are mic input jacks (phone plug or XLR). These permit
use of both balanced as well as unbalanced input.Phantom
power can be supplied to the XLR connectors.
“Using condenser mics” (p. 137)
LINE:
These jacks accept stereo input from keyboards, CD players,
and other devices at line level (RCA phono jacks).
For output, in addition to the LINE OUT jacks (stereo RCA
phono jacks), optical DIGITAL OUT connectors are also
provided for high-quality digital recording to digital audio
recording devices (e.g., DAT recorders and MD recorders).

15
Introduction to the BR-1180/BR-1180CD
About Disk Space
The BR-1180/1180CD is equipped with a 20 GB internal hard
disk.
With this disk you can record up to approximately 200 hours
or more in LV2 mode (in terms of mono tracks).
What are V-Tracks?
Each track consists of eight virtual tracks, and you can
choose any one of these tracks for recording or playback.
This means that you can record to up to a maximum of
80 tracks, and then select any ten of them to play back.
These virtual tracks that make up the actual tracks are
called “V-Tracks.”
fig.00-01
A “Track Sheet” is provided at the rear of this
manual (p. 190), which you make copies of, and fill
in when recording music to V-Tracks.
V-Track2
V-Track1
V-Track3
V-Track4
V-Track5
V-Track6
V-Track7
V-Track8
What is COSM
(Composite Object Sound Modeling)?
Technology that virtually reconstructs an actually
existing structure or material using a different means is
called “modeling” technology. COSM is proprietary
Roland technology that creates new sounds by
combining various sound modeling technologies.
What is a CD-R disc?
CD-R (Compact Disc Recordable) is a CD to which data
can be written. It is not possible to erase or move the
data that has been written.
What is a CD-RW disc?
CD-RW (Compact Disc ReWritable) is a CD that can be
written and erased. Data that has been written can be
erased, and new data written.

16
Panel Descriptions
Front Panel
fig.00-21
1. POWER Switch
This is the power switch. It turns the power of the BR-1180/
1180CD on/off.
2. SENS knob
Use this knob to adjust the sensitivity at the input jacks (e.g.,
GUITAR/BASS, MIC 1, and MIC 2).
3. PEAK indicator
This indicator enables you to determine the degree of
distortion in the sound (input source) being input at the
various input jacks (e.g., GUITAR/BASS, MIC 1, and MIC 2).
This indicator lights at a level 6 dB lower than where sound
distortion occurs. Adjust the input sensitivity with the SENS
knob so that this indicator lights only occasionally, at those
moments when you play your guitar (or other instrument) at
its loudest.
4. INPUT SELECT buttons
Use these buttons to select the input source (input jack) that
you wish to record. The indicator of the selected button will
light. You can mute (silence) the input sound by pressing a
button that is lit.
GUITAR/BASS, MIC 2:
The GUITAR/BASS jack (for guitar or bass) or the MIC 2
jack (for mic) will be selected.
MIC 1:
The MIC 1 jack (for microphone) will be selected.
LINE:
For selecting the LINE jack (stereo) for the line inputs,
such as keyboards or CD players.
SIMUL:
Pressing the GUITAR/BASS, MIC 2 button and the MIC
1 button simultaneously allows you to record using both
of these inputs at the same time. The input sources will
be GUITAR/BASS and MIC 1 if an instrument is
connected to the GUITAR/BASS jack, while MIC 1 and
MIC 2 are selected if a mic is connected to the MIC 2
connector.
* If an instrument and mic are connected to both the GUITAR/
BASS jack and the MIC 2 jack respectively, the GUITAR/
BASS jack will be selected automatically.
* If the INPUT SELECT setting is changed, the insert effect
bank changes automatically (p. 51).
AF method is enabled when either the GUITAR/BASS,
MIC 2 button or MIC 1 button is alone selected.
13
11
10
9
5
4
2
3
6
14
12 15
8
7
16 17 18 28 29
37
23 27 36
33
3130
1
32
3435
19
38 39
20 21 22
2625
24

17
Panel Descriptions
5. EFFECTS button
Press this button to call up the screens used for selecting
patches for the insert effects (p. 51) and for editing settings.
6. INPUT LEVEL Knob
Use this knob to adjust the volume of the input source.
* If you use the INPUT LEVEL knob to turn down the volume
of the input source during recording, the sound will be
recorded in the audio track at a low volume, so that noise will
be more apparent when you raise the volume of the audio track
for playback. If you wish to lower the monitor volume of the
input source during recording, you should use the MASTER
fader or the PHONES VOLUME knob to lower the volume.
7. TUNER ON/OFF Button
Use this button to turn on and off the tuner (p. 130).
8. REC MODE (recording mode) Button
This button selects the recording mode of the recorder. There
are three recording modes.
INPUT:
The sound of the mic or instrument connected to the
input jacks will be recorded. The unit is normally used in
this mode.
BOUNCE:
Use this button to copy the recordings on multiple
separate tracks together on two tracks (or one track).
MASTERING:
Enables use of the Mastering Tool Kit and mastering on
tracks 9/10.
This cannot be used with other tracks.
9.
REC MODE (recording mode) Indicators
These indicators show the current recording mode. When
you switch the recording mode using the REC MODE button,
the INPUT, BOUNCE, or MASTERING indicator lights
accordingly.
10
. MARKER
These buttons are used for settings related to the Marker function.
MARK Button
This button assigns a marker at the desired location in a
song. When you press this button, a marker will be
assigned to the current location.
Markers are numbered sequentially from the beginning
of the song. Each marker can also be given a name. The
marker field of the display will indicate the marker for
the current location if a marker has been assigned at the
current location, or the previous marker if no marker has
been assigned at the current location. If you assign
markers in a song, it will be easier to tell which part of a
song is currently playing or the like.
“Registering a marker in your song” (p. 61)
SEARCH button:
This button jumps you to the location of the previous marker.
SEARCH button:
This button jumps you to the location of the next marker.
CLEAR Button:
This button erases a marker. When you press this button,
the marker currently displayed in the marker field of the
display will be erased.
11
. AUTO PUNCH IN/OUT
These buttons are used to make settings for the auto punch-
in/out function.
ON/OFF Button:
This button switches the auto punch-in/out function
on/off. When this is on, the button indicator will light.
IN Button:
This button specifies the punch-in location. Press this
button to set the punch-in location at the current location
in the track. When set, the indicator on this button will
light. After setting the punch-in location, you can jump
to the punch-in location by pressing this button.
OUT Button:
This button specifies the punch-out location. Press this
button to set the punch-out location at the current
location in the track. When set, the indicator on this
button will light. After the punch-out location is set, you
can press this button to automatically jump to the punch-
out location.
What is AF method
(Adaptive Focus method)?
This is a proprietary method from Roland that vastly
improves the signal-to-noise (S/N) ratio of the A/D and
D/A converters.

18
Panel Descriptions
DELETE Button:
This button erases the punch-in/out locations that were
stored at the IN and OUT buttons. By holding down this
button and pressing either IN or OUT, you can erase the
location that was stored at the respective button. The
indicator of the corresponding button will go dark.
12
. ZERO Button
Press to jump to the beginning of the track.
13
. REW Button
The song will rewind while you hold down the button.
14
. FF Button
The song will fast-forward while you hold down the button.
15
. REPEAT Button
You can specify a region that you wish to hear, and hear it
repeatedly (p. 129).
This feature is useful if you want to repeatedly play back the
recording between the punch-in and out locations (p. 44)
until you are satisfied or use the phrase trainer (p. 131) to try
to copy a difficult phrase recorded from a CD or the like.
16
. STOP Button
Stops recording or playback of the song.
17
. PLAY Button
Plays back songs. When [REC] is pressed and the REC
indicator is flashing, press [PLAY] to start recording. During
recording or playback, the indicator on the button lights in
green.
18
. REC (Recording) Button
This is the Record button. In addition to the Recording
operation, it is also used for manual punch-in/out. While in
recording standby, the indicator on this button flashes in red,
and during recording, it lights in red.
19
. PAN Button
Pressed to access a screen where you can set the pan (left/
right location of the sound) for the playback of each track or
for the input sound (p. 40, 129).
20
. EQ (equalizer) Button
Pressed to access a screen where you can make equalizer
settings to adjust the tone of each track (p. 40).
“Mixer effect parameter functions” (p. 141)
21
. CHORUS/DELAY Button
This calls up the settings screen for the volume level sent
from each track to the loop effects chorus/delay (the send
level), the chorus/delay switching and parameter settings
screen, and other screens (p. 56).
“Mixer effect parameter functions” (p. 141)
22
. REVERB Button
This calls up the settings screen for the volume level sent
from each track to the loop effects reverb (the send level) and
the reverb parameter settings screen (p. 57).
“Mixer effect parameter functions” (p. 141)
23
.
AUDIO TRACK MIXER fader 1–8, 9/10
For controlling the volumes of each track during playback.
Tracks 9 and 10 are linked as a stereo pair, so moving one of
the faders controls the volume level for both tracks
simultaneously.
* Hereafter, the AUDIO TRACK MIXER faders shall be
referred to as the “TRACK faders.”
24
. REC TRACK (Recording Track)
button 1–8, 9/10
Use these buttons to select to which track you will record.
Tracks 9 and 10 are linked as a stereo pair, so both tracks are
selected when one of their buttons is pressed.
The button of the track selected will flash in red and then
light in red when recording begins. When recording is
finished, the button of the selected track will light alternately
in orange and green. The relationship between the indicator
and the track conditions is given below.
Unlit:
This track contains no recorded data.
Green:
An audio track that contains recorded data.

19
Panel Descriptions
Flashing in green:
The track contains recorded data but has been muted
(silenced)
Flashing in red:
The track is selected as the recording destination, and is
in recording standby.
Red:
The track is now being recorded
Lighting alternately in orange and green:
This track contains recorded data and is selected for
recording.
Flashing in orange:
The track contains recorded data but has been muted,
and is also selected for recording
25
. PHRASE TRAINER
Use this button to perform the settings for the phrase trainer
function.
CENTER CANCEL Button:
When using the Phrase Trainer, this button switches the
Center Cancel function on/off, allowing you to cancel
the vocal or other sound that is heard from the center.
When this is on, the button indicator will light.
“Canceling the center sound” (p. 132)
TIME STRETCH Button:
When using the Phrase Trainer, this button switches the
Time Stretch function on/off, allowing you to slow
down the playback speed. When this is on, the button
indicator will light.
“Slowing down the speed” (p. 131)
26
. MASTERING TOOL KIT Button
Used in MASTERING mode, this button is used for
switching the Mastering Tool Kit on and off, and for calling
up the screen for changing the settings.
27
. STEREO RHYTHM/LOOP
(Rhythm Guide/Loop Phrase Sequence)
Makes the settings affecting the Rhythm Guide and Loop
Phrase Sequence functions (p. 81, p. 92).
AUTO/ON/OFF Button:
Switches the Rhythm Guide function to Auto/On/Off
and the Loop Phrase Sequence On/Off.
EDIT Button:
Calls up the screen for setting the Rhythm Guide and
Loop Phrase Sequence patterns and tempos.
Fader 11
Adjusts the Rhythm Guide and Loop Phrase Sequence
volume levels.
TAP Button
You can set the tempos for the Rhythm Guide and Loop
Phrase Sequence to the timing you’ve used in tapping
this button.
28
. V-TRACK Button
Use this button to call up the screen for selecting a V-Track.
“What are V-Tracks?” (p. 15)
“Utilizing the V-Tracks” (p. 48)
29
. TRACK MUTE Button
By holding down this button and pressing a REC TRACK
button whose indicator is lit green, you can mute that track
during playback, regardless of the position of its TRACK
fader. When you repeat the same action, muting will be
defeated. While muted, the REC TRACK button of that track
will blink green. (p. 38)
* If a recording track was muted, muting will be defeated when
recording ends.
30
. UTILITY Button
Pressed to access a variety of functions, including track
editing, song management, and disk operations.
31
. UNDO/REDO Button
For undoing the last-performed recording or editing
operation and returning the data to its previous state. By
pressing this button once again, you can bring back the
canceled recording or re-execute the editing operation. (p. 75)

20
Panel Descriptions
32
. TIME/VALUE Dial
Ordinarily, you use this dial to shift the current position
within a song (e.g., fast forwarding and rewinding). It is also
used to change the values of the various function settings.
33
. CURSOR Buttons
Press these buttons to move the cursor within the screen.
34
. ENTER/YES Button
Press this button to confirm a selection or a value being
entered.
35
. EXIT/NO Button
Press this button to return to the previous screen or cancel
the last entry.
36
. MASTER fader
Controls the overall volume of the BR-1180.
37
. CD-R/RW
AUDIO CD WRITE/PLAY Button
Used for creating music CDs, and for simple playback.
* Available only with the BR-1180CD. The BR-1180 does not
feature this function.
DATA SAVE/LOAD Button
Used for saving recorded songs and loading saved data
to the BR-1180.
* Available only with the BR-1180CD. The BR-1180 does not
feature this function.
LOOP PHRASE IMPORT Button
Used for importing break beats and other loop phrases.
38
. MIDI Indicator
Lights up to indicate that MIDI messages are being received
through the MIDI IN connector.
39
. HD ACCESS indicator
Lights while data is being written to the hard disk.
* Never turn off the power while this is lit. Doing so may
damage the hard disk, possibly rendering it permanently
unusable.
CD-R/RW Drive
fig.00-22
Drive unit into which CD-R/RW discs are inserted (BR-
1180CD only).
* CDI-BR-1 (sold separately) can be installed in the BR-1180.
1. Disc Tray
Place the CD to be loaded on this tray.
2. Access Indicator
This indicator will light when the inserted CD-R/RW disc is
being read or when data is being written to the CD-R/RW
disc.
3. Eject Button
Press this button to eject the CD-R/RW disc. You cannot eject
the CD-R/RW disc unless the power is on.
If you need to eject a disc after the power has been
turned off, always eject the disc by turning the power
back on, then pressing the Eject button. Forcibly ejecting
may result in damage to the disk drive.
4. Emergency eject hole
This hole allows the disc tray to be opened in case of an
emergency. (p. 24)
1
2
4 3
/