Installation Manual: PAD100-PSSA/PSDA Pull Station (Single & Dual Action)
NOTICE TO THE INSTALLER
This manual provides an overview and the installation instructions for the PAD100-PSSA / PSDA (Single Action / Dual Action)
module. This module is only compatible with addressable re systems that utilize the PAD Addressable Protocol.
All terminals are power limited and should be wired in accordance with the requirements of NFPA 70 (NEC) and NFPA 72 (National
Fire Alarm Code). Failure to follow the wiring diagrams in the following pages will cause the system to not operate as intended. For
further information, refer to the control panel installation instructions.
The module shall only be installed with listed control panels. Refer to the control panel installation manual for proper system
operation.
1. Description
The PAD100-PSSA (Single Action) is activated by pulling the white "T" bar handle down. The PAD100-PSDA (Dual Action) is
activated by lifting the front cover and then pulling the white "T" bar handle down. Once activated, the "T" bar cannot be reset
without opening the front cover. Opening the front cover will also activate the pull station. To reset the PAD100-PS series, use the
Potter WS-93 key to unlock and open the front cover. Once the cover is open, push the "T" bar back into the normal position and
re-secure the front cover. It is a non-coded addressable pull station and installs on a single gang box or surface mounts using the
P32-BB or P32-DBB (deep) back box.
2. Setting the Address
All PAD protocol detectors and modules require an address prior to connection to the panel's SLC loop. Each PAD device's
address (i.e., detector and/or module) is set by changing the dip switches located on the device. PAD device addresses are
comprised of a seven (7) position dip switch used to program each device with an address ranging from 1–127.
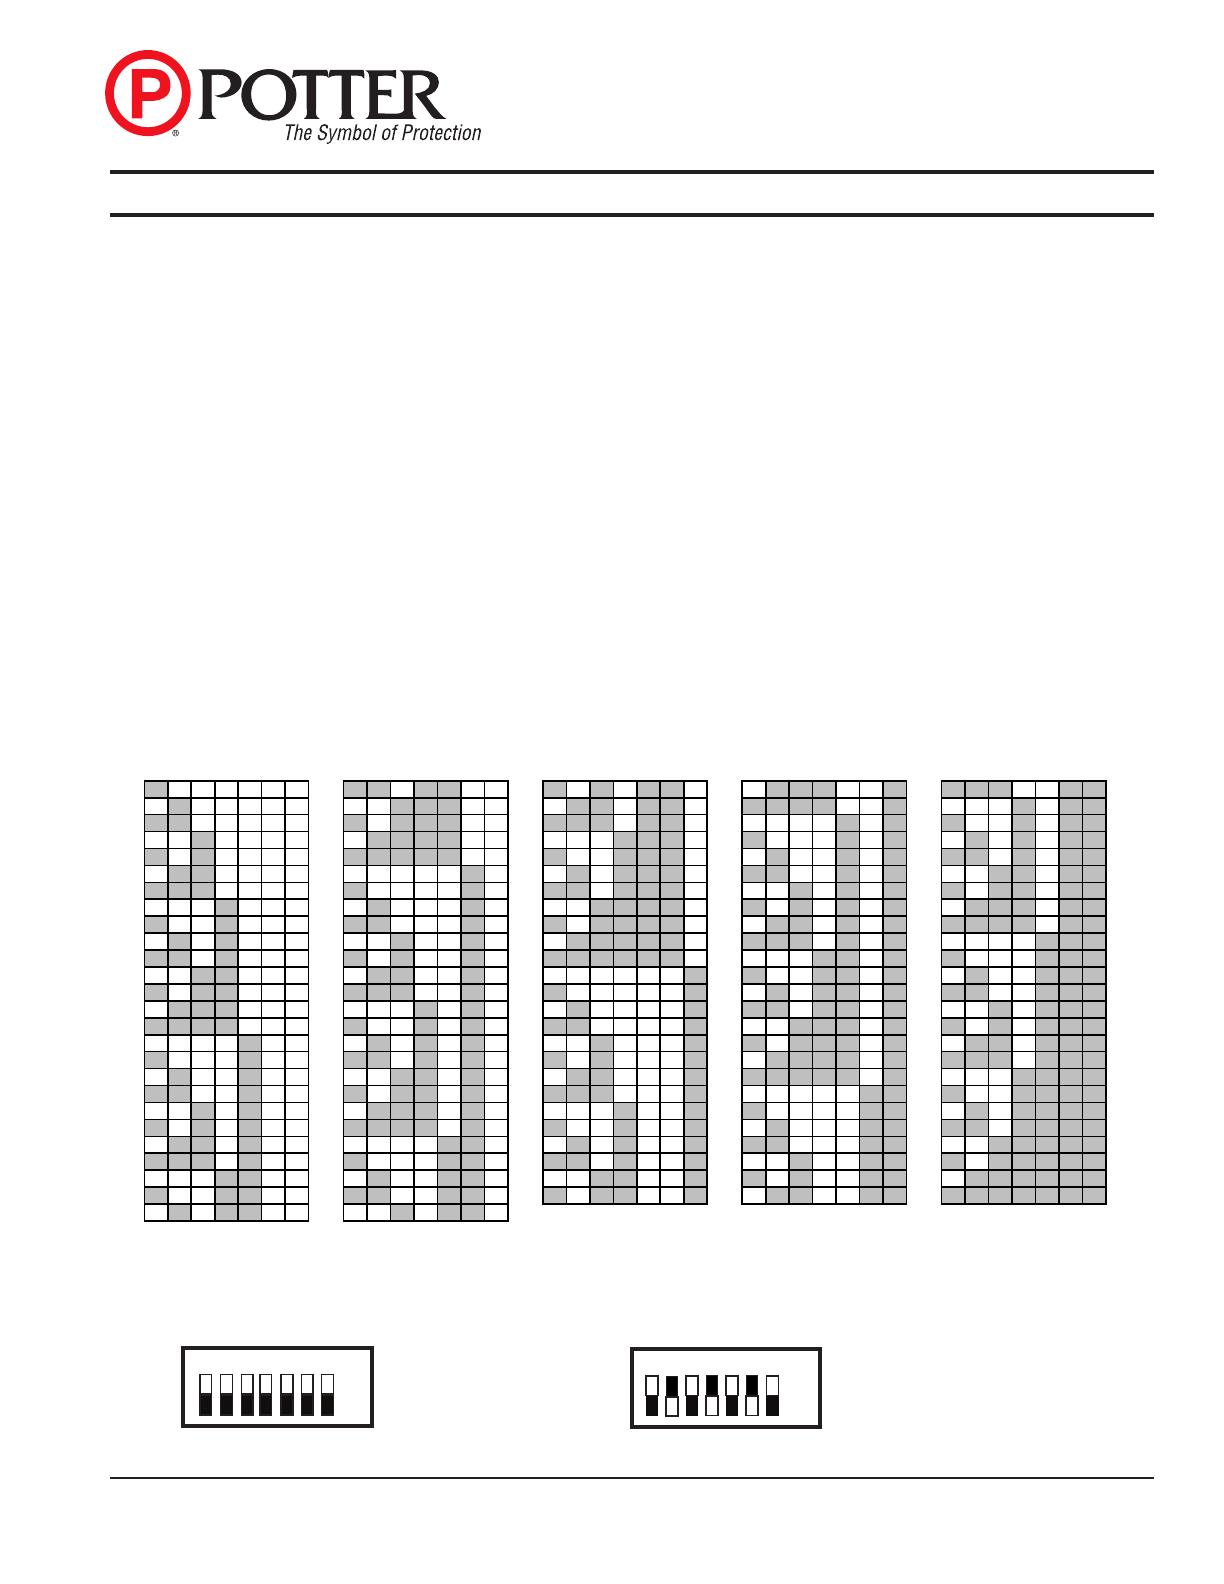
Figure 1. PAD Device Dip Switch Addresses Table (Addresses 1–127)
Note: Each "gray" box indicates that the dip switch is "On," and each "white" box indicates "Off."
The examples shown below illustrate a PAD device's dip switch settings: the 1st example shows a device not addressed where all
dip switch settings are in the default "Off" position, the 2nd illustrates an addressed PAD device via the dip switch settings.
Figure 2. Examples of PAD Device Showing Default Dip Switch Setting (Unaddressed) & Addressed PAD Device
Document 5406320-A 02/16
Potter Electric Signal Co., LLC • St. Louis, MO • Phone: (866) 956-0988 • www.pottersignal.com
PAGE 1 OF 3
1 2 4 8 16 32 64 1 2 4 8 16 32 64 1 2 4 8 16 32 64 1 2 4 8 16 32 64 1 2 4 8 16 32 64
26 52 1 2 4 8 16 32 64 1 2 4 8 16 32 64 1 2 4 8 16 32 64
1 2 4 8 16 32 64 1 2 4 8 16 32 64
Off
On
1 2 4 16
8 32 64 All dip switches are
shown in the "Off"
position. Off
On
1 2 4 16
832 64 Example shows this PAD device's
address = 42. Dip switches #2, 8 &
32 are in the "On" position.


