Page is loading ...

HDR soft
© 2017 HDRsoft. All rights reserved.
User Manual
Photomatix Pro 6

Table of Contents
Introduction �������������������������������������������������������������������������������������������������������������������������������������������� 1
1 Taking Photos for HDR ���������������������������������������������������������������������������������������������������������������������������� 2
1.1 Setting up the Camera ............................................................................................................................................3
1.2 Exposure .......................................................................................................................................................................3
1.2.1 Selecting Exposures .................................................................................................................................................4
1.2.2 Interiors with Bright Windows, and other High Contrast Scenes.............................................................4
1.3 Using Film-Based Cameras .....................................................................................................................................5
2 Loading and Pre-Processing Images ����������������������������������������������������������������������������������������������������� 6
2.1 Merging a Bracketed Photo Set ...........................................................................................................................6
2.1.1 Loading a Bracketed Photo Set ............................................................................................................................6
2.1.2 Merge to HDR Options ............................................................................................................................................8
2.1.3 The Deghosting Options Window ....................................................................................................................10
2.1.4 Using the Selective Deghosting Tool ..............................................................................................................11
2.1.5 Using Automatic Deghosting ............................................................................................................................12
2.1.6 Options for Raw Files ............................................................................................................................................13
2.2 Working with Single Image Files ......................................................................................................................14
2.2.1 Options for Single Raw Image Files ................................................................................................................14
3 HDR Rendering Images ������������������������������������������������������������������������������������������������������������������������ 15
3.1 HDR Rendering Workow....................................................................................................................................15
3.1.1 Workow Dierences when using the Lightroom Plugin .......................................................................16
3.1.2 Save As dialog .......................................................................................................................................................... 16
3.2 Image Adjustment Interface .............................................................................................................................. 17
3.2.1 Preview .......................................................................................................................................................................17
3.3 Working with Presets ............................................................................................................................................ 18
3.3.1 Preset Thumbnails Panel ...................................................................................................................................... 18
3.3.2 Built-in Presets .........................................................................................................................................................18
3.3.3 Custom Presets ........................................................................................................................................................18
3.3.4 Saving Custom Presets ......................................................................................................................................... 19
3.3.5 Favorite Presets .......................................................................................................................................................19
3.4 Color Adjustments ................................................................................................................................................. 20
4 Brush Selection Tool ������������������������������������������������������������������������������������������������������������������������������ 21
4.1 Selective Adjustment Workow ........................................................................................................................21
4.1.1 Brush Strokes and Selections ............................................................................................................................21
4.1.2 Adding Selective Adjustments, Removing Selective Adjustments ...................................................... 22
4.1.3 Brush Tool Usage Example: Adjusting Color .................................................................................................22
4.1.4 Brush Tool Usage Example: Blending Source Photos ................................................................................ 23
4.2 Brush Tool Palette. .................................................................................................................................................. 23
5 Finishing Touch �������������������������������������������������������������������������������������������������������������������������������������� 25
5.1 Contrast and Sharpen ...........................................................................................................................................25
5.2 Crop and Straighten .............................................................................................................................................. 25
6 Automating with Batch Processing ������������������������������������������������������������������������������������������������������26
6.1 Batch Processing Bracketed Photos ................................................................................................................26
6.1.1 Using Batch Processing ........................................................................................................................................ 26
6.1.2 Custom Settings or Multiple Presets Window .............................................................................................. 27
6.1.3 More Merge Options ............................................................................................................................................. 28
6.1.4 Batch Processing Subfolders .............................................................................................................................. 29
6.1.5 Advanced Selection Options.............................................................................................................................. 29
6.2 Batch Processing Single Images ....................................................................................................................... 30
7 Tips and Techniques ������������������������������������������������������������������������������������������������������������������������������31
7.1 Integrating Lightroom with Photomatix Pro ................................................................................................ 31
7.2 Processing Raw les in Third-Party Raw Converters .................................................................................. 31
7.3 Dealing with Noise .................................................................................................................................................32
7.4 Photomatix Pro and Color Management .......................................................................................................32
8 Appendix: Rendering Settings ����������������������������������������������������������������������������������������������������� 33
8.1 Color and Blending Settings ..............................................................................................................................33
8.2 HDR Settings - Details Enhancer .......................................................................................................................34
8.3 HDR Settings - Contrast Optimizer ..................................................................................................................36
8.4 HDR Settings - Tone Compressor ......................................................................................................................37
8.5 HDR Settings - Tone Balancer ............................................................................................................................. 38
8.6 HDR Settings - Fusion ........................................................................................................................................... 39
Glossary ����������������������������������������������������������������������������������������������������������������������������������������������������������� 41
Getting More Information and Help ...............................................................................................................................................43
All sections above are clickable links� Click any page footer below, to return to this TOC�
TOC link

Photomatix Pro 6.0 User Manual 1
Introduction
Photomatix Pro works with photographs of the same scene taken under dierent exposure settings. These
dierently exposed images of the same scene are often called “bracketed” images in reference to the auto-
bracketing exposure functions available on many camera models. If you have not taken any bracketed photo
sets, you can start using Photomatix Pro with the sample images available from the download page of the
Photomatix Pro website – http://www�hdrsoft�com. Use the information in Section 1, Taking Photos for
HDR to try Photomatix Pro with your own bracketed images.
This manual contains information about how to use Photomatix Pro to render images using dierent HDR
Rendering methods. All of the methods are accessed from one window within the application, making it easy to
try dierent settings to achieve the results you want. Refer to Section 2, Loading and Pre-Processing Images
and Section 3, HDR Rendering Images for detailed information about the dierent settings that are available.
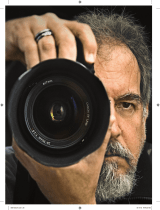
Cove Point Lighthouse photo © Ferrell McCollough

Photomatix Pro 6.0 User Manual 2
1 Taking Photos for HDR
The shooting phase is essential for getting good
results with Photomatix Pro. To photograph a high
contrast scene, you need to take several exposures in
order to capture information in both the highlights
and the shadows of the scene. The exposures taken
must properly cover the dynamic range of the scene,
especially the shadows.
The number of photos you need depends on the scene.
It also depends on the Exposure Value (EV) spacing
separating the photos. If you take them in one-EV steps
(e.g., -1, 0, +1 EV), you will need more photos than
if you take them in two-EV steps (e.g., -2, 0, +2 EV).
We recommend shooting in two-EV steps whenever
possible.
High contrast scenes can be grouped into roughly two
types depending on their dynamic range:
• Medium dynamic range scene: Most landscapes
and other types of outdoor scenes fall into this
category. Three exposures taken in two-EV steps (i.e.
–2, 0 +2 EV), or ve exposures taken in one-EV steps,
are usually sucient for this type of scene.
• High dynamic range scene: A typical example is the
interior of a room with a view outside the window on
a sunny day. You need to take at least ve exposures
in two-EV steps (or nine exposures in one-EV steps)
to capture this type of scene, but you may need
more.
The source photographs for HDR processing can be
taken with digital or lm-based cameras. The only
requirement is that the exposure can be adjusted when
taking pictures. If you use a lm-based camera, you
will need to scan the photographs into your computer
before processing them (refer to Section 1�3).
2
Three exposures of a medium dynamic
range scene, taken in two-EV steps

Photomatix Pro 6.0 User Manual 3
1.1 Setting up the Camera
• Set your camera to Aperture priority (the "A" setting) so that
only shutter speed will vary between the exposures.
• Set a low ISO such as ISO 100, or lower if available.
• Turn o the ash. The ash may try to balance the exposure of
all the images, when the goal instead is a range of exposures.
• A tripod is typically recommended, but is not required, as
Photomatix Pro includes options to automatically align
hand-held bracketed sets.
DSLR cameras and some compact digital cameras oer
Automatic Exposure Bracketing (AEB). This enables you to
automatically take three or more exposures in a row: one at the
proper exposure, one or more underexposed, and one or more
overexposed. Follow these steps if your camera oers AEB mode:
• Select the Continuous shooting mode on the camera’s
drive setting. Consult your camera manual for model-specic
instructions for using this setting.
• Set the camera to Auto Exposure Bracketing (AEB).
• If possible, use the camera’s self-timer setting, a cable release
or a wireless shutter release to minimize camera shake.
• Set the exposure increment to +/- 2 for optimal exposure range.
If your camera does not oer +/- 2 exposure increments, select
the maximum possible. Consult the camera manual for model-
specic instructions for choosing this setting.
1.2 Exposures
To get good results with HDR processing, your bracketed
sequence must include photos that correctly expose highlights
as well as photos that correctly expose shadows. The latter is especially
important to prevent noise in the processed HDR image.
In the lightest photo of the sequence, the darkest shadow areas of the scene should be shifted at least
into the mid-tones. To check this, use your camera’s histogram preview in playback mode. In your most
overexposed photo, the left part of the histogram should be empty until 1/3rd of the histogram’s width. If
this is not the case, add one or more photos taken with longer exposure times. Another option is to re-shoot
the exposure sequence with the normal exposure set one or more EVs higher if your most underexposed
image in the exposure sequence was too dark. This is the case when the histogram of your darkest image is
completely empty on the right half.
The number of exposures needed depends on the dynamic range of the scene, in addition to the exposure
increment. For most outdoor scenes, three exposures taken at +/- 2 exposure increments is sucient,
provided the scene does not include the sun. However, for the interior of a room with a bright view out the
window, you will need at least ve images taken with an exposure increment of +/- 2, or nine images taken
with an exposure increment of +/- 1.
The continuous shooting mode may not always
be the best strategy, because camera shake may
build up. It is recommended to use a method
that ensures the least possible shake for each
single shot, such as mirror lock-up functionality,
if available.
AEB settings on a Nikon D7000
(3 frames, at +/- 2 EV)
Canon Rebel T2i/550D LCD showing
AEB with +/-2 EV increments selected
Note

Photomatix Pro 6.0 User Manual 4
1.2.1 Selecting Exposures
The number of exposures to shoot depends on the dynamic range in frame, the exposure dierence between
the darkest and brightest areas of the scene. Your brightest exposure must capture the darkest areas of the
scene, and the darkest exposure must capture the brightest sections of the scene.
The total number of exposures also depends on the Exposure Value (EV) spacing between each exposure. If
you shoot your exposures in 1 EV steps, you will need more exposures to capture the entire dynamic range of
a scene than if you shoot them in 2 EV steps. We recommend shooting in 2 EV steps whenever possible.
A typical outdoor scenes will usually require 3 shots at 2 EV spacing (i.e. -2, 0, +2. Very high contrast scenes,
such as a interior with a bright window in the frame, will typically require 5 frames, at 2 EV steps, and
sometimes more.
A 2 EV spacing has several advantages compared to an 1 EV spacing. It requires fewer shots to span the
dynamic range, and therefore reduces the risk of ghosting in non-static scenes. It also reduces storage needs
and makes for faster processing in Photomatix. On the other hand, an 1 EV spacing -or lower- does have the
advantage of better smoothing out noise when merging to an HDR image.
1.2.2 Interiors with Bright Windows, and other High Contrast Scenes
Capturing a particularly high contrast scene, such as a room interior which includes a bright window, requires
more bracketed exposures. The key to getting a good result with such scenes is to take enough exposures
to properly cover the dynamic range. In most cases, you will need at least ve exposures, spaced 2 EVs apart.
If you take fewer exposures, you may get washed-out highlights or noisy shadows due to "holes" in the
coverage of the dynamic range.
To help determine the exposures required in scenes with extreme dierences between the lightest and
darkest details, you can use the HDR Exposure Calculator tool available in the "HDR Tutorial for real estate
photographers" linked below.
When using Photomatix Pro to edit real estate photos, we recommend you display just the "Architecture"
category (using the presets lter menu, above the thumbnails list on the right). The presets with "Interior" in
their name are optimized for room interiors with bright windows, and provide a good starting point when
working with high contrast scenes in general. The presets "Interior" and "Interior 2", are particularly good
at keeping a balanced and "photorealistic" look, while still preserving highlights. For real estate interiors in
particular, please refer to these real estate shooting tips.
The steps listed below apply to any scene with very high contrast. If you are taking real estate interiors with
bright windows, see more specic instructions in the HDR tutorial for real estate photographers.
These steps listed below apply to any scene with very high contrast:
1. Set the ISO below 400.
2. Set your camera to Aperture priority, and set the aperture for the scene, based on the depth of eld you
are trying to achieve or other considerations.
3. Set your camera to Auto Exposure Bracketing (AEB). If you are not familiar with the AEB functionality of
your camera, see the Automatic Exposure Bracketing Setup page or consult your camera's manual..
4. Using the AEB option, set the EV spacing to +/- 2 EV if your camera supports it, otherwise to the highest
EV spacing it supports.
5. Switch your camera’s to spot metering mode. Aim the camera at the darkest area of the scene and adjust
the shutter speed until your camera indicates a correct exposure. This will be the shutter speed for your
most overexposed photo.

Photomatix Pro 6.0 User Manual 5
6. Aim the camera at the brightest area of the scene and adjust the shutter speed until your camera
indicates a correct exposure. This will be the shutter speed for your most underexposed photo.
7. [Optional]: To check the shutter speeds you just measured, it is a good idea to take a photo for each
meter reading and look at the camera’s histogram. If the histogram graph touches the left side, this
indicates that there is lost shadow information. If the graph touches the right side, this indicates burned
out highlights.
8. Using this HDR Exposure Calculator enter the shutter speeds you measured in Steps 5 and 6.
9. Switch the camera to Manual mode and Set the Shutter Speed determined by the HDR Exposure
Calculator for the rst bracketed set.
10. Select the Continuous Shooting mode on the camera and release the shutter to take the rst set of
bracketed photos.
11. Take the other photos or bracketed photos determined by the HDR Exposure Calculator, if any.
Note that you will need to use a tripod if you cannot cover the range with just one bracketed set.
1.3 Using Film-Based Cameras
• Follow the camera setup listed at the top of Section 1�1 and the tips on selecting exposures in Sections
1�2 and 1�2�1. Keep in mind that you will not have the option of previewing the live histogram to
determine your exposure range.
• Scan lm or slides, not prints. Photo labs attempt to make the best print from each of your source images,
and you will not achieve good results scanning these for HDR generation.
• Turn o your scanner’s auto-exposure options. This allows you to manually control the exposure.
• Make sure you select the Align images option in Photomatix Pro when combining your images.

Photomatix Pro 6.0 User Manual 6
2 Loading and Merging Photos
This section describes
how to load and merge
bracketed image les of a
scene taken under dierent
exposure settings, as well as
how to load single images
into Photomatix Pro. See
Section 2.2 regarding how
to load a single image le
for HDR rendering.
Photomatix Pro works with
bracketed images that are
in 8-bit or 16-bit/channel
mode, as well as Camera
Raw les.
Supported le types include
JPEG, TIFF, PSD, DNG, and
Raw les from many camera
models. Photomatix Pro
is updated frequently to
add support for Raw les
of new camera models.
You can check whether a
new update of Photomatix
Pro is available by choosing
"Check for updates���" from
the Help menu (Windows) or
Photomatix Pro menu (Mac).
2.1 Merging a Bracketed Photo Set
2.1.1 Loading a Bracketed Photo Set
To load bracketed image les, do one of the following:
• Drag and drop the les onto the Photomatix Pro app
(the screen shot, shown above), or onto the app icon.
• Click on the Browse & Load button in the above
window, which opens at start up. The Open le dialog
then appears, allowing you to select an image le set
to process.
1. Select image les to load, using one of the following
methods:
• Click the rst le, then press and hold the
Command [Mac] or Ctrl [PC] key. While still
holding down the Command/Ctrl key, click each of
the other les you wish to select.
If you have Lightroom, you can use the
Photomatix Plug-in for Lightroom to load
images into Photomatix Pro.
Refer to Section 7 for more information.
The term “bracketed images” refers to a
sequence of images of the same scene taken
under dierent exposure settings. A bracketed
image set can be produced using a camera's
Automatic Exposure Bracketing (AEB)
function, if available. Without AEB any camera
can still be used to produce a bracketed set,
manually.
Drag and drop all image les for a given bracketed
exposure sequence all at the same time, so that
they will be properly processed and merged.
Note
Note
Drag and drop images here, or load images using a standard dialog
Note

Photomatix Pro 6.0 User Manual 7
• Click the rst le, then press and hold the Shift key.
While still holding the Shift key down, click the last
le. This will select all the les in between the rst and
last le.
2. Click Load, and the selected image les will be loaded
into the Selected Photos window.
The Selected Photos Window
Before merging your bracketed set into a single image
le, review the thumbnails and deselect any photos you
may wish to not include in the merge (for example, a
duplicate photo).
Click Next: Choose Merge Options, if your bracketed
set is complete and correct.
Entering Missing Exposure Values
If exposure information cannot be located in the metadata
of the image les, or if there are any duplicate EV values,
the Selected Photos dialog will display estimated relative
Exposure Values.
If the estimated Exposure Values are incorrect, you can
either click on and edit each one of them individually, or
set global EV Spacing for the bracketed set.
Click Next: Choose Merge Options, once you've set the
missing Exposure Values.
Merge options are covered next, in section 2.1.2
Single Image Files
Please refer to Section 2.2, which describes options for
loading a single image for HDR rendering.
The order of the les in a bracketing sequence
does not matter. Photomatix Pro automatically
sorts the images based on the exposure
information in the image les' EXIF metadata.
If exposure information is not available in the
EXIF data, Photomatix Pro sorts the images by
evaluating the relative brightness of the photos.
Note
Set or adjust missing exposure settings
Selected photos, ready to "Choose Merge Options"

Photomatix Pro 6.0 User Manual 8
2.1.2 Merge to HDR Options
After the bracketed photos are selected, you can customize the steps performed before merging the images,
such as aligning the images or removing "ghosts".
• Refer to the following 2 pages for a description of the options for merging a bracketed photo set�
• Section 2.2 describes options for loading a single
image for HDR rendering.
Alignment Options
The Align source images option is checked by default. It
corrects misalignment problems when the camera moves
slightly between the bracketed frames. Handheld bracketed
sets have camera movement between frames, but even
bracketed sets shot on a tripod can have some slight camera
movement between frames as well, as can be caused by
wind, for example.
The Crop aligned images option removes unneeded
borders resulting from alignment adjustments. Without this,
the merged image will have white areas around the edges.
You should disable this option when you need the resulting
image to have exactly the same width and height as the
source images.
You can customize alignment settings depending on how
the given bracketed set was taken:
• Include perspective correction: This alignment option
corrects for all types of camera movement, including
rotation in all three dimensions, as well as horizontal,
vertical, forward, and backward motion.
• Maximum shift: Sets the maximum amount of camera
movement between photos that the alignment will try to correct for, expressed as a percentage of the
image size. Larger values increase the time required for alignment, but may be necessary when hand-
held shots are taken when it is windy, or when using a long zoom lens.
The alignment Preset drop-down menu lets you select pre-dened alignment settings that are appropriate
for particular shooting situations. The four presets oered are On Tripod, Hand-held (minimal movement),
Hand-held (standard) and Hand-held (large shifts).
If you took the photos hand-held, the default preset, Hand-
held (standard), is suitable in most cases. The Hand-held
(minimal movement) preset is appropriate when the camera
barely moved between the bracketed shots, and has the
advantage of being faster. The Hand-held (large shifts) preset
is for photos taken in conditions where signicant camera
movements are dicult to avoid. If you choose Hand-held
(large shifts), a more extensive alignment search will be done,
though at the expense of longer processing times.
Selecting options to merge to HDR
The Align source images option should not be
checked when your source images are stitched
panoramas or when they are "fake exposures"
derived from a single Raw le.
Note

Photomatix Pro 6.0 User Manual 9
Deghosting Options
Deghosting addresses the problem of artifacts that appear when combining the bracketed images of a
dynamic scene. For example, if the moving subjects are people walking, the people will appear multiple
times in the combined image, once for each frame, faded and in a dierent position as if they were “ghosts”.
This is why artifacts that arise from movement in a scene are commonly referred to as “ghosting” and the
techniques to eliminate them are referred to as “deghosting”.
Show options to remove ghosts enables the Deghosting Options window, which will then open after you
select your merge to HDR options, and then click the Align & Show Deghosting button. The Deghosting Options
window provides an adjustable image-wide Automatic Deghosting algorithm and, for more control over
deghosting, a manually applied Selective Deghosting Tool. Refer to section 2.1.3 for details on this window.
Noise Reduction Options
The Reduce noise on option processes source photos with a high-quality noise reduction algorithm, and is
recommended when processing Raw les directly in Photomatix Pro.
Noise reduction is typically most helpful in dark areas of the source images, and these dark areas are more
prevalent in the underexposed and, sometimes, in the normally exposed frames. With this in mind, you can
use the Reduce noise on menu to specify that
noise reduction be applied only to the darkest
images in the bracketed set, to the normal and
the darker images, or to all the images in the set.
Strength increases or decreases noise
reduction strength relative to the
automatically determined default strength value, which is based on the noise level in the image. Values range
from 50% to 150%.
Reduce Chromatic Aberrations
The Reduce Chromatic Aberrations option automatically corrects color fringing due to chromatic
aberrations of the lens. Checking this option is recommended, given that chromatic aberrations tend to
show around high contrast edges, and are particularly an issue for HDR images.
Show 32-bit Unprocessed Image
This option opens the merged, but not yet processed, bracketed image set in a viewing window. This allows
you to save the merged-but-unprocessed le in an HDR image le format such as Radiance or OpenEXR.
Saving the 32-bit unprocessed merged image is useful when you want to be able to process the image with
other settings later without having to load and merge your bracketed photos again. However, you will still
need to load and merge the original photos again if you want to use Exposure Fusion.
If you check Show 32-bit unprocessed image,
when the unprocessed image is displayed you
will have to click the HDR Rendering button, in
the Workow Shortcuts window, to continue to
the next step.
Note
Noise reduction options

Photomatix Pro 6.0 User Manual 10
2.1.3 The Deghosting Options Window
Select Show options to remove ghosts in the Preprocessing Options window, to subsequently access the
Deghosting Options window.
The Deghosting Options window provides two
deghosting methods:
• A manually applied Selective Deghosting Tool
• An adjustable Automatic Deghosting algorithm.
The Selective Deghosting Tool enables you to lasso-
select the specic areas of the image that require
processing to remove ghosting caused by image to
image movement of elements in the scene. Photomatix
Pro uses the single image that it deems best exposed for
each selected area's brightness, as the default deghosting
target image. You may change the automatically selected
deghosting target image to any other image of your
choice using the tool.
Automatic Deghosting processes the entire image with
an automated ghost reduction algorithm. It is useful for
scenes with many small changes image to image, which
are not practical to lasso manually. This deghosting
method has the disadvantage of potentially degrading
image quality, depending upon the nature of the scene,
the type of ghosting, the number of source frames, and
other factors. When applying Automatic Deghosting, use
the lowest setting that successfully deghosts the image.
Two Deghosting methods: Selective, Automatic
The Deghosting Options window

Photomatix Pro 6.0 User Manual 11
2.1.4 Using the Selective Deghosting Tool
To use the Selective Deghosting tool, click and drag the mouse to draw a lasso around a region that requires
deghosting. Ensure that the dashed line forms a fully closed loop.
Right-click (Windows) or control-click (Mac) inside the selected region and select Mark selection as ghosted
area from the pop-up menu. The line around the selected area changes from dashed to solid, to indicate that
the area is now selected for deghosting. You may make additional deghosting selections, following these
same steps, to mark other image areas for deghosting.
At any time, use the Brightness slider to increase or decrease the brightness of the image.
Or, use the Zoom slider to zoom in and out.
If necessary, you can remove
a region from the deghosting
selection. Control click or right
click inside an already marked
region and click Remove selection
from the pop-up menu.
You may also change the image
used as the deghosting target.
Control-click or right-click inside
an already marked region and click
Set another photo for selection
from the pop-up menu. The tool
displays a pop-up menu with a list
of the available exposures. Select
an exposure value from the list.
The photo that the tool
automatically sets for the selection
is not always the most appropriate
exposure choice. It is thus a good
idea to check whether changing
to another photo produces a
better deghosting result.
A dotted selection being marked for deghosting
Right-clicking a marked selection, to choose a dierent replacement photo

Photomatix Pro 6.0 User Manual 12
To view a preview of the deghosted image, click Preview deghosting. To make more selections or modify
existing regions selected for deghosting, click Return to selection mode. You may continue selecting
regions of the image and previewing the results until you are satised with the results.
In Quick Selection Mode, every completed selection lasso will automatically be converted into a deghosting
selection, without the need to individually "Mark selection as ghosted area"�
2.1.5 Using Automatic Deghosting
The Automatic Deghosting option automatically detects ghosted areas in the image. The deghosting slider
sets the "aggressiveness" of ghosting detection.
Aggressive Deghosting setting removes more ghosting artifacts, but increases the possibility and severity of
unwanted artifacts. Use a setting as low as possible, to maximize the quality of the merged HDR image.
If you need high settings to remove ghosts completely, it is
recommended that you use the manually applied Selective
Deghosting Tool instead, if possible.
When automatic deghosting is used, one of the source photos is
used to create the HDR image in areas detected as ghosted. The
Base Photo is the one selected to do this. By default this is the
median exposure, but you can select one of the other photos
instead by clicking on its thumbnail.
After using the Selective Deghosting Tool, or applying Automatic
Deghosting, click OK to apply the deghosting adjustments to the
image, or click Cancel to stop merging the images.
If you wish to continue working with the current bracketed set
without deghosting applied, then set the Automatic Deghosting
amount to "0", or make no Selective Deghosting Tool selections,
and simply click OK to proceed.
Automatic Deghosting tools
Deghosting works with all HDR rendering
methods (Details Enhancer, Contrast
Optimizer, Tone Balancer and Tone
Compressor) and with the Fusion/Natural
method. Deghosting however is not applicable to
any of the other Exposure Fusion methods.
Note

Photomatix Pro 6.0 User Manual 13
2.1.6 Options for Raw Files
Photomatix Pro oers additional pre-processing options for Raw les.
These options are automatically available when Raw les are loaded.
The White Balance option lets you change the white balance if desired, and preview the eect of changing
it. The default value is "As Shot", which reads the white balance setting from the EXIF metadata. To adjust
the white balance, either select a pre-dened value from the White Balance drop-down list, or type a color
temperature value in Kelvin in the text box.
Click Preview Sample to view the eect of the white balance change on the source image.
The Color Primaries drop-down list provides options for converting the Raw data from the camera's native
color space to the display prole of the selected value. Adobe RGB is the default value, and is appropriate
when you want to print the resulting image. If you would like to display the resulting image only on the web
and do not intend to print it, then select sRGB to avoid having to convert the image from Adobe RGB to sRGB.
Merge to HDR Options window for Raw les

Photomatix Pro 6.0 User Manual 14
2.2 Working with Single Image Files
Photomatix Pro supports HDR Rendering with single image les. To load a single image le:
1. Drag and drop the le onto the Photomatix Pro app, or onto the app icon.
Or, click on the Browse button of the window that shows at start up.
2. A le browser window displays.
Navigate to the le and open it.
3. To process the image, click Next: HDR Rendering.
2.2.1 Options for Single Raw Image Files
When your single image is a Raw le, Photomatix must rst
convert the Raw data. The following options are available for pre-processing the Raw data.
The Reduce noise before rendering option processes the converted Raw le with a high-quality noise
reduction algorithm. It is checked by default as reducing noise is always recommended when processing
Raw les. The Strength slider lets you increase or decrease the strength of the noise reduction relative to the
automatically determined value based on the
noise level in the image. Values range from
50% to 150%.
Enable Exposure Fusion allows a single
image to be processed using Fusion methods.
Normally, Fusion methods only apply to
multiple image sets. This option will split the
single Raw le into darker and lighter images,
which can then be rendered using Exposure
Fusion-based presets, such as the 'Natural'
preset, for instance.
The Reduce chromatic aberrations option
automatically corrects color fringing due to lens
chromatic aberrations.
The White Balance options let you change the
white balance, if desired, and preview the eect of
changing it. The default value is "As Shot", which
reads the white balance from the EXIF metadata.
To adjust the white balance, select an item from
the White Balance drop-down list or type a color
temperature in Kelvin in the text box.
Click Preview sample to view the eect of the white balance change on the source image.
The Color Space drop-down list provides options for converting the Raw data from the camera's native color
space to the display prole of the selected value. Adobe RGB is the default value and is appropriate when you
want to print the resulting image. Select sRGB for web-only images, to avoid having to convert the image
from Adobe RGB to sRGB.
Raw Processing Options
HDR rendering using the Details Enhancer
method makes any noise present in the image
much more visible, so it is a good idea to use
noise reduction when merging photos for use
with that HDR rendering method.
Note

Photomatix Pro 6.0 User Manual 15
3 HDR Rendering Images
The heart of Photomatix Pro is where you adjust the image with various HDR Rendering methods. The image
adjustment interface has three main sections:
Adjustments Panel on the left, Preview in the middle, Presets Panel on the right.
3.1 HDR Rendering Workow
After you have merged your source images (or opened a single image le), the main workow steps are:
1. Choose a Style for Your Image
Choose a style by selecting a thumbnail in the Presets Panel, either a built-in preset delivered with Photomatix
Pro, or a custom preset that you previously created.
See Section 3�3 for details on working with presets.
2. Rene the Eect
You can rene the eect of the Preset using the controls
in the HDR Settings and Color Settings sections (see
descriptions of each setting in Section 8: Settings). You can
also selectively assign settings to specic parts of your image,
using the Brush Tool (see Section 4: Brush Selection Tool).
3. Apply the Adjustments
When you are satised with the preview result, click on the Next: Finish button at the bottom of the
Adjustments panel. This will apply the selected preset and settings adjustments to the image, at its original
resolution.
4. Add Finishing Touches
Before saving the image, you can use the options on the Finishing Touch palette in order to increase the
Contrast of your image, Sharpen it, Crop it or Straighten it.
5. Save the Image
Choose File > Save As to save the image.
Refer to section 3.1.2 on the following page for information on the Save As dialog.
6. [Optional] Try Other Adjustments
You can try other adjustment on the same image, without
having to load and merge the photos again:
• Selecting Redo With Other Settings in the Workow
Shortcuts panel allows you to start fresh with the current
image, and apply another preset or settings.
• Selecting Double HDR Rendering allows you to add
additional eects, using your already-rendered image as
the starting point.
The settings you selected are automatically
embedded in the saved rendered image.
To view the settings, click View Settings
from the Workflow Shortcuts panel.
Note
Presets from Fusion rendering methods (e.g. the
“Natural” preset) are only available when you
have loaded bracketed photos. If you loaded a
single Raw le, however, you can still use Fusion
presets if you select “Enable Exposure Fusion".
Note
To undo or redo your adjustment
steps, click the undo / redo arrows
in the Adjustments panel.
For multiple undo or redo steps,
click multiple times.
Note

Photomatix Pro 6.0 User Manual 16
3.1.1 Workow Dierences when using the Lightroom Plugin
If you are using the Export to Photomatix Pro Plugin for
Lightroom, and have checked the option to Automatically
re-import into Lightroom library, the rendering workow
described above stops at step 4. Additionally, the button
that returns the rendered image to Lightroom will be named
Reimport & Save instead of Done.
3.1.2 Save As Dialog
To save your image, choose File > Save As, navigate to the folder where you want to save the image, and
use the default le name or enter a new name in the File name eld. Then, select a le type among the three
oered.
JPEG is best if you want to go straight to the Web with no further processing.
TIFF 16-bit oers the highest quality output and is the best format if you plan on processing the image
further in an image editor.
If you would like to automatically reimport the saved image into another photo or image application, check
Open Saved Images with and select an application from the drop-down list. If the desired photo application
is not on the list, click Add application���, navigate to the folder that contains the application, and select it.
If you would like to save your image at a specic pixel size/resolution, use the Save with Size option. There
are various standard image export size options.
By default, the le name of the rendered image
is suxed by either the name of the Preset you
selected or the name of the method used when
you adjusted the image with custom settings.
You can change this rule or set your own sux
under the Files tab of the Preferences panel.
Note

Photomatix Pro 6.0 User Manual 17
3.2.1 Preview
The Preview displays the image rendered with your cur-
rent Preset and settings, and is updated immediately after
a Preset or setting has been changed. The Preview panel
provides the following controls.
Undo / Redo: Undo allows you to step
backwards though your most recent adjustments, removing them one by one. You can
Redo any Undo steps, if you wish to keep your recent adjustments after all.
Split View: Clicking the Split View button temporarily removes the HDR rendered preview from
the left half of the image. This allows you to compare your original unprocessed image to the
rendered image. To return to adjusting your image, click the Split View button a 2nd time.
Magnify icons +/-: Increases or
decreases image preview size by 20%,
and re-renders it at the new size.
Scaling Slider: Zooms in or out the refreshed preview from 50%
to 150%. The preview is not re-rendered but is simply scaled. When
Fit or one of the Magnify icons is clicked, the Preview is not simply
scaled but is re-rendered, and the Zoom Slider is reset to 100%
Histogram: This oating window contains four tabbed histograms: Luminance, Red, Green, and Blue.
In addition, you can move the mouse back and forth across the histogram to display Level, Count, and Percentile
information. If the histogram is turned o, enable it by selecting 8-bit Histogram from the View menu.
3.2 Image Adjustment Interface
Image Adjustment Interface Overview
The image adjustment interface consists of three main sections:
The setting Adjustments Panel, the image Preview, and the thumbnail Presets Panel.
8-bit Histogram
Image adjustment Preview panel controls
The Loupe may not properly show the eect of
some settings, especially Details Enhancer's Micro-
smoothing setting, when the area magnied is
uniform. If you want to see the eect of the Micro-
smoothing setting at 100% resolution on a uniform
area such as the sky, you will have to select an area that
contains an object in the scene in addition to the sky.
Important Note
When using the Details Enhancer or Contrast
Optimizer methods, the Preview is not always an
accurate representation of the nal HDR rendered
image.
Note
Fit: Resizes the preview to
ll the available space in the
Preview panel.
Show Original/Show Preview: Toggles between a preview of the image
and the “normal” exposure (0EV) of the set. This is helpful to for evaluating
your current eect settings.

Photomatix Pro 6.0 User Manual 18
3.3 Working with Presets
3.3.1 Preset Thumbnails Panel
The Presets panel lists the available presets, showing a thumbnail preview of
the eect of that preset. When you click on a preset thumbnail, the Preview
image is refreshed to show the result of rendering with the settings of that
preset.
By default, the panel displays one column of small thumbnails. Click on the
“+” icon on the top of the panel to enlarge the thumbnails. Click on the icon
on the top right of the panel to display the thumbnails in two columns.
There are two types of presets, "Built-in" factory presets, and "My Presets"�
"My Presets" are your customized presets – presets that you have carefully
rened to match your tastes and your images – as well as presets that you
have collected from other Photomatix users.
3.3.2 Built-in Presets
Built-in or “factory” presets are those provided with the software. Photomatix
Pro oers 41 built-in presets when you are working with bracketed photo sets,
and 34 built-in presets for when you are working with single photo les.
The drop-down list at the top of the Presets panel lets you lter presets by
categories. There are four categories of built-in presets which correspond
to eect styles (Artistic, Realistic, Architecture and Black & White) and four
categories which correspond to rendering methods (Details Enhancer,
Contrast Optimizer, Tone Balancer, Tone Compressor and Fusion).
The Compact List item displays a selected subset of presets from all
categories. The Favorites item displays only presets you have marked as
favorite. See more details on Favorite presets at the end of this section.
3.3.3 Custom Presets
Custom presets are presets that you saved while adjusting your images, or
presets created by other Photomatix users that you have imported.
To access custom presets, click on the My Presets tab located at the bottom of
the Preset Thumbnails panel. To create your own custom presets, refer to the
Saving Custom Presets paragraph below.
You can also import custom presets created by other Photomatix users which you
have downloaded to your computer as XMP les. To import these presets, select
the Import Presets… item in the pop-up menu on the top left of
the Preset Thumbnails panel, and browse to the location on your
computer where you downloaded the XMP preset les.
If you save the preset in the default location
(which is the Presets folder of the Photomatix Pro
application), the preset is automatically added
to the Presets combo-box list, and also shows in
the My Presets tab of the thumbnail Presets
Panel.
Note
Preset panel, All Styles
Single column, large thumbs
/