Page is loading ...

2
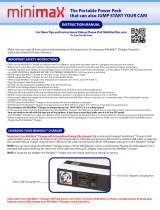
Quick Install • Installation rapide
1. Place the MiniMax drive on a stable surface.
CAUTION! The Iomega
®
MiniMax
™
hard drive is
designed to fit UNDER the Mac
®
mini. Never place the
MiniMax drive on top of the Mac mini.
2. Connect the included power supply to the back of the
drive and to a power outlet.
CAUTION! Do not move the drive while it is powered up
to avoid drive damage or data loss.
3. Connect the appropriate USB/FireWire cable to the
back of the drive and your computer. Make sure the
power switch on the back of the drive is ON.
Mac Users: The drive should mount and appear on the
Mac Desktop.
PC Users: Your computer will not recognize the drive
until it is reformatted. See instructions below.
Formatting the Drive for Windows
CAUTION! Reformatting the drive will erase all existing data!
1. Open Windows Disk Management (right click on
My Computer, select Manage, and click on Disk
Management).
2. If the Disk Wizard opens, click Next. Select the disk,
click Next, then Finish.
If the Wizard does not open, locate the drive in the
lower list. Look for a disk that does not show a drive
letter or file system. Right click on the drive name and
select Initialize Disk (Windows XP) or Write Signature
(Windows 2000), then OK.
3. The drive will now appear as Unallocated and the
bar will be black. Right click on the black bar and
select New Partition (Windows XP) or Create Partition
(Windows 2000).
4. When the Partition Wizard opens, click Next at each
screen to select the default options and format the
drive NTFS.
NOTE: If you want to use the drive with other operating
systems, use the Iomega FAT32 Formatter located on the
CD to change the format to FAT32. If you need detailed
instructions, check the Support and Downloads area on
www.iomega.com.
1. Placez le lecteur MiniMax sur une surface stable.
ATTENTION ! Le lecteur de disque dur Iomega MiniMax
est conçu pour s’adapter SOUS le Mac mini. Ne placez
jamais le lecteur MiniMax au-dessus du Mac mini.
2. Connectez l’alimentation fournie à l’arrière du lecteur,
puis connectez-la à une prise secteur.
ATTENTION ! Ne déplacez pas le lecteur lorsqu’il est
sous tension pour éviter tout dommage ou perte de
données.
3. Connectez le câble USB/FireWire approprié à l’arrière du
lecteur et à votre ordinateur. Vérifiez que l’interrupteur
d’alimentation à l’arrière du lecteur est sur ON.
Utilisateurs de Mac : Le lecteur doit être monté et
apparaître sur le bureau du Mac.
Utilisateurs de PC : Vous devrez le reformater pour que
l’ordinateur puisse le reconnaître.
Reportez-vous aux
instructions ci-dessous.
Formatage du disque pour
Windows
ATTENTION ! Le reformatage du lecteur efface toutes les
données existantes !
1. Ouvrez l’utilitaire de gestion des disques de Windows
(cliquez avec le bouton droit de la souris sur Poste de
travail, Gérer, puis Gestion des disques).
2. Si l’Assistant lecteur s’ouvre, cliquez sur Suivant.
Sélectionnez le lecteur, cliquez sur Suivant puis sur
Terminer.
Si l’Assistant ne s’ouvre pas, recherchez le lecteur
dans la liste inférieure. Recherchez un disque ne
présentant ni lettre de lecteur ni système de fichiers.
Cliquez avec le bouton droit de la souris sur le nom du
lecteur et sélectionnez Initialiser le lecteur (Windows
XP) ou Ecrire une signature (Windows 2000) puis OK.
3. Le disque apparaît comme Non attribué et la barre
doit être noire. Cliquez avec le bouton droit sur
la barre noire et sélectionnez Nouvelle partition
(Windows 2000) ou Créer une partition (Windows XP).
4. Lorsque l’Assistant Création de partition s’ouvre,
cliquez sur Suivant sur chaque écran pour
sélectionner les options par défaut et formater le
disque au format NTFS.
REMARQUE : Si vous souhaitez utiliser le disque avec
d’autres systèmes d’exploitation, utilisez le Iomega Fat32
Formatter situé sur le CD pour formater le disque au format
FAT32 (requis pour la compatibilité multiplate-forme).

11
[R7P ^7 ;GMiniMax .dC 4 ]C
.&R [7$R !B*(MiniMaxAIomegaS8)P _- 0 ?'!& @'Mac mini[R7P ^7 ; I .MiniMax
Y-) ]CMac mini .
./- 6+b [R73R ^7 S7,' /$7'R /-R /&Hb ?*HC @
.T--*R 5$ bP [R73R ^7 <& cV-# >Wb NB&*" O-(P [R73R ^7 >7 @$ I !B*(
? ?*HC @USB/ FireWireVCC'R ?*"R U-# :G A 5+b .7C*'%R Y-)b [R73R ^7 S7,' @FJ'R
D& [R73R ^7 S7,'ON.
S8)P E5' /(-MacY-) .% 4 D& aXC)b [R73R ^7 .*7 . :Mac.
TRV-XKR 7 R .B*) SV-Q @ D [R73R ^7 D& 7C*'%R Y-) \7! A :7C*'%R S8)P E5' /(-
.a-VP SVXRCR
?*"R _- ( [R73R ^7 /*)Windows
!SVCC'R T--*R ;*' 4 DQ [R73R ^7 /*) SV-Q cV, !B*(
] 4RDisk Management?*"R _- ( /H-R [[R73R SXRVQ/Windows] ]C A'3R Zb-'R X8 7$R)My Computer/
] 7R @ M[7C*'%R Y-)Manage] ]C 7$Rb M[SXRVQ/Disk Management.([[R73R SXRVQ/
] ]C 7$- M[R73R 2-! 4 @ RWQNext] ]C 7$R @ M[7$R 7R .[E-R/Next] @ M[E-R/Finish .[O-)Q/
^7 \7 7) e I [7 A 1R .?#3R E SVCC'R /'F-$R E [R73R ^7 `-% V5 M2-!'R 4 @ @ RWQb
] 7Rb M[R73R ^7 @R ]C A'3R Zb-'R X8 7$R .T-#& _- bP [R7PInitialize Disk_- ) [[7$R /*)/
?*"RWindows XP] bP (Write Signature?*"R _- ) [;*C /-/Windows 2000] ]C 7$R @ M(OK.[=RC/
] BP D& `LR [R73R ^7 7) *UnallocatedA'3R Zb-'R X8 7$R .VC3R `C&- :7R 7) *b [9 7*/
] 7Rb MVC3R :7R R6 ]CNew Partition?*"R _- ) [55 @/Windows XP] bP (Create PartitionO-Q/
?*"R _- ) [@Windows 2000.(
] ]C 7$R M_-3R 2-! 4 5(Next_- ( [R73R ^7 /*)b /*GR7IR TRX-*R X-*I /- ? E [E-R/
NTFS.

12
Using Your Drive
Drive Placement and Venting
The MiniMax drive is designed to fit UNDER the Mac
®
mini. This allows the MiniMax drive proper ventilation, and doesn’t
interfere with the optical drive or the wireless signal on the Mac mini. Do NOT block the vents at the back of the MiniMax drive.
Disconnecting the Drive
CAUTION! To prevent data loss, do not disconnect the drive during data transfer (drive activity light flashing). Always use the
safe removal procedure for your operating system when disconnecting the drive.
Using the USB Hub and FireWire Ports
The MiniMax drive includes a 3-port USB 2.0 hub that you can use to connect other USB devices to the computer. When using
the USB hub, connect the MiniMax to the computer via USB.
The MiniMax also includes two FireWire 800 ports that can be used for FireWire pass-through. The FireWire ports will transfer
data at FireWire 800 speeds only when the MiniMax is using FireWire 800 as the interface connection to the computer. You
can use the FireWire ports for pass-through when the MiniMax is connected to the computer via USB, but performance will
be limited to USB 2.0 transfer speeds (up to 480 Mbits/sec). For best results, a device connected to FireWire pass-through
should have its own power supply connection.
Avoid connecting the MiniMax to more than one interface on the computer at the same time. Follow the instructions below if
you want to change the interface connection used by the drive.
Changing the Interface Connection Used by the MiniMax Drive
1. Save files and close all folders and applications on the drive to avoid losing data.
2. Use the safe removal procedure for your operating system to unmount the drive.
3. Disconnect the interface cables from the back of the drive.
4. Power down the drive.
5. Re-connect the drive to the computer using only the interface connection you want the drive to use.
6. Turn on power to the drive.
7. Reconnect other devices to the USB hub or FireWire ports.
Backing Up with Your Drive
Iomega recommends periodic system backups and more frequent data backups to ensure that your critical data is always
protected. The frequency of your backup should depend on the importance of your data. To protect your data, you can simply
drag and drop copies of your critical files onto the drive, or you can use backup software to schedule regular backups.
CAUTION! Any data storage device can fail. Always keep at least two copies on different disks for all critical data files.
Time Machine Compatibility
The MiniMax Hard Drive ships formatted HFS+ and is compatible with Time Machine (available in Mac OS X version 10.5 and above).
Troubleshooting
Drive does not appear in My Computer or Windows Explorer or on the Mac Desktop
PC Users: Make sure the drive is formatted for use with Windows. Refer to the instructions on page 2.
• Try rebooting your computer.
• Check all connections.
• Make sure the drive is receiving power (check if the status light is on). Make sure the power switch is on.
• Make sure you are using the USB or FireWire cable that came with the drive.
• Make sure the drive is connected to only one interface.
• Try disconnecting the drive, then reconnecting the drive to a single interface (USB or FireWire). Turn off power to the
drive after disconnecting the drive, then turn the drive back on after reconnecting.
• Mac Users: Open Finder Preferences and make sure the box for External Disks (or Hard Disks) is checked.
If the drive is still not detected, please visit the Support area on www.iomega.com.
PC will not start up
If your PC will not start up when the drive is connected, the BIOS on the computer probably has a conflict with large capacity
removable drives. To work around this problem, power off the drive when starting the computer. Power on the drive after
the computer finishes starting up.

22
Limited Warranty • Garantie Limitée
Eingeschränkte Garantie • Garanzia limitata
Garantía limitada • Garantia limitada • Beperkte garantie
Ограниченная гарантия
Iomega warrants this hardware product to be free from defects in materials and workmanship for the warranty period. This non-transferable, limited
warranty is only to you, the first end-user purchaser. The warranty begins on the date of purchase and lasts for a period of one (1) year for product
purchased in the Americas or the Asia-Pacific region; ninety (90) days for Iomega reconditioned products purchased in these regions; or, two (2)
years for product purchased by an end-user in Europe, the Middle East, or Africa. Customers who register their new products at www.iomegareg.
com within 90 days of purchase will receive a warranty extension so that their total warranty shall be a period of three (3) years in all regions.
NOTE: Reconditioned products are not eligible for a warranty extension.
This warranty does not apply to: (a) Iomega software products; (b) expendable components such as fuses or bulbs; or (c) third party products,
hardware or software, supplied with the warranted product. Iomega makes no warranty of any kind on such products which, if included, are
provided “AS IS.” This warranty does not cover damage caused by accident, misuse, abuse, failure to follow instructions given in the product
documentation, use of non-Iomega supplied or approved replaceable components, exposure of media to excessive magnetic fields, external
environmental causes, or damage arising from any cause or causes for which Iomega is not responsible such as exposure to abnormal
temperatures, shock, power surges, power, outages, improper power supply, or damage caused while the product is being shipped from you to
Iomega.
Your sole and exclusive remedy for a covered defect is repair or replacement of the defective product, at Iomega’s sole option and expense
(shipping may be charged), and Iomega may use new or refurbished parts or products to do so. The replaced part/product will be warranted for
the remainder of the original warranty or three (3) months from the date of shipment of such parts/products, whichever is longer. If Iomega is
unable to repair or replace a defective product, your alternate exclusive remedy shall be a refund of the original purchase price.
The above is Iomega’s entire obligation to you under this warranty. IN NO EVENT SHALL IOMEGA BE LIABLE FOR INDIRECT, INCIDENTAL,
CONSEQUENTIAL OR SPECIAL DAMAGES OR LOSSES, INCLUDING LOSS OF DATA, USE, OR PROFITS EVEN IF IOMEGA HAS BEEN ADVISED OF THE
POSSIBILITY OF SUCH DAMAGES. In no event shall Iomega’s liability exceed the original purchase price of the drive or the media disk. Some
jurisdictions do not allow the exclusion or limitation of incidental or consequential damages, so the above limitation or exclusion may not apply
to you.
Obtaining Warranty Service
You must notify Iomega within the warranty period to receive warranty service. Just as technology and market conditions vary, Iomega’s specific
customer support policies (including fees for services) and procedures change over time. To obtain information about Iomega’s current policies
or warranty service, please visit our website at www.iomega.com/supportpolicy.html or write to: Iomega Customer Service, 4059 South 1900
West, Roy, UT 84067. Contact Information for Iomega Customer Service can be obtained on our Support website at:
• U.S., Canada, and Latin America—www.iomega.com/support
• Europe, the Middle East, and Africa—www.iomega.com/europe/support
If your product is eligible for warranty service, you will be required to return it to Iomega, along with proper identification, a return authorization
number obtained from the Iomega website or provided by the Iomega representative, and proof of purchase. Iomega will not protect, recover, or
return data during warranty service so you should duplicate your data before shipment.
Limitations
THE ABOVE WARRANTY IS EXCLUSIVE AND IN LIEU OF ALL OTHER WARRANTIES, EXPRESS OR IMPLIED. To the extent permitted by applicable
law, IOMEGA SPECIFICALLY DISCLAIMS ANY IMPLIED WARRANTIES, INCLUDING ANY IMPLIED WARRANTY OF MERCHANTABILITY OR FITNESS FOR
A PARTICULAR PURPOSE. Any implied warranty required by applicable law shall be limited in duration to the express warranty term. Some
jurisdictions do not allow disclaimers of implied warranties or limitations on how long an implied warranty lasts, so the above limitation may not
apply to you. This warranty gives you pecific legal rights and you may also have other rights that vary from jurisdiction to jurisdiction. Any suit for
breach of any warranty on your Product must be filed within one (1) year of the first date the suit could have been brought.
Iomega garantit que ce produit est exempt de tout vice de fabrication ou de malfaçon pendant toute la période de garantie. Cette garantie
limitée n’est pas transférable et ne s’applique qu’à l’utilisateur final. La garantie est effective à partir de la date d’achat et reste ensuite valable
pendant une période de un (1) an à compter de cette même date sur le continent américain ou dans la région Asie-Pacifique, quatre-vingt dix
(90) jours pour les produits remis en état achetés dans les régions précédemment citées ou deux (2) ans dans le cadre d’un achat effectué par
un utilisateur final en Europe, au Moyen-Orient ou en Afrique. Les clients enregistrant leurs nouveaux produits sur www.iomegareg.com dans
les 90 jours suivant l’achat bénéficieront d’une extension de garantie. La durée totale de la garantie sera alors de trois (3) ans, dans toutes les
régions.
REMARQUE : les produits remis en état ne peuvent pas bénéficier d’une extension de garantie.
Cette garantie ne s’applique pas : (a) aux produits logiciels Iomega, (b) aux composants consommables comme les fusibles ou les ampoules
ou (c) aux produits tiers, matériel ou logiciel, fournis avec le produit sous garantie. Iomega ne garantit en aucun cas ces produits qui, si inclus,
sont fournis “EN L’ETAT”. Cette garantie ne couvre pas les dommages causés par un accident, une mauvaise utilisation, un usage abusif, le non-
respect des instructions fournies dans la documentation du produit, l’utilisation de pièces de rechange non fournies ou non approuvées par
Iomega, une exposition excessive des supports à des champs magnétiques, ou tout autre cause externe d’origine naturelle, ou les dommages
découlant de toute cause dont Iomega n’est pas responsable, comme l’exposition à des températures anormales, des chocs, des crêtes de
tension, des coupures de courant, une alimentation incorrecte, ou les dommages causés alors que vous expédiez le produit à destination
d’Iomega.

29
Gwarancja ograniczona
Klienci, którzy w ciągu 90 dni od nabycia dokonają rejestracji nowego produktu pod adresem
www.iomegareg.com otrzymają przedłużenie gwarancji; w związku z tym całkowity okres gwarancyjny dla tych produktów we
wszystkich powyższych regionach będzie obejmował trzy (3) lata.
UWAGA: Należy się zarejestrować, korzystając z dostępnego języka. Okres gwarancyjny produktów odnawianych nie podlega
przedłużeniu.
Pełna treść gwarancji znajduje się pod adresem: www.iomega.com/support.
Περιορισμένη εγγύηση
Οι πελάτες που θα δηλώσουν τα καινούρια τους προϊόντα σε διάστημα 90 ημερών από την ημέρα αγοράς στη διεύθυνση
www.iomegareg.com, θα λάβουν επέκταση εγγύησης έτσι ώστε η συνολική τους εγγύηση να φτάνει το διάστημα των τριών (3) ετών
σε όλες τις περιοχές.
ΣΗΜΕΙΩΣΗ: Για να εγγραφείτε, χρησιμοποιήστε μία διαθέσιμη γλώσσα. Δεν προβλέπεται επέκταση εγγύησης για τα
ανακατασκευασμένα προϊόντα.
Για πλήρη δήλωση εγγύησης, επισκεφτείτε την ιστοσελίδα www.iomega.com/support.
Sınırlı Garanti
Yeni ürünlerini satın alma işleminden sonraki 90 gün içerisinde www.iomegareg.com adresinde kaydeden müşterilerin toplam garanti
süreleri tüm bölgelerde üç (3) yıl olacak şekilde uzatılacaktır.
NOT: Mevcut olan bir dili kullanarak kayıt yapmalısınız. Yenilenmiş ürünler garanti uzatmasından yararlanamazlar.
Garanti bildiriminin tamamını okumak için www.iomega.com/support adresini ziyaret edin.
wwwiomegaregcom
3
wwwiomegacomsupport
'$FBF1B
T%'O'"BDK"HEAP",LEL=OGO(BTF7BA/$P+5<LFBMC6)-BGEELOwwwiomegaregcomP90'EMC6
T MBF1CBPC@B'FBA/+NBBF1CB;2HFB5PF!N9LH+
P90QF1B'FBCJET.RB71%NB"HFB'7S)9LFB8CB'#'&+AP",B>PC6"O4#TE
5<LFBO*A1:AE?F0PMC6L/$CB
wwwiomegacomsupport

30
Regulatory Information • Informations relatives à la réglementation
Gesetzliche Bestimmungen • Informazioni sulle regolamentazioni
Información reglamentaria • Informações regulamentares
Regulatieve informatie • Сведения о нормативных требованиях
Manufacturer/Responsible Party
Iomega Corporation
4059 South 1900 West
Roy, UT 84067 USA
CE (European Community)
This Iomega product conforms to the following European Directive(s)and Standard(s): Application of Council Directive:
2004/108/EC. Standards to which Conformity is declared: EN55022, EN55024, EN61000-3-2, EN61000-3-3. Importer’s
Name: Iomega International, S.A. Type of Equipment: Information Technology Equipment.
Waste Electrical and Electronic Equipment (WEEE)
In accordance with European Directive 2002/96/EC on Waste Electrical and Electronic Equipment (WEEE),
the presence of the above symbol on the product or on its packaging indicates that this item must not
be disposed of in the normal unsorted municipal waste stream. Instead, it is the user’s responsibility to
dispose of this product by returning it to a collection point designated for the recycling of electrical and
electronic equipment waste. Separate collection of this waste helps to optimize the recovery and recycling
of any reclaimable materials and also reduces the impact on human health and the environment.
For more information concerning the correct disposal of this product, please contact your local authority or the retailer
where this product was purchased.
FCC
This equipment complies with Part 15 of the FCC Rules. Operation is
subject to the following conditions: (1) This device may not cause harmful
interference, and (2) this device must accept any interference received,
including interference that may cause undesired operation.
NOTE: This equipment has been tested and found to comply with the limits for a Class B digital device, pursuant to part 15
of the FCC Rules. These limits are designed to provide reasonable protection against harmful interference in a residential
installation. This equipment generates, uses and can radiate radio frequency energy and, if not installed and used in
accordance with the instructions, may cause harmful interference to radio communications. However, there is no guarantee
that interference will not occur in a particular installation. If this equipment does cause harmful interference to radio or
television reception, which can be determined by turning the equipment off and on, the user is encouraged to try to correct
the interference by one or more of the following measures:
• Reorient or relocate the receiving antenna.
• Increase the separation between the equipment and receiver.
• Connect the equipment into an outlet on a circuit different from that to which the receiver is connected.
• Consult the dealer or an experienced radio/TV technician for help.
Canadian Verifi cation
This Class B digital apparatus meets all requirements of the Canadian Interference-Causing Equipment Regulations (ICES-
003, Class B).

Copyright © 2010 Iomega Corporation. All rights reserved. Iomega, the stylized “i” logo, and MiniMax are either registered trademarks or
trademarks of Iomega Corporation in the United States and/or other countries. Microsoft and Windows are either registered trademarks or
trademarks of Microsoft Corporation in the United States and/or other countries. Apple, Mac, and FireWire are either registered trademarks or
trademarks of Apple Inc. in the United States and/or other countries. Certain other product names, brand names, and company names may be
trademarks or designations of their respective owners.
31884300 1/28/10 a
English
For service and support for your Iomega product, visit us at www.iomega.com.
Français
Pour obtenir des services et de l’assistance pour votre produit Iomega,
visitez notre site à l’adresse : www.iomega.com.
Deutsch
Servicedienstleistungen und Kundendienst für Ihr Iomega Produkt
fi nden Sie unter www.iomega.com.
Italiano
Per ottenere assistenza e supporto per il prodotto Iomega in uso,
visitare il sito Web all’indirizzo www.iomega.com.
Español
Si desea obtener información sobre servicios y asistencia para su producto Iomega,
visítenos en www.iomega.com.
Português
Para obter serviços e suporte para seu produto Iomega,
visite-nos no site www.iomega.com.
Русский
Для получения обслуживания и поддержки продукта Iomega посетите
веб-сайт www.iomega.com/support.
/