Yamaha TSX-14 Owner's manual

Category
Alarm clocks
Type
Owner's manual
i En
1 To assure the finest performance, please read this
manual carefully. Keep it in a safe place for future
reference.
2 Install this unit in a well ventilated, cool, dry, clean
place - away from direct sunlight, heat sources,
vibration, dust, moisture and cold. For proper
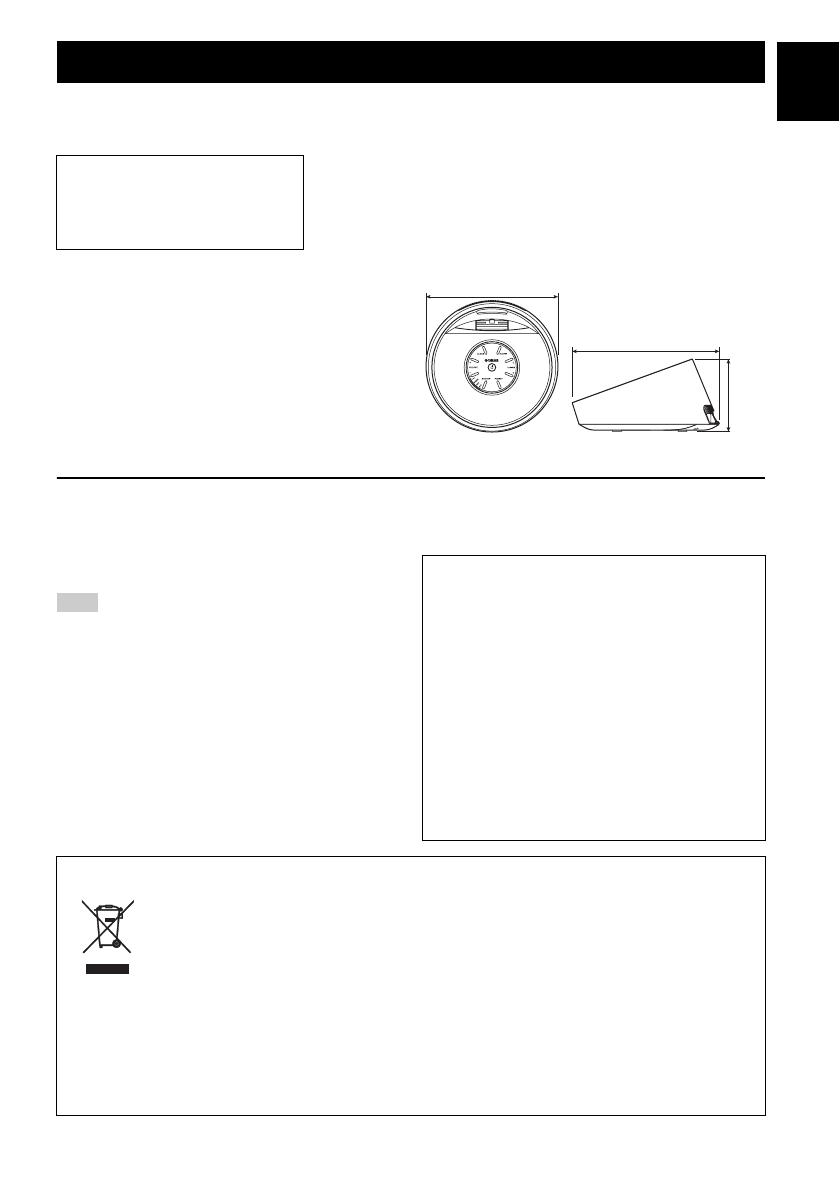
ventilation, allow the following minimum clearances.
Top: 15 cm (6 in)
Rear: 10 cm (4 in)
Sides: 10 cm (4 in)
3 Locate this unit away from other electrical
appliances, motors, or transformers to avoid
humming sounds.
4 Do not expose this unit to sudden temperature
changes from cold to hot, and do not locate this unit
in an environment with high humidity (i.e. a room
with a humidifier) to prevent condensation inside this
unit, which may cause an electrical shock, fire,
damage to this unit, and/or personal injury.
5 Avoid installing this unit where foreign object may
fall onto this unit and/or this unit may be exposed to
liquid dripping or splashing. On the top of this unit,
do not place:
Other components, as they may cause damage
and/or discoloration on the surface of this unit.
Burning objects (i.e. candles), as they may cause
fire, damage to this unit, and/or personal injury.
Containers with liquid in them, as they may fall
and liquid may cause electrical shock to the user
and/or damage to this unit.
6 Do not cover this unit with a newspaper, tablecloth,
curtain, etc. in order not to obstruct heat radiation. If
the temperature inside this unit rises, it may cause
fire, damage to this unit, and/or personal injury.
7 Do not plug in this unit to a wall outlet until all
connections are complete.
8 Do not operate this unit upside-down. It may
overheat, possibly causing damage.
9 Do not use force on switches, knobs and/or cords.
10 When disconnecting the power cable from the wall
outlet, grasp the plug; do not pull the cable.
11 Do not clean this unit with chemical solvents; this
might damage the finish. Use a clean, dry cloth.
12 Only voltage specified on this unit must be used.
Using this unit with a higher voltage than specified is
dangerous and may cause fire, damage to this unit,
and/or personal injury. Yamaha will not be held
responsible for any damage resulting from use of this
unit with a voltage other than specified.
13 To prevent damage by lightning, keep the power
cable disconnected from a wall outlet or this unit
during a lightning storm.
14 Do not attempt to modify or fix this unit. Contact
qualified Yamaha service personnel when any
service is needed. The cabinet should never be
opened for any reasons.
15 When not planning to use this unit for long periods of
time (i.e. vacation), disconnect the AC power plug
from the wall outlet.
16 Be sure to read the “TROUBLESHOOTING” section
on common operating errors before concluding that
this unit is faulty.
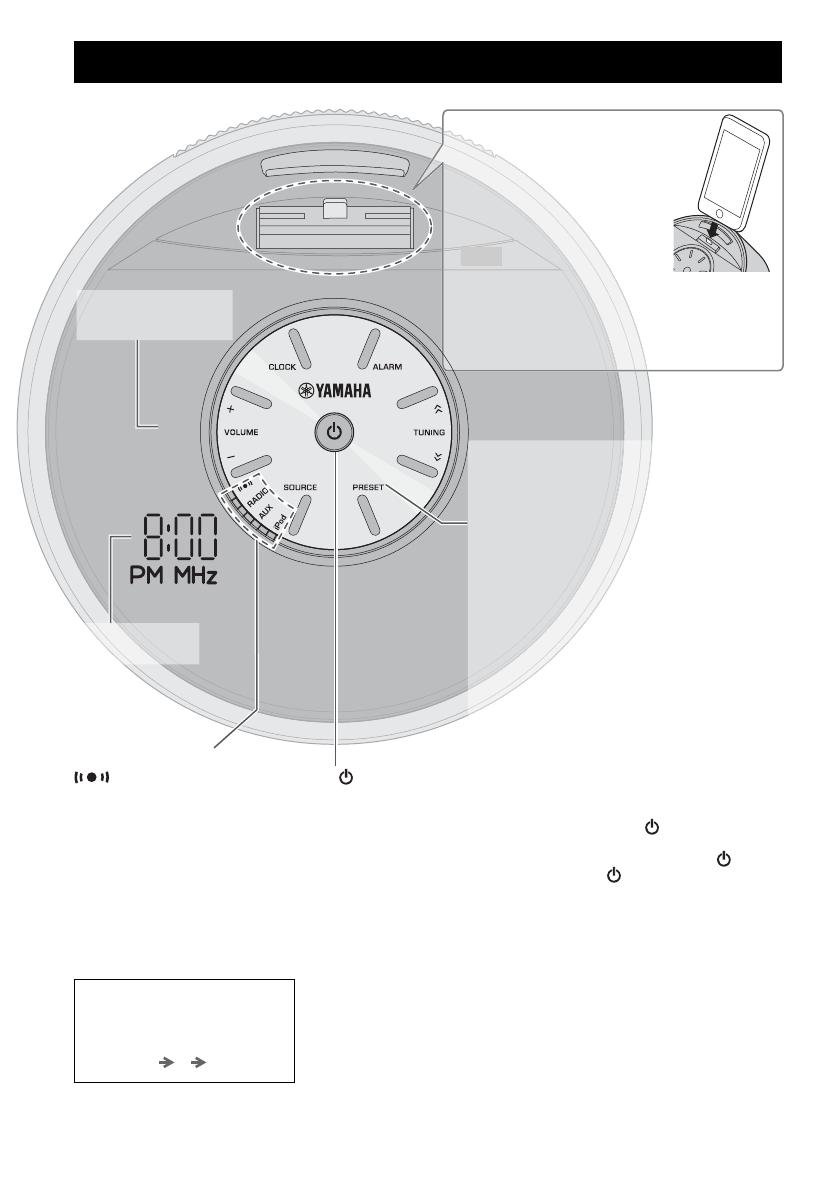
17 Before moving this unit, press to set the system to
off, and disconnect the AC power plug from the wall
outlet.
18 Condensation will form when the surrounding
temperature changes suddenly. Disconnect the power
cable from the outlet, then leave this unit alone.
19 When using this unit for a long time, this unit may
become warm. Turn the system off, then leave this
unit alone for cooling.
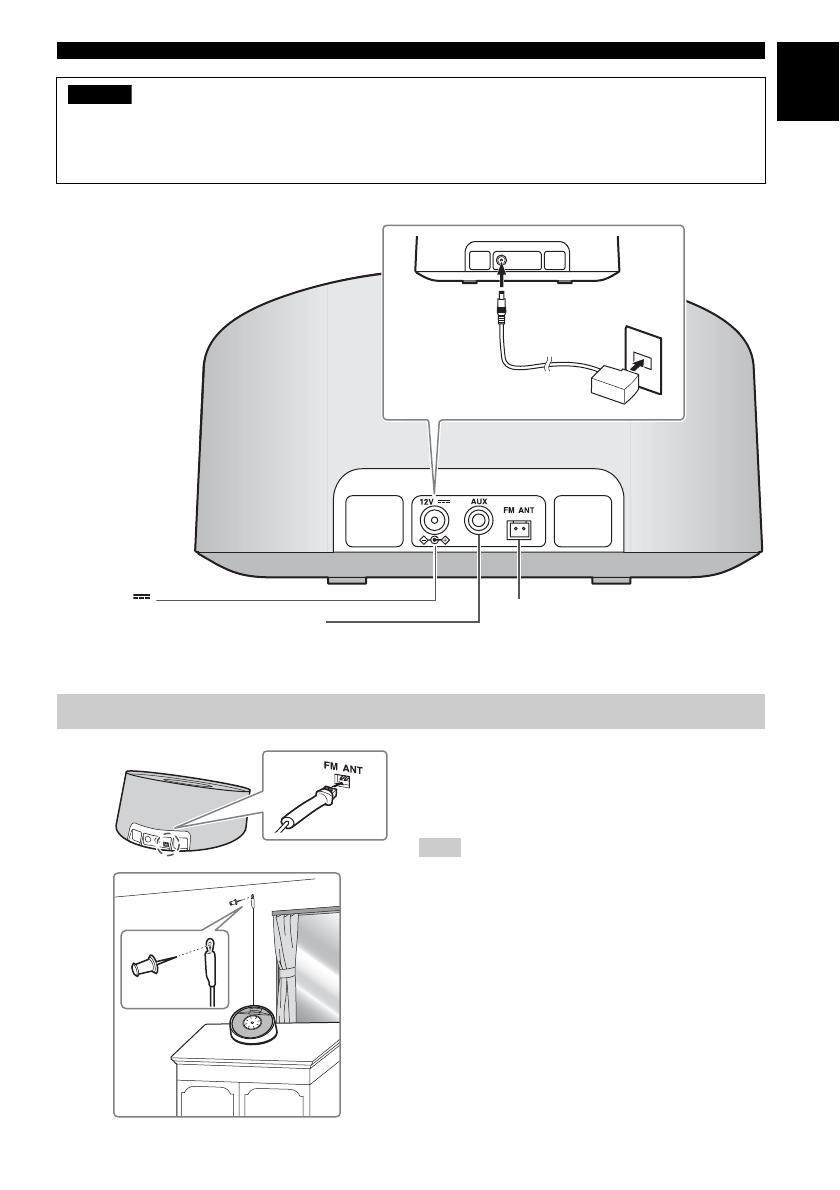
20 Install this unit near the wall outlet and where the AC
power plug can be reached easily.
21 Be sure to use the AC adaptor supplied with this unit.
Using an AC adaptor other than the one provided
may cause fire or damage to this unit.
CAUTION: READ THIS BEFORE OPERATING YOUR UNIT.
This unit is not disconnected from the AC power source
as long as it is connected to the wall outlet, even if this
unit itself is turned off by . In this state, this unit is
designed to consume a very small quantity of power.
WARNING
TO REDUCE THE RISK OF FIRE OR ELECTRIC
SHOCK, DO NOT EXPOSE THIS UNIT TO RAIN OR
MOISTURE.
This unit’s speakers use magnets. Do not place items
that are sensitive to magnetism, such as CRT-type TVs,
clocks, credit cards, floppy disks, etc., on or beside this
unit.
There is a chance that placing this unit too close to a
CRT-based (Braun tube) TV set might impair picture
color. Should this happen, move this unit away from the
TV set.
We, Yamaha Music Europe GmbH hereby
declare that this unit is in compliance with the
essential requirements and other relevant
provisions of Directive 1999/5/EC.
Yamaha Music Europe GmbH
Siemensstr. 22-34 25462 Rellingen, Germany
Tel: +49-4101-303-0
1 En
En
PREPARATION
Features
Playback of iPod/iPhone (with Lightning connector), FM radio, and external devices with an AUX
connector.
Setting alarm using iPod/iPhone (with Lightning connector), or FM radio.
Supplying power to iPod/iPhone (with Lightning connector).
Rich sound by 5cm full-range custom speaker and DSP (Digital Signal Processor) made by Yamaha.
Enhanced treble and thick mid/bass, even when playing a compressed audio source, such as MP3, etc.
(Music Enhancer)
iPod/iPhone
Supported models:
iPhone 5/iPhone 5c/iPhone 5s
iPod touch (5th generation)
iPod nano (7th generation)
(as of August 2014)
* This unit is iPod and also iPhone-compatible. “iPod” described in this manual may also refer to “iPhone”.
An iPod may not be detected by the unit or some features may not be compatible, depending on the
model or software version of the iPod.
indicates precautions for use of the unit and its feature limitations.
indicates supplementary explanations for better use.
Supplied accessories
NAMES OF PARTS AND THEIR FUNCTIONS .................................................................................... 2
BASIC FUNCTIONS................................................................................................................................... 4
LISTENING TO FM STATIONS .............................................................................................................. 6
LISTENING TO iPod.................................................................................................................................. 7
LISTENING TO EXTERNAL SOURCES ............................................................................................... 8
TROUBLESHOOTING .............................................................................................................................. 9
SPECIFICATIONS ................................................................................................................................... 11
Note
y
AC adaptor FM antenna
DC 12 V, 1.5 A,
model number:
MU18-D120150-C5
CONTENTS
2 En
Top panel
NAMES OF PARTS AND THEIR FUNCTIONS
D
Press to turn on the system or enter standby mode.
Eco Standby mode
This can reduce power consumption. Press and hold for more than
3 seconds to set the system to power saving mode. All the indicators and
display turn off, and audio playback and input via buttons except are
disabled. To cancel Eco Standby mode, press .
Even in standby mode or Eco Standby mode, the alarm function is
available.
Auto Standby ( page 5)
This unit has a function that automatically activates standby mode when no
audio signal is input from a connecting device, or when the connecting
device is playing at a low volume for a certain period (about 20 minutes).
A Grille ( page 3)
F VOLUME
Controls volume. When you control the
volume, the volume level will be displayed on
the display for a while.
G CLOCK
Sets the clock ( page 4).
H ALARM
Sets the alarm ( page 4).
I TUNING
Adjust the time or radio frequency
( page 4, 6).
J PRESET
Stores up to five favorite FM radio stations
( page 6).
K SOURCE
Selects an input source from iPod, AUX, or
RADIO.
E iPod dock
Set your iPod on the Lightning connector
of the iPod dock.
y
An iPod is charged when set in the
iPod dock.
The iPod may not be set in the
iPod dock securely if it is in its
protective case.
This unit stops supplying power when it is in Eco
Standby mode.
Note
B Display
C Indicators
(Alarm): Lights when the
alarm function is on
( page 4).
RADIO: Lights when the radio is
selected as an input
source ( page 6).
AUX: Lights when AUX is selected
as an input source
( page 8).
iPod: Lights when iPod is selected
as an input source
( page 7).
y
Dimmer function
Press CLOCK repeatedly to set the
brightness of the display and
indicators.
3 (brightest) 2 1 (darkest)
NAMES OF PARTS AND THEIR FUNCTIONS
3 En
En
Rear panel
A grille is attached to this product to protect the speakers.
Since the grille cloth is made of soft material, it can be easily damaged, so do not scratch it with a sharp object.
Do not overstress the grille cloth. If it is overstressed, it will become contorted and damaged. This may cause damage to
the speakers. Be careful when handling the grille cloth.
Connecting the FM antenna
A Connect the supplied antenna to the
unit.
B Pin the antenna where the best
reception is obtained.
Be sure to stretch out the antenna as the illustration shows.
If FM reception is poor, change the height or direction of
the antenna, or relocate the unit.
Caution
L 12 V
Connect the supplied
AC adaptor.
M AUX
Connect external devices with
ø3.5mm stereo mini plug cables
( page 8).
N FM ANT
FM antenna terminal
To AC wall outlet
A
B
A
Note
4 En
OPERATION
You can play back the radio, the iPod, and emit beeps at a set time with this unit.
Setting the time and sound
BASIC FUNCTIONS
Adjusting the clock
A Press and hold CLOCK for more than
2 seconds.
The display flashes.
B Adjust the time with TUNING.
y
If you press and hold TUNING, the numbers
advance quickly.
C Press CLOCK.
If you want to cancel clock setting mode, press .
y
If you press PRESET in step B, you can select the
time display method (12 hours/24 hours).
The time settings are lost approximately one week after
unplugging the unit.
Alarm setting
A Press and hold ALARM for more than
2 seconds.
The alarm indicator ( ), the
RADIO
indicator
(or the iPod indicator), and display flash.
B
Set the alarm time with
TUNING
.
C
Press
SOURCE
to select the alarm type.
iPod: this unit resumes the song you listened to last
time.
RADIO: this unit plays back the radio station you
listened to last time.
D Set the alarm volume with VOLUME.
The volume level is displayed.
E Press ALARM.
Alarm is set and the alarm indicator ( )
lights.
y
The alarm type of this unit are the radio and
beeping, and iPod and beeping.
The radio/iPod turns on 3 minutes before the alarm
time and beeping starts at the set alarm time.
If you press
ALARM
to complete the setting of the alarm
without changing the alarm time and volume, the alarm setting
mode will be cancelled and the alarm will not be set to on.
When iPod is selected as a source, set the iPod in the iPod
dock ( page 7). If the iPod is not set at the alarm time,
the unit emits beeps.
A
,
C
B
Note
A
,
E
D
C
B
Alarm
indicator
()
RADIO
indicator
iPod indicator
Note
BASIC FUNCTIONS
5 En
En
Switching the alarm on/off
At the set time, alarm sound plays back. During playback, operations below are available.
Stopping the alarm
The system automatically enters standby mode under the following circumstance.
No audio signal is input from a connecting device or when the connecting device is playing at a low volume
for a certain period (about 20 minutes).
If no operation is performed for more than 8 hours while music is being played back or stopped.
Press ALARM.
When the alarm is on, the alarm indicator ( )
and the RADIO indicator (or the iPod indicator)
light and the alarm time is displayed for a while.
Alarm
indicator
()
RADIO
indicator
iPod indicator
Operations during playing back alarm sound
Press ALARM or .
y
Unless you stop the alarm, the alarm stops after
60 minutes automatically.
When you stop the alarm, the alarm time setting, etc., is
saved for convenient use next time.
Press any button except ALARM and once to stop the
beeping, and twice to stop the radio source or iPod (snooze
function). 4 minutes after the radio source or iPod is
stopped, it will start fading in again and after another
minute the beeping will resume.
When the snooze function is activated, the display, alarm
indicator ( ) and RADIO indicator (or the iPod
indicator) flash.
RADIO
indicator
Alarm
indicator
()
iPod indicator
Auto Standby
6 En
You can store up to five favorite FM radio stations with the preset function.
LISTENING TO FM STATIONS
Tuning radio stations
A Press SOURCE to select RADIO.
The RADIO indicator lights.
B For automatic tuning, press and hold
TUNING.
For manual tuning, press TUNING
repeatedly.
If you tune into a station manually, the sound is monaural.
Presetting radio stations
A Press TUNING to select a favorite radio
station.
The radio frequency is displayed temporally.
B Press and hold PRESET for more than
2 seconds.
The preset number is displayed on the display and
flashes.
C Press PRESET to select the preset
number you want to store to.
The preset number is displayed as follows:
P1
P2 P3 P4 P5 P1
D Press and hold PRESET for more than
2 seconds to complete.
Selecting preset radio stations
A Press SOURCE to select RADIO.
The RADIO indicator lights.
B Press PRESET repeatedly to select the
preset radio station.
A
B
RADIO indicator
Note
A
B
,
C
,
D
RADIO indicator
B
A
RADIO indicator
7 En
En
Connecting an iPod to the iPod dock
For details on compatible iPod models, refer to “SPECIFICATIONS” ( page 11).
LISTENING TO iPod
y
An iPod will be recharged while it is connected to the dock. The iPod
will not be recharged when the unit is in Eco Standby mode.
If an iPod in protective case is connected by force, the connector may
be damaged. Remove the protective case before connection.
Slowly connect or remove the iPod.
Insert the iPod straight in the right angle without adding pressure to it.
If you insert the iPod in the wrong angle and forcibly insert it into the
unit, a malfunction may occur.
Do not connect an unsupported iPod to this unit. The operation of an
unsupported iPod is not guaranteed.
Remove the iPod when carrying this unit.
If the battery of the iPod is very low, charge the iPod for a while
before operating.
If the iPod is not turned on, the iPod will not operate even if it is set on
the unit. Check if the iPod is turned on before operating.
Remove the iPod if you will not use the unit for a long time.
Connect your iPod without any other iPod accessories (such as
headphones, a wired remote control, an FM transmitter, etc.)
connected.
It is recommended that you update your iPod software before using it
with this unit. The updater for the iPod software is available at the
Apple website.
Note
Playing the iPod
A Connect an iPod to the
iPod dock
.
B Press SOURCE and set
iPod
as the playback
source.
C
Play the iPod.
y
You can remove the iPod during playback.
When the unit is used with the iPod’s shake shuffle function
on, the iPod might shuffle due to the vibration of speaker
depending on the music played back. If this happens, turn the
shake shuffle function off. (Refer to the instruction manual of
the iPod to turn the function off.)
Although this unit may operate or display differently
depending on the model or the software of the iPod, it does
not affect the basic playback operation.
For how to operate the iPod itself, etc., refer to the owner’s
manual supplied with each product.
B
A
8 En
LISTENING TO EXTERNAL SOURCES
A Connect your portable audio
device to AUX using a
commercially available 3.5 mm
(1/8 in) mini plug cable.
Turn down the volume of this unit and your
portable audio device before connection.
B Turn on the system.
C Press SOURCE to set the
playback source to AUX.
The AUX indicator lights.
D
Start playback on the connected
portable audio device.
A
C
B
Rear panel
AUX indicator
Note
9 En
En
Refer to the table below if the unit does not operate properly. If the problem you are experiencing is not listed
below, or if the instruction below does not help, press to enter standby mode, disconnect the power cable,
and contact the nearest authorized Yamaha dealer or service center.
TROUBLESHOOTING
General
Problem Cause Solution
The speakers make no
sound.
The volume may be set to the minimum
level.
Adjust the volume level.
The source may be incorrect. Select the correct source.
The unit is setting the alarm. Press ALARM to complete the alarm setting.
Sound suddenly turns off.
Auto Standby function is enabled. Turn on the system and play the source again.
Since the connecting device outputs at a
very low volume, the Auto Standby
function is enabled.
Raise the volume of the connecting device.
Sound is cracked/
distorted or there is
abnormal noise.
Input source volume is excessive, or
volume of this unit is excessive.
Adjust the volume with VOLUME.
The unit does not operate
properly.
The unit may have received a strong
electrical shock such as lightning or
excessive static electricity, or power
supply may have dropped.
Press to enter standby mode and
disconnect the power cable. Wait about
30 seconds, reconnect the power cable, and
turn on the system.
The system turns on but
immediately shuts off.
The power cable may be connected
improperly.
Make sure the power cable is plugged into the
wall outlet firmly.
The unit may have received a strong
electrical shock such as lightning or
excessive static electricity.
Disconnect the power cable. Wait about
30 seconds, reconnect the power cable, and
turn on the system.
A digital or high-frequency
equipment produces
noises.
The unit may be placed too close to the
digital or high-frequency equipment.
Place the unit farther away from the
equipment.
The clock setting has been
cleared.
The unit is left more than one week after
you disconnect the power cable from the
wall outlet.
Plug the power cable into the wall outlet
firmly, and set the clock again ( page 4).
The clock flashes.
The unit is setting CLOCK or ALARM. Press to cancel setting CLOCK or
ALARM.
FM radio reception
Problem Cause Solution
Too much noise during
stereo broadcast.
The radio station you selected may be far
from your area, or the radio wave
reception is weak in your area.
Try manual tuning to improve the signal
quality ( page 6) or change the height or
direction of the antenna, or relocate the unit
( page 3).
TROUBLESHOOTING
10 En
iPod, iPhone
“Made for iPod” and “Made for iPhone” mean that an electronic accessory has been designed to connect specifically to iPod or
iPhone, respectively, and has been certified by the developer to meet Apple performance standards.
Apple is not responsible for the operation of this device or its compliance with safety and regulatory standards. Please note that
the use of this accessory with iPod or iPhone may affect wireless performance.
iPhone, iPod , iPod touch, iPod nano, iTunes and Lightning are trademarks of Apple Inc., registered in the U.S. and other
countries.
iPod
Problem Cause Solution
No sound.
The iPod is not set in the iPod dock
firmly.
Set the iPod firmly.
Earphones are connected. Remove the earphones.
The proper data is not in the iPod. Check if the proper playable data is in the
iPod.
For the proper data format or how to put the
data into the iPod, refer to the owner’s manual
supplied with each product.
The iPod software version has not been
updated.
Download the latest iTunes software to update
the iPod software version to the latest.
The iPod does not charge
up.
The iPod is set in the iPod dock
improperly.
Remove the iPod from the unit, and then set it
in the iPod dock again ( page 7).
The system is set to Eco Standby mode
( page 2).
Press to cancel Eco Standby mode
( page 2).
Suddenly the music being
played back is canceled
and another track starts
playing without
performing any operation.
The iPod’s Shake to Shuffle function is
turned on.
Turn off the Shake to Shuffle function in the
iPod’s settings.
11 En
En
PLAYER SECTION
iPod/iPhone
An iPod may not be detected by the unit or some features
may not be compatible, depending on the model or
software version of the iPod.
AUX IN
Input connector
............STEREO L/R: 3.5 mm (1/8 in) STEREO mini Jack
AMPLIFIER SECTION
Driver unit .........................5 cm (2 in) full-range driver × 2
TUNER SECTION
Tuning range (FM) .................................87.5 to 108.0 MHz
GENERAL
Power Supply ........................... AC 100 to 240 V, 50/60 Hz
Power consumption .....................................................11 W
Standby consumption (Clock displayed) ....................1.0 W
Eco Standby consumption ..........................................0.2 W
Time of power management (Auto Standby)
................................................ No sound: about 20 minutes
.................................................No operation: about 8 hours
Weight......................................................... 0.9 kg (2.0 lbs.)
Specifications are subject to change without notice.
For U.K. customers
If the socket outlets in the home are not suitable for the plug
supplied with this appliance, it should be cut off and an
appropriate 3 pin plug fitted. For details, refer to the
instructions described below.
The plug severed from the mains lead must be destroyed, as a
plug with bared flexible cord is hazardous if engaged in a live
socket outlet.
Special Instructions for U.K.
Model
SPECIFICATIONS
Made for.
iPhone 5/iPhone 5c/iPhone 5s
iPod touch (5th generation)
iPod nano (7th generation)
(as of August 2014)
•Dimensions
200 mm (7-7/8 in)
100 mm
(3-7/8 in)
180 mm (7-1/8 in)
Note
IMPORTANT
THE WIRES IN MAINS LEAD ARE COLOURED
IN ACCORDANCE WITH THE FOLLOWING
CODE:
Blue: NEUTRAL
Brown: LIVE
As the colours of the wires in the mains lead of this
apparatus may not correspond with the coloured
markings identifying the terminals in your plug,
proceed as follows:
The wire which is coloured BLUE must be connected
to the terminal which is marked with the letter N or
coloured BLACK. The wire which is coloured
BROWN must be connected to the terminal which is
marked with the letter L or coloured RED.
Make sure that neither core is connected to the earth
terminal of the three pin plug.
Information for Users on Collection and Disposal of Old Equipment
This symbol on the products, packaging, and/or accompanying documents means that used electrical and
electronic products should not be mixed with general household waste.
For proper treatment, recovery and recycling of old products, please take them to applicable collection
points, in accordance with your national legislation and the Directives 2002/96/EC.
By disposing of these products correctly, you will help to save valuable resources and prevent any potential
negative effects on human health and the environment which could otherwise arise from inappropriate
waste handling.
For more information about collection and recycling of old products, please contact your local
municipality, your waste disposal service or the point of sale where you purchased the items.
[Information on Disposal in other Countries outside the European Union]
This symbol is only valid in the European Union. If you wish to discard these items, please contact your
local authorities or dealer and ask for the correct method of disposal.
http://europe.yamaha.com/warranty/
AVEEA71102B
Important Notice: Guarantee Information for customers in EEA* and Switzerland
English
For detailed guarantee information about this Yamaha product, and Pan-EEA* and Switzerland warranty service, please either
visit the website address below (Printable file is available at our website)
or contact the Yamaha representative office for your
country. * EEA: European Economic Area
English
© 2014 Yamaha Corporation Printed in China ZN35240
  • Page 1 1
  • Page 2 2
  • Page 3 3
  • Page 4 4
  • Page 5 5
  • Page 6 6
  • Page 7 7
  • Page 8 8
  • Page 9 9
  • Page 10 10
  • Page 11 11
  • Page 12 12
  • Page 13 13
  • Page 14 14
  • Page 15 15
  • Page 16 16
  • Page 17 17
  • Page 18 18
  • Page 19 19
  • Page 20 20
  • Page 21 21
  • Page 22 22
  • Page 23 23
  • Page 24 24
  • Page 25 25
  • Page 26 26
  • Page 27 27
  • Page 28 28

Yamaha TSX-14 Owner's manual

Category
Alarm clocks
Type
Owner's manual

Ask a question and I''ll find the answer in the document

Finding information in a document is now easier with AI