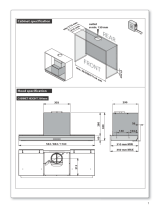
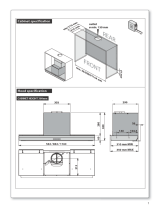
Alno ADF 60 E User manual

Category
Cooker hoods
Type
User manual

This manual is also suitable for

Alno ADF 60 E is a versatile kitchen appliance that can be used as either an extractor hood or a filter hood. It comes with a variety of features to make cooking easier and more efficient.

As an extractor hood, the Alno ADF 60 E can be connected to an exhaust pipe to remove smoke, odors, and grease from the kitchen. This can help to improve air quality and make the kitchen more comfortable.

As a filter hood, the Alno ADF 60 E uses a charcoal filter to remove odors from the air. This can be useful in kitchens that do not have an exhaust pipe or in situations where it is not possible to install one.

ISTRUZIONI D'USO
OPERATING INSTRUCTIONS
552.4 - 852.4
389
34
598 - 898
81
105
280
174
20
170
BEDIENANLEITUNG
ADF 602 G
ADF 60 E
50
13
5
59
51
600
28
0
ADF 601 W
10401250390
Fig.1
Ø
125
150
Ø
125
150
Ø
125
100
Ø
125
100
ADF 602 G - ADF 60 E ADF 601 W
Fig.2
A
B
1
2
III II I 0
I 0
III II I 0
I 0
Fig.3
Fig.4
A
B
1
2
III II I 0
I 0
III II I 0
I 0
Fig.4
Fig.3
C
D
Fig.5
Fig.6
G
C
D
Fig.5
F
E
G
Fig.6
15
5
10401250390
La cappa è utilizzabile sia come cappa aspirante che filtrante. Tale
descrizione è valida per diversi tipi d’apparecchi. Potreste pertanto
trovare indicazioni relative ad elementi di cui non è dotata la vostra
cappa. In caso di disponibilità d’evacuazione (tubo di scarico oppure
canna d’aerazione) è opportuno usare la cappa in versione aspirante
per permettere lo scarico all’esterno dei vapori e degli odori creatisi in
cucina. Gli accessori possono variare da paese a paese. Ci riserviamo
di modificare il prodotto senza preavviso, sempre nell’ambito di un
miglioramento e nel rispetto delle normative.
Versione aspirante (Fig.1)
In questo caso è necessario collegare, tramite la flangia o la riduzione (fornita
in dotazione), la cappa ad una tubazione di scarico per condurre l’aria
aspirata all’esterno della cucina. La speciale conformazione della flangia
permette di utilizzare a scelta, senza perdite di carico apprezzabili, Su
eventuali tratti orizzontali il tubo deve avere un’inclinazione di circa il 10%
verso l’alto da “monte” a “valle”.
Nota — L’efficienza della cappa aspirante diminuisce al crescere della
lunghezza e del numero di deviazioni del tubo di scarico. In funzionamento
aspirante bisogna osservare le prescrizioni seguenti. Per l’allacciamento
della cappa aspirante è vietato collegare lo scarico a canne fumarie, canali
di scarico e canne per l’aerazione di locali espositivi. Con scarico in canne
fumarie o canali di scarico fuori funzione è consigliabile farsi rilasciare il
benestare dal responsabile competente per lo stabile. L’aria evacuata non
deve essere immessa in un condotto di circolazione d’aria calda. Per
l’evacuazione dell’aria aspirata si devono osservare le prescrizioni ufficiali.
Raccomandazioni per l’uso della cappa in posizione aspirante
Durante il funzionamento contemporaneo di una cappa aspirante e di una
fonte di calore che necessita dell’aria dell’ambiente (come ad esempio stufe
a gas, ad olio, a carbone etc.) si deve prestare molta attenzione perché
tramite la cappa si aspira dall’ambiente l’aria di cui si ha bisogno per la
combustione, creando una depressione. Un funzionamento senza pericolo
si ottiene quando nell’ambiente si ha una depressione massima di 0,04 mbar,
in tali condizioni si evita il risucchio dei gas di scarico della fonte di calore.
Tale risultato si ottiene praticando nell’ambiente delle aperture che non
possano essere chiuse (non vanno bene porte, finestre, etc.) dalle quali l’aria
necessaria alla combustione possa affluire liberamente.
Nota — Per dare un giudizio si deve considerare, comunque, I’intera
conduttura di scarico prevista nell’appartamento. In caso di dubbio è bene
farsi consigliare o rilasciare l’autorizzazione del responsabile dello stabile.
Nell’utilizzazione di fornelli a gas, del forno a gas etc. come pure nell’uso della
cappa in posizione filtrante tali precauzioni non sono necessarie.
Versione filtrante (Fig.2)
Questa versione si adotta in mancanza di tubazione di scarico verso
l’esterno. L’aria viene depurata da un filtro a carbone vegetale attivo per
essere poi riciclata nell’ambiente stesso. Assicurarsi che il filtro carbone
antiodori sia inserito. In caso di cappa filtrante è necessario che la flangia
d’uscita sia collegata ad un tubo che attraversando il pensile scarichi l’aria
filtrata all’esterno dello stesso.
Montaggio
Importante: la cappa non deve essere messa in funzione, prima di essere
stata montata completamente.
La cappa deve essere montata al centro del piano di cottura. La distanza
minima fra il piano di cottura e la superficie inferiore della cappa deve essere
650 mm. La cappa è adatta per essere montata su un piano di cottura con
4 fuochi.
Nota — Tali distanze sono comunque soggette alle normative in materia di
sicurezza in vigore nei vari paesi.
Nota — Assicurarsi che il mobile sostenga il peso della cappa.
Fissaggio per modello ADF 601 W
Tagliare il fondo del pensile utilizzando la maschera di foratura fornita a
corredo (Fig.3). Tagliare il foro d’uscita nel top del pensile con la maschera
di foratura. Fissare dall’interno la cappa, con le otto viti fornite a corredo, al
fondo del pensile, prestando attenzione che il bordo anteriore del gruppo (B)
non fuoriesca dall’ingombro del pannello (A) del pensile (Fig.3). Qualora il
pensile fosse più profondo dell’apparecchio è possibile applicare su quest’ul-
timo un distanziale fissandolo con le viti nella parte inferiore del gruppo.
Fissaggio per modello ADF 602 G - ADF 60 E
Tagliare il fondo e forare i fianchi del pensile utilizzando la maschera di
foratura fornita a corredo (Fig.3). Tagliare il foro d’uscita nel top del pensile
con la maschera di foratura. Inserire la cappa nel mobile e spingerla in alto
fino a quando le molle di ritegno non si incastrano nei fori laterali preceden-
temente realizzati (FIG.3/A). Fissare dall’interno la cappa al pensile con le
6 viti fornite a corredo (Fig.3/B), attraversando i distanziali in plastica. Se i
fianchi del pensile hanno uno spessore maggiore di 16 mm e la cappa si
blocca sui distanziali in plastica (Fig.3/B), togliere i distanziali con un giravite
a taglio. Qualora il pensile fosse più profondo dell’apparecchio, è possibile
applicare su quest’ultimo un distanziale di profondità (a richiesta) fissandolo
ai due fori situati nella parte inferiore del gruppo, con le viti a corredo.
Collegare la riduzione flangia (Fig.1) 150-125 mm (fornita a corredo) alla
cappa e completare il collegamento della tubazione d’evacuazione all’ester-
no (non fornita a corredo) con tubi da 150 mm o 125 mm, a scelta.
Collegamento elettrico
Controllare che i valori della tensione d’alimentazione corrispondano a quelli
riportati sulla targhetta di funzionamento dell’apparecchio.
Attenzione: se l’apparecchio non è provvisto di spina, nell’installazione
fissa deve essere previsto un dispositivo di separazione che assicuri
l’onnipolare disinserzione dalla rete con una distanza d’apertura dei contatti
di almeno 3 mm. Se il prodotto è fornito con la spina, essa deve essere
accessibile dopo il montaggio dell’apparecchio.
Attenzione: La casa produttrice declina ogni responsabilità per inconve-
nienti derivati dall’inosservanza della suddetta disposizione.
Per il modello ADF 602 G - ADF 60 E
I fili contenuti nel cavo d’alimentazione vanno interpretati in base alle
colorazioni nel modo seguente: Giallo/Verde = Terra — Blu = Neutro —
Marrone = Linea
Istruzioni d’uso
La cappa deve essere messa in funzione al più tardi all’inizio della cottura.
Prima di mettere in funzione la cappa, si devono togliere tutte le pellicole di
protezione come per esempio su i filtri alluminio per grassi.
La cappa è dotata seguenti comandi (Fig.4):
1 - interruttore velocità — 2 - interruttore luce
Estraendo la veletta si accende il motore e la luce, se erano stati preceden-
temente accesi tramite gli interruttori. Chiudendo la veletta la cappa si
spegne, lasciando in memoria la velocità.
Manutenzione
Nota — In caso d’interventi disinserire la spina dalla presa di corrente. La
pulizia esterna della cappa va fatta con una spugna umida con detersivo
liquido neutro o con un panno inumidito con alcool etilico denaturato. Evitare
l’uso di prodotti contenenti abrasivi.
L’aria con vapori ed odori viene aspirata prima attraverso il filtro per grassi
e (se la cappa è filtrante) attraverso il filtro antiodori. L’efficienza dell’appa-
recchio dipende dallo stato in cui si trovano i filtri.
Filtro per grassi
Assorbe le particelle di grasso in sospensione nei vapori, proteggendo la
cucina ed i mobili dai residui di sostanze grasse.
Il filtro va lavato ogni 10-15 gg. (in condizioni normali d’esercizio) immergen-
dolo in soluzione tiepida sgrassante.
Filtro antiodore al carbone attivo
Attenzione! È consigliabile l’uso del filtro solo in versione filtrante. L’aria
aspirata passa attraverso il filtro carbone attivo e viene depurata dagli odori.
Questo filtro non può essere lavato e dovrà essere sostituito secondo la
frequenza d’uso. (Circa due volte l’anno).
Pulizia o sostituzione filtro per grassi (Fig.5)
Estrarre la veletta (5/C). Prendere la maniglia del filtro (5/D) e togliere la
griglia (5/D).
Per il modello ADF 601 W : sganciare i ferma filtri (5/E) ed eseguire la
pulizia del filtro (5/F) immergendolo in soluzione tiepida sgrassante;
non strizzare il filtro, comprimerlo semplicemente in un panno per
l’asciugatura.
Per il modello ADF 602 G - ADF 60 E : il filtro va messo in lavastoviglie.
Attenzione durante tale operazione a non danneggiare il filtro urtan-
dolo o schiacciandolo dato che è costituito da più strati in lega legge-
ra. Il filtro alluminio si può scurire; tale effetto non influisce sull’effica-
cia del filtro, ma potrebbe migliorare le prestazioni dello stesso.
Per rimontare il filtro eseguire le operazioni di cui sopra nel senso inverso.
Sostituzione filtro antiodore (Fig.6)
Togliere il filtro per grassi (Fig.5). Entrare con la mano nel vano d’aspirazione
e rimuovere i due i filtri antiodore (Fig.6), girandoli in senso antiorario.
Rimontare i nuovi filtri e rimontare il filtro per grassi.
Essendo il filtro antiodore un optional, la versione aspirante può essere
facilmente convertibile dall’utente in versione filtrante, seguendo le modalità
qui sopra riportate. La pulizia esterna della cappa va fatta con una spugna
umida con detersivo liquido neutro o con un panno inumidito con alcool etilico
denaturato. Evitare l’uso di prodotti contenenti abrasivi.
Sostituzione delle lampade (Fig. 6/G)
Per sostituire le lampade è sufficiente smontare la plafoniera (Fig.6/G). Non
mettere mai lampade con potenza superiore a quelli indicata nell’etichetta
situata all’interno della cappa.
Per il modello ADF 601 W : Usare solo lampade del tipo “oliva”.
Per il modello ADF 602 G - ADF 60 E : usare solo lampade neon.
Norme di sicurezza
E’ proibito cucinare alla fiamma sotto la cappa. Per friggere si deve tenere
sotto controllo il lavoro per tutta la sua durata in quanto l’olio nella friggitrice
si potrebbe incendiare. Onde evitare pericolo d’incendio è necessaria la
pulizia frequente su tutte le superfici. Ciò può essere effettuato con un panno
e/o pennello imbevuto d’alcool etilico denaturato. È inoltre importante
smontare e pulire, o sostituire, frequentemente ogni filtro installato sulla
cappa.
Questo apparecchio non deve essere usato da bambini o persone con
problemi psico-motori, senza assistenza. Questo apparecchio non è un
giocattolo.
Attenzione: l’aria evacuata non deve essere condotta in canali di scarico
di qualsiasi tipo. Inoltre, l’aria evacuata non deve essere scaricata in canali
che non siano predisposti per tale scopo.
The hood may be used as an exhaust or filter hood. Since these instructions
cover more than one type of hood within the same series, it may be that
reference is made to components that do not form part of the hood that you
are installing.
If evacuation is available (exhaust duct or air flue) we recommend using the
hood in the exhaust version to discharge all the kitchen vapours and odours
outdoors. Fittings can vary from country to country. We reserve the right
modify the product without any notice always with the aim of improvements
and in compliance with the relevant norms.
Exhaust version (Fig. 1)
The hood must be connected by the flange or the reduction (supplied as part
of the hood) to a duct to vent all the exhausted air outside the kitchen. The
flange is designed to use ducts with no appreciable performance loss. Over
horizontal areas, if any, the duct must be slanted about 10% upwards from
upstream to downstream.
Note — The efficiency of the exhaust hood decreases as the length of the
ducts and number of elbows increase. When using the exhaust version,
follow these rules: Do not connect the exhaust hood to chimneys, flues, and
air ducts serving the room.
Before venting into exhaust flues and ducts no longer in use, ask for the
approval of the person or agency responsible for the building. The evacu-
ated air must not be let into a warm air duct. For the evacuation of the
exhausted air please note official instructions.
Suggestions for using the hood in exhaust position
When an exhaust hood and a heat source requiring ambient air (e.g. gas,
oil, coal stoves, etc.) are used at the same time, attention is required because
the air necessary for combustion is exhausted from the room through the
hood and this creates depression. There is no such danger when the
maximum depression in the room is 0,04 mbar. In this condition no exhaust
gas from the heat source is piped. To assure this condition, make openings
in the room which cannot be closed (doors, windows, etc. are not sufficient)
and through which the air necessary for combustion can freely flow.
Note — All the exhaust ductwork in the apartment or house should be
studied. In case of doubts, get advice or authorisation from the person or
agency responsible for the building. When using gas burners, gas ovens,
etc. as well as when using the hood in the filter version, these precautions
are not necessary.
Filter version (Fig. 2)
This version is used when no exhaust duct to the outdoors is available. The
air is purified by an active vegetable carbon filter and recycled into the room.
Make sure the carbon odour filter is inserted.
The filter hood outlet flange must be connected to a duct, which passes
through the cabinet and discharges the filtered air.
Installation
Important: The cooker hood should not be operated until it is
completely mounted.
The hood must be mounted over the centre of the cooking area. The
minimum distances between the cooking area and the under part of the hood
is 650 mm. This hood is suitable to be use over a hob with 4 fireplaces.
Note — The distances, however, are subject to the safety rules in effect
in the various countries.
Note — Make sure the cabinet supports the weight of the hood.
Fastening only for ADF 601 W
Drill holes in the bottom and the out-let opening in the top of the cabinet using
the enclosed jig. Make sure the front edge of unit B matches the measure-
ment of panel A of the cabinet. (Fig. 3) From the inside of the hood insert eight
screws supplied with the hood. If the wall cupboard should be deeper than
the appliance, a spacer (with depth as requested) can be fitted with screws
on the lower part of the hood.
Fastening only for ADF 602 G - ADF 60 E
Cut the bottom and drill holes in the sides of the cabinet using the enclosed
template (Fig.3). Cut the out-let opening in the top of the cabinet using the
enclosed template. Insert the cooker hood into the cabinet until the two
retaining springs (Fig.3/A) are fixed into the previously drilled. From the
inside of the hood insert six screws (Fig.3/B) supplied with the hood. If the
sides of the cabinet are thicker than 16 mm and the cooker hood can not
be installed due to the plastic spacer (Fig.3/B), please take off the spacer
with aid of a tool. If the wall cupboard should be deeper than the appliance,
a spacer can be fitted with 2 screws into the 2 holes on the underside of the
hood.
Fix the spigot reduction (Fig.1) onto the cooker hood 150-125 mm (supplied)
and complete the exhaust ducting (not supplied) with diameter 150mm or
125 mm.
Electric connection
Make sure the supply voltage ratings correspond with those stated on the
appliance data plate.
Attention: If the appliance does not have a plug, when making a fixed
installation, a cut-off device must be used to assure omnipolar disconnection
of the mains. The cut-off distance of the contacts must be at least 3 mm.
If the appliance is provided with a supply cord and plug, the appliances must
be positioned so that the plug is accessible.
Attention: The manufacturers decline responsibility for problems caused by
failure to observe this rule.
For ADF 602 G - ADF 60 E
The wires in the supply cord are coloured as follows:
yellow/green = ground — blue = neutral (N) — brown = line (L)
Operating instructions
The hood should be switched on at least as soon as cooking is tarted. Before
using the cooker hood please ensure that all plastic films like on metal grease
filter is removed.
The hood has the following controls (Fig. 4):
1 - speed switch — 2 - light switch
The appliances is provided with microswitch, when the vapour flap is pulled
out, the light and motor turns on (if the light and motor switch is connected).
The hood turns off when the flap is closed please keep the chosen speed
stored.
Maintenance
NOTE: Prior to any maintenance, switch off and disconnect from electrical
supply.
1) Under normal cooking conditions the grease filter should be cleaned
every 10-15 days in hot water, to which a suitable detergent has been
added. For reasons of efficiency and safety regular cleaning is
advised. The grease filter may be subject to a small amount of
shrinkage initially.
2) The outer casing of the Cooker Hood should be cleaned with a damp
cloth.
3) The effective life of the carbon filter will naturally depend on the
frequency and type of cooking fumes to which it is subject. As general
guide we suggest that a replacement is fitted at least every 12 months.
4) Once a year, (more frequently with heavy usage), call a serviceman
to clean the fan and air ducts to prevent build-up of flammable fat
deposits.
Note: Vaporous and odours in the air are exhausted first through the grease
filter and then (if the hood is in filter version) through the odour filter. The
efficiency of the appliance depends on the condition of the filters. Clean the
outside of the hood with a sponge soaked with liquid neutral detergent or with
a cloth soaked with denatured ethyl alcohol. Do not use products containing
abrasives.
Grease filter
This absorbs vapour-suspended grease particles and protects the kitchen
and furniture from greasy residues. The filter should be washed every 10
to 15 days (in normal operating conditions). Dip the filter into a warm
degreaser solution.
Active carbon odour filter
Attention: The filter should only be used in filter hoods. The exhausted air
passes through the active carbon filter and is cleaned. This filter cannot be
washed and must be replaced depending on how often the hood is used
(about twice a year).
Cleaning or changing the grease filter (Fig.5)
Pull out the vapour flap (5/C), grab the opening tongue at the filter (5/D), and
take out the filter.
Only for ADF 601 W : remove the retaining springs (5/E and clean the
filter (5/F). Dip the filter into a warm degreaser solution do not wring the
filter; press it in a cloth to dry.
Only for ADF 602 G - ADF 60 E : Dip the filter into a degreaser solution
or put it in the dishwasher. Make sure not to damage the filter, which
is made of several layers of thin alloy, by hitting or crushing it. The
aluminium filter will may change colour, that will have no influence of the
efficiency of the filter, may it will improve it.
To reinstall it operates reversed.
Changing the active carbon odour filter (Fig.6)
Take off the grease filter as descripted mention above.
For changing the carbon filter it is sufficient to turn if counter clockwise.
As the filter is an optional, the exhausting version can be easily converted
by the user into filtering version, following the above mentioned modalities
of the instructions-booklet.
Changing the bulbs (Fig. 6/G)
To change the bulbs, it is sufficient to take off the lamp-cover (Fig.6/
G). Never use lamps with wattage higher than the one shown on the
label inside the hood.
Only for ADF 601 W : the bulbs must be only “olive”-type
Only for ADF 602 G - ADF 60 E : use only neon lamps
Safety rules
Do not do any flambé cooking underneath the hood.
When frying never leave the pan alone because the cooking oil could flare
up. Clean all the surfaces frequently to avoid danger of fire. To do so use
a cloth and or brush soaked in denatured ethyl alcohol. It is also important
to remove and clean or substitute frequently the filter installed in the hood.
This appliance is not intended for use by small children or infirm persons
without supervision. Young children should be supervised to ensure that
they do not play with the appliance.
Warning: Exhaust air must not be discharged into any chimney or flue that
may carry combustion products from other sources. In addition, exhaust
air must not be discharged into a wall cavity unless designed for the purpose.
Die Dunsthaube kann als Abluft- oder auch als Umlufthaube benutzt
werden. Diese Anleitung ist gültig für mehrere Produkte der gleichen Serie,
Sie können deshalb Beschreibungen finden die auf Ihr Modell nicht zutreffen.
Im Falle des Vorhandenseins eines Abzugsrohres oder Luftschachtes ist
es angebracht, die Haube in Abluftausführung zu benutzen, um die Dämpfe
und Kochgerüche nach Außen abzuleiten. Die Zubehörteile und die entspre-
chenden Ersatzeile dieser Haube können von Bestimmungsland zu Bestim-
mungsland unterschiedlich sein. Wir behalten uns vor ohne Vorankündi-
gung Verbesserungen an der Haube vorzunehmen, mit Abstimmung der
Prüfbehörden.
Abluftbetrieb (Abb. 1)
In diesem Fall ist es nötig, die Haube durch den Abluftstutzen oder dem
Reduzierstück (beiliegenden) mit dem Abzugsrohr zu verbinden, um die
abgesaugte Luft nach außen abzuleiten. Die besondere Ausführung des
Abluftstutzens erlaubt es wahlweise ohne Leistungsverlust. Bei eventuellen
horizontalen Strecken muß das Rohr eine Neigung von ca. 10% nach oben
von stromaufwärts nach stromabwärts haben.
Wichtiger Hinweis: Je kürzer das Abzugsrohr und je weniger Bögen, umso
besser die Wirkung der Dunsthaube. Bei Abluftbetrieb müssen folgende
Vorschriften beachtet werden: Für den Abluftanschluß niemals einen in
Betrieb befindlichen Rauch- oder Abgaskamin oder einen Belüftungs-
schacht für Heizräume verwenden. Bei Abführung der Abluft in nicht in
Betrieb befindliche Rauch- oder Abgaskamine ist es zweckmäßig, die
Zustimmung des zuständigen Schornsteinfegers einzuholen. Die abge-
saugte Luft darf nicht in einen Kanal, in dem Warmluft zirkuliert abgeleitet
werden. Bei Ableitung der Abluft sind die behördlichen Vorschriften zu
beachten.
Achtung bei Abluftbetrieb
Bei gleichzeitigem Betrieb einer Abluftdunstabzugshaube und einer raum-
luftabhängigen Feuerstätte (wie z.B. Gas, Öl oder kohlebetriebene
Heizgeräte, Durchlauferhitzer, Warmwasserbereiter) ist Vorsicht geboten,
da beim Absaugen der Luft durch die Dunstabzugshaube dem Aufstellraum
die Luft entnommen wird, die Feuerstätte zur Verbrennung benötigt. Ein
gefahrloser Betrieb ist möglich, wenn bei gleichzeitigem Betrieb von Haube
und raumluftabhängiger Feuerstätte im Aufstellraum der Feuerstätte ein
Unterdruck von höchstens 0,04 mbar erreicht wird und damit ein Rück-
saugen der Feuerstättenabgase vermieden wird. Dies kann erreicht wer-
den, wenn durch nicht verschließbare Öffnungen z.B. in Türen, Fenstern-
, Zuluft- und Abluftmauerkästen oder Ähnliches die Verbrennungsluft
nachströmen kann.
Anmerkung: Bei der Beurteilung muß immer der gesamte Lüftungsverbund
der Wohnung mit beachtet werden. Bei Betrieb von Kochgeräten z.B.
Kochmulde und Gasherd wird diese Regel nicht angewendet. Im Zweifelsfall
muß der zuständige Schornsteinfegermeister zu Rate gezogen werden.
Wenn die Dunstabzugshaube im Umluftbetrieb - mit Aktivkohlefilter -
verwendet wird, ist der Betrieb ohne Einschränkung möglich.
Umluftbetrieb (Abb. 2)
Bei nicht vorhandener Abzugsmöglichkeit wird die Umluftmethode ange-
wandt, wo die Luft durch einen Aktivkohlefilter angesaugt und gereinigt dem
Raum wieder zugeführt wird. Bitte vergewissern Sie sich, daß der Kohlefilter
(Geruchsfilter) eingesetzt ist.
Im Falle der Umlufthaube muß der Abzugsflansch an ein Rohr geschlossen
werden, das durch den Hängeschrank geht und dabei die gefilterte Luft
wieder aus demselben herausführt.
Montage
Wichtig: Das Gerät darf erst nach dem Einbau in Betrieb nehmen.
Die Dunsthaube muß stets über der Mitte der Kochstelle angebracht
werden. Der Mindestabstand zwischen Kochstelle und Dunsthaube muß
650 mm betragen. Die Dunstabzugshaube ist geeignet für eine Montage
über ein Kochstelle mit 4 Kochfeldern.
Bitte beachten Sie jedoch, daß diese Entfernung je nach den in den
verschiedenen Ländern gültigen Sicherheitsbestimmungen variiert.
Befestigung für ADF 601 W
Bitte vergewissern Sie sich, daß das Möbel das Gewicht der Haube hält.
Mittels beigefügter Skizze die Löcher und die Ausschnitte auf dem Unter-
und Oberboden des Hängeschrankes (Fig.3) anbringen. Hierbei darauf
achten, daß der vordere Rand der Haube (B) nicht aus den Massen des
Teiles A des Hängeschrankes tritt. Von innen der Haube die 8 beigelegten
Schrauben eindrehen.
Falls das Hängemöbel tiefer als das Gerät sein sollte, besteht die Möglichkeit
eine Abstandsleiste anzubringen, indem man diese mit Schrauben am
unteren Teil der Haube befestigt.
Befestigung für ADF 602 G - ADF 60 E
Bitte vergewissern Sie sich, daß das Möbel das Gewicht der Haube hält.
Mittels beigefügter Skizze die Ausschnitte am Unter- und Oberboden und
die Bohrungen an den Seiten des Hängeschrankes (Fig.3) ausführen. Die
Haube in den Bodenausschnitt einführen und sie soweit noch oben zuschie-
ben bis die Haltefedern (Abb.3/A) in den Bohrungen einrasten. Von innen
der Haube durch die Distanzstücke (Abb.3/B) die 6 beigelegten Schrauben
eindrehen. Sollten die Seiten des Hängeschrankes stärker sein als 16mm
schlägt die Haube an die Distanzstücke an und läßt sich nicht einbauen. In
diesem Fall müssen die Distanzstücke entfernt werden.
Falls der Hängeschrank tiefer als das Gerät sein sollte, besteht die
Möglichkeit eine Abstandsleiste anzubringen, indem man diese mit Schrau-
ben am unteren Teil der Haube befestigt.
Elektrischeranschluß
Bitte kontrollieren Sie, daß die Spannung Ihres Hausanschlusses mit dem
auf dem Typenschild angegebenen übereinstimmt.
Achtung: Wenn das Gerät keinen Stecker besitzt, muß in der Installation
vom Netz eine allpolig Trennvorrichtung mit Kontaktweite von mindestens
3 mm vorgesehen werden. Ist das Gerät mit einem Netzstecker versehen,
so muß nach Installation der Haube die Steckverbindung zugänglich sein.
Achtung nur für ADF 602 G - ADF 60 E:
Das Netzanschlußkabel muß wie folgt angeschlossen werden:
Grün/Gelb = Erde - Blau = Neutral - Braun = Spannung
Gebrauchsanleitungen
Die Haube muß spätestens bei Koch- bzw. Bratbeginn eingeschaltet
werden. Bevor die Dunsthaube in Betrieb genommen wird müssen alle
Schutzfolien wie zum Beispiel auf den Aluminiumfettfilter oder sonstigen
Flächen entfernt werden. Die Haube besitzt folgende Schalter (Abb. 4):
A - Stufenschalter
B – Lichtschalter
Die Hauben schaltet den Motor und das Licht ein (bei eingeschalteten
Schaltern), wenn der Schwadenschirm ausgezogen wird. Wird der
Schwadenschirm geschlossen, schaltet die Haube aus.
Wartung
Bitte bei Reinigung oder irgendwelchen Wartungsarbeiten das Gerät durch
Herausziehen des Netzsteckers stromlos machen. Die mit Dämpfen und
Kochgerüchen angefüllte Luft wird erst durch den Fettfilter gesaugt und
dann (falls die Haube in Umluft funktioniert) durch den Aktivkohlefilter
(Geruchsfilter). Die Wirksamkeit des Gerätes hängt von dem Zustand der
Filter ab.
Fettfilter
Der Fettfilter nimmt die Fettpartikeln auf, die sich ohne ihn an den Wänden
und Küchenmöbeln absetzen würden. Der Filter wird in mehr oder weniger
häufigen Abständen - je nach Gebrauch - auswaschbar. Dies sollte aber
mindestens alle 10-15 Tage in lauwarmen Seifenwasser vorgenommen
werden.
Aktivkohlefilter (Geruchsfilter)
Dieser Filter wird nur bei Umluftbetrieb gebraucht. Die angesaugte Luft wird
durch den Aktivkohlefilter von den Kochgerüchen befreit. Dieser Filter ist
nicht auswaschbar. Er muß je nach Häufigkeit des Gebrauchs ca. zweimal
jährlich ersetzt werden.
Auswechseln des Fettfilters (Abb. 5)
Den Schwadenschirm (5/C) herausziehen. Den Griff (5/D) leicht nach
innen drücken, den Filter (5/D) abnehmen,
Nur für ADF 601 W : die Befestigungsbügel (5/E) herausnehmen und
den Filter (5/F) herausziehen. Der Filter aus Acrylfaser ist in mehr oder
weniger häufigen Abständen - je nach Gebrauch – auswaschbar, den
Filter nicht auswringen, sondern mit einem Tuch abtrocknen.
Nur für ADF 602 G - ADF 60 E : Der Aluminiumfilter sollte im
Geschirrspüler gereinigt werden. Bitte achten Sie hierbei darauf, ihn
nicht zu biegen oder zu drücken, da er aus mehreren dünnen
Metallschichten besteht. Dabei kann eine Verfärbung eintreten, die
aber keinen negativen Einfluß auf die Wirksamkeit des Filters hat,
sondern eventuell die Wirksamkeit verbessert.
Den Filter in umgekehrter Reihenfolge wieder zusammenbauen.
Auswechseln des Kohlefilters (Abb. 6)
Um den Aktivkohlefilter zu wechseln genügt es ihn gegen den Uhrzeigersinn
zudrehen. Die Äußere Reinigung der Haube erfolgt mit einem feuchten
Schwamm und neutralem, flüssigen Reinigungsmittel oder einem in Äthyl-
Alkohol getränkten Tuch.
Auswechseln der Lampen (Abb. 6/G)
Um die Lampen auszuwechseln genügt es, die Lampenabdeckung (Abb.6/
G) zu entfernen. Sollte die Beleuchtung bei Betätigung des Lichtschalters
nicht funktionieren, kontrollieren Sie bitte, ob die Lampen gut einschraubt
sind, bevor Sie den Kundendienst anrufen.
Nur für ADF 601 W : nur Glühlampen „Kerzen“ Typ verwendet werden
sollten.
Nur für ADF 602 G - ADF 60 E : nur Neonlampen benutzen Benutzen
nie Lampen mit einer höheren Leistung als die auf dem Typenschild
angegeben.
Sicherheitsbestimmungen
Flambieren unter der Dunsthaube ist verboten. Beim Fritieren muß der
Vorgang während der gesamten Betriebsdauer beaufsichtigt werden, da
sich das Öl im Fritiergerät durch Überhitzen selbst entzünden kann.
Gebrauchtes Öl entzündet sich schnell und kann leicht einen Brand
verursachen. Um Brandgefahr zu vermeiden ist es nötig, die Oberflächen
oft zu reinigen. Dies kann mit einem in Äthyl-Alkohol getränkten Tuch oder
Pinsel vorgenommen werden. Außerdem ist es wichtig, regelmäßig jeden
in der Haube befindlichen Filter zu säubern oder zu ersetzen.
Dieses Gerät ist darf nicht von Kindern oder gebrechlichen Personen
ohne Aufsicht benutzt werden. Dieses Gerät ist kein Spielzeug.
Achtung: Abgesaugte Luft darf nicht in Abluftkanäle geleitet werden, die
irgendwelche Verbrennungsabluft befördern. Weiterhin, Abluft darf nicht in
Mauerschächte abgeführt werden die nicht dafür vorgesehen sind.
  • Page 1 1
  • Page 2 2
  • Page 3 3
  • Page 4 4
  • Page 5 5
  • Page 6 6
  • Page 7 7
  • Page 8 8

Alno ADF 60 E User manual

Category
Cooker hoods
Type
User manual
This manual is also suitable for

Alno ADF 60 E is a versatile kitchen appliance that can be used as either an extractor hood or a filter hood. It comes with a variety of features to make cooking easier and more efficient.

As an extractor hood, the Alno ADF 60 E can be connected to an exhaust pipe to remove smoke, odors, and grease from the kitchen. This can help to improve air quality and make the kitchen more comfortable.

As a filter hood, the Alno ADF 60 E uses a charcoal filter to remove odors from the air. This can be useful in kitchens that do not have an exhaust pipe or in situations where it is not possible to install one.

Ask a question and I''ll find the answer in the document

Finding information in a document is now easier with AI

in other languages