Page is loading ...

Limited Warranty: This product’s limited warranty can be
found at www.fedsig.com/SSG-Warranty
SAFETY MESSAGES TO INSTALLERS AND USERS :
Products should be installed by a licensed electrician and
follow all safety instructions. Failure to do so may result
in property damage, serious injury, or death.
• Read and understand instructions before installing
or operating equipment.
• To avoid electrical shock hazards, do not connect
wires when power is applied.
• To be an effective warning device, this product
produces bright light that could be hazardous to
eyesight. The possibility exists that rapid ashing
lights could induce photosensitive epilepsy. Do not
stare directly at the light.
OVERVIEW - The model 121ALED rotating LED warning
light is designed for mounting on a at (horizontal or
vertical) surface or on a 1/2" NPT threaded pipe. The unit
is available in 24 VDC.
Certications and Ratings
• UL and cUL Listed
• Type 4X, IP66 enclosure. Indoor/Outdoor Use
• IP69K Compliant
• Model 121ALED is NSF Certied (dome-up) for
Splash Zones and Non-food Zones to NSF/ANSI 2:
Food Equipment
• Electrical ratings: 024VDC, 0.3A
• Certied operating temperature: -40°F to 150°F
(-40°C to 66°C)
Installation
Unpacking the Device: After unpacking the device,
examine it for damage and verify the parts. If a part is
missing or damaged, do not attempt to install it; contact
Federal Signal Customer Support.
Mounting the Device
The unit comes standard to mount on a at (horizontal
or vertical) surface or a 1/2" NPT pipe. Wall or corner
mounting accessories are sold separately.
Model 121ALED
Vitalite® LED Rotating Light
Pipe Mounting: On a 1/2" NPT Pipe, feed the wires
through the pipe and turn clockwise to tighten. The
recommended tightening torque is 5-ft-lb (6.8 N-m).
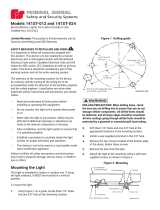
Figure 1 Pipe Mounting
5.12"/ 130 mm
6.26"/ 159 mm
1/2" NPT
Pipe Mount
LED Lamp
Elliptical Dome
(12" Curvature
Radius)
Screw
in base
Surface/Panel Mounting: Using the provided gasket as a
template, mark three mounting holes and a center hole
for wiring. Drill or punch 3/16" (4.8 mm) diameter holes
for mounting and a 1" (25.4 mm) hole for wiring. Set the
base on the gasket, feed the wires through the center, and
attach the unit to the mounting surface using the provided
#8 tapping screws from the underside.
Wall/Corner Mounting: Wall (Model LSWB) and corner
(Model LCMB2) brackets are sold separately. Mounting
bracket accessories are not NSF Certied.
NOTE: Model LCMB2 is Type 3R rated. If installing in
combination with a 4X device, the unit is Type 3R rated.
When Type 4X is required, pair with Model LSWB.
Figure 2 Wall/Corner Mounting
WARNING -SHOCK HAZARD: To avoid electrical shock,
do not connect wires when circuits are energized. Use
18AWG eld wiring or larger.
24VDC Models: Connect the positive (+) power source
lead to the red wire and connect the negative (-) power
source lead to the black wire.
25500635 Rev A2 1123

2Federal Signal signaling.fedsig.com
Testing and Operating
After installation, test the system to verify that each
signal operates, and establish a program for periodic
testing of the device. Provide copy of these instructions
to all operating personnel.
Replacing the LED Lamp
SHOCK HAZARD – To avoid electric shock, disconnect
the power and allow the lamp to cool.
To replace the lamp:
1. Remove the set screw located at the bottom of the
dome.
2. Grasp the top of the dome and push it down while
turning the dome counterclockwise.
3. Remove the dome and ensure that the gasket
between the dome and base is secured.
4. Grasp the lamp near the base and gently push
toward the socket while turning counterclockwise.
5. Insert the new lamp while gently pushing it toward
the socket and turning clockwise.
6. Before replacing the dome, ensure that the gasket
is properly seated on the housing base.
7. Place the dome over the base and align the
recesses inside the dome lip with the four pins
on the base. Push down on the dome and turn
clockwise until it locks in place (approximately
3/4").
8. Replace the set screw on the bottom of the dome.
9. Test the light for proper operation.
Maintenance and Service
Technical Assistance: Contact our Technical Support
Team at +1 708-587-3587 or signalsupport@fedsig.com.
Repair Service: A return authorization is required. Contact
your Authorized Distributor or Federal Signal Customer
Support. Defective products under warranty will be
repaired or replaced at Federal Signal’s discretion.
Product Returns: Returns require authorization from
Federal Signal. Contact your Authorized Distributor for
more information on our return policy or to request a
return.
Ordering Replacement Parts
Consult the product datasheet online for an updated list
of replacement parts. If your product requires a part that
is not available for purchase, your unit must be repaired
or replaced.
2645 Federal Signal Drive, University Park, Illinois 60484
Additional translations available at signaling.fedsig.com
Traducciones adicionales disponibles en signaling.fedsig.com
Customer Support 1-800-344-4634+1-708-534-4756, iordersup@fedsig.com
Technical Support 1-800-755-7621+1-708-587-3587, signalsupport@fedsig.com
signaling.fedsig.com
1/2


