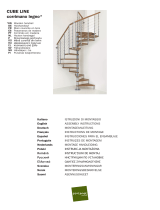
Page is loading ...

Italiano ISTRUZIONI DI MONTAGGIO
English ASSEMBLY INSTRUCTIONS
Deutsch MONTAGEANLEITUNG
Français INSTRUCTIONS DE MONTAGE
Español INSTRUCCIONES PARA EL ENSAMBLAJE
Português INSTRUÇES DE MONTAGEM
Nederlands MONTAGE HANDLEIDING
Polski
Česky
Magyar ÖSSZESZERELÉSI ÚTMUTATÓ
Română
Русский
Hrvatski
Srpski
Slovenščina
Dansk MONTERINGSINSTRUKTIONER
Svenska MONTERINGSINSTRUKTIONER
Suomi ASENNUSOHJEET
Eesti keel MONTAAŽIJUHEND

6 - ck
English
Before starting the assembly process, unpack all components of the staircase. Lay them out on a large surface and
check the quantity of all the pieces, by consulting the table (TAB.1: A = Code, B = Quantity).
Inside the staircase box you will also nd a DVD which we suggest watching before proceeding to assemble.
For the USA only: call the customer support line at 1-888 STAIRKT, should you have any case of need.
Preliminary Assembly
1. Screw the parts D32 and D33 into the treads (L02) (g. 2).
2. Carefully measure the oor-to-oor height and determine the required number of spacers (D03) (TAB.2).
3. Assemble the spacers (D14, D03, D02) together in one piece. Do the same for the spacers (D04, D03, D02)
(g. 1).
4. Assemble the parts C63, C65, C66 into the baluster (C03) (g. 3).
5. Assemble the parts B72, B73, B74, B78 into the landing E03, without tightening (g. 7).
6. Assemble the base G03, B17 and B46 (g. 1).
Assembly
7. Determine and mark on the oor the centre of the hole, then position the base (G03+B17+B46) (g. 4).
8. Drill with 14 mm (
35
/
64
”
) drill bit and x the base (G03+B17+B46) into the oor by means of the parts B13 (g. 1).
9. Screw the pole (G02) into the base (G03+B17+B46) (g. 1).
10. Insert the spacers (D14+D03+D02) (g. 5).
11. Insert the base plate cover (D05) (g. 5).
12. Insert the rst tread (L02) into the pole (G02). Then continue with the assembly, by adding alternatively one
spacer (D04+D03+D02) and one tread (L02). At this stage we suggest to position the treads alternately one to
the right and one to the left, in order to distribute the weight in a balanced way (g. 5).
13. When you reach the end of the pole (G02), screw the part B47 on it, then add the second pole (G02) and
continue with the stair assembly (g. 5).
14. When you reach the end of the pole (G02), screw on it the part B46 and the part G01. (Screw the part G01, until
its upper end sticks out approximately 15 cm (5
29
/
32
”
) from the stair height (g. 6). Continue adding the treads,
by using the part D01 inserted into the spacers (D04+D03+D02).
15. Finally add the stair landing (E03). Fasten the parts B05, B04 and screw the part B03 sufciently (g. 1) but
keeping in mind that the treads still have to be rotated to their nal position and that the points A and B of the
landing (E03) have touch the oor (g. 8).
Fitting of the Landing
16. Screw the part B71 into the element B74, making it run till the end. Insert the parts B75, B76, B75 - in this
order – and then again the element B71, without tightening too hard (g. 7).
17. Approach the part B76 to the ceiling. Determine the position, then drill with 14 mm (
35
/
64
”
) drill bit and x
completely by using the part B58 (g. 7).
18. Screw the lower part B71 till the points A, B and C touch the oor (g. 8).
19. Block the upper part B71 on the part B76 (g. 7).
20. Finally, block the part B73 (g. 7).
Assembly of the Railing
21. Spread-out the treads (L02) fan-like, after having chosen the rotation direction. The stair is now ready to use.
22. Starting from the landing (E03), insert the longer railing balusters (C03 - H 1190 mm - 46
7
/
8
”
), that build the
connection between the treads. Face them with the part C63 showing the part with the holes turned upwards
(g. 10). Tighten only the part B02 of the lower tread (g. 2).
23. Check very carefully the vertical position of the inserted balusters C03. This control is very important for insuring
the best results.
24. Tighten the part B03 completely (g. 10).
25. Tighten the part B02 of the upper treadcompletely (g. 2).
26. Check once more the vertical position of the railing balusters (C03) and, if necessary, correct it, by repeating the

7 - ck
previous operations.
27. Set the rst baluster (C03 - H 1190 mm - 46
7
/
8
”
) together with the reinforcing part (F07). Cut one long baluster
(C03 - H 1190 mm - 46
7
/
8
”
) to obtain the same size as all others you assembled previously.
28. Fix into the oor in relation to the rst baluster (C03), the part F01, by drilling with 8 mm (
5
/
16
”
) diameter bit. Use
the parts B11, B12, B83 and B02 (g. 1).
29. Find the handrail piece marked with letter “M” (A22) and the one with letter “R” (A23) which will be used for the
railing of the landing (E03) (g. 11).
30. Start to model the handrail pieces (A22) marked with “M”, in order to give it the handrial staircase’s shape most
alike (g. 1).
31. Beginning from the baluster (C03) on the landing (E03), start to x the handrail (A22),that you have already
slightly bent in the previous operation. Use the parts C64.
32. Connect all other handrail pieces (A22), by screwing, glueing and shaping them. Use the parts B33, D72 and the
glue (X01).
33. When you reach the rst baluster (C03) at the bottom of the stair, cut the excess piece of the handrail with a
hacksaw.
34. Complete the handrail (A22) by assembling the part A37. Use the parts C64 and the glue (X01) (g. 1).
35. Fit all remaining railing balusters into the treads (L02), tighten the part B02 and x to the handrail (A22), paying
attention to the vertical position (for the stairs with a diameter larger than 140 cm (55
1
/
8
”
), we suggest that you
rst assemble the shorter balusters) (g. 12).
36. Check again the regular shape of the handrail (A22) and, if necessary, correct it with a rubber hammer.
37. Complete the railing assembly by tting the parts B82 into the lower part of the balusters (C03) (g. 1).
Assembly of the Balustrade
38. Screw the baluster (C04) into the part G01 that sticks out from the landing (E03) (g. 10).
39. Assemble the parts F01 into the holes of the landing (E03), using the parts B07, B06, B23 (g. 1).
40. Position the shorter balusters (H. 935 mm - 36
13
/
16
”
) and tighten the part B02 (g. 1).
41. Fix the part A36 into the baluster (C04), by using the part B02 (g. 1).
42. Fix the handrail (A23) marked with the letter “R”, using the parts C64 (g. 1).
43. In case there were walls around the stair and depending on their position, it could be necessary to set one or
two more balusters (H. 935 mm - 36
13
/
16
”
) (g. 12).
44. In that case it is necessary to consider either the distance between all other balusters, or otherwise the
distance from the wall. For the xing it is suggested to drill the landing (E03) with 9 mm (
23
/
64
”
) diameter bit and
to use the xing parts F01, B02, B07, B06, B23. Whereas for the xing into the oor it is suggested to drill with
the 12 mm (
15
/
32
”
) drill bit and to use the parts F01, B02, B87 (g. 13).
Final Assembly
45. In order to tighten the staircase at the intermediate points, you must x into the wall the parts F09 and connect
them to the balusters (C03) by using the part F08. Drill the wall with a drill bit 8 and use the parts C50, C49,
B11, B12 (g. 14).
46. Stick the panels (H01) to the treads (L02) using the part B96 (g. 1).
47. Stick the panels (H03, H04), to the landing (E03) using the part B96 (g. 1).
After you have nished assembling the staircase,
please visit our website and send us your suggestions: www.arke.ws

58 - ck
dati identificativi del prodotto
denominazione commerciale: CK
tipologia: scala a chiocciola a pianta tonda
materiali impiegati
STRUTTURA
descrizione
composta da distanziali (1) in metallo (saldati al
gradino) e spessori (2) in plastica impilati e compressi
sul palo (3) centrale modulare
materiali
distanziali: Fe 370
spessori: materiale plastico nylon
palo: Fe 370 zincato
finitura
distanziali: verniciatura a forno con polveri epossidiche
GRADINI
descrizione
gradini (4) in metallo circolari o a ventaglio impilati sul
palo (3) centrale corredati da un pannello (5) antiscivolo
ed antiusura
materiali
gradini: lamiera Fe 370 spessore 25/10
pannello antiscivolo: polipropilene
finitura
gradini: verniciatura a forno con polveri epossidiche
RINGHIERA
descrizione
composta da colonnine (6) verticali in metallo ssate ai
gradini (4) e da un corrimano (7) di PVC
materiali
colonnine: Fe 370
corrimano: PVC con anima in alluminio
ssaggi (8)
: nylon
finitura
colonnine: verniciatura a forno con polveri epossidiche
PULIZIA
pulire con panno morbido inumidito in acqua, privo
di qualsiasi prodotto contenente solventi o materiali
abrasivi.
MANUTENZIONE
dopo circa 12 mesi dalla data di installazione,
controllare il serraggio della viteria dei vari componenti.
la manutenzione straordinaria deve essere eseguita a
regola d'arte.
PRECAUZIONI D’USO
evitare usi impropri e non consoni al prodotto. eventuali
manomissioni o installazioni non rispondenti alle
istruzioni del produttore possono inciare le conformità
prestabilite del prodotto.
product details
trade name: CK
type: spiral round staircase
used materials
STRUCTURE
description
composed of spacers (1) in metal (welded to the tread)
and spacers (2) in plastic stacked and packed on the
central modular pole (3)
materials
spacers:
Fe 370
plastic spacers: nylon
pole: Fe 370 galvanized
finishing
spacers: oven varnishing with epoxy powders
TREADS
description
treads (4) in metal circular or fan-shaped stacked
on the central pole (3) equipped by an antiskid and
antiwear panel (5)
materials
treads: plate Fe 370 thickness 25/10
antiskid panel: polyropylene
finishing
treads: oven varnishing with epoxy powders
RAILING
description
composed of vertical metal balusters (6) xed to the
treads (4) and by a PVC handrail (7)
materials
balusters: Fe 370
handrail: PVC with aluminium core
xings (8): nylon
finishing
balusters: oven varnishing with epoxy powders
CLEANING
clean with a soft wet cloth, without any product
containing solvents or abrasive materials.
MAINTENANCE
about 12 months after the installation date, check the
tightening of bolts on the various components. all non-
routine maintenance procedures must be carried out in
a strictly professional manner.
USE PRECAUTION
avoid any improper use that is not in accordance
with the product. possible violations or installations
which don’t comply with the providers instructions can
invalidate the agreed product conformities.
IT) EN)

arkè by Fontanot
Albini & Fontanot S.p.A.
Via P. Paolo Pasolini, 6
47853 Cerasolo Ausa
Rimini, Italy
tel. +39.0541.90.61.11
fax +39.0541.90.61.24
www.arke.ws
cod. 065191000
CK
D.U.M
12/2013
/


