Page is loading ...

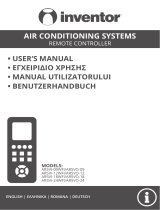
F567311
Operating Instructions
Air Conditioner
Indoor Unit Outdoor Unit
CS-RE9JKE-1 CU-RE9JKE-1
CS-RE12JKE-1 CU-RE12JKE-1
CS-RE15JKE-1 CU-RE15JKE-1
QUICK GUIDEQUICK GUIDE
GUIDE RAPIDEGUIDE RAPIDE
GUÍA RÁPIDAGUÍA RÁPIDA
GUIDA RAPIDAGUIDA RAPIDA
GUΙA RÁPIDOGUΙA RÁPIDO
© Panasonic Home Appliances Air-Conditioning
(Guangzhou) Co., Ltd. 2009. Unauthorized
copying and distribution is a violation of law.
ENGLISH 2 ~ 7
Before operating the unit, read these operating instructions
thoroughly and keep them for future reference.
FRANÇAIS 8 ~ 13
Avant d’utiliser l’appareil, lisez ce mode d’emploi dans son
intégralité et conservez-le pour toute référence ultérieure.
ESPAÑOL 14 ~ 19
Antes de utilizar la unidad, sírvase leer atentamente estas
instrucciones de funcionamiento y conservarlas como futuro
elemento de consulta.
ITALIANO 20 ~ 25
Prima di utilizzare l’unità si prega di leggere attentamente le
istruzioni e di conservare questo opuscolo per potervi fare
riferimento in futuro.
PORTUGUÊS 26 ~ 31
Antes de ligar a unidade, leia cuidadosamente este manual
de utilização e guarde-o para futura referência.
БЪЛГАРСКИ 32 ~ 37
Преди да задействате климатика, прочетете внимателно
инструкциите за употреба и ги запазете за бъдещи справки.
EΛΛΗΝΙΚΆ 38 ~ 43
Προτού θέσετε τη μονάδα σε λειτουργία, διαβάστε
προσεκτικά αυτές τις οδηγίες χρήσης και φυλάξτε τις για
μελλοντική αναφορά.
DEUTSCH 44 ~ 49
Bevor Sie das Gerät in Betrieb nehmen, lesen Sie bitte
diese Bedienungsanleitung aufmerksam durch und
bewahren Sie sie für die künftige Verwendung auf.
NEDERLANDS 50 ~ 55
Lees voor u het apparaat gebruikt deze gebruiksinstructies
grondig en bewaar ze voor toekomstig gebruik.
БЪРЗ СПРАВОЧНИКБЪРЗ СПРАВОЧНИК
ΣΥΝΤΟΜΟΣ ΟΔΗΓΟΣΣΥΝΤΟΜΟΣ ΟΔΗΓΟΣ
KURZANLEITUNGKURZANLEITUNG
SNELLE GIDSSNELLE GIDS
F567311 Book.indb 1F567311 Book.indb 1 2010-02-05 3:32:03.MD2010-02-05 3:32:03.MD

2
SAFETY PRECAUTIONS
To prevent personal injury, injury to others, or property damage, please
comply the following.
Incorrect operation due to failure to follow instructions may cause harm or
damage, the seriousness of which is classified as below:
WARNINGWARNING
This sign warns of death or serious injury.
CAUTIONCAUTION
This sign warns of injury or damage to
property.
The instructions to be followed are classified by the following symbols:
This symbol denotes an action that is
PROHIBITED.
These symbols denote an actions that
is COMPULSORY.
WARNINGWARNING
INDOOR UNIT AND OUTDOOR UNIT
This appliance is not intended for use by persons (including
children) with reduced physical, sensory or mental
capabilities, or lack of experience and knowledge, unless
they have been given supervision or instruction concerning
use of the appliance by a person responsible for their safety.
Children should be supervised to ensure that they do not
play with the appliance.
Please consult authorized dealer or specialist to repair,
install, remove and reinstall the unit. Improper installation
and handling will cause leakage, electric shock or fire.
Do not install the unit in a potentially explosive or flammable
atmosphere. Failure to do so could result in fire accident.
Do not insert your fingers or other objects into the
air conditioner indoor or outdoor unit, rotating parts
may cause injury.
Do not touch the outdoor unit during lightning, it may cause
electric shock.
REMOTE CONTROL
Do not allow infants and small children to play with the
remote control to prevent them from accidentally swallowing
the batteries.
Thank you for purchasing
Panasonic Air Conditioner
TABLE OF CONTENTSTABLE OF CONTENTS
SAFETY PRECAUTIONS
2 ~ 3
REMOTE CONTROL
4~5
INDOOR UNIT
6
TROUBLESHOOTING
7
INFORMATION
56 ~ 61
PRODUCT SPECIFICATION
62
QUICK GUIDE
BACK COVER
NOTENOTE
The illustrations in this manual are for
explanation purposes only and may
differ from the actual unit. It is subjected
to change without notice for future
improvement.
F567311 Book.indb 2F567311 Book.indb 2 2010-02-05 3:33:13.MD2010-02-05 3:33:13.MD

3
ENGLISH
CAUTIONCAUTION
INDOOR UNIT AND OUTDOOR UNIT
Do not wash the indoor unit with water,
benzene, thinner or scouring powder.
Do not use for other purpose such as
preservation of food.
Do not use any combustible equipment in front
of the airflow outlet to avoid propagate fire.
Do not expose directly to cold air for a long period.
Do not sit or step on the unit, you
may fall down accidentally.
Do not touch the sharp aluminium fin,
sharp parts may cause injury.
Do not switch ON the indoor when waxing the
floor. After waxing, aerate the room properly
before operating the unit.
Do not install the unit in oily and smoky areas.
Ensure drainage pipe is connected properly.
Otherwise, leakage may occur.
Aerate the room regularly.
After long period of use, make sure the
installation rack is not deteriorate to prevent the
unit falls down.
REMOTE CONTROL
Do not use rechargeable (Ni-Cd) batteries.
It may damage the remote control.
Remove the batteries if the unit is not going to
be used for a long period of time.
New batteries of the same type must be
inserted following the polarity stated to prevent
malfunction of the remote control.
WARNINGWARNING
POWER SUPPLY
Do not use modified cord,
joint cord, extension cord or
unspecified cord to prevent
overheat and fire.
Do not share the same power outlet with other
equipment to prevent overheat and fire.
Do not operate with wet hands to prevent electric
shock.
If the supply cord is damage, it must be replaced
by the manufacturer, its service agent or similarly
qualified persons in order to avoid a hazard.
Strongly recommended to be installed with Earth
Leakage Circuit Breaker (ELCB) or Residual
Current Device (RCD) to prevent electric shock
or fire.
This equipment must be earthed to prevent
electrical shock or fire.
In case of emergency or abnormal conditions
(burnt smell, etc), turn off the power supply, and
please consult authorized dealer.
Prevent electric shock by switch off the power
supply when:
- Before cleaning or servicing.
- Extended non-use.
- Abnormally strong lightning activity.
OPERATION CONDITIONOPERATION CONDITION
Use this air conditioner under the following temperature range
Temperature (°C)
Indoor Outdoor
*DBT *WBT *DBT *WBT
COOLING
Maximum 32 23 43 26
Minimum 16 11 16 11
HEATING
Maximum 30 - 24 18
Minimum 16 - -5 -6
NOTICE: • This model is not suitable for 24 hours non-
stopping operation in heating mode below -5°C. When the
outdoor temperature is below -5°C and you use this model
out of above conditions, the outdoor unit might be frozen up
and stop operation for protection control.
* DBT: Dry bulb temperature
* WBT: Wet bulb temperature
Air inletAir inlet
Air OutletAir Outlet
Air OutletAir Outlet
Air inletAir inlet
Air inletAir inlet
Indoor
Unit
Power
Supply
Remote
Control
Outdoor
Unit
F567311 Book.indb 3F567311 Book.indb 3 2010-02-05 3:33:23.MD2010-02-05 3:33:23.MD

4
REMOTE CONTROL
(GREEN)
(ORANGE)
(GREEN)
(RED)
SELECTSELECT
CHECKCHECK
ERRORERROR RESETRESET RESETRESET
SET/CANCELSET/CANCEL
hrhr
DELAYDELAY
hrhr
DELAYDELAY
OFF
ON
ON
OFF
AUTO
HEAT
COOL
DRY
A
B
FAN
SPEED
SWING
AIRAUTOAUTO
POWERFULPOWERFUL
POWERFUL / QUIETPOWERFUL / QUIET
AUTOQUIETAUTOQUIET
OFF
SELECTSELECT
CHECKCHECK
ERRORERRORRESETRESET
RESETRESET
SET/CANCELSET/CANCEL
hrhr
DELAYDELAY
hrhr
DELAYDELAY
OFF
ON
ON
OFF
AUTO
HEAT
COOL
DRY
AB
FAN
SPEED
SWING
AIR
AUTOAUTO
POWERFULPOWERFUL
POWERFUL / QUIETPOWERFUL / QUIET
AUTOQUIETAUTOQUIET
OFF
Press the remote control’s button
1
TO TURN ON OR OFF THE UNIT
• Please be aware of the OFF indication on the remote
control display to prevent the unit from starting/stopping
improperly.
2
TO SET TEMPERATURE
• For heat, cool and dry modes, the range of temperature
for selection is 16°C ~ 30°C.
• Operating the unit within the recommended temperature
could induce energy saving.
HEAT mode : 20°C ~ 24°C.
COOL mode : 26°C ~ 28°C.
DRY mode : 1°C ~ 2°C lower than room temperature.
3
TO SELECT OPERATION MODE
AUTO mode - For your convenience
• During operation mode selection the power indicator
blinks.
• Unit selects operation mode every 10 minutes according
to temperature setting and room temperature.
HEAT mode - To enjoy warm air
• In heat mode, it may take a while for the unit to warm up.
The POWER indicator blinks during preheating.
COOL mode - To enjoy cool air
• Use curtains to screen off sunlight and outdoor heat to
reduce power consumption during cool mode.
DRY mode - To dehumidify the environment
• Unit operates at low fan speed to give a gentle cooling
operation.
Maximum distances: 8m
1
8
Remote Control display
4
TO SELECT FAN SPEED (5 OPTIONS)
FAN
S
PEED
• For AUTO, the indoor fan speed is automatically adjusted
according to the operation mode.
5
TO ADJUST AIRFLOW DIRECTION
(5 OPTIONS)
AIR SWING
• Keeps the room ventilated.
• In COOL/DRY mode, if AUTO is set, the louver swing up/
down automatically.
• In HEAT mode, if AUTO is set, the horizontal louver fix at
predetermined position.
6
TO SWITCH AMONG POWERFUL, QUIET AND
NORMAL OPERATION MODE
POWERFUL: TO ACHIEVE TEMPERATURE QUICKLY
• This setting enables the desired set temperature to be
reached quickly.
QUIET: TO ENJOY QUIET ENVIRONMENT
• This setting provides a quiet environment by reducing the
airflow noise.
• POWERFUL AND QUIET operations can not be activated
at the same time.
7
PRESS TO RESTORE THE REMOTE CONTROL’S
DEFAULT SETTING
8
NOT USED IN NORMAL OPERATIONS
6
7
2
3
4
5
F567311 Book.indb 4F567311 Book.indb 4 2010-02-05 3:33:35.MD2010-02-05 3:33:35.MD

5
ENGLISH
TO SET THE TIMERTO SET THE TIMER
(12-HOUR TIMER SETING)(12-HOUR TIMER SETING)
• When you want the air conditioner to turn ON or OFF
automatically.
DELAY OFF-TIMER
For example, to stop the air conditioner 5 hours later.
1 To select the Delay OFF-TIMER, press the
button once.
2 Press the
button to select the delay hour.
• The OFF-TIMER can only be set while the air-
conditioner is in operation.
DELAY ON-TIMER
For example, to start the air conditioner 2 hours later.
1 To select the Delay ON-TIMER, press the
button once.
2 Press the
button to select the delay hour.
• The ON-TIMER can only be set while the air-
conditioner is not in operation.
DELAY OFF AND ON TIMER
For example, to stop the air conditioner 3 hours later
and start 4 hours later.
1 To select the Delay OFF and ON Timer, press the
button twice repeatedly.
2 Press the
button to select the delay hour for
OFF Timer.
3 Press the
button to select the delay hour for
ON Timer.
• This mode of timer can only be set while the air-
conditioner is in operation.
DELAY ON AND OFF TIMER
For example, to start the air conditioner 7 hours later
and stop 10 hours later.
1 To select the Delay ON and OFF Timer, press the
button twice repeatedly.
2 Press the
button to select the delay hour for
ON Timer.
3 Press the
button to select delay hour for OFF
Timer.
• This mode of timer can only be set while the air-
conditioner is not in operation.
TO CONFIRM THE TIMER SETTING
Press the
SET/CANCELSET/CANCEL
button once to activate the timer
operation which will start when the set time is reached.
TO CANCEL THE TIMER SETTING
Press the
SET/CANCELSET/CANCEL
button again to cancel the timer
operation.
• The timer indicator of the indoor unit will light up
during the timer operation.
• When ON Timer is set, the unit may start earlier
before the actual set time in order to achieve the
desired temperature on time.
• If you press operation button during the
timer setting operation, timer setting will be cancelled.
• If timer is cancelled manually or due to power failure,
you can restore the timer again by repeating steps
above (once power is resumed).
F567311 Book.indb 5F567311 Book.indb 5 2010-02-05 3:33:45.MD2010-02-05 3:33:45.MD

6
CAUTION
• Switch off the power supply before cleaning.
• Do not touch the aluminium fin, sharp parts may cause injury.
1
INDOOR UNIT
• Wipe the unit gently with a soft, dry cloth.
2
FRONT PANEL
Remove Front Panel
• Raise and pull to remove the front panel.
• Wash gently and dry.
Close Front Panel
• Press down both ends of the front panel to close it securely.
3
RECEIVER
4
ALUMINIUM FIN
5
HORIZONTAL AIRFLOW DIRECTION LOUVER
• Manually adjustable.
WARNINGWARNING
Be carefull not to insert your fi ngers into
the unit to avoid injuring by cross-fl ow fan.
6
VERTICAL AIRFLOW DIRECTION LOUVER
• Do not adjust by hand.
7
AUTO OFF/ON BUTTON
• Use when remote control is misplaced or malfunction.
Action Mode
Press once. Auto
Press and hold until 1 beep is heard,
then release.
Cooling
Press and hold until you hear double
beep sound, then release.
Heating
Press the button to turn off.
8
SUPER ALLERU-BUSTER FILTER
Vacuum the super
alleru-buster filter.
• Vacuum the filter whenever necessary.
• Replace the filter every 10 years or replace any
damaged filter.
9
AIR FILTERS
• Clean the filters regularly.
• Wash/rinse the filters gently with water to avoid damage
to the filter surface.
• Dry the filters thoroughly under the shade, away from
fire or direct sunlight.
• Replace any damage filter.
INDOOR UNIT
WASHING INSTRUCTIONSWASHING INSTRUCTIONS HINTHINT
• Do not use benzene, thinner or scouring powder.
• Use only soap ( pH7) or neutral household detergent.
• Do not use water hotter than 40°C.
• To ensure optimal performance of the unit, cleaning
maintenance have to be carried out at regular intervals.
NOTENOTE
• If chemical cloth is used to wipe the unit, instruction for
the cloth should be followed.
2
6
5
7
1
4
3
9
8
F567311 Book.indb 6F567311 Book.indb 6 2010-02-05 3:33:54.MD2010-02-05 3:33:54.MD

7
ENGLISH
The following symptoms do not indicate malfunction.The following symptoms do not indicate malfunction.
SYMPTOMSYMPTOM CAUSECAUSE
Mist emerges from indoor unit. ► • Condensation effect due to cooling process.
Water flowing sound during operation. ► • Refrigerant flow inside the unit.
The room has a peculiar odour. ► • This may due to damp smell emitted by the wall, carpet,
furniture or clothing.
Indoor fan stops occasionally during automatic fan speed
setting.
► • This helps to remove the surrounding odours.
Operation is delayed a few minutes after restart. ► • The delay is a protection to the unit’s compressor.
Outdoor unit emits water/steam. ► • Condensation or evaporation occurs on pipes.
The unit operates automatically when power is resumed
after a power failure.
► • It is the Auto Restart function of the unit. Operation will
be restarted automatically under the previous operation
mode and air flow direction when power is resumed as
the operation is not stopped by remote control.
• To cancel the Auto Restart Control, please contact with
authorized distributor.
Indoor fan stops occasionally during heating operation. ► • To avoid unintended cooling effect.
Power indicator blinks before the unit is switched on. ► • This is a preliminary step in preparation for the operation
when the ON timer has been set.
Cracking sound during operation. ► • Changes of temperature cause the expansion/
contraction of the unit.
Check the following before calling for servicing.Check the following before calling for servicing.
SYMPTOMSYMPTOM CHECKCHECK
Heating/Cooling operation is not working efficiently. ► • Set the temperature correctly.
• Close all doors and windows.
• Clean or replace the filters.
• Clear any obstruction at the air inlet and air outlet vents.
Noisy during operation. ► • Check if the unit has been installed at an incline.
• Close the front panel properly.
Remote control does not work.
(Display is dim or transmission signal is weak.)
► • Insert the batteries correctly.
• Replace weak batteries.
The unit does not work. ► • Check if the circuit breaker is tripped.
• Check if timers have been set.
The unit does not receive the signal from the remote
control.
► • Make sure the receiver not obstructed.
• Certain fluorescent lights may interfere with signal
transmitter. Please consult authorized dealer.
The unit stops and the timer indicator blinks.The unit stops and the timer indicator blinks.
Use remote control to retrieve error code.
SELECTSELECT
CHECKCHECK ERRORERROR RESETRESET RESETRESET
SET/CANCELSET/CANCEL
POWERFUL / QUIETPOWERFUL / QUIET
1
Press for 5
seconds.
3
Press for 5 seconds
to quit checking.
2
Press until you hear
beep sound, then jot
down the error code.
Note:
• For certain error, you may
restart the unit with limited
operation with 4 beeps
during operation starts.
4
Turn the unit off and reveal the error code to authorized dealer.
TROUBLESHOOTINGTROUBLESHOOTING
F567311 Book.indb 7F567311 Book.indb 7 2010-02-05 3:34:15.MD2010-02-05 3:34:15.MD

56
INFORMATION/INFORMATIONS/INFORMACIÓN/
INFORMAZIONI/INFORMAÇÃO/ИНФОРМАЦИЯ/
ΠΛΗΡΟΦΟΡΙΕΣ/INFORMATIONEN/INFORMATIE
Information for Users on Collection and Disposal of Old Equipment and Used Batteries
Pb
These symbols on the products, packaging, and/or accompanying documents mean that used electrical and electronic
products and batteries should not be mixed with general household waste.
For proper treatment, recovery and recycling of old products and used batteries, please take them to applicable collection
points, in accordance with your national legislation and the Directives 2002/96/EC and 2006/66/EC.
By disposing of these products and batteries correctly, you will help to save valuable resources and prevent any potential
negative effects on human health and the environment which could otherwise arise from inappropriate waste handling.
For more information about collection and recycling of old products and batteries, please contact your local municipality,
your waste disposal service or the point of sale where you purchased the items.
Penalties may be applicable for incorrect disposal of this waste, in accordance with national legislation.
For business users in the European Union
If you wish to discard electrical and electronic equipment, please contact your dealer or supplier for further information.
[Information on Disposal in other Countries outside the European Union]
These symbols are only valid in the European Union. If you wish to discard these items, please contact your local
authorities or dealer and ask for the correct method of disposal.
Note for the battery symbol (bottom two symbol examples):
This symbol might be used in combination with a chemical symbol. In this case it complies with the requirement set by the
Directive for the chemical involved.
Avis aux utilisateurs concernant la collecte et l’élimination des piles et des appareils électriques et
électroniques usagés
Pb
Apposé sur le produit lui-même, sur son emballage, ou figurant dans la documentation qui l’accompagne, ce pictogramme indique
que les piles et appareils électriques et électroniques usagés doivent être séparés des ordures ménagères.
Afin de permettre le traitement, la valorisation et le recyclage adéquats des piles et des appareils usagés, veuillez les porter à l’un
des points de collecte prévus, conformément à la législation nationale en vigueur ainsi qu’aux directives 2002/96/CE et 2006/66/CE.
En éliminant piles et appareils usagés conformément à la réglementation en vigueur, vous contribuez à prévenir
le gaspillage de ressources précieuses ainsi qu’à protéger la santé humaine et l’environnement contre les effets
potentiellement nocifs d’une manipulation inappropriée des déchets.
Pour de plus amples renseignements sur la collecte et le recyclage des piles et appareils usagés, veuillez vous renseigner auprès
de votre mairie, du service municipal d’enlèvement des déchets ou du point de vente où vous avez acheté les articles concernés.
Le non-respect de la réglementation relative à l’élimination des déchets est passible d’une peine d’amende.
Pour les utilisateurs professionnels au sein de l’Union européenne
Si vous souhaitez vous défaire de pièces d’équipement électrique ou électronique, veuillez vous renseigner directement
auprès de votre détaillant ou de votre fournisseur.
[Information relative à l’élimination des déchets dans les pays extérieurs à l’Union européenne]
Ce pictogramme n’est valide qu’à l’intérieur de l’Union européenne. Pour connaître la procédure applicable dans les pays
hors Union Européenne, veuillez vous renseigner auprès des autorités locales compétentes ou de votre distributeur.
Note relative au pictogramme à apposer sur les piles (voir les 2 exemples ci-contre):
Le pictogramme représentant une poubelle sur roues barrée d’une croix est conforme à la réglementation. Si ce pictogramme est combiné
avec un symbole chimique, il remplit également les exigences posées par la Directive relative au produit chimique concerné.
Información para Usuarios sobre la Recolección y Eliminación de aparatos viejos y baterías usadas
Pb
Estos símbolos en los productos, embalajes y/o documentos adjuntos, significan que los aparatos eléctricos y
electrónicos y las baterías no deberían ser mezclados con los desechos domésticos.
Para el tratamiento apropiado, la recuperación y el reciclado de aparatos viejos y baterías usadas, por favor, observe las
normas de recolección aplicables, de acuerdo a su legislación nacional y a las Directivas 2002/96/CE y 2006/66/CE.
Al desechar estos aparatos y baterías correctamente, Usted estará ayudando a preservar recursos valiosos y a prevenir
cualquier potencial efecto negativo sobre la salud de la humanidad y el medio ambiente que, de lo contrario, podría surgir
de un manejo inapropiado de los residuos.
Para mayor información sobre la recolección y el reciclado de aparatos y baterías viejas, por favor, contacte con su
comunidad local, su servicio de eliminación de residuos o al comercio donde adquirió estos aparatos.
Podrán aplicarse penas por la eliminación incorrecta de estos residuos, de acuerdo a la legislación nacional.
Para usuarios empresariales en la Unión Europea
Si usted desea desechar aparatos eléctricos y electrónicos, por favor contacte con su distribuidor o proveedor a fin de
obtener mayor información.
[Informacion sobre la Eliminación en otros Países fuera de la Unión Europea]
Estos símbolos sólo son válidos dentro de la Unión Europea. Si desea desechar estos objetos, por favor contacte con sus
autoridades locales o distribuidor y consulte por el método correcto de eliminación.
Nota sobre el símbolo de la bateria (abajo, dos ejemplos de símbolos):
Este símbolo puede ser usado en combinación con un símbolo químico. En este caso, el mismo cumple con los
requerimientos establecidos por la Directiva para los productos químicos involucrados.
F567311 Book.indb 56F567311 Book.indb 56 2010-02-05 3:32:38.MD2010-02-05 3:32:38.MD

59
FOR SEASONAL INSPECTION AFTER EXTENDED NON-USE
• Checking of remote control batteries.
• No obstruction at air inlet and air outlet vents.
• Use Auto OFF/ON button to select Cooling/Heating operation,
after 15 minutes of operation, it is normal to have the following
temperature difference between air inlet and air outlet vents:
Cooling: ≥ 8°C Heating: ≥ 14°C
NON SERVICEABLE CRITERIAS
TURN OFF POWER SUPPLY then please consult
authorized dealer under the following conditions:
• Abnormal noise during operation.
• Water/foreign particles have entered the remote
control.
• Water leaks from Indoor unit.
• Circuit breaker switches off frequently.
• Power cord becomes unnaturally warm.
• Switches or buttons are not functioning properly.
• The timer indicator blinks and the unit can not
be operated.
FOR EXTENDED NON-USE
• Activate Heat mode for 2~3 hours to remove moisture left in
the internal parts thoroughly to prevent mould growth.
• Turn off the power supply.
• Remove the remote control batteries.
INSPECTION ANNUELLE APRÈS UNE PÉRIODE
PROLONGÉE D’INUTILISATION
• Vérifiez que les piles de la télécommande sont en bon état.
• Assurez-vous de l’absence d’obstruction des orifices d’entrée
et de sortie d’air.
• Utilisez le bouton automatique d’arrêt et de marche OFF/ON
pour choisir l’opération de refroidissement/réchauffement,
après 15 minutes d’opération, il est normal d’avoir la différence
suivante de température entre la prise d’air et la sortie de
bouches d’aération:
Refroidissement: ≥ 8°C Chauffage: ≥ 14°C
PIECES NON SUSCEPTIBLES D’ETRE
REPAREES PAR VOS SOINS
DÉBRANCHEZ L’ALIMENTATION ÉLECTRIQUE
et contactez le revendeur autorisé dans les
conditions suivantes:
• Bruits anormaux pendant la mise en service.
• Pénétration d’eau ou de corps étrangers à
l’intérieur de la télécommande.
• Fuite d’eau de l’unité intérieure.
• Désactivation fréquente du disjoncteur.
• Le cordon d’alimentation est inhabituellement
chaud.
• Les interrupteurs ou les boutons ne fonctionnent
pas correctement.
• Le voyant de la minuterie clignote et l’appareil
ne peut pas fonctionner.
PRÉPARATION EN CAS D’INUTILISATION PROLONGÉE
• Activez le mode Chauffage pendant 2 à 3 heures pour éliminer
complètement l’humidité restée dans les pièces internes afin
d’éviter la formation de moisissures.
• Déconnectez la source d’alimentation.
• Retirez les piles de la télécommande.
PARA INSPECCIÓN ESTACIONAL DESPUÉS DE UN LARGO
PERÍODO EN DESUSO
• Verifique las pilas del mando a distancia.
• Compruebe que las tomas de entrada y salida de las rejillas
de ventilación no estén obstruidas.
• Use el botón Auto OFF/ON (apagado/encendido automático)
para seleccionar el funcionamiento de Refrigeración/
Calefacción. Después de 15 minutos de funcionamiento, es
normal tener la siguiente diferencia de temperatura entre la
ventilación del aire que ingresa y el aire que sale:
Enfriamiento: ≥ 8°C Calentamiento: ≥ 14°C
NO UTILICE LA UNIDAD SI
APAGUE EL SUMINISTRO DE ENERGÍA y luego
consulte con el distribuidor autorizado bajo las
siguientes condiciones:
• Si escucha ruidos extraños durante el
funcionamiento.
• Si entra agua o elementos extraños en el mando
a distancia.
• Si hay escapes de agua de la unidad interior.
•
Si el interruptor del circuito salta frecuentemente.
•
El cable de alimentación está demasiado caliente.
• Los interruptores o los botones no funcionan
correctamente.
• El indicador de temporizado parpadea y el
equipo no funciona.
SI NO SE VA A UTILIZAR LA UNIDAD DURANTE UN
PERIODO PROLONGADO DE TIEMPO
• Active el modo CALOR durante 2~3 horas para retirar
totalmente la humedad restante en las piezas internas para
evitar que se origine moho.
• Apague la unidad.
• Extraiga las pilas del mando a distancia.
F567311 Book.indb 59F567311 Book.indb 59 2010-02-05 3:32:49.MD2010-02-05 3:32:49.MD

62
Indoor Unit
Outdoor Unit
Model
CS-RE9JKE-1
CU-RE9JKE-1
CS-RE12JKE-1
CU-RE12JKE-1
CS-RE15JKE-1
CU-RE15JKE-1
COOL HEAT COOL HEAT COOL HEAT
Single, 230V, 50Hz Single, 230V, 50Hz Single, 230V, 50Hz
Power/Current
[kW] 0.700 0.820 1.010 1.120 1.260 1.385
[A] 3.30 3.70 4.70 5.20 6.00 6.30
Refrigerant
[k
g
]
R410A
0.850
R410A
0.970
R410A
1.000
Cooling Capacity
[kW] 2.500 3.500 4.200
Heating Capacity
[kW] 3.300 4.250 5.000
Noise Level
JIS C 9612
[<70 dB(A)]
[dB(A)]
42 42 42 42 46 46
Conditions
1m Distance
Max. cooling/
heating
operation
47 48 48 50 50 51
Sound power
level
[dB(A)]
58 58 58 58 62 62
63 64 64 66 66 67
Air Circulation
[m
3
/min.] 12.5 12.5 12.6 13.3 14.0 15.6
kg
Product Weight
[k
g
]
9.0 9.0 9.0
24 28 29
Dimensions (L x W x H)
[mm]
848 × 204 × 290
780 × 289 × 540
PRODUCT SPECIFICATION
Test conditions
1.
Temperature (°C)
Indoor Outdoor
*DBT *WBT *DBT *WBT
COOLING 27 19 35 24
HEATING 20 12 7 6
2. Standard piping length: 7.5 m (Includes Indoor Unit piping length).
F567311 Book.indb 62F567311 Book.indb 62 2010-02-05 3:32:55.MD2010-02-05 3:32:55.MD

SELECTSELECT
CHECKCHECK ERRORERROR RESETRESET RESETRESET
SET/CANCELSET/CANCEL
hrhr
DELAYDELAY
hrhr
DELAYDELAY
OFF
ON
ON
OFF
AUTO
HEAT
COOL
DRY
AB
FAN
SPEED
SWING
AIRAUTOAUTO
POWERFULPOWERFUL
POWERFUL / QUIETPOWERFUL / QUIET
AUTOQUIETAUTOQUIET
OFF
Panasonic Corporation
Website: http://panasonic.net/
F567311
Printed in China
F0912-00
QUICK GUIDE/GUIDE RAPIDE/GUÍA RÁPIDA/GUIDA RAPIDA/GUIA RÁPIDO/БЪРЗ
СПРАВОЧНИК/ΣΥΝΤΟΜΟΣ ΟΔΗΓΟΣ/KURZANLEITUNG/SNELLE GIDS
MODEMODE
AUTO HEAT
DRY COOL
Select the desired mode.
Sélectionnez le mode de fonctionnement souhaité.
Seleccione el modo deseado.
Selezionare la modalità desiderata.
Seleccione o modo de funcionamento pretendido.
Избор на желания режим на работа.
Επιλέξτε τον επιθυμητό τρόπο λειτουργίας.
Gewünschte Betriebsart einstellen.
Selecteer de gewenste modus.
1
OFF/ONOFF/ON
Start/stop the operation.
Mettez l’appareil sous/hors tension.
Inicie/detenga el funcionamiento.
Avviare/arrestare l’apparecchio.
Ligue/Desligue a unidade.
Включване/спиране.
Ξεκινήστε/σταματήστε τη λειτουργία.
Gerät ein- bzw. ausschalten.
Start/stop het gebruik.
2
TEMPTEMP
Select the desired temperature.
Sélectionnez la température souhaitée.
Seleccione la temperature deseada.
Selezionare la temperatura desiderata.
Programe a temperatura desejada.
Настройка на желаната температура.
Ρυθμίστε την επιθυμητή θερμοκρασία.
Die gewünschte Temperatur einstellen.
Selecteer de gewenste temperatuur.
3
1
2
Pursuant to at the directive 2004/108/EC, article 9(2)
Panasonic Testing Centre
Panasonic Service Europe, a division of
Panasonic Marketing Europe GmbH
Winsbergring 15, 22525 Hamburg, F.R. Germany
Remote Control Preparation • Préparation De La Télécommande • Preparación Del Mando A Remote Control Preparation • Préparation De La Télécommande • Preparación Del Mando A
Distancia • Telecomando: Operazioni Preliminari • Preparação Do Controlo Remoto • Подготвяне Distancia • Telecomando: Operazioni Preliminari • Preparação Do Controlo Remoto • Подготвяне
На Дистанционното Управление• Προετοιμασία Τηλεχειριστηρίου • Vorbereitung der На Дистанционното Управление• Προετοιμασία Τηλεχειριστηρίου • Vorbereitung der
Fernbedienung • Afstandsbediening voorbereidingFernbedienung • Afstandsbediening voorbereiding
1
Pull out • Retirez • Quite • Estrarre • Retire • Изтеглете • Τραβήξτε έξω • Nach unten
ziehen • Verwijderen
2
Insert AAA or R03 batteries (can be used ~ 1 year) •
Placez des piles AAA ou R03 (valables environ 1 an) •
Inserte pilas AAA o R03 (puede ser usado ~ 1 año) •
Inserire batterie AAA o R03 (può essere utilizzato per circa 1 anno) •
Introduza pilhas AAA ou R03 (pode ser utilizado ~ 1 ano) •
Поставете AAA или R03 батерии (могат да се използват приблизително една година)
Τοποθετήστε μπαταρίες AAA ή R03 (μπορούν αν χρησιμοποιηθούν ~ 1 χρόνο)
Batterien des Typs AAA oder R03 einlegen (Betriebsdauer etwa ein Jahr)
Plaats AAA of R03 batterijen (kunnen ongeveer 1 haar gebruikt worden)
3
Close the cover • Fermez le couvercle • Cierre la tapa • Chiudere il coperchio • Feche a
tampa • Затворете капака • Κλείστε το κάλυμμα • Batteriefach schließen • Sluit de klep
3
F567311 Book.indb 64F567311 Book.indb 64 2010-02-05 3:33:06.MD2010-02-05 3:33:06.MD
/