Little Wonder 8141 Owner's manual
- Category
- Garden tools
- Type
- Owner's manual
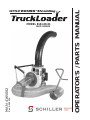
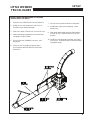
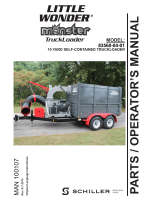
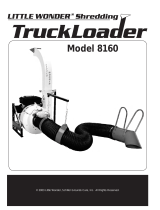
Little Wonder 8141 is a powerful tool designed to help you manage debris and keep your outdoor spaces clean. With its rugged construction and efficient design, this machine is ideal for a variety of tasks, including:
- Clearing leaves and other debris from yards and gardens
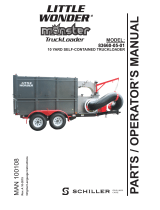
- Loading mulch, compost, and other materials into trucks or trailers
- Removing snow from driveways and walkways
- Cleaning up after construction or demolition projects
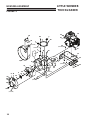
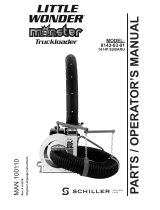
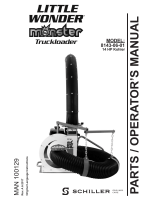
The Little Wonder 8141 is equipped with a 14HP engine that provides ample power for even the most challenging jobs. The large hopper capacity allows you to collect a significant amount of debris before needing to empty it, and the adjustable discharge chute lets you direct the debris exactly where you want it.
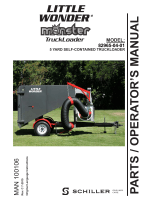
Little Wonder 8141 is a powerful tool designed to help you manage debris and keep your outdoor spaces clean. With its rugged construction and efficient design, this machine is ideal for a variety of tasks, including:
- Clearing leaves and other debris from yards and gardens
- Loading mulch, compost, and other materials into trucks or trailers
- Removing snow from driveways and walkways
- Cleaning up after construction or demolition projects
The Little Wonder 8141 is equipped with a 14HP engine that provides ample power for even the most challenging jobs. The large hopper capacity allows you to collect a significant amount of debris before needing to empty it, and the adjustable discharge chute lets you direct the debris exactly where you want it.


-
 1
1
-
 2
2
-
 3
3
-
 4
4
-
 5
5
-
 6
6
-
 7
7
-
 8
8
-
 9
9
-
 10
10
-
 11
11
-
 12
12
-
 13
13
-
 14
14
-
 15
15
-
 16
16
-
 17
17
-
 18
18
-
 19
19
-
 20
20
-
 21
21
-
 22
22
-
 23
23
-
 24
24


Little Wonder 8141 Owner's manual
- Category
- Garden tools
- Type
- Owner's manual
Little Wonder 8141 is a powerful tool designed to help you manage debris and keep your outdoor spaces clean. With its rugged construction and efficient design, this machine is ideal for a variety of tasks, including:
- Clearing leaves and other debris from yards and gardens
- Loading mulch, compost, and other materials into trucks or trailers
- Removing snow from driveways and walkways
- Cleaning up after construction or demolition projects
The Little Wonder 8141 is equipped with a 14HP engine that provides ample power for even the most challenging jobs. The large hopper capacity allows you to collect a significant amount of debris before needing to empty it, and the adjustable discharge chute lets you direct the debris exactly where you want it.
Ask a question and I''ll find the answer in the document
Finding information in a document is now easier with AI
Related papers
-
 Little Wonder 8143-03-01 Owner's manual
-
 Little Wonder 8143-06-01 Owner's manual
-
 Little Wonder 83660-05-01 Owner's manual
-
 Little Wonder 83560-04-01 Owner's manual
-
 Little Wonder 82965-04-01 Owner's manual
-
 Little Wonder 8293-04-01, 8295-04-01 Owner's manual
-
 Little Wonder 8160 Owner's manual
-
 Little Wonder 8160 Owner's manual
-
 Little Wonder 8183-04-01, 8184-04-01 Owner's manual
-
 Little Wonder 8160 User manual


Other documents
-
 Recon 2641XHP Tailgate Light Bar Plug-In De-Coder Install Instructions
-
Lifetime Yard Vacuum 115 User manual
-
 WONDER WORLD V8 User manual
-
RetroSound Wonder Bar® 3 Quick start guide
-
 Husky Liners 63811 Owner's manual
-
Billy Goat HTR1803VEU User manual
-
 Powerhorse Chipper/Shredder Debris Vacuum Truck Loader Owner's manual
-
-
Bolens BL3100 Owner's manual
-
Bluebird BH270 969121149 Owner's manual


