Page is loading ...

TAL 1211 (L) Rev. 4 © MSA 2012 Prnt. Spec. 10000005389(A) Mat. 10088650
Doc. 10088650
CRANBERRY TWP.,PENNSYLVANIA,U.S.A.16066
For More Information, call 1-800-MSA-2222 or VisitOurWebsiteatwww.MSAsafety.com
This Self-Contained Breathing Apparatus (SCBA) is certified by the
National Institute of Occupational Safety and Health (NIOSH).
The warranties made by MSA with respect to the product are voided if
the product is not installed, used and serviced in accordance with the
instructions in this manual. Please protect yourself and your employees
by following the instructions. Please read and observe the WARNINGS
and CAUTIONS inside. For any additional information relative to use or
repair, write or call 1-800-MSA-2222 during regular working hours.
See separate insert for NIOSH approval information: P/N 10024128.
For air-line use refer to User’s Instructions P/N 10046412.
This manual must be carefully read and followed by all persons who
have or will have the responsibility for using or servicing this air
mask. This air mask will perform as designed only if used and
serviced according to the instructions; Otherwise it could fail to
perform as designed, and persons who rely on the air mask could
sustain serious personal injury or death.
OPERATION AND INSTRUCTIONS
AirHawk
®
II
Air Mask

INTRODUCTION
NIOSH APPROVAL INFORMATION CAUTIONS AND
LIMITATIONS
D- Air-line respirators can be used only when the
respirators are supplied with respirable air meeting the
requirements of CGA G-7-1 Grade D or higher quality.
E- Use only the pressure gauges and hose lengths
specified in the User’s Instructions.
I- Contains electrical parts which have not been
evaluated as an ignition source in flammable or
explosive atmospheres by MSHA/NIOSH.
J- Failure to properly use and maintain this product could
result in injury or death.
M- All approved respirators shall be selected, fitted, used
and maintained in accordance with MSHA, OSHA and
other applicable regulations.
N- Never substitute, modify, add or omit parts. Use only
exact replacement parts in the configuration as
specified by the manufacturer.
O- Refer to Users Instructions, and/or maintenance
manuals for information on use and maintenance of
these respirators.
S- Special or critical Users Instructions and/or specific
use limitations apply. Refer to user instructions before
donning.
S - SPECIAL OR CRITICAL USERS INSTRUCTIONS
Approved for use at temperatures above -25°F. Approved
only when the compressed-air container is fully charged
with air meeting the requirements of the Compressed Gas
Association Specification G-7 for quality verification level
(grade) D air or equivalent specifications. The cylinder
shall meet applicable DOT specifications.
Use with adequate skin protection when worn in gases
and vapors that poison by skin absorption (for example:
hydrocyanic-acid gas).
In making renewals or repairs, parts identical with those
furnished by the manufacturer under the pertinent
approval shall be maintained.
NIOSH Approval Information is included as a supplement
to these instructions (P/N 10024128).
IMPORTANT NOTICE FOR RESPIRATORY
PROTECTION PROGRAM ADMINISTRATORS
1. An adequate respiratory protection program must
include knowledge of hazards, hazard assessment,
selection of proper respiratory protective equipment,
instruction and training in the use of equipment,
inspection and maintenance of equipment, and
medical surveillance. [See OSHA regulations, Title 29
CFR, Part 1910. 134, Subpart I, Par. 1910. 134 (c).]
2. This air mask may be used only after proper
instruction and training in its use as specified in NFPA-
1500 and OSHA regulations Title 29 CFR, Part 1910.
134, Subpart 1, Par. 1910. 134 (b) (3).
3. This air mask must be secured by a positive
mechanical means if stowed within an enclosed
seating area of fire department vehicles, or in a
compartment with a positive latching door. The
method of holding the air mask in place must be
designed to minimize injury to persons in the vehicle
in the event of an accident, rapid deceleration, or
acceleration.
4. Do not mark the air mask, i.e., with stamps, labels,
paint or other method. Use of such markings may
interfere with apparatus use or may constitute a
flammability hazard.
5. Be sure that no other equipment interferes with the air
mask facial seal, or with the users hands, or other
necessary means of mobility.
For more information on self-contained breathing
apparatus use and performance standards, please consult
the following publications:
2
TAL 1211 (L) Rev. 4 - 10088650
TABLE OF CONTENTS
Introduction.............................................................................................................................................................................2
Description..............................................................................................................................................................................4
Donning...................................................................................................................................................................................6
Removing the Apparatus ......................................................................................................................................................10
Cold Weather Operation .......................................................................................................................................................13
Cleaning/Disinfecting ............................................................................................................................................................14
Inspections............................................................................................................................................................................15
Functional Tests ....................................................................................................................................................................17
Flow Test/Overhaul Requirements........................................................................................................................................18
Lifetime Warranty ..................................................................................................................................................................20

INTRODUCTION
ANSI Standard Z88.5, Practices for Respiratory Protection
for the Fire Service; and, ANSI Standard Z88.2, Practices
for Respiratory Protection.
American National Standards Institute, 1430 Broadway,
New York, NY 10018.
OSHA Safety and Health Standards (29 CFR 1910) (see
specifically Part 1910. 134), available from the
Superintendent of Documents, U. S. Government Printing
Office, Washington, DC 20402.
Compressed Gas Association, Inc., 1725 Jefferson Davis
Hwy., Suite 1004, Arlington, VA 22202.
1. Read and observe all NIOSH and other approval
limitations as they apply to using the breathing
apparatus.
2. Do not use the air mask as an underwater device.
3. This system must be supplied with respirable
[Quality Verification Level (Grade) D, see ANSI/CGA
G-7.1-1989] or higher quality air; and a dew point
not to exceed -65°F (24ppm v/v) [Compressed Gas
Association Specification G-7.1 for Quality
Verification Level (Grade) D Gaseous Air].
4. This device may not seal properly with your face if
you have a beard, gross sideburns or similar
physical characteristics (see NFPA-1500 and ANSI
Z88.2). An improper facial seal may allow
contaminants to leak into the facepiece, reducing
or eliminating respiratory protection. Do not use
this device if such conditions exist. The face-to-
facepiece seal must be tested before each use.
Never remove the facepiece except in a safe, non-
hazardous non-toxic atmosphere.
5. Return to a safe atmosphere immediately if
discoloration, crazing, blistering, cracking or other
deterioration of the lens material is observed.
6. Users must wear suitable protective clothing and
precautions must be taken so that the air mask is
not exposed to atmospheres that may be harmful.
7. Take into account the following factors which may
affect the duration or the service life.
a. the degree of physical activity of the user;
b.the physical condition of the user;
c. the degree that the user’s breathing rate is
increased by excitement, fear, or other emotional
factors;
d.the degree of training or experience which the
user has had with this or similar equipment;
e. whether or not the cylinder is fully charged;
f. the presence in the compressed air of carbon
dioxide concentrations greater than the .04%
level normally found in atmospheric air;
g.the atmospheric pressure; if used in a
pressurized tunnel or caisson at 2 atmospheres
(15 psi gauge) the duration will be one-half as
long as when used at 1 atmosphere; at
3 atmospheres the duration will be one-third as
long;
h.the condition of the apparatus.
Failure to follow the above warnings can result in
serious personal injury or death.
BEFORE USE
Thoroughly inspect this air mask on receipt and before
use.
This air mask is to be used only by trained and qualified
personnel.
Read and understand these instructions before attempting
to use this equipment. If you have any questions, call toll
free 1-800-MSA-2222.
3
TAL 1211 (L) Rev. 4 - 10088650

DESCRIPTION
DESCRIPTION
The air masks from MSA are pressure-demand, self-
contained breathing apparatus (air mask) certified by the
National Institute for Occupational Safety and Health
(NIOSH) for use in atmospheres immediately dangerous to
life or health:
``Immediately dangerous to life or health’’ means
conditions that pose an immediate threat to life or health
or conditions that pose an immediate threat of severe
exposure to contaminants, such as radioactive materials,
which are likely to have adverse cumulative or delayed
effects on health’’ [Title 42 CFR, Part 84.2, (Q)]
• This air mask is not compliant with National Fire
Protection Association (NFPA) Standard 1981. The
air mask should not be used for firefighting
applications where NFPA compliance is required.
• This air mask is not NIOSH approved for use
against CBRN live agents. If NIOSH CBRN Agent
Approval is required, use a NIOSH CBRN Agent
approved FireHawk
®
Air Mask.
• This air mask must be equipped with an Ultra Elite
®
Hycar Facepiece (model numbers 7-935-7. 7-935-8,
and 7-935-9) and a CBRN regulator (model
numbers 10060982 or 10060983) when exposure to
CBRN live agents is possible. DO NOT use a
silicone facepiece or a regulator that is not
identified as CBRN regulator against CBRN live
agents.
Failure to follow these warnings can result in serious
personal injury or death.
The AirHawk II Air Mask consists of the following major
sub-assemblies.
• first stage regulator
• second stage regulator
• air cylinder and valve
• Audi-Larm™ Audible Alarm
• carrier and harness
• facepiece
FIRST STAGE REGULATOR
The first stage regulator is a pressure reducer that keeps
the pressure to the mask mounted regulator at
approximately 80 to 100 psig throughout the entire
operating pressure range of the cylinder. The regulator has
a redundancy feature to minimize the possibility of a first
stage failure. The regulator uses a large sintered filter
which is easy to replace. The filter captures particulates
that may be in the air stream.
SECOND STAGE REGULATOR
This is a pressure-demand regulator, which keeps a
positive pressure in the facepiece all the time. The release
button on top of the regulator stops air flow. To stop
airflow, push the button in. To restart the regulator, inhale
sharply. The regulator attaches to the facepiece with a
Push-To-Connect connector or slide connector. The
regulator delivers large flow rates accurately and quickly.
AirHawk II Air Mask with the FireHawk
®
MMR (model
numbers 10060982 and 10060983) are considered by
MSA to be “CBRN hardened.” They can be identified by
Firehawk Regulator model number and the CBRN marking
on the underside of the regulator housing. Air mask with
these regulator models have passed CBRN live agent
testing, but are not CBRN-approved by NIOSH since they
are not certified as NFPA compliant.
AIR CYLINDER AND VALVE
*as approved by NIOSH
The air cylinder and valve consists of a tank and a
cylinder valve assembly. The cylinder valve includes a
valve body, cylinder valve inlet tube, handwheel, safety
disc (burst disc), and pressure gauge. The pressure gauge
shows the air pressure in the cylinder continuously. The
gauge is calibrated in 100 psig increments. For example,
a gauge reading of 20 is read as 20 x 100 or 2,000 psig. A
handwheel is used to open and close the cylinder valve.
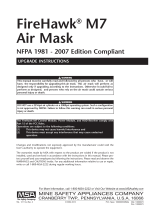
AUDI-LARM AUDIBLE ALARM
The audible alarm sounds when there is approximately
25% of the air mask’s rated service time remaining. The
alarm also sounds when the cylinder valve is first opened,
providing an audible indication that the alarm is
functioning.
4
TAL 1211 (L) Rev. 4 - 10088650
Capacity Pressure Rated Svc*
Cubic Ft. psig Life (Min.)
45 2216 30
45 4500 30
66 4500 45
88 4500 60
Approx. Remaining
Cylinder Service Time
30-min. 2216 psig 7 min.
30-min. 4500 psig 7 min.
45-min. 4500 psig 11 min.
60-min. 4500 psig 14 min.

DESCRIPTION
CARRIER AND HARNESS
The carrier consists of a backplate, a cylinder strap with
buckle to hold the cylinder, and a harness, consisting of
shoulder straps, chest strap (optional), adjustable
pullstraps waist-strap, shoulder pads (optional) and belt
mounted regulator retainer.
LUMBAR PAD (OPTIONAL)
The lumbar pad with a flared design is designed to
provide a cushion between the wearer and harness. The
flared design evenly distributes cylinder weight across the
wearer’s hips.
RESCUE BELT (OPTIONAL)
The MSA Fire Service Rescue Belt is a personal escape
system integrated into the carrier and harness assembly.
The system is designed to provide the user with a means
of escape from an elevated position. Care and use
instructions are provided in User Instructions P/N
10052748 (P/N 10115063 for Rescue Belt II).
FACEPIECE
Two facepieces are available in three sizes.
• The Ultra Elite Facepiece
• The Advantage
®
4000 Facepiece
Only Ultra Elite Hycar Facepieces (model numbers 7-935-
7, 7-935-8, and 7-935-9) have been tested against and
meet CBRN live agent test requirements. Silicone
facepieces are NOT CBRN-approved.
The facepieces have a low-resistance, pressure-demand
exhalation valve designed for easy cleaning. An inhalation
check valve in the inlet housing keeps moisture and
contaminants out of the mask mounted regulator. The
Ultra Elite Facepiece has a speaking diaphragm for clear,
short-range communication.
5
TAL 1211 (L) Rev. 4 - 10088650

DONNING
DONNING THE AIR MASK
1. Remove the facepiece from the case.
Do not use a cover lens in a high-temperature
environment. High temperatures may distort the cover
lens, or moisture trapped between a cover lens and
the facepiece lens may condense and distort vision.
Always remove the cover lens before donning the
facepiece.
2. Ensure that the Audi-
Larm coupling nut is
hand-tight (no tools).
3. Check that the cylinder is fully pressurized.
If the cylinder is not full, the service time is reduced
accordingly & should not be used.
DO NOT use an air mask with a loose Audi-Larm
coupling nut. Using an air mask with a loose coupling
nut can cause o-ring failure which can result in sudden
loss of cylinder pressure. Always hand-tighten the
coupling nut before using the air mask. Failure to follow
this warning can result in serious personal injury or
death.
4. Reach inside the right shoulder straps and grasp the
pressure gauge, slide left arm through left shoulder
straps.
5. Bend forward slightly, rest it on your back.
6. Attach the chest strap (optional).
7. Fasten the waist-strap and pull it tight for a snug fit.
8. As you straighten up, pull the shoulder strap tabs out.
Hike the unit up for a comfortable fit.
9. The shoulder straps and waist-strap ends must be
tucked in and lay flat across the body.
REGULATOR AND AUDIBLE ALARM CHECKS
TESTING
1. Grasp the mask mounted regulator and push the top
release button.
2. Check that the red
bypass knob is fully
closed (clockwise).
3. Reach behind and
open the cylinder valve
fully. Listen for the
alarm to sound briefly.
4. As the pressure rises from 50 to 200 psig, the alarm
sounds automatically, indicating that the alarm is
functional.
If the alarm fails to sound, do not use the apparatus.
The air mask must be checked and corrected for
proper operation by an MSA trained or certified
repairperson before using. Failure to follow this
warning may result in serious personal injury or death.
5. No air should flow from
the regulator. If it does,
repeat steps 1 and 2.
6. Check the gauge and cylinder gauges. Gauges must
be within 220 psig for 2216 psig; 450 psig for 4500
psig.
If your readings do not agree with these values, return
the air mask to an MSA trained or certified
repairperson.
6
TAL 1211 (L) Rev. 4 - 10088650

DONNING
7. Check for bypass
operation. Grasp the
red knob and turn it
counter-clockwise.
Listen for airflow, then
turn it OFF. Close
cylinder valve fully.
8. Check for air leaks. Open cylinder valve fully to
pressurize system, then close the cylinder valve and
watch the harness pressure gauge.
9. If the needle drops more than 100 psi in 10 seconds,
there is a leak. Do not use the apparatus until the leak
is found and corrected.
10. Crack the bypass valve slowly to bleed off pressure
until gauge needle drops below:
550 psig - approximately (low-pressure system) or,
1125 psig – approximately (high-pressure system)
The alarm will sound. The alarm must continue to
sound until pressure is less than 200 psig. Close the
bypass fully.
If the alarm fails to sound, do not use the apparatus.
The air mask must be checked and corrected for
proper operation by an MSA trained or certified
repairperson before using. Failure to follow this
warning may result serious personal injury or death.
Note: Before donning, check that the regulator sealing
ring is seated properly in its groove, and that it is not torn,
gouged, or nicked.
DONNING THE FACEPIECE
Do not wear eye glasses under the facepiece. The
temples or sidebars on eye glasses will prevent an
airtight seal. if you must wear glasses, install the
spectacle kit. Failure to follow this warning can cause
inhalation of contaminated air, resulting in serious
respiratory injury or death.
When using the Advantage 4000 Facepiece, ensure the
inhalation valve disc is laying flat against the adapter
orifice.
1. Extend the facepiece straps fully. Place neckstrap
around your neck and don the facepiece by inserting
your chin first.
2. Pull the head harness
completely over your
head and tighten the
lower (neck) straps.
3. Tighten the lower
(neck) harness straps
first, by pulling them
straight back, not out.
Tighten the temple
straps the same way.
Tuck in the ends of the
straps so that they lay
flat across the head.
4. Push headband pad towards neck, retighten the
straps (if necessary) for best visibility and fit. Tuck in
the ends of the straps so they lie flat across the head.
FACEPIECE FIT CHECK
Check the inhalation valve, inhale. If you do not
receive sufficient flow of air, do not use facepiece. The
facepiece must be repaired or replaced.
1. To check for facepiece
fit, hold the palm of
your hand over the inlet
connection and inhale.
Hold your breath at
least 10 seconds. The
facepiece should
collapse and stay
collapsed against your
face. If it does not,
readjust the facepiece
and test again. If this
does not correct the
leak, do not use the
facepiece.
7
TAL 1211 (L) Rev. 4 - 10088650
Ultra Elite Facepiece
Advantage 4000 Facepiece
Ultra Elite Facepiece

DONNING
2. Test the exhalation
valve, take a deep
breath and hold it.
Block the inlet
connection with the
palm of your hand and
exhale. If the exhalation
valve is stuck, you may
feel a heavy rush of air
around the facepiece.
Note: You may need to exhale sharply to open the valve.
If this does not release the valve, do not use the
facepiece.
This device may not seal properly with your face if you
have a beard, gross sideburns or similar physical
characteristics (see ANSI Z88.2). An improper facial
seal may allow contaminants to leak into the
facepiece, reducing or eliminating respiratory
protection. Do not use this device if such conditions
exist. The face-to-facepiece seal must be tested
before each use. Never remove the facepiece except
in a safe, non-hazardous non-toxic atmosphere.
Failure to follow this warning can result in serious
personal injury or death.
3. Open the cylinder valve
fully.
INSTALLING PUSH-TO-CONNECT MASK MOUNTED
REGULATOR
1. Grasp regulator and
orient regulator so that
red bypass knob is
pointing to the right.
2. Insert regulator into
facepiece adapter by
pushing inward.
3. Ensure the regulator locks into the facepiece.
4. Check proper engagement by pulling on the regulator
to ensure regulator is securely attached to facepiece.
Do not use the respirator unless the regulator is
connected properly. A regulator that is not installed
correctly can separate from the facepiece unexpectedly.
Return the respirator to an MSA trained or certified
repairperson to correct the condition. Failure to follow
this warning can result in serious personal injury or
death.
5. Inhale sharply to start the airflow.
a. Check the bypass again by turning the red knob
counter-clockwise until you feel increased airflow.
Close the bypass.
8
TAL 1211 (L) Rev. 4 - 10088650
Ultra Elite Facepiece
Advantage 4000 Facepiece
Advantage 4000 Facepiece

DONNING
There must be a continuous flow of air when the
bypass knob is opened. If not, do not use the
apparatus. The respirator must be checked and the
condition corrected by an MSA trained or certified
repairperson before using it. Failure to follow this
warning can result in serious personal injury or death.
Note: If the Air Mask passes all tests, the unit is ready to
use. Remember, you must perform these tests every time
before you enter the hazardous atmosphere. If the unit
fails to meet any of the tests, the condition(s) must be
corrected before using the apparatus.
INSTALLING SLIDE MASK MOUNTED REGULATOR
1. Grasp regulator and orient regulator so that red
bypass knob is pointing to the right and slide button is
on top.
2. Slide regulator onto rail (fast track) of facepiece cover.
Slide regulator down the rail cover until regulator
stops.
3. Insert regulator into facepiece adapter by pushing
inward.
4. Ensure the regulator locks into facepiece.
5. Check proper engagement by pulling on the regulator
to ensure regulator is securely attached to facepiece.
Do not use the respirator unless the regulator is
connected properly. A regulator that is not installed
correctly can separate from the facepiece
unexpectedly. Return the respirator to an MSA trained
or certified repairperson to correct the condition.
Failure to follow this warning can result in serious
personal injury or death.
6. Inhale sharply to start the airflow.
a. Check the bypass again by turning the red knob
counter-clockwise until you feel increased airflow.
Close the bypass.
There must be a continuous flow of air when the
bypass knob is opened. If not, do not use the
apparatus. The respirator must be checked and the
condition corrected by an MSA trained or certified
repairperson before using it. Failure to follow this
warning can result in serious personal injury or death.
Note: If the air mask passes all tests, the unit is ready to
use. Remember, you must perform these tests every time
before you enter the hazardous atmosphere. If the unit
fails to meet any of the tests, the condition(s) must be
corrected before using the apparatus.
PRECAUTIONS DURING USE
Periodically check the pressure indicated on the remote
pressure gauge. It continually displays the cylinder
pressure. When the needle reaches the red zone, the
alarm
will begin sounding. When the alarm starts sounding or
when the pressure reaches approximately 25% of the
rated service pressure, return to fresh air.
The alarm activates when cylinder pressure drops below
approximate values:
550 psig approximately for low-pressure
1125 psig approximately for high pressure
when the alarm activates, immediately return to fresh air.
Note: Air mask service life is reduced greatly when the
bypass is used.
• Reduced air flow: Immediately open the bypass.
Immediately return to fresh air.
• Air mask free-flows: Immediately return to fresh air.
• Audible alarm
sounds: Immediately return to fresh air.
9
TAL 1211 (L) Rev. 4 - 10088650

REMOVING THE APPARATUS
REMOVING THE APPARATUS
DISCONNECTING THE PUSH-TO-CONNECT
REGULATOR
1. Grasp top of regulator.
2. Push the release
buttons and pull
regulator down and out
of facepiece adapter.
3. Close the cylinder valve
fully. Open the bypass
to release system
pressure. Close the
bypass.
4. Stow the regulator with
red bypass knob
pointing to the right in
the STAND-BY belt
mount.
5. To remove the facepiece, fully loosen the harness
straps and pull the facepiece up and away from your
face.
6. To remove the carrier harness, press the belt buckle
release buttons IN.
7. Disconnect the chest strap (if used).
8. To loosen the shoulder straps, grasp the release tabs.
Push them out and away from your body.
9. Slip your right arm out of the shoulder strap first, then
remove the harness.
Note: Be sure to replace the cylinder with a full one.
Complete Inspection and Cleaning and Disinfecting
Procedures are outlined in this manual. Ensure complete
apparatus is clean and dry. Ensure that facepiece head
harness straps and harness adjustment straps are fully
extended. Place the complete apparatus in the storage
case or suitable storage location so it can be reached
easily for emergency use. (See storage instructions.)
DISCONNECTING THE SLIDE REGULATOR
1. Grasp top of regulator.
2. Push the release buttons and pull regulator down and
out of facepiece adapter.
Note: Regulator can hang on cover rail in a stand-by mode.
3. Slide regulator up rail until regulator slide button is
free of cover rail.
4. Close the cylinder valve fully. Open the bypass to
release system pressure. Close the bypass.
5. Stow the regulator with red bypass knob pointing to
the right in the STAND-BY belt mount.
6. To remove the facepiece, fully loosen harness straps
and pull the facepiece up and away from your face.
7. To remove the carrier harness, press the belt buckle
release button IN.
8. Disconnect the chest strap (if used).
9. To loosen the shoulder straps, grasp the release tabs.
Push them out and away from your body.
10. Slip your right arm out of the shoulder pad first, then
remove the harness.
Note: Be sure to replace the cylinder with a full one.
Complete Inspection and Cleaning and Disinfecting
Procedures are outlined in this manual. Ensure complete
apparatus is clean and dry. Ensure that facepiece head
harness straps and harness adjustment straps are fully
extended. Place the complete apparatus in the storage
case or suitable storage location so it can be reached
easily for emergency use. (See storage instructions.)
CHANGING THE CYLINDER WITH BAND AND LATCH
Be careful not to drop cylinder or bump valve knob. An
unsecured cylinder can become an airborne projectile
under its own pressure if the valve is opened even
slightly. Failure to follow this warning can result in
serious personal injury or death.
10
TAL 1211 (L) Rev. 4 - 10088650

REMOVING THE APPARATUS
1. Be sure there is no
pressure in the system
before replacing a
cylinder. Disconnect
the Audi-Larm Alarm
Assembly coupling nut.
2. Lift and turn the latch wing to loosen the cylinder
clamp.
3. Slide out the empty cylinder and install one that is fully
charged. Be sure that the adjustable cylinder band
and latch is in the proper slot before you insert a new
cylinder. Make sure that the lock tab on the carrier is
fully engaged in the appropriate cylinder band slot
position.
4. Slide the fully charged cylinder into the carrier, with
gauge facing out, turn the latch wing clockwise to
tighten fully. Fold over the latch wing toward
backplate, locking latch wing in place.
Note: Be sure to tighten the latch wing fully each time a
cylinder is installed.
5. To check that the cylinder is secure, place one hand
on the backplate and grasp the cylinder valve with the
other. Try to pull the cylinder and valve down and out
away from the carrier. Make sure that the band and
latch holds the cylinder securely in the carrier.
Note: If the cylinder feels loose, re-check that the band and
latch is in the proper slot; that the lock tab is fully engaged
in the slot; and that the latch wing is fully tightened and
flipped over with the label side OUT. Do not use the air
mask if the cylinder is not held securely in the carrier.
6. Check that the O-ring is inside the Audi-Larm Alarm
Assembly coupling nut. If the O-ring is damaged it
must be replaced before the alarm is used.
7. Thread the Audi-Larm
Alarm Assembly
coupling nut to the
cylinder valve and
hand-tighten (no tools).
CHANGING THE CYLINDER WITH BUCKLE AND
STRAP
Be careful not to drop cylinder or bump valve knob. An
unsecured cylinder can become an airborne projectile
under its own pressure if the valve is opened even
slightly. Failure to follow this warning can result in
serious personal injury or death.
1. Be sure there is no pressure in the system before
replacing a cylinder. Disconnect the alarm Assembly
coupling nut.
2. Lift over center buckle to loosen the cylinder strap.
3. Slide out the empty cylinder and install one that is fully
charged. Be sure that the adjustable cylinder buckle is
properly installed.
4. Slide the fully charged cylinder into the carrier, with
gauge facing out. Close the over center buckle to
tighten the cylinder strap.
5. To check that the cylinder is secure, place one hand
on the back plate and grasp the cylinder valve with
the other. Try to pull the cylinder and valve down and
out away from the carrier. Make sure that the strap
and buckle hold the cylinder securely in the carrier.
NOTE: If the cylinder feels loose, re-check that the strap
and buckle are properly adjusted. Open cylinder buckle.
Tighten cylinder strap by pulling on top (outer) strap. It will
be necessary to reposition the black plastic slide during
adjustment. Tighten cylinder strap until cylinder buckle is
approximately 45 degrees from vertical. Close the cylinder
buckle. Do not use the air mask if the cylinder is not held
securely in the carrier. DO NOT over-tighten the cylinder
strap; otherwise it will damage the center buckle
assembly.
6. Check that the O-ring is inside the Alarm Assembly
coupling nut. If the O-ring is damaged it must be
replaced before the alarm is used.
7. Thread the alarm Assembly coupling nut to the
cylinder valve and hand-tighten (no tools).
CHARGING CYLINDERS
Always check to be sure the hydrostatic test date is within
the prescribed period and that the cylinder is properly
labeled to indicate its gaseous service. New labels are
restricted items which are only available through certified
hydrostatic test facilities.
Inspect the cylinder body for cracks, dents, weakened
areas, corrosive agent, causing the fibers to break or peel,
or signs of heat-related damage. If the cylinder is
damaged, return it to an MSA Service Center. Call 1-800-
MSA-2222 for instructions.
11
TAL 1211 (L) Rev. 4 - 10088650

REMOVING THE APPARATUS
When replacing cylinder valves or after retesting of
cylinders, make sure the proper cylinder valve, burst disc,
and gasket are installed prior to cylinder recharging.
Establish the service pressure of the cylinder. Type 3AA
(steel) cylinders that bear a plus (+) sign after the latest
retest date may be recharged to a pressure 10% greater
than the stamped service pressure, i.e., a cylinder
stamped 3AA2015 with a plus (+) sign after the latest test
date may be recharged to 2216 psig (this applies to steel
cylinders only). Steel cylinders without a plus (+) sign
stamped after the latest test date must be removed from
service. All other cylinders which are not type 3AA shall be
filled to the designated service pressure only (as found on
the DOT approval label or stamping). Appropriately
connect the cylinder to the filling recharge system and
refill. Terminate the filling when the pressure reaches
service pressure and allow the cylinder to cool to room
temperature.
If necessary, top-off the cylinder such that service
pressure is attained with the cylinder at a temperature of
70°F. Close the valves on the cylinder and the recharge
system and remove the cylinder. Apply a soap solution to
determine if there is any leakage between the cylinder and
the valve. If there is no leakage, the cylinder is now ready
for re-use.
STORAGE
Do not store the apparatus or spare cylinders within or
near an area where the apparatus can or might be
exposed to any substances that will or might attach any
part of the apparatus, causing the apparatus NOT to
perform as designed and approved.
Be careful not to drop cylinder or bump valve knob. An
unsecured cylinder can become an airborne projectile
under its own pressure if the valve is opened even
slightly. Failure to follow this warning can result in
serious personal injury or death.
Do not store the apparatus with an empty or partly filled
cylinder. Always install a fully-charged cylinder so that the
apparatus is ready for use. Complete Inspection and
Cleaning and Disinfecting Procedures are outlined in this
manual. Ensure the complete apparatus is clean and dry.
Ensure the facepiece head harness adjustment straps are
fully extended. Place the complete apparatus in the
storage case or suitable storage location so it can be
easily reached for emergency use.
12
TAL 1211 (L) Rev. 4 - 10088650

COLD WEATHER OPERATION
SUGGESTED PROCEDURES FOR COLD WEATHER
OPERATION
Moisture can cause problems in Air Masks if it freezes.
However, moisture can cause freezing problems even if
the surrounding air is above freezing. This is due to air
flowing from the cylinder through the regulator drops from
cylinder pressure to close to atmospheric pressure very
quickly. As it does so it expands, causing the air and the
regulator to become colder. Although the surrounding
temperature may be warmer than 32°F, the temperature
inside the regulator may be lower. Any water inside could
turn to ice and restrict airflow.
1. To keep moisture from entering the mask-mounted
regulator. Stow the regulator in the STAND-BY belt
mount.
2. When the Air Mask is away from heat, water spray can
freeze on the regulator surface. Ice can build up and
freeze the buttons, bypass valve, and the release tabs.
Before entering or re-entering a hazardous
atmosphere, make sure the buttons, release tabs, and
bypass valve are ice-free and operating properly.
Periodically, check the bypass to be sure it is ice-free.
3. Moisture can enter through the cylinder valve or
coupling nut when cylinders are replaced on the Air
Mask. When replacing cylinders, be careful to prevent
moisture or contamination from entering the system.
Remove any ice from these fittings. Wipe the coupling
nut threads and cylinder valve threads dry before
disconnecting the cylinder. Water can contaminate the
system and freeze.
4. NIOSH certification requires a nosecup at
temperatures below 32°F. The nosecup reduces lens
fogging and must be used whenever freezing
conditions are encountered.
5. Thoroughly dry the facepiece and mask mounted
regulator after cleaning and disinfecting. Follow
Confidence Plus
®
Cleaning Solution Instructions.
13
TAL 1211 (L) Rev. 4 - 10088650

CLEANING AND DISINFECTING
CLEANING AND DISINFECTING
Depending on the cleaning policy adopted, either a
designated person or the user should clean each device
after each use. ANSI standards suggest that users should
be trained in the cleaning procedure. Confidence Plus
Cleaning Solution (P/N 10009971) from MSA is
recommended. It cleans and disinfects in one operation. It
retains its germicidal efficiency in hard water to inhibit the
growth of bacteria. It will not deteriorate rubber, plastic,
glass, or metal parts. Refer to label for user instructions.
• DO NOT use any cleaning substances that can or
might attack any part of the apparatus.
• Alcohol should not be used as a germicide
because it may deteriorate rubber parts.
• If not rinsed thoroughly, cleaning agent residue
may irritate the wearer’s skin.
1. Preparing Solution
a. Follow the instructions with the Confidence Plus
Cleaning Solution.
b.If the Confidence Plus Cleaning Solution is not
used, wash in a mild cleaning solution, rinse
thoroughly, and submerge in a germicide solution
for the manufacturer’s recommended time.
2. Clean and Disinfect the Facepiece
a. Remove the mask mounted regulator from the
facepiece.
b.Thoroughly wash the facepiece (and nosecup) in the
cleaning solution. A soft brush or sponge can be
used to clean the soiled facepiece.
c. Rinse the facepiece and components in clean,
warm (110°F), water (preferably running and
drained).
d.Clean the pressure demand exhalation valve by
pressing in on the stem with a blunt object and
flushing with clean water.
e. Allow the facepiece to air dry. Do not dry the parts
by placing them near a heater or in direct sunlight.
The rubber will deteriorate.
f. Operate the exhalation valve by hand to be sure it
works properly.
Note: Do not force-dry the parts by placing them in a
heater or in direct sunlight. The rubber will deteriorate.
When the facepiece is thoroughly dry, store the facepiece
in the plastic bag that it was shipped in.
3. In general, only the facepiece requires cleaning and
disinfecting after each use. If the apparatus is soiled
(i.e. heavy smoke residue, or dirt accumulation) use a
sponge damp with mild soap solution or use a
soft/medium bristle brush to remove deposits that
may interfere with normal operation of:
a. Harness (straps and buckles)
b.Cylinder carrier
c. Cylinder (coupling nut, gauge, outlet connection)
d.Audi-Larm audible alarm
e. MMR remote gauge lens
f. First stage regulator
g. MMR second stage regulator. Cover outlet of the
MMR second stage regulator to prevent water, dirt
or debris from entering.
4. Inspect the entire apparatus as you re-assemble it.
Follow the Inspection Instructions.
5. Thoroughly dry the facepiece and regulator after
cleaning and disinfecting. The facepiece can trap
water which could enter the regulator.
14
TAL 1211 (L) Rev. 4 - 10088650

INSPECTION
INSPECTION
Inspect the entire air mask after it is cleaned and
disinfected. ANSI Standards Z88.2 and Z88.5, describe
three levels of inspection procedures which are to be
performed. Refer to these documents, or to an inspection
program prepared by a health professional in establishing
an inspection program. Detailed repair procedures are
located in the MMR User’s Maintenance Instructions.
If the air mask does not meet any of the following
inspections, it must be removed from service. Do not
inspect the air mask before cleaning if there is danger of
contacting hazardous contaminants. Clean and disinfect
first, then inspect. Failure to follow this warning can
cause inhalation or skin absorption of the contaminant
and result in serious personal injury or death.
COMPONENT INSPECTION
(AFTER EACH USE AND MONTHLY)
1. Don the air mask following the instruction procedures.
These steps make up the Air Mask Functional Test.
2. If all steps are performed successfully, remove the air
mask and inspect it following the steps below.
3. Facepiece
a. Inspect the facepiece for rubber deterioration, dirt,
cracks, tears, holes, or tackiness.
b.Check the harness headstraps for breaks, loss of
elasticity, missing buckles or straps. Check the
straps for signs of wear.
c. Inspect the lens for cracks, scratches, and a tight
seal with the facepiece rubber.
d.The exhalation valve must be clean and operate
easily. The valve must move off the seat and return
when released.
e. Inspect the facepiece coupling for damage. Also
check to be sure the spider gasket, and valve disc
are present.
4. Cylinder and Remote Gauges
a. Be sure you can see both gauge needles and face
clearly through the lens. Also be sure the gauge
stem is not bent.
b.Inspect the gauge hose for any visible damage.
5. Audi-Larm Audible Alarm
a. Check that the alarm is undamaged and clean.
b.Ensure that the Audi-Larm Coupling nut is hand-
tight (no tools).
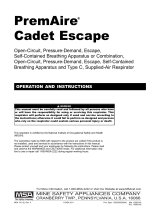
6. Quick-Fill and URC Coupling Inspection
Inspect the URC and Quick-Fill coupling for tightness of
the coupling halves and tightness of the coupling to the
air mask. Perform both inspections simultaneously.
a. Close the cylinder valve and relieve system
pressure. (See DISCONNECTING THE FIREHAWK
PUSH-TO-CONNECT REGULATOR or
DISCONNECTING THE SLIDE-TO-CONNECT
FIREHAWK REGULATOR for instructions).
b.Use a fine-tip ink
marker and a ruler or
straight edge to
draw a line on the
male coupling. Make
sure the line extends
across the joint and
coupling hex flats
onto the Audi-Larm
or Quick Fill manifold
body.
c. Put the dust cover on the coupling.
d.Grasp the dust cover by hand and, using maximum
effort, attempt to loosen the coupling at the joint by
turning the dust cover counterclockwise. Do not
use tools.
e. If the line does not
line up across the
joint...
...or across the joint
where the coupling
attaches to the air
mask, remove the air
mask from service
until a replacement
coupling is installed.
If the line does line
up, the coupling is
sufficiently tight and
the air mask may be
returned to service.
7. Cylinder
Breathing apparatus cylinders should be recharged as
soon as possible after use. Cylinders should not be
stored partially charged for two reasons:
• If used without recharge, the service life of the
apparatus is reduced.
• The cylinder burst disc vents excess pressure if a
full cylinder is over exposed to fire or heat. If the
cylinder is not full, it may be damaged before the
burst disc vents.
It is also essential that the required inspections and tests
be performed on all air mask cylinders in accordance with
Department of Transportation (DOT) regulations. DOT
regulations require that composite cylinders be retired
from service after the fifteenth year. Please note this does
15
TAL 1211 (L) Rev. 4 - 10088650

INSPECTION
not include cylinder valve assembly which may be reused.
Aluminum cylinder service life is indefinite if proper
inspection and hydrotest procedures are followed and
they indicate that the cylinder may remain in service.
Please contact your MSA distributor or sales associate if
you have questions or if you need additional information
regarding this policy.
Note: ANSI Z88.5 recommends checking cylinder
pressure weekly. For maximum safety the cylinders should
be stored full or empty (pressure above ambient but less
than 100 psig).
a. If the cylinder is less than FULL, recharge it before
storing it. Cylinder air must be at least CGA Quality
Verification Level (Grade) D respirable air.
b.Inspect the cylinder valve for signs of damage. The
valve may be opened slightly to be sure it operates
properly. Be sure to fully close the valve.
c. Inspect the cylinder body for cracks, dents,
weakened areas, corrosive agent causing the fibers
to break or peel, or signs of heat-related damage. If
the cylinder is damaged return it to an MSA Service
Center. Call 1-800-MSA-2222 for instructions.
d.Check the hydrostatic test date on the cylinder
approval sticker located on the cylinder neck.
Fiberglass and Kevlar composite cylinders must be
tested every three years. Steel cylinders and carbon
fiber cylinders must be tested every five years.
Aluminum cylinder life is indefinite if proper
inspection and hydro test procedures are followed
and they indicate that the cylinder may remain in
service.
8. Harness
a. Inspect all harness components for cuts, tears,
abrasion or signs of heat or chemically-related
damage.
9. Carrier
a. Inspect the cylinder strap and buckle to be sure it
holds the cylinder securely. Operate the latch to be
sure that it opens and closes properly and that it
holds the cylinder securely.
b.Inspect back plate for cracks, weakened areas or
signs of heat or chemically related damages.
10. Rescue Belt
a. Detailed inspection instructions for the Rescue Belt
are provided under a separate manual, (P/N
10052748 (P/N 10115063 for the Rescue Belt II).
11. Record Keeping
Following inspection, the date and initials of the
designated person should be recorded on an
inspection tag. A more detailed record of the
operations performed can be noted on an inspection
and maintenance log. Inspection tags and inspection
and maintenance logs are available from MSA. When
the inspection data has been recorded, the breathing
apparatus is stored in a ready position.
16
TAL 1211 (L) Rev. 4 - 10088650

FUNCTIONAL TESTS
FUNCTIONAL CHECKS
(AFTER EACH USE AND MONTHLY)
1. Check that the regulator works properly. The regulator
outlet should be sanitized before and after testing.
a. Check that the cylinder valve and buttons are
closed and that the system is not pressurized.
b.Gently inhale through the regulator outlet and hold
your breath for about 10 seconds. If the negative
pressure is maintained, there is no leakage.
c. Gently exhale through the regulator outlet for about
10 seconds. If the positive pressure is maintained,
there is no leakage.
d.Do not use the apparatus if airflow through the
regulator is detected in either test. Return the
regulator to a certified repairperson.
2. Inspect the buttons and bypass valve.
a. With the regulator pressurized, operate each valve
to be sure it operates. Venting of pressure relief
valves (or a continuing flow of air through the
regulator when the user is not inhaling) indicates
that the regulator needs to be repaired.
b.Listen to the regulator. Any unusual sounds such as
whistling, chattering, clicking, or rattling mean that
the regulator should be checked further.
c. If any of these symptoms occur, the apparatus must
be removed from service. Return the regulator to a
certified repairperson.
3. Audi-Larm Audible Alarm
a. Check the function of the audible warning device
by observing the regulator gauge pressure at which
the alarms sounds. Perform this test with a
minimum cylinder pressure of 1,200 psig for the
Low Pressure Air Mask, and 2,000 psig for the High
Pressure Air Mask.
b.Pressurize the system by opening the cylinder valve
for a moment, then close it. The alarm must sound
indicating it is functioning.
c. Open bypass slowly.
d.Watch the drop in pressure on the shoulder gauge
and the point at which the whistle must begin to
sound. Nominal gauge readings at which the alarm
starts to sound are listed below.
550 psig approximately (low pressure system)
1125 psig approximately (high pressure system)
e. The alarm must continue until the air pressure is
approximately 200 psig or less. If the whistle does
not function properly, the apparatus must be
removed from service.
Do not disconnect the regulator coupling nut when
pressure is shown on the regulator gauge. Release all
pressure from the regulator by opening the bypass
valve. Removing the coupling nut with the regulator
pressurized may result in serious personal injury,
death, or damage to equipment.
f. Open the bypass valve slowly to release trapped air.
Close bypass valve.
g. Unscrew the regulator coupling nut from the
cylinder valve. It is hand-tight and should not
require tools.
h. Inspect the coupling nut for thread damage. Also be
sure there is an O-ring and that it is not damaged.
i. Replace the O-ring if it is damaged.
17
TAL 1211 (L) Rev. 4 - 10088650

FLOW TEST AND OVERHAUL REQUIREMENTS
FLOW TEST AND OVERHAUL REQUIREMENTS
The air mask Regulator and alarm must be flow tested
and overhauled at specific time intervals. These
maintenance procedures must be performed by a trained
repairperson or at a Certified Service Center. Contact your
MSA sales representative or call the MSA Customer
Service Center at 1-800-MSA-2222. They will supply the
information you need to meet these requirements.
The required replacement/overhaul schedule for self-
contained breathing apparatus from MSA is based on
apparatus usage on an individual basis. The frequency
required for air mask overhaul depends upon how often
the apparatus is used. MSA breathing apparatus must be
overhauled based on the actual level of usage, rather than
on time alone.
Overhaul is covered in the Regulator Disassembly and
Repair sections and includes installation of the Regulator
overhaul kits.
MSA breathing apparatus must be flow tested every year
using an MSA approved flow test device.
The following table summarizes MSA’s required frequency
for overhaul and flow testing.
*A decision to retire an air mask should be based on an
air mask’s performance data and whether that data meets
the specified level of performance as defined in
maintenance requirements from MSA.
*The unit of air mask use is defined as the consumption of
one 30 min. cylinder of air. Example: If three cylinders of
air are used, the air mask would be considered to have
been used three times. If an assessment of an air mask’s
usage cannot be estimated or determined, then the air
mask shall be overhauled every three years.
18
TAL 1211 (L) Rev. 4 - 10088650
Average Recommended Recommended
Air Mask Usage* Overhaul Frequency Flow Test Frequency
1 cylinder per Every 3 years Every year
day or greater
1 cylinder every Every 8 years Every year
other day
1 cylinder per Every 15 years Every year
week or less

20
TAL 1211 (L) Rev. 4 - 10088650
Mine
Safety
Appliances
Company
SCBA
Lifetime
Wa
rranty
and
Te
rms
of
Sal
e
1
.
Expr
ess War
ranty
—
Air
Masks
and/or
components furn
i
shed
or
er
carry a Lifetime
r
against
defects
of
those
components
specifically identified
her
ein.
MSA
shall
be
r
eleased
fr
om
all
obligations
under
this
warranty in the
event
r
or
e
t
its
or
authorized
or
if
t
he
r
esults
fr
om
abuse,
m
isuse,
or
w
ear
and
tear
of
the
pr
oduct.
No
epr
any
af
fir
mation,
r
epr
esentation
or
modification
of
the warra nty
concer
sold
contract.
no
warranty c
-
tur
ed by
MSA,
but
w
ill
pass on to the
Pur
chaser
a warrantie
s
of
m e
rs
s
uch
components.
THIS W
ARRANTY
WARRANTY W
IS
IN
U
LIEU
OR
-
RY,
AND IS STRICTLY LIMITED TO THE TERMS
HEREOF:
MSA
SPE CIF ICALLY DISCLAIMS ANY WARRANTY OF
MER -
CHANTABILITY OR OF FITNESS FOR A PARTICULAR
PURPOSE.
Pr
oduct
Description Warranty Period Routine
Air
Mask Maintenance
Air Mask (less
Cylinder
)
Lifetime
Air Mask Cylinder
Until
end
of
service life
as
by
gov
t.
r
Air Mask Replacement Parts Lifetime
Air Mask
Critical
Repair Parts Lifetime
3
.
Exclusive —
It
is
expressly
agr
eed
that
t
he
Pur
chaser
’
s
’
sole and exclusive rem
, fo
r
any
of
or
any
other
cause
of
shall
be the
r
r
at
’
any
equipment
or
parts
t
hat
a
fter
by MSA
ar
e
pr
oven to be
d f
defective.
and/or
w
ill
pr
ovided
at
no
cost
t
,
F.
Pur
chaser
’
s
of
re to
r
epair
not
cause the remedy
established
her
eby to
fail
of
i
ts
essential
purpose.
MSA
r
es that the air mask be maintained as
specified in the Operationsand Instructions
Manual;
,
coverage is
for
faulty
,
not
dependent on
r
outine The
costs of
pr
es
other
r
ar
ethe
r
of
the
pur
chaser and
ar
e not ed by the warranty
.
2
.
Exceptions—The products below are excluded from MSA
’
s
Lifetime Wa
rranty:
4
.
Exclusion
f
of
Pur
f l
specifical
-
and
agr
ees
t
w
MSA be liable to
Pur
chaser
i
ncidental,
or
consequential
damages
or
l
osses
of
any kind
whatsoever
,
r
i
ncluding
but
not
limited
to,
l
oss
f
of
anticipated
pr
o
f
fits and any
This exclusion is to claims
for
br
each
of
warranty
,
y, y
tor-
tious
conduct
or
any
other
cause
of
action
against
MSA.
Pr
oduct
Exception Warranty Period
Facemask Br T
ube,
ube,
Har &Nose Cup
Rubber
Pr
oduct
5
Y
ear
ear
Limited/Age Deterioration
Electr
onic Speech Communication Manufacture
r
’
s
’ Warranty 1
Y
ear
ear
ICM
®
Unit 2000 & ICM Unit 2000 Plus MSA Limited Warranty 2
Y
ears
ears
Non-Rechargeable Batteries Expendable
and/or
Consumable
Parts
N/
A
A
ID
0
-
MC/ Aug
2
002
Printed in
Fire Service Customer Service: MSA Canada
P.O.
4
Phone Phone
6
7
2
2
0
USA Fax
39
8
Fax 1
3
000
MSA International MSA
Phone Phone 22
57 3
0
U.S. Customer Service Center F
AX
(
4
Fax
59 3
0
Phone
1
-8
00
-MSA-
2222

CRANBERRY TWP.,PENNSYLVANIA,U.S.A.16066
For More Information, call 1-800-MSA-2222 or VisitOurWebsiteatwww.MSAsafety.com
/