Page is loading ...

4 5 6 7
Getting Started:
Your metal detector comes completely
assembled. You only need to install batteries
(not included) in the metal detector and its
light and adjust the detector to the height you
would like it to be.
Installing The Batteries In
The Metal Detector:
You will need a 9-volt battery (not included)
to power the metal detector. Remove the
battery door from the compartment located
in the handle of the unit with a screwdriver.
Insert a 9-volt battery in the compartment
by following the polarity (+)(-) markings on
the inside of the fitted battery compartment.
Do not force the battery into place with the
polarity reversed because this can damage
the item. Replace the battery door and
tighten the door with a screwdriver.
Adjusting The Height:
The metal detector can be used as a full-size
metal detector or adjusted to a hand held unit. To adjust the length,
turn the locking ring located on the shaft of the metal detector counter-
clockwise. Adjust to desired length and position the coil to be flat to the
ground while in use. Turn the locking ring clockwise to lock the length
of the shaft to desired position. To adjust to a hand held unit loosen the
locking rings and position the head close to the handle.
Using Your Metal Detector:
Before powering on the device, position the metal detector so the search coil is
away from any metal objects. Then, turn the unit on by moving the toggle on the
device away from you. You will see a green LED indicator showing the power is
turned on. Your unit is self-calibrated and
needs no further adjustment. Your metal
detector is ready to be used in the most
sensitive detection setting. To search for
metal objects, swing the metal detector back
and forth slowly while keeping the search
coil level and about ¾ inches above the
ground. When your metal detector locates a
metal object it will start to emit a tone. The
more solid and louder the tone, the stronger
the signal, which indicates how close the
object is to the coil. The green LED indicator
on the handle will illuminate when the signal
strength is strong. By using both the LED
indicator and the tone you will be able to discover many amazing articles just below
ground. Note: The detection coil is water resistant and can be used in shallow
water like puddles. Do not fully submerge the coil for long periods of time.
Using The LED Light:
The LED light that is on the shaft of the metal detector can aid you in your
discoveries by illuminating darker search areas or providing extra light during
dawn or twilight detecting sessions. To use the LED light, you will need to
install 3 AAA batteries in the light unit. To do so, remove the battery door with a
screwdriver. Insert 3 AAA batteries following the polarity (+)(-) inside the fitted
battery compartment. Do not force a battery into place with the polarity reversed
because this can damage the item. Replace the battery door and tighten the door
with a screwdriver. Now that you have installed your batteries in your LED light,
you may power the unit on by pressing the light switch.
Places To Search:
The beach, which is a great place to begin because you will get fewer competing
signals on a sandy beach and it will be easier to dig there; Under trees where
people may have sat to rest; At the homes of your relatives — especially those
that live in older homes; Your own front and back yards; or areas where historic
battles occurred (Be sure to ask permission first because you may not be able to
remove objects from these locations).
Know These Important Rules Of Metal Detecting And Digging:
Some parks and public land prohibit metal detecting and digging.
Always check first. Always ask for permission from the property owner before
entering private property. Be responsible and cover the holes that you dig.
Cleaning Tips:
Dampen a cloth (not included) with cleaning solution and gently wipe away
any residue. Protect the device against dirt and dust, and always leave it to dry
properly after use at room temperature before storing.
Unlock
Lock
Lock
9V
x1
NOT INCLUDED
x3
NOT INCLUDED
A
A
A
A
A
A
A
A
A
Unlock
Lock
Lock
9V
x1
NOT INCLUDED
x3
NOT INCLUDED
A
A
A
A
A
A
A
A
A
SAFETY WARNINGS
• Respect privacy: When using
this device, respect the
privacy of other people. For
example, do not use them to
look into people’s homes.
• Choking hazard: Children
should only use device
under adult supervision.
Keep packaging materials
like plastic bags and rubber
bands out of the reach of
children as these materials
pose a choking hazard.
• Battery guidelines: This
device contains electronic
components that are
powered by batteries.
Batteries should be kept
out of children’s reach.
When inserting batteries,
please ensure the polarity is
correct. Insert the batteries
according to the displayed
+/- information. Never
mix old and new batteries.
Replace all batteries at
the same time. Never mix
alkaline, standard carbon-
zinc and rechargeable
nickel-cadmium batteries.
Never short circuit the
device or batteries or throw
either into a fire. Leaking
or damaged batteries can
cause injury if they come
into contact with the skin.
If you need to handle such
batteries, please wear
suitable safety gloves.
Remove batteries from the
product before extended
storage to prevent leaking.
Do not immerse the battery
compartment in water.
• Risk of fire: Do not place
device, particularly the
lenses, in direct sunlight.
The concentration of light
rays could cause a fire.
• Do not disassemble this
device. In the event of a
defect, please contact
your dealer. The dealer
will contact the Customer
Service Department and
can send the device in to
be repaired if necessary.
• Do not subject the
device to temperatures
exceeding 60° C (140° F).
• This device complies with
part 15 of the FCC Rules.
Operation is subject to
the following conditions:
This device may not cause
harmful interference.
This device must accept
interference received,
including interference
that causes undesired
operation.
• Disposal: Keep packaging
materials, like plastic bags
and rubber bands, away
from children as they a
pose a risk of suffocation.
Dispose of packaging
materials as legally
required. Consult the local
authority on the matter
if necessary and recycle
materials when possible.
Read and follow the instructions, safety rules, and first aid information.
HOW TO SET UP
Correct
Incorrect
Correct
Incorrect

©2018 National Geographic Partners LLC. All rights reserved.
NATIONAL GEOGRAPHIC and Yellow Border Design are trademarks of the
National Geographic Society, used under license.
©2018 Explore Scientific, LLC.
1010 S. 48th Street, Springdale AR 72762
All rights reserved. explorescientificusa.com | exploreone.com | 866.252.3811
Made in China
CONFORMS TO THE SAFETY REQUIREMENTS OF ASTM F963
01
02
05
23
Discover Hidden Treasures!
You don’t have to sail the high seas or come across an ancient map to find buried
treasure. In fact, all around us precious metals are located just beneath the
surface waiting to be found. All you need to start hunting is a metal detector!
With the National Geographic Metal Detector, you can unearth coins, jewelry
and even antique pieces. Depending on what you find, you can then turn your
treasure into cash, clean it up and keep it or use these items as clues to learn
more about the history of the area you’re searching.
For Instance, Did You Dig Up A Horseshoe?
Discoveries like this can give us a glimpse into the past. The soil you’re
searching could be the former site of a farm or even a civil war camp.
Did You Find A Coin?
When you unearth a coin, the first thing you’ll want to do is check to see the date
on it. If the dates go back far enough, someone’s lost pocket change might be
worth more than face value. For example, any U.S. dime, quarter, half dollar or
dollar coin that is dated 1964 or earlier is made up of 90 percent silver – which
means it is worth more!
Did You Discover A Piece Of Jewelry?
It can be difficult to determine the value of a piece of jewelry at a glance, but
researching just what you’ve found can be rewarding both financially and
mentally. Whether it is a ring, an earring or a necklace, every piece of jewelry
has a story and imagining what that is can be lots of fun.
Did You Know?
A great time to go metal detecting is right after a heavy rain because the
ground is soft. Wet ground also is a better conductor than dry ground so you
will have a better chance of locating objects that could be buried deeper than
you would in dry ground.
PRODUCT INTRODUCTION
CONTENTS
01 Metal Detector
02 LED Light
03 Handle w/LED Indicator
04 Extendable Shaft w/
Locking Mechanism
05 Detection Coil
03
04
NOT INCLUDED
X3
NOT INCLUDED
X1
Do not mix old and new batteries. Do not mix alkaline,
standard (carbon-zinc), or rechargeable (ni-cad, ni-mh, etc.) batteries.
8+
AGES
OUTDOOR EXPLORATION GEAR
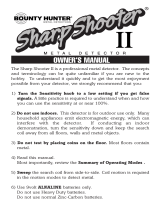
JR METAL DETECTOR
INSTRUCTION MANUAL
CHOKING HAZARD
— Small parts.
Not for children under 3 years.
WARNING:
/