Tevion INTERNET RADIO & MEDIA PLAYER User manual
- Category
- Radios
- Type
- User manual
This manual is also suitable for
Tevion INTERNET RADIO & MEDIA PLAYER is a user-friendly device that combines the functionality of an internet radio and a media player. With its ability to connect to Wi-Fi networks, it grants access to a wide range of online radio stations, allowing you to tune in to your favorite broadcasts or discover new ones. The media player feature enables you to enjoy your personal music collection stored on a networked PC, supporting various audio file formats like MP3 and WAV. Additionally, the device boasts FM radio capabilities, providing you with the option to listen to local radio stations.
Tevion INTERNET RADIO & MEDIA PLAYER is a user-friendly device that combines the functionality of an internet radio and a media player. With its ability to connect to Wi-Fi networks, it grants access to a wide range of online radio stations, allowing you to tune in to your favorite broadcasts or discover new ones. The media player feature enables you to enjoy your personal music collection stored on a networked PC, supporting various audio file formats like MP3 and WAV. Additionally, the device boasts FM radio capabilities, providing you with the option to listen to local radio stations.


-
 1
1
-
 2
2
-
 3
3
-
 4
4
-
 5
5
-
 6
6
-
 7
7
-
 8
8
-
 9
9
-
 10
10
-
 11
11
-
 12
12
-
 13
13
-
 14
14
-
 15
15
-
 16
16
-
 17
17
-
 18
18
-
 19
19
-
 20
20
-
 21
21
-
 22
22
-
 23
23
-
 24
24
-
 25
25
-
 26
26
-
 27
27
-
 28
28
-
 29
29
-
 30
30
-
 31
31
-
 32
32
-
 33
33
-
 34
34
-
 35
35


Tevion INTERNET RADIO & MEDIA PLAYER User manual
- Category
- Radios
- Type
- User manual
- This manual is also suitable for
Tevion INTERNET RADIO & MEDIA PLAYER is a user-friendly device that combines the functionality of an internet radio and a media player. With its ability to connect to Wi-Fi networks, it grants access to a wide range of online radio stations, allowing you to tune in to your favorite broadcasts or discover new ones. The media player feature enables you to enjoy your personal music collection stored on a networked PC, supporting various audio file formats like MP3 and WAV. Additionally, the device boasts FM radio capabilities, providing you with the option to listen to local radio stations.
Ask a question and I''ll find the answer in the document
Finding information in a document is now easier with AI
Other documents
-
 Sangean Electronics RCR-8WF User manual
-
 King Champion Electronics VSAKP100IB0001 User manual
-
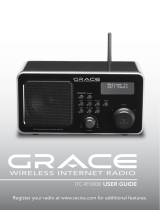
Grace ITC-IR1000W User manual
-
Hager Onair User manual
-
Sagem 700 User manual
-
 Grace Digital ITC-IR1000B User manual
-
-
 C. Crane AE Wi-Fi Internet Radio User manual
-
BT Internet Radio User manual
-
Roberts Stream 201 (WM201)( Rev.1) User guide


