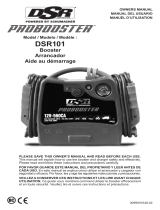
Schumacher Electric DSR132 Ultracapacitor Hybrid Jump Starter Owner's manual

Category
Battery chargers
Type
Owner's manual

This manual is also suitable for

0099002021-01
PLEASE SAVE THIS OWNER’S MANUAL AND READ BEFORE EACH USE.
This manual will explain how to use the jump starter safely and effectively.
Please read and follow these instructions and precautions carefully.
POR FAVOR GUARDE ESTE MANUAL DEL PROPIETARIO Y LEER ANTES DE
CADA USO. En este manual se explica cómo utilizar el arrancador con seguridad
y ecacia. Por favor, lea y siga las siguientes instrucciones y precauciones.
ESSAYER DE GARDER LE MANUEL D’INSTRUCTIONS ET LE LIRE AVANT
CHAQUE UTILISATION. Ce manuel explique comment utiliser le booster d’une
façon sûre et efcace. S’il vous plaît lisez et suivez ces instructions et précautions.
MODEL / MODELO / MODÈLE :
DSR132
Ultracapacitor Hybrid Jump Starter
Arrancador híbrido de Ultracapacitor
Booster hybride à ultra-condensateur
OWNERS MANUAL / MANUAL DEL USUARIO / MANUEL D’UTILISATION
• 2 •
1. IMPORTANT SAFETY INSTRUCTIONS – SAVE THESE INSTRUCTIONS.
1.1 Working in the vicinity of a lead-acid
battery is dangerous. Batteries generate
explosive gases during normal operation.
It is important that you follow these
instructions each time you use the jump
starter.
1.2 To reduce the risk of battery explosion, follow
these instructions and those published by the
battery manufacturer and the manufacturer
of any equipment you intend to use in the
vicinity of a battery. Review cautionary
marking on these products and on the
engine.
1.3 Keep out of reach of children.
1.4 Use only in a well-ventilated area.
1.5 Do not disassemble the jump starter. Take it
to a qualied service professional if service
or repair is required. Incorrect assembly may
result in re or electrical shock.
1.6 Never operate the jump starter if it is
damaged.
1.7 Do not set the jump starter on ammable
materials, such as carpeting, upholstery,
paper, cardboard, etc.
1.8 Place the jump starter as far away from the
battery being jumped as the cables
will permit.
1.9 Do not expose the jump starter to rain
or snow.
1.10 Never place the jump starter directly above
battery being jumped.
1.11 To prevent arcing, never allow the clamps to
touch together or to contact the same piece
of metal.
1.12 If someone else uses the jump starter,
ensure they are well informed on how to use
it safely, and have read and understood the
operating instructions.
1.13 The jump starter is NOT designed to be
installed as a replacement for a vehicle
battery.
1.14 Do not use for dry cell batteries that are
commonly used with home appliances.
1.15 Make sure your vehicle is in “park” and the
emergency brake is engaged.
1.16 Turn off ALL electronics in your vehicle (air
conditioner, heat, radio, lights, chargers,
etc.).
1.17 Make sure the key is in the “OFF” position.
For smart-key fobs (push-to-start vehicles),
make sure the vehicle is completely OFF
before jump starting.
2. PERSONAL SAFETY PRECAUTIONS
2.1 Wear complete eye protection and protective
clothing when working near lead-acid
batteries. Always have someone nearby for
help.
2.2 Have plenty of fresh water, soap and baking
soda nearby for use, in case battery acid
contacts your eyes, skin, or clothing. Wash
immediately with soap and water and seek
medical attention.
2.3 If battery acid comes in contact with eyes,
ush eyes immediately for a minimum 10
minutes and get medical attention.
2.4 Neutralize any acid spills thoroughly with
baking soda before attempting to clean up.
2.5 Remove all personal metal items from your
body, such as rings, bracelets, necklaces
and watches. A battery can produce a short
circuit current high enough to weld a ring to
metal, causing a severe burn.
2.6 Never smoke or allow a spark or ame in the
vicinity of the battery or engine.
1. IMPORTANT SAFETY INSTRUCTIONS
• 3 •
3. FEATURES
1. Battery clamps
2. Digital display
3. ON/OFF button
4. Micro USB input port
5. 12V DC socket
Not shown:
6. Lithium battery compartment
(on back)
7. 12V DC car charger
for charging ultracapacitors
8. Micro-USB cable
for charging lithium battery
1
2
3 4
5
4. CONTROL PANEL
1. Digital display
2. Voltage indicator
3. Ultracapacitor charge indicator
(Solid LED)
Ultracapacitors are charging
(Pulsing LED)
4. Lithium battery level indicator
5. Micro USB input
6. 12V DC input port
7. ON/OFF button
8. GLOW button
9. Condition indicator
1 2 3 4
5
6
789
Digital Display
V Vehicle’s battery voltage
% Charging percentage
of the ultracapacitors
Err Reverse polarity connection/
Lithium battery too low to charge
ultracapacitors
FUL Ultracapacitors are fully charged
OUr Override mode is active
CH6 Lithium battery is charging
Condition Indicator
Steady red:
Reversed Connection/Fault
Alternating red and green:
Glow Mode
Blinking green for 5 seconds,
then steady green:
Override Mode
Steady green:
Ready
• 4 •
5. OPERATING INSTRUCTIONS
Pre-Charging
The DSR132 must be pre-charged before
it can be used to jump start your vehicle.
(Press the ON/OFF button once to see the
Ultracapacitor charge %.) The “Standard
Mode” instructions will guide you on using your
current vehicle’s “weak” battery to pre-charge
the jump starter. If your vehicle’s battery is
completely discharged, or does not allow you
to pre-charge the jump starter, see “Alternative
Pre-Charge Methods”.
Standard Mode
In most cases, the weak battery can fully
recharge the jump starter.
Follow these steps to pre-charge your jump
starter and get your car started:
1. For a negative-ground vehicle (as in
most vehicles), connect the POSITIVE
(RED) clamp to the POSITIVE (POS, P, +)
battery post. Next, connect the NEGATIVE
(BLACK) clamp to the vehicle chassis or
engine block, away from the battery.
2. For a positive-ground vehicle, connect
the NEGATIVE (BLACK) clamp to the
NEGATIVE (NEG, N, -) battery post. Next,
connect the POSITIVE (RED) clamp to
the vehicle chassis or engine block away
from the battery.
3. The jump starter will turn on automatically.
The digital display will show the voltage of
the vehicle’s battery.
4. Press the ON/OFF button. The jump
starter will start to recharge. The digital
display will show the charging percentage
of the internal ultracapacitors.
5. When digital display shows FUL, and the
condition indicator is steady green, crank
the engine.
Alternative Pre-charge Methods
If your vehicle’s battery is completely
discharged, or is unable to charge the jump
starter, the Fault indicator will turn on and an
audio alarm will sound. You can use one of the
following alternative pre-charging methods:
• From a battery (i.e, friend’s car)
Connect the jump starter’s red (POSITIVE)
output clamp to the POSITIVE post of
the battery. Next, connect the black
(NEGATIVE) output clamp to a heavy,
unpainted metal part of the chassis or
engine block, away from the battery. DO
NOT connect clamp to the negative
battery post, carburetor, fuel line or a
sheet metal part. The jump starter will start
to charge itself automatically. When the
digital display shows FUL, the audio alarm
sounds and the condition indicator is steady
green, turn off and disconnect the jump
starter by removing the output clamp from
the chassis or engine block, followed by the
output clamp from the battery post.
• From a 12V socket
The jump starter can be recharged from a
donor car’s 12V DC socket. Make sure the
car is running. Plug in the provided 12V
adapter. Charging starts automatically.
Once you have fully charged your jump
starter (the digital display shows 100%),
you can continue with the connection and
starting instructions in Standard Mode.
If your vehicle’s battery is completely
discharged, and you are unable to start the
vehicle in Standard Mode, you may need to
use the Override Mode starting instructions.
Override Mode
If there is no battery mounted on the engine
to be started, follow these steps to use
Override mode:
NOTE: The GLOW function will not operate in
this mode.
• Always read the vehicle manufacturer’s
instruction manual.
An initial battery indication of below 12V may
suggest that there is an internal fault.
1. Remove the vehicle’s positive (red) lead
from the battery terminal (g. 1). Ensure
that the jump starter is switched off.
Connect the jump starter’s positive clamp
to the vehicle positive lead, NOT the
battery terminal (g.1).
2. Press the ON/OFF button for 2 seconds and
then release.
Override can be activated two ways:
If the capacitor’s charge is over 80%,
Override mode (OUr) will activate and an
audio alarm will sound.
If the capacitor’s charge is less than 80%,
the lithium ion batteries will recharge the
capacitors until the display shows 100%.
Override mode (OUr) will then activate,
and an audio alarm will sound.
3. After Override mode is activated, the
condition indicator will pulse to show that
the jump starter is getting ready to start
the engine.
• 5 •
4. When the condition indicator turns steady
green, crank the engine right away.
(The ability for an engine to continue to
run without a battery connected will vary,
depending on the make and model of the
vehicle).
WARNING: Do not leave the engine running
without a connection to the jump starter or
the battery. Failure to comply could result in
damage to the vehicle ECU. The manufacturer
will not accept responsibility for any damage
caused by incorrect use of this product.
5. As soon as the engine starts, and keeping
the jump starter clamp and battery lead
connected, attach the positive lead to the
positive battery terminal and tighten the
terminal clamp (g. 2). After the positive
lead has been secured to the battery
terminal, switch off the jump starter and
disconnect from the battery.
Glow Mode:
In cold weather, the glow plugs in most diesel
vehicles will energize rst to heat up the
engine chamber before the engine start, as
indicated by the GLOW sign on the dashboard.
The process needs a current of 40-60Amp and
takes about 4-6 seconds. In this case, after the
jump starter is fully recharged and connected,
press the GLOW button, and then turn on the
ignition.
NOTE: GLOW is inactive during Override Mode.
Lithium Back-up Battery Pack
This jump starter is equipped with a lithium
battery pack. Recharge the battery pack with
the micro USB charging cable (included) and
your USB charger. Once connected to a USB
charger, charging starts automatically.
IMPORTANT: Make sure to use a USB
charging port rated for 1A @ 5V DC or higher.
If the product does not charge with a USB
plug, make sure the voltage marked on the
charger plug is the same as the jump starter.
Recharge time is approximately 5-8 hours.
The battery level indicators will show battery
status. Fully recharge the lithium battery
pack at least once a year or after using
Override Mode 2-3 times.
Working Cycle
• Maximum of 3 consecutive jump starting
operations.
• Allow a 20-minute interval between each
session.
6. SPECIFICATIONS
Input .....................................................................................................12V DC 10A, 5V DC 2A
Working temperature ............................................................... -40°C to 65°C (-40°F to 150°F)
Starting current ................................................................................................................. 900A
Battery pack ..................................................................................... Lithium, 11.1V / 2200mAh
Recharge time from vehicle battery ...................................................................... 130 seconds
Recharge time from 12V socket.................................................................................4 minutes
Recharge time from lithium battery .........................................................................5-6 minutes
7. REPLACEMENT PARTS
12V DC cig charging cable ................................................................................. 3899003573Z
Micro-USB charging cable .................................................................................. 3899003781Z
Lithium battery pack ............................................................................................ 5799000052Z
• 6 •
8. FREQUENTLY ASKED QUESTIONS
Q: Is this jump starter safe for the ECU and cars computer?
A: Unlike traditional jump starters, this jump starter uses ultracapacitors instead of a battery.
The voltage of capacitors is restricted to a range which is safe for all kinds of ECU.
Therefore, there is no risk from overvoltage.
Capacitors have a very small capacity, about 0.2-0.4Ah. They will fully recharge from the
alternator within couple seconds once the vehicle is started. Disconnecting the jump starter
will not cause any load dump, so there is no voltage spike produced.
Q. Will the transfer of residual energy to the jump starter damage the weak battery?
A. No. This jump starter draws only 0.2-0.4Ah energy from the battery. A weak car battery
normally has a capacity of 10-30Ah and can recharge the jump starter many times without
any adverse effects.
Q. How many jump starts can a fully recharged jump starter perform?
A. This jump starter is designed to start only once when fully recharged. It recharges itself after
each use, if left connected to a car’s battery. Therefore, it can jump start many times as
needed, successively.
Q. How long can the jump starter hold a charge?
A. This jump starter will self-discharge to 0 in a few days, but it can be instantly recharged from a
weak battery or from the back-up lithium battery, and be ready for use.
Q. What is the life span of this jump starter?
A. This jump starter can be used more than 10,000 times before noticeable loss of performance.
Ultracapacitors remain operable for more than 10 years.
Q. Is my hybrid jump starter safe?
A. It is extremely safe. Ultracapacitor technology is one of the foremost advantages over the
battery-based jump starters. Ultracapacitors are specially designed to receive and release a
large electrical current of instant power.
This jump starter is also equipped with short circuit/reverse polarity protection. Therefore,
short circuit due to unintended use will not damage the ultracpacitors. They will not overheat
and cause re or explosion.
NOTE: Reverse polarity and short circuit protection is disabled during Override Mode.
Q. Does the jump starter need to be regularly recharged?
A. No. The jump starter relies on the instant recharging of ultracapacitors rather than stored electric
energy. Therefore, it does not need regular recharge and can be stored for years. However, the
back-up lithium battery needs to be recharged at least once a year.
Q. What is OVERRIDE mode?
A. The ECU of some cars does not allow engine to start if battery’s voltage is lower than 8V. In
this situation, the positive lead needs to be disconnected from the car battery, and instead
connected directly to the jump starter. Then the ECU can detect the high voltage provided by
the jump starter.
WARNING: CAREFULLY READ USER’S MANUAL BEFORE USING OVERRIDE MODE.
Q. What is GLOW?
A. In cold weather, the glow plugs in most diesel vehicles will energize rst to heat up the engine
chamber before the engine start, as indicated by the GLOW sign on the dashboard. The process
needs a current of 40-60Amp and takes about 4-6 seconds. In this case, after the jump starter is
fully recharged and connected, press the GLOW button, and then turn on the ignition.
Q. What size of engines can be used with this jump starter?
A. Success of a jump start depends on many factors such as battery condition, temperature, age of
the car, etc.
Here is general guide of jump starter choice for different engine size:
GASOLINE DIESEL
Cranking
Current
Warm Cold Warm Cold Cold
No Battery No Battery No Battery
Weak Battery
No Battery
900A <8.0L <7.0L <5.0L <5.0L <4.0L
• 7 •
9. BEFORE RETURNING FOR REPAIRS – NORTH AMERICA
For more information about troubleshooting,
contact customer service for assistance:
www.batterychargers.com
or call 1-800-621-5485
For REPAIR OR RETURN, contact Customer Service at 1-800-621-5485.
DO NOT SHIP UNIT until you receive a RETURN MERCHANDISE AUTHORIZATION (RMA)
number from Customer Service at Schumacher Electric Corporation.
10. LIMITED WARRANTY – NORTH AMERICA
SCHUMACHER ELECTRIC CORPORATION, 801 BUSINESS CENTER DRIVE, MOUNT
PROSPECT, IL 60056-2179, MAKES THIS LIMITED WARRANTY TO THE ORIGINAL
RETAIL PURCHASER OF THIS PRODUCT. THIS LIMITED WARRANTY IS NOT
TRANSFERABLE OR ASSIGNABLE.
Schumacher Electric Corporation (the “Manufacturer”) warrants this jump starter for one (1) year
from the date of purchase at retail against defective material or workmanship that may occur
under normal use and care. If your unit is not free from defective material or workmanship,
Manufacturer’s obligation under this warranty is solely to repair or replace your product, with a
new or reconditioned unit, at the option of the Manufacturer. It is the obligation of the purchaser
to forward the unit, along with proof of purchase and mailing charges prepaid to the Manufacturer
or its authorized representatives in order for repair or replacement to occur.
Manufacturer does not provide any warranty for any accessories used with this product
that are not manufactured by Schumacher Electric Corporation and approved for use with
this product. This Limited Warranty is void if the product is misused, subjected to careless
handling, repaired, or modied by anyone other than Manufacturer or if this unit is resold
through an unauthorized retailer.
Manufacturer makes no other warranties, including, but not limited to, express, implied or statutory
warranties, including without limitation, any implied warranty of merchantability or implied warranty
of tness for a particular purpose. Further, Manufacturer shall not be liable for any incidental,
special or consequential damage claims incurred by purchasers, users or others associated
with this product, including, but not limited to, lost prots, revenues, anticipated sales, business
opportunities, goodwill, business interruption and any other injury or damage. Any and all such
warranties, other than the limited warranty included herein, are hereby expressly disclaimed
and excluded. Some states do not allow the exclusion or limitation of incidental or consequential
damages or length of implied warranty, so the above limitations or exclusions may not apply to
you. This warranty gives you specic legal rights and it is possible you may have other rights which
vary from this warranty.
THIS LIMITED WARRANTY IS THE ONLY EXPRESS LIMITED WARRANTY AND THE
MANUFACTURER NEITHER ASSUMES OR AUTHORIZES ANYONE TO ASSUME OR
MAKE ANY OTHER OBLIGATION TOWARDS THE PRODUCT OTHER THAN THIS
WARRANTY.
• 8 •
11. LIMITED WARRANTY – AUSTRALIA
WARRANTY TERMS AND CONDITIONS
Schumacher Electric Corporation (the “Manufacturer”) or the resellers authorized by the Manufacturer
(the “Reseller”) warrant this charger (the “Product”) for one (1) year, according to the following
stipulations. Any and all warranties, other than the warranty included herein, are hereby expressly
disclaimed and excluded to the fullest extent permissible under applicable law. Legislation may
imply warranties or conditions or impose obligations on Manufacturer which cannot be excluded,
restricted or modied in relation to consumer goods.
Consumer End-User Warranty
Any claims under this warranty must be communicated to Reseller within 2 months after discovery
of the non-conformity.
Resellers/Professional End-User Warranty
The Manufacturer provides a limited warranty for hidden defects or non-conformities. This
warranty is subject to the following conditions:
a. The Manufacturer only warrants hidden defects in material or workmanship present in their root
cause at the moment of the rst sale by the Manufacturer;
b. Manufacturer’s obligation under this warranty is limited to repairing or replacing the Product
with a new or reconditioned unit at the sole option of the Manufacturer;
c. Manufacturer does not have any warranty obligations if the alleged defects were caused by
abnormal usage, fair wear and tear, unauthorized use of the Product or use of the Product differing
from the description in the applicable manual or other specications given by the Manufacturer,
insufcient care, repairs carried out by persons or entities or with parts not approved by
Manufacturer, poor care, accidents, unauthorized changes or modications, incorrect transport,
storage or treatment of the Product;
d. In order to exercise this right, the Product must be returned complete and in its original state
and packaging, with mail costs prepaid, along with proof of purchase to the Manufacturer or its
authorized representatives in order for repair or replacement to occur.
Common Warranty Provisions
The warranty mentioned above only applies to the rst professional or consumer user having
legally acquired the Product from the Manufacturer or a Reseller. No warranty is extended towards
clients, agents or representatives of those buyers.
The Product is sold under the specications, for the use and purpose in accordance with the
provisions of this manual, with express exclusion and disclaimer of warranty of any other
specications, uses and purposes.
Authorized Resellers are prohibited from making any statements or providing any warranty in
excess of the above warranties Non-authorized resellers may only sell the product under the
condition that they assume all warranty obligations with the total exclusion of any warranty
provided by the Manufacturer.
Manufacturer does not provide any warranty for any accessories used with the Product that are not
manufactured by Schumacher Electric Corporation.
This warranty does not exclude or diminish any claims the Manufacturer may have against the
distributors of The Product.
THE MANUFACTURER NEITHER ASSUMES NOR AUTHORIZES ANYONE TO ASSUME
OR MAKE ANY OTHER OBLIGATION TOWARDS THE PRODUCT OTHER THAN THIS
WARRANTY.
Warranty, Repair Service and Distribution Centers:
Australia/New Zealand:
Schumacher Asia Pacic Pty. Ltd.
A.B.N. 43613943525
Unit 53B – 28 Burnside Road, Ormeau
Queensland, Australia, 4208
07 3807 6510
Schumacher
®
is a registered trademark of Schumacher Electric Corporation.
• 9 •
1. INSTRUCCIONES IMPORTANTES DE SEGURIDAD –
GUARDE ESTAS INSTRUCCIONES.
1.1 Resulta peligroso trabajar en forma
cercana a una batería de plomo. Las
baterías generan gases explosivos
durante su normal funcionamiento. Por
este motivo, resulta de suma importancia
que siga las instrucciones cada vez que
utiliza el arrancador.
1.2 Para reducir el riesgo de explosión de una
batería, siga estas instrucciones y aquellas
publicadas por el fabricante de la batería y por
el fabricante de cualquier equipo que intente
utilizar en la proximidad de la batería. Revise
las pautas de precaución en estos productos
y en el motor.
1.3 Manténgase alejado de los niños.
1.4 Utilice solo en zonas bien ventiladas.
1.5 No desarme el arrancador; hágalo revisar
por una persona capacitada que efectúe
reparaciones cuando necesite servicio de
mantenimiento o una reparación. Volver a
ensamblar el arrancador en forma incorrecta
puede provocar riesgo de incendio o
descarga eléctrica.
1.6 Nunca opere el arrancador si está dañado.
1.7 No coloque el arrancador sobre materiales
inamables como alfombras, tapicería,
papel, cartón, etc.
1.8 Coloque el arrancador tan lejos de la batería
que se está cargando como los cables lo
permitan.
1.9 No exponga el arrancador a la lluvia
o la nieve.
1.10 Nunca coloque el arrancador directamente
sobre la batería que se está cargando.
1.11 Para evitar la formación de arcos eléctricos,
nunca permita que las pinzas se toquen
entre sí o estén en contacto con la misma
pieza de metal.
1.12 Si otra persona usa el arrancador, asegúrese
de que esté bien informada sobre cómo
usarlo de manera segura y además, de que
haya leído y comprendido las instrucciones de
funcionamiento.
1.13 El arrancador NO está diseñado para ser
instalado como reemplazo de la batería del
vehículo.
1.14 No lo utilice para cargar las baterías de
celdas secas que se suelen usar en los
aparatos domésticos.
1.15 Asegúrese de que el vehículo esté en
“estacionado” (park) y que el freno de mano
esté accionado.
1.16 Apague TODOS los componentes
electrónicos en su vehículo (aire
acondicionado, calefacción, radio, luces,
cargadores, etc.).
1.17 Asegúrese de que la llave esté en la posición
Apagado (OFF). En el caso de llaveros
inteligentes (presionar para encender el
vehículo), asegúrese de que el vehículo esté
completamente apagado (OFF) antes de
utilizar el arrancador.
2. PRECAUCIONES DE SEGURIDAD PERSONAL
2.1 Use protección completa para los ojos y ropa
protectora cuando trabaje cerca de baterías
de plomo-ácido. Siempre cuente con la
presencia de otra persona para obtener
ayuda.
2.2 Tenga a la mano bastante agua fresca, jabón
y bicarbonato de sodio en caso de que el
ácido de la batería entre en contacto con los
ojos, la piel o la ropa. Lave inmediatamente
con agua y jabón y busque atención médica.
2.3 Si el ácido de la batería entra en contacto
con los ojos, enjuague inmediatamente
durante 10 minutos como mínimo y busque
atención médica.
2.4 Neutralice el ácido derramado
abundantemente con bicarbonato de sodio
antes de intentar limpiarlo.
2.5 Retire todos los objetos metálicos de su
cuerpo (anillos, pulseras, collares y relojes).
Una batería puede producir una corriente
de cortocircuito lo sucientemente alta
como para soldar un anillo al metal, lo que
ocasionaría una quemadura grave.
2.6 NUNCA fume o permita la presencia de
chispas o llamas en la proximidad de una
batería o motor.
1. INSTRUCCIONES IMPORTANTES DE SEGURIDAD
• 10 •
3. CARACTERÍSTICAS
1. Pinzas de la batería
2. Pantalla digital
3. Botón de APAGADO/ENCENDIDO
4. Puerto de entrada micro USB
5. Toma de 12V DC
No mostrada:
6. Cubierta para las baterías de ión-litio
(en la parte posterior)
7. Cargador de automóvil de 12V CC
para carga de ultracapacitores
8. Cable micro-USB
para cargar la batería de litio
1
2
3 4
5
4. PANEL DE CONTROL
1 2 3 4
5
6
789
1. Pantalla digital
2. Indicador de voltaje
3. Indicador de carga de
ultracapacitor (LED encendido)
Los ultracapacitores se están
cargando (LED parpadeando)
4. Indicador de nivel
de la batería de litio
5. Puerto de entrada micro USB
6. Puerto de entrada de 12V DC
7. Botón de APAGADO/
ENCENDIDO
8. Botón de modo
incandescente (GLOW)
9. Indicador LED de condición
Pantalla digital
V Voltaje de la batería del vehículo
% Porcentaje de carga de los
Ultracapacitadores
Err Polaridad invertida/Batería de litio
con carga demasiado baja para cargar
ultracapacitores
FUL Ultracapacitadores completamente
cargados
OUr Modo Override activado
CH6 La batería de litio está cargando
Indicador de condición
Rojo jo:
Conexión invertida/Falla
Rojo-verde alternativamente:
Modo GLOW (brillo)
Verde parpadea 5 segundos
y queda jo:
Modo Override
Verde jo:
Listo
• 11 •
5. INSTRUCCIONES DE OPERACIÓN
Carga previa
El DSR132 se debe cargar previamente antes
de poderlo usar para arrancar su vehículo.
(Presione el botón ON/OFF una vez que
vea el % de carga del ultracapacitor.) Las
instrucciones de “modo estándar” lo guiarán
en el uso de la batería actualmente “baja”
de su vehículo para cargar previamente el
arrancador. Si la batería de su vehículo está
completamente descargada o no le permite
cargar previamente el arrancador, consulte los
“Métodos alternativos de carga previa”.
Modo estándar
En la mayoría de los casos, la batería “baja”
de su vehículo puede cargar previamente y de
manera completa el arrancador
Siga estos pasos para cargar previamente su
unidad y arrancar su vehículo:
1. En los vehículos con carga negativa a tierra
(como en la mayoría de los vehículos),
conecte la pinza con el polo POSITIVO
(ROJO) al borne POSITIVO (POS, P, +) de
la batería. A continuación, conecte la pinza
con el polo NEGATIVO (NEGRO) al chasis
del vehículo o al bloque del motor, lejos de
la batería.
2. En los vehículos con carga positiva a tierra,
conecte la pinza con el polo NEGATIVO
(NEGRO) al borne NEGATIVO (NEG, N,
-) de la batería. A continuación, conecte
la pinza con el polo POSITIVO (ROJO) al
chasis del vehículo o al bloque del motor,
lejos de la batería.
3. El arrancador se encenderá
automáticamente. La pantalla digital
mostrará el voltaje de la batería del
vehículo.
4. Pulse el botón de ENCENDIDO/
APAGADO. El arrancador empezará
a recargarse. La pantalla digital
muestra el porcentaje de carga de los
ultracapacitadores internos.
5. Cuando en la pantalla digital aparezca
FUL y el indicador esté verde jo,
encienda el motor.
Métodos alternativos de carga previa
Si la batería de su vehículo está
completamente descargada, o no se
puede utilizar para cargar el arrancador, se
encenderá el indicador de falla y sonará una
alarma. Puede utilizar uno de los siguientes
métodos alternativos de carga previa:
• Desde una batería (es decir, el automóvil
de un amigo)
Conecte la pinza de salida con el polo
POSITIVO (ROJO) del arrancador al borne
POSITIVO de la batería. A continuación,
conecte la pinza de salida con el polo
NEGATIVO (NEGRO) a una parte metálica
pesada y sin pintar del chasis o bloque del
motor, lejos de la batería. NO conecte la
pinza al borne negativo de la batería, al
carburador, al tubo de combustible o a una
pieza metálica. El arrancador comenzará
a cargarse automáticamente. Cuando la
pantalla digital muestre FUL, suene la alarma
y el indicador de estado se encienda en verde
de manera permanente, apague y desconecte
el arrancador retirando la pinza de salida del
chasís o del bloque de motor, y luego la pinza
de salida del borne de la batería.
• Desde un enchufe de 12 V
El arrancador se puede cargar desde
el enchufe de 12 V del automóvil de un
amigo. Asegúrese de que el automóvil esté
encendido. Conecte el adaptador de 12 V.
La carga se inicia automáticamente.
Una vez que haya cargado completamente
su unidad
(la pantalla digital muestra
100%)
, puede continuar con la conexión
y las instrucciones de arranque en modo
estándar.
Si la batería de su vehículo
está completamente descargada, y no es
capaz de arrancar el vehículo en el modo
Estándar, puede que tenga que utilizar
las instrucciones de arranque en modo de
Override.
Modo de Override
Si el modo Estándar falla, siga estos pasos
para utilizar el modo de Override:
NOTA: La función incandescente no funciona
en este modo.
• Lea siempre el manual de instrucciones del
fabricante del vehículo.
• La indicación inicial de batería de menos
de 12 V puede indicar que existe una falla
interna.
1. Quite el cable positivo (rojo) del vehículo del
borne de la batería (g. 1). Asegúrese de
que el arrancador esté apagado. Conecte
la pinza positiva del arrancador al cable
positivo del vehículo, NO al borne de la
batería (g. 1).
• 12 •
2. Presione el botón ON/OFF durante 2
segundos y luego suelte.
El modo Override se puede activar de dos
maneras:
Si la carga del capacitor es superior
a 80%, se activará el modo Override
(OUr) y sonará una alarma.
Si la carga del capacitor es inferior
a 80%, las baterías de iones de litio
recargarán los capacitores hasta que
la pantalla muestre 100%. El modo
Override (OUr) se activará y sonará una
alarma.
3. Después de activar el modo Override,
el indicador de estado parpadeará para
mostrar que el arrancador está listo para
hacer partir el motor.
4. Cuando el indicador de estado
se encienda en verde de manera
permanente, haga arrancar el motor de
inmediato. (La capacidad de un motor
de continuar funcionando sin una batería
conectada es variable y depende de la
marca y modelo del vehículo).
ADVERTENCIA: No deje el motor encendido
sin que el arrancador o la batería estén
conectados. Si lo hace, podría causar daños
en la ECU del vehículo. El fabricante no se
hace responsable de los daños causados
por el uso incorrecto de este producto.
5. Inmediatamente después de que el motor
arranque, y con la pinza y el cable de la
batería del arrancador conectados, conecte
el cable positivo al borne positivo de la
batería y ajuste la pinza del borne (g. 2).
Después de que haya asegurado el cable
positivo al borne de la batería, apague el
arrancador y desconecte la batería.
Modo incandescente (GLOW):
En climas fríos, en la mayoría de los vehículos
diésel, las bujías incandescentes se activarán
primero para calentar la cámara del motor
antes de que el motor arranque, como lo indica
el signo INCANDESCENTE en el tablero.
El proceso necesita una corriente de 40-60
Amp y tarda unos 4 a 6 segundos. En este
caso, después de que el arrancador esté
completamente cargado y conectado, presione
el botón INCANDESCENTE, y luego encienda
la ignición.
NOTA: La función INCANDESCENTE está
inactiva en el modo de Override.
Batería de litio auxiliar
El arrancador está equipado con baterías
de litio. Recargue las baterías con el cable
de carga micro USB (incluido) y tu cargador
USB. Una vez conectado el cargador USB, la
carga comienza de forma inmediata.
IMPORTANTE: Asegúrese de utilizar un
puerto de carga USB con un régimen nominal
de 1 A a 5 V CC o más. Si el producto no se
carga con un conector USB, asegúrese de
que la tensión marcada en el enchufe del
cargador sea la misma que la del arrancador.
El tiempo de recarga aproximado es de 5-8
horas. Los indicadores de nivel de batería
mostrarán el estado de la batería. Recargue
completamente las baterías de litio por lo
menos una vez al año o después de usar el
modo Override 2 o 3 veces.
Ciclo de trabajo
No más de 3 intentos de arranque auxiliar
seguidos.
• Espere 20 minutos entre las tentativas.
6. ESPECIFICACIONES
Entrada ............................................................................................ 12 V DC 10 A, 5 V DC 2 A
Temperatura de funcionamiento ............................................ -40 °C a 65 °C (-40 °F a 150 °F)
Corriente de arranque .......................................................................................................900 A
Paquete de batería ............................................................................... Litio, 11,1V / 2200mAh
Tiempo de recarga desde una batería de vehículo ............................................130 segundos
Tiempo de recarga desde un enchufe de 12 V .......................................................... 4 minutos
Tiempo de recarga desde la batería de litio ............................................................ 5-6 minutos
7. PIEZAS DE REPUESTO
Cable de carga de 12 V DC ................................................................................ 3899003573Z
Cable de carga micro-USB ................................................................................. 3899003781Z
Batería de litio de respaldo ................................................................................. 5799000052Z
• 13 •
8. PREGUNTAS FRECUENTES
P: ¿Este arrancador es seguro para la ECU y la computadora del automóvil?
R: A diferencia de los arrancadores tradicionales, este arrancador utiliza ultracapacitores en
lugar de una batería. El voltaje de los capacitores está restringido a un intervalo que es
seguro para todos los tipos de ECU. Por lo tanto, no hay riesgo de sobrevoltaje.
Los capacitores tienen una capacidad muy pequeña, alrededor de 0.2 a 0.4 Ah. Una vez
que se arranca el vehículo, se recargan por completo desde el alternador en un de par de
segundos. La desconexión del arrancador no causa ningún vaciado de carga, por lo que no
se producen picos de voltaje.
P: ¿La transferencia de energía residual al arrancador puede dañar la batería baja?
R: No. Este arrancador extrae solamente de 0.2 a 0.4 Ah de energía de la batería. Una batería
baja de automóvil normalmente tiene una capacidad de 10 a 30 Ah y puede recargar el
arrancador muchas veces sin ningún efecto adverso.
P: ¿Cuántos arranques puede realizar un arrancador recargado completamente?
R: Este arrancadorr está diseñado para arrancar solamente una vez cuando está recargado
completamente. Se recarga después de cada uso si se deja conectada a la batería del auto. Por
lo tanto, se pueden realizar arranques tantas veces como sea necesario y de manera sucesiva.
P: ¿Cuánto tiempo puede el arrancador mantener una carga?
R: Este arrancador se descarga automáticamente hasta 0 en unos pocos días, pero se puede
recargar al instante desde una batería baja o desde la batería de litio de respaldo, y estará listo
para su uso.
P: ¿Cuál es el promedio de vida útil del arrancador?
R: Este arrancador se puede utilizar más de 10,000 veces antes de que haya pérdida notable de
rendimiento. Los ultracapacitores se pueden seguir usando por más de 10 años.
P: ¿Es seguro mi arrancador híbrido?
R: Es extremadamente seguro. La tecnología de ultracapacitores es una de las ventajas más
importantes con respecto a los arrancadores basados en baterías. Los ultracapacitores están
diseñados especialmente para recibir y liberar una gran cantidad de corriente eléctrica de
potencia al instante.
Este arrancador también está equipado con protección contra cortocircuitos/polaridad inversa.
Por lo tanto, un cortocircuito debido a un uso no intencionado no dañará los ultracapacitores.
No van a sobrecalentarse ni provocar un incendio o una explosión.
NOTA: La protección contra inversión de polaridad y cortocircuitos se desactiva durante el
modo de Overridel.
P: ¿El arrancador necesita ser recargado periódicamente?
R: No. El arrancador se basa en la recarga instantánea de ultracapacitores en lugar de la
energía eléctrica almacenada. Por lo tanto, no necesita ser recargado regularmente y puede
ser almacenado durante años. Sin embargo, la batería de litio auxiliar debe cargarse al menos
una vez al año.
P: ¿Qué es el modo de OVERRIDE?
R: La ECU de algunos automóviles no permite que el motor arranque si el voltaje de la batería
es inferior a 8 V. En esta situación, se debe desconectar el cable positivo de la batería del
automóvil, y en su lugar se debe conectar directamente al arrancador.
A continuación, la ECU puede detectar el alto voltaje proporcionado por el arrancador.
ADVERTENCIA: LEA ATENTAMENTE EL MANUAL DEL USUARIO ANTES DE UTILIZAR
EL MODO DE OVERRIDE.
• 14 •
P: ¿Qué es INCANDESCENTE (GLOW)?
R: En climas fríos, en la mayoría de los vehículos diésel, las bujías incandescentes se activarán
primero para calentar la cámara del motor antes de que el motor arranque, como lo indica el signo
GLOW en el tablero. El proceso necesita una corriente de 40-60 Amp y tarda unos 4 a 6 segundos.
En este caso, después de que el arrancador esté completamente cargado y conectado, presione el
botón GLOW, y luego encienda la ignición.
P: ¿Qué tamaño de motores se pueden utilizar con este arrancador?
R: El éxito de un arranque depende de muchos factores como la condición de la batería, la
temperatura, la edad del automóvil, etc.
Aquí tiene una guía general de las opciones del arrancador para motores
de diversos tamaños:
GASOLINA DIÉSEL
Corriente de
arranque
Calentamiento
Enfriamiento
Calentamiento
Enfriamiento Enfriamiento
Sin Batería Sin Batería Sin Batería
Batería baja
Sin Batería
900A <8,0L <7,0L <5,0L <5,0L <4,0L
9. ANTES DE DEVOLVER A REPARACIONES – NORTEAMÉRICA
Si desea obtener más información sobre la solución de problemas,
póngase en contacto con el departamento de servicio al cliente
para recibir asistencia:
www.batterychargers.com
o llame 1-800-621-5485
Para REPARACIÓN O DEVOLUCIÓN, comuníquese con Servicios al Cliente al
1-800-621-5485. NO ENVÍE LA UNIDAD hasta que usted reciba AUTORIZACIÓN DE
DEVOLUCIÓN DE MERCANCÍA (RMA) de Servicios al Cliente de Schumacher Electric
Corporation.
10. GARANTÍA LIMITADA
SCHUMACHER ELECTRIC CORPORATION, 801 BUSINESS CENTER DRIVE,
MOUNT PROSPECT, IL 60056-2179, REALIZA LA PRESENTE GARANTÍA LIMITADA AL
COMPRADOR MINORISTA ORIGINAL DE ESTE PRODUCTO. LA PRESENTE GARANTÍA
LIMITADA NO PUEDE TRANSFERIRSE NI CEDERSE.
Schumacher Electric Corporation (el “Fabricante”) otorga garantía por esta arrancador por
un (1) año contados a partir de la fecha de compra, contra cualquier material defectuoso o
de mano de obra de la unidad que pudieran surgir durante su uso y bajo cuidado normal.
Si su unidad cuenta con material defectuoso o defectos de mano de obra, la obligación de
los Fabricantes, conforme a la presente garantía, será simplemente reparar o sustituir el
producto por uno nuevo o por una unidad reparada, a elección del fabricante. Es la obligación
del comprador enviar la unidad con comprobante de compra y los gastos de envío prepagos
al Fabricante o a sus representantes autorizados para que estos reparen o reemplacen el
producto.
El Fabricante no presta garantía por lo accesorios utilizados con este producto que no sean
los fabricados por Schumacher Electric Corporation y que no estén aprobados para su uso
con este producto. La presente Garantía Limitada será nula si el producto se utiliza en forma
errónea, se trata de manera inadecuada, es reparado o modicado por personas que nos sean
el Fabricante o si esta unidad es revendida a través de un vendedor minorista no autorizado.
• 15 •
El Fabricante no realiza ninguna otra garantía, incluidas, a título enunciativo, las garantías
expresas, implícitas o legales, incluidas, a modo de ejemplo, las garantías implícitas de
comerciabilidad o adecuación a un n especíco. Asimismo, el Fabricante no será responsable
ante reclamos por daños accidentales, especiales ni directos en los que incurran los
compradores, usuarios u otras personas asociadas al producto, incluidas, a título enunciativo,
los ingresos y ganancias no percibidas, ventas anticipadas, oportunidades comerciales,
el buen nombre, la interrupción de la actividad comercial o cualquier otro daño que haya
provocado. Todas las garantías, excepto la garantía limitada incluida en el presente, por medio
de la presente, quedan expresamente anuladas y excluidas. Algunos estados no permiten la
exclusión ni la limitación de los daños accidentales ni directos o el plazo de garantía implícita,
por lo que las limitaciones o exclusiones mencionadas anteriormente podrían no corresponder
con su caso. La presente garantía le otorga derechos legales especícos y es probable que
usted cuente con otros derechos que podrían diferir de los incluidos en la presente garantía.
LA PRESENTE GARANTÍA LIMITADA ES LA ÚNICA GARANTÍA LIMITADA EXPRESA Y EL
FABRICANTE NO ASUME NI AUTORIZA A NADIE A ASUMIR O A ADQUIRIR NINGUNA
OTRA OBLIGACIÓN RESPECTO DEL PRODUCTO QUE NO SEA LA PRESENTE
GARANTÍA.
Para clientes fuera de América del Norte,,
póngase en contacto con su distribuidor local.
Australia / Nueva Zelanda:
Schumacher Asia Pacic Pty. Ltd.
A.B.N. 43613943525
Unit 53B – 28 Burnside Road, Ormeau
Queensland, Australia, 4208
07 3807 6510
Schumacher
®
es una maraca registrada de Schumacher Electric Corporation.
• 16 •
1. CONSIGNES DE SÉCURITÉ IMPORTANTES –
CONSERVER CES CONSIGNES.
1.1 Travailler au voisinage d’accumulateur
au plomb est dangereux. Les batteries
produisent des gaz explosifs en marche
normale. pour cette raison, il est de la
plus haute importance que vous suiviez
les directives à chaque fois que vous
utilisez l’unité.
1.2 Pour réduire le risque d’explosion de la
batterie, suivez ces directives et celles
publiées par le fabricant de la batterie et du
fabricant de tout autre appareil que vous
pensez utiliser au voisinage de la batterie.
Examinez les avertissements inscrits sur ces
produits et sur le moteur.
1.3 Ne pas laisser à la portée des enfants.
1.4 N’utilisez cet appareil que dans des lieux
bien ventilés.
1.5 Ne démontez pas l’unité. Prenez-la à une
personne qualiée si une réparation est
nécessaire. Un montage incorrect peut
provoquer un incendie ou un choc électrique.
1.6 Ne jamais utiliser l’unité si elle est
endommagée.
1.7 Ne mettez pas l’unité sur des matériaux
inammables, tels que les tapis, tissus
d’ameublement, papier, carton, etc.
1.8 Placez l’unité loin de la batterie qui va être
utilisé étant que les câbles le permettent.
1.9 Ne pas exposer l’unité à la pluie ou la neige.
1.10 Ne placez jamais le booster directement au-
dessus de la batterie renforcée.
1.11 Pour éviter un arc électrique, ne jamais
laisser les pinces se toucher entre eux ou
mis avec le même morceau de métal.
1.12 Si quelqu’un d’autre utilise l’unité, assurez-
vous qu’ils sont bien informés sur la façon
de l’utiliser en toute sécurité, et avoir lu et
compris les instructions de fonctionnement.
1.13 L’unité n’est pas conçue pour être installée
comme un remplacement de la batterie du
véhicule.
1.14 Ne l’utilisez pas avec les batteries
sèches qui sont d’usage courant dans les
électroménagers.
1.15 Vériez que le levier des vitesses est en
position « Park » et que le frein à main
est serré.
1.16 Éteignez TOUT ce qui peut comporter
des composants électroniques dans votre
voiture (climatisation, chauffage, radio, feux,
chargeurs, etc.).
1.17 Vériez que la clé de contact est en
position OFF. Pour les immobilisateurs à
clé intelligente (véhicules avec démarreur
à bouton), vériez que le véhicule est
complètement « OFF » (éteint) avant un
démarrage assisté.
2. MESURES DE SÉCURITÉ PERSONNELLE
2.1 Porter des lunettes et des vêtements de
protection lorsque vous travaillez à proximité
des batteries au plomb. Toujours avoir
quelqu’un à proximité pour vous aider.
2.2 Avoir beaucoup d’eau fraîche, du savon et
du bicarbonate de soude pour une utilisation
à proximité, en cas si l’acide touche vos
yeux, la peau ou les vêtements. Laver
immédiatement avec du savon et de l’eau et
consulter un médecin.
2.3 Si l’acide de la batterie entre en contact avec
les yeux, rincer les yeux immédiatement
pendant 10 minutes et consulter un médecin.
2.4 Neutraliser l’acide avec du bicarbonate de
soude avant d’essayer de nettoyer.
2.5 Retirez tous les objets personnels en métal de
votre corps, tels que des bagues, bracelets,
colliers et montres. Une batterie peut produire
un court-circuit sufsamment élevé pour
souder une bague de métal, causant de
graves brûlures.
2.6 Ne jamais fumer jamais ou produire une
étincelle ou amme au alentour d’une
batterie ou d’un moteur.
1. CONSIGNES DE SÉCURITÉ IMPORTANTES
• 17 •
3. CARACTÉRISTIQUES
1. Pinces pour batterie
2. Afchage numérique
3. Bouton Marche/Arrêt
4. Port d’entrée micro USB
5. Prise 12V DC
Pas montré :
6. Compartiment de la batterie
lithium (à l’arrière)
7. Chargeur allume-cigare 12V DC
pour ultrondensateurs
8. Câble micro-USB pour charger
la batterie au lithium
1
2
3 4
5
4. PANNEAU DE CONTRÔLE
1 2 3 4
5
6
789
1. Afchage numérique
2. Indicateur de tension
3. Témoin indicateur de charge
d’ultracondensateur
(DEL allumée en permanence)
Le chargeur débite un courant
de recharge (DEL clignotante)
4. Indicateur de charge
de la batterie lithium
5. Port d’entrée micro USB
6. Port d’entrée
allume-cigare 12V DC
7. Bouton Marche/Arrêt
8. Bouton GLOW
9. Indicateur d’état
Afchage numérique
V Voltage de la batterie du véhicule
% Pourcentage de charge
des ultra-condensateurs
Err Erreur – Inversion de polarité/
La charge des accumulateurs
au lithium est trop faible pour recharger
les ultracondensateurs
FUL Les ultra-condensateurs
sont complètement chargés
OUr OVERRIDE mode activé
CH6 La batterie lithium se recharge
Indicateur d’état
Reste rouge : Inversion de polarité/Défaut
Rouge et vert alternativement :
Mode GLOW
Clignote pendant 5 secondes
puis reste vert : Mode Override
Reste vert : Prêt
• 18 •
5. CONSIGNES D’UTILISATION
Précharge
Le DSR132 doit être préchargé avant de
pouvoir aider au démarrage de votre véhicule.
(Pour voir le pourcentage de charge des
ultracondensateurs, appuyez sur le bouton
« ON/OFF » une fois.) Les instructions du
« Mode standard » vous guideront dans
l’utilisation de la « batterie faible » actuelle de
votre véhicule pour précharger le booster. Si
la batterie de votre véhicule est complètement
déchargée, ou est trop faible pour précharger
le booster, voyez « Méthodes de précharge
alternatives ».
Mode standard
Dans la plupart des cas, la batterie de votre
véhicule, même faible, suft pour précharger à
fond le booster
Accomplissez les étapes suivantes pour
précharger votre booster et démarrer votre
voiture :
1. Si le négatif est à la masse sur votre
véhicule (cas le plus courant), connectez
la pince POSITIVE (ROUGE) à la borne
POSITIVE (marquée POS, P ou +) de la
batterie. Puis, xez la pince NÉGATIVE
(NOIRE) au châssis ou au bloc moteur,
loin de la batterie.
2. Si le positif est à la masse sur votre
véhicule, connectez la pince NÉGATIVE
(NOIRE) à la borne NÉGATIVE (marquée
NEG, N ou –)
de la batterie. Puis, xez la pince
POSITIVE (ROUGE) au châssis ou au
bloc moteur, loin de la batterie.
3. Le booster s’allumera automatiquement.
L’afchage numérique indiquera la tension
de la batterie du véhicule.
4. Appuyez sur le bouton ON/OFF
(Marche/Arrêt). La précharge du booster
commencera. L’afchage numérique
indique le pourcentage de charge des
ultra-condensateurs.
5. Lorsque l’afchage numérique indique
FUL, et que le voyant LED indicateur d’état
reste vert, démarrez le moteur.
Méthodes de précharge alternatives
Si l’accumulateur de votre véhicule est
complètement déchargé ou ne peut recharger
votre survolteur de démarrage d’appoint, le
témoin de défaut s’allumera et une alarme
sonore se fera entendre. Vous pouvez avoir
recours à l’une des méthodes de précharge
alternatives suivantes :
• À partir d’une batterie (p. ex. celle de la
voiture d’un ami)
Connectez la pince de sortie rouge
(POSITIVE) du booster à la borne POSITIVE
de la batterie. Ensuite, connectez la pince
de sortie noire (NÉGATIVE) à une partie
métallique massive et non peinte du châssis
ou du bloc moteur, loin de la batterie. NE
LA CONNECTEZ PAS à la borne négative
de la batterie, ni au carburateur ou aux
conduits d’essence, ni à une pièce en
tôle. L’appareil de démarrage d’appoint sera
mis sous charge automatiquement. Lorsque
l’afcheur numérique montre FUL, l’alarme
sonore se fera entendre et le témoin de
condition s’allumera et puis s’éteindra,
éteignez et déconnectez alors l’appareil de
démarrage d’appoint en retirant la pince de
connexion de masse sur le bloc moteur puis
la pince sur la borne de l’accumulateur.
• À partir d’une prise 12 V
Le booster peut être chargé depuis une prise
12 V de la voiture d’un ami. Assurez-vous que
le moteur tourne. Branchez l’adaptateur 12 V.
La charge commence automatiquement.
Une fois votre booster chargé à fond (l’afcheur
numérique afche 100 %), vous pouvez
reprendre la procédure de connexion et de
démarrage indiquée dans les instructions
du mode standard. Si la batterie de votre
véhicule est complètement déchargée et que
le véhicule ne démarre pas en mode standard,
vous devez peut-être suivre les instructions de
démarrage prioritaire.
Mode Override
Si le mode standard échoue, réalisez les
étapes suivantes pour passer au mode
Override :
REMARQUE : La fonction « GLOW » (bougie
de préchauffage) ne fonctionnera pas avec
ce mode.
• Veuillez toujours lire les directives dans le
manuel du fabricant du véhicule.
Un état initial de batterie de moins de 12 V
peut signier qu’il y a un défaut d’origine
interne.
1. Retirez le l positif (rouge) du véhicule
à partir de la borne de batterie (g. 1).
Assurez-vous que le booster est éteint.
Connectez la bride positive du booster au
l positif du véhicule, et NON à la borne
de batterie (g. 1).
• 19 •
2. Actionnez le bouton « ON/OFF » durant
deux (2) secondes et puis relâchez-le.
Override peut être activé de deux façons :
Si la charge du condensateur est
supérieure à 80 %, le mode Override
(OUr) s’activera et une alarme sonore se
fera entendre.
Si la charge du condensateur est
inférieure à 80 %, les accumulateurs
au lithium-ion rechargeront les
condensateurs jusqu’à ce que l’afcheur
indique 100 %. Le mode Override (OUr)
s’activera alors et l’alarme sonore se
fera entendre.
3. Après que le mode Override est activé, le
témoin de condition clignotera pour indiquer
que l’appareil de démarrage d’appoint est
presque prêt à démarrer le moteur.
4. Lorsque le témoin de condition s’allume
en permanence, actionnez le démarreur
sur le champ. (La capacité d’un moteur de
demeurer en marche sans accumulateur
branché dépendra de la marque et du
modèle du véhicule).
AVERTISSEMENT : Ne laissez pas tourner le
moteur sans que le booster ou la batterie ne
soient connectés. Ne pas suivre ces directives
pourrait endommager la BCE du véhicule. Le
fabricant ne sera pas tenu responsable de tout
dommage causé par une utilisation impropre
de ce produit.
5. Aussitôt que le moteur démarre, attachez
le l positif à la borne de batterie et serrez
la bride de la borne en prenant soin que
la bride du booster et le l de la batterie
sont toujours connectés (g. 2). Une
fois que le l positif a été sécurisé à la
borne de batterie, éteignez le booster et
déconnectez la batterie.
Mode de bougie de préchauffage (GLOW) :
Par temps froid, sur la plupart des véhicules
diesel, les bougies de préchauffage s’activent
d’abord, avant le démarreur, pour préchauffer
la chambre de combustion. Le voyant GLOW
du tableau de bord l’indique. Ce processus
consomme de 40 à 60 ampères et prend de 4
à 6 secondes. Si c’est le cas de votre véhicule,
une fois que le booster est chargé à fond
et connecté, appuyez d’abord sur le bouton
GLOW, puis mettez le contact.
REMARQUE : Le mode « GLOW » (bougie
de préchauffage) est inactif en mode
Override.
Batterie lithium de secours
Le présent appareil de démarrage d’appoint
est muni d’un bloc-piles au lithium. Rechargez
le bloc-piles à l’aide du câble de recharge
à connecteur micro USB (fournis) et votre
chargeur USB. Une fois raccordé à un
chargeur USB, la recharge commencera
automatiquement.
IMPORTANT : S’assurer de disposer d’un
chargeur USB d’une tension nominale
de 5 Vcc à 1 A ou plus. Si le produit ne
se recharge pas une fois branché sur
un chargeur USB, vérier que la tension
indiquée sur la che du chargeur est
identique à celle du booster.
Le temps de recharge complète est d’environ
5 à 8 heures. Les témoins d’indication de
charge de l’accumulateur indiqueront l’état
de charge de l’accumulateur. Rechargez
complètement le bloc-piles au lithium au
moins une fois par an ou après vous être servi
du mode Override deux à trois fois.
Cycle de travail
Maximum 3 démarrages consécutifs.
• Attendez 20 minutes entre chaque session
de démarrage.
6. SPÉCIFICATIONS
Entrée .............................................................................................. 12 V CC 10 A, 5 V CC 2 A
Température de service ........................................................ de –40 à +65 °C (–40 à +150 °F)
Courant de démarrage ......................................................................................................900 A
Batterie............................................................................................. Lithium, 11.1V / 2200mAh
Temps de recharge à partir d’une batterie du véhicule ....................................... 130 secondes
Temps de recharge à partir d’une prise 12 V ............................................................. 4 minutes
Temps de recharge à partir de batterie au lithium ..................................................5-6 minutes
• 20 •
7. PIÊCES DE RECHANGE
Câble de charge 12 V CC ................................................................................... 3899003573Z
Câble de chargement micro-USB ....................................................................... 3899003781Z
Batterie lithium de secours.................................................................................. 5799000052Z
8. FOIRE AUX QUESTIONS
Q : Ce booster est-il sans danger pour le bloc de commande électronique (BCE) et
l’ordinateur de bord?
R : À la différence des dispositifs d’aide au démarrage traditionnels, ce booster utilise des
ultracondensateurs au lieu d’une batterie. La tension des condensateurs est limitée à une
plage sûre pour tous les types de BCE. Il n’y a donc aucun risque de surtension.
Les condensateurs sont d’une très faible capacité (d’environ 0,2 à 0,4 Ah). Une fois que le
moteur du véhicule a démarré, le courant de l’alternateur les recharge à fond en environ 2
secondes. La déconnexion du booster ne provoquera aucune perte de charge, donc aucune
pointe de tension.
Q : Le transfert de son énergie résiduelle au booster peut-il endommager la batterie
déchargée?
R : Non. Ce booster ne puise que de 0,2 à 0,4 Ah de la batterie. Une batterie de voiture, même
faible, conserve normalement une charge de 10 à 30 Ah. Elle peut donc recharger le booster
de nombreuses fois sans aucun effet indésirable.
Q : Combien de démarrages le booster peut-il assister avec une charge complète?
R : Ce booster est conçu pour assister un seul démarrage par charge complète. L’appareil se
rechargera automatiquement s’il est gardé connecté à un accumulateur d’automobile. Il peut
donc assister autant de démarrages que nécessaire, successivement.
Q : Combien de temps le booster garde-t-il la charge?
R : Ce booster perd toute sa charge en quelques jours, mais il peut être rechargé à l’instant à partir
d’une batterie déchargée ou de la batterie de secours au lithium, et être prêt à l’usage.
Q : Quelle est la durée de vie de ce booster?
R : Ce booster peut être utilisé plus de 10 000 fois avant que ses performances ne subissent une
baisse perceptible. Les ultracondensateurs restent opérationnels pendant plus de dix ans.
Q : Mon booster hybride est-il sûr?
R : Il est extrêmement sûr. La technologie des ultracondensateurs est l’un de ses principaux
avantages sur les aides au démarrage à batterie. Les ultracondensateurs sont spécialement
conçus pour recevoir et pour délivrer un courant instantané de forte intensité.
Ce booster est également équipé d’une protection contre les courts-circuits et l’inversion
de polarité. Donc, un court-circuit provoqué par mégarde n’endommagera pas les
ultracondensateurs. Ils ne sont pas susceptibles de surchauffe, et ne présentent aucun risque
d’incendie ni d’explosion.
REMARQUE : les protections contre l’inversion de polarité et les courts-circuits sont
désactivées en mode Override.
Q : Le booster doit-il être périodiquement rechargé?
R : Non. Il dépend de la recharge des ultracondensateurs juste avant utilisation, pas d’un
stockage d’électricité. Aucune charge périodique n’est donc nécessaire, et il peut resté
entreposé pendant des années. Cependant, la batterie de secours au lithium doit être
rechargée au moins une fois par an.
  • Page 1 1
  • Page 2 2
  • Page 3 3
  • Page 4 4
  • Page 5 5
  • Page 6 6
  • Page 7 7
  • Page 8 8
  • Page 9 9
  • Page 10 10
  • Page 11 11
  • Page 12 12
  • Page 13 13
  • Page 14 14
  • Page 15 15
  • Page 16 16
  • Page 17 17
  • Page 18 18
  • Page 19 19
  • Page 20 20
  • Page 21 21
  • Page 22 22
  • Page 23 23
  • Page 24 24

Schumacher Electric DSR132 Ultracapacitor Hybrid Jump Starter Owner's manual

Category
Battery chargers
Type
Owner's manual
This manual is also suitable for

Ask a question and I''ll find the answer in the document

Finding information in a document is now easier with AI