Page is loading ...

Article Number03E: 25070PD2700050
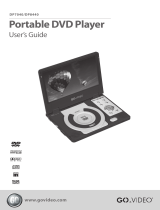
Portable
DVD / VCD / CD / MP3
Audio and Visual Disc Playe
r
Owner’s Manual
D1700
1-800-645-4994
Customer Service
128-6169

Do not move the player during playback
During playback, the disc spins at high speed, so do not lift or
move the player. Doing so may damage the disc.
When transporting the player
Be sure to remove the disc and close the lid when transporting
the player. Also slide the power switch to the “ OFF “ position to
turn off the power, then unplug the power cord once “ OFF “ on
the display window appears. Transporting the player with a disc
loaded may result in damage.
Place of installation
Select a stable place near the TV or stereo system to which you
are going to connect the player. Do not place the player on top
of a TV or color monitor. Install the player away from cassette
decks or other devices which are easily affected by magnetic
forces.
Do not place objects on top of the player
Do not place any objects on top of the player.
We strongly advise against using the player while driving. Most
countries and states have laws, which prohibit or severely restrict
the use of the player in vehicles while driving.
Do not leave the player or the battery pack in places
where the
temperature is extremely low or extremely high, such as inside the
passenger cabin or trunk in midsummer.
Doing so may warp the outer case or reduce the performance or
quality of the battery pack.
Turn off the power when not using the player
Depending on the TV reception conditions, stripes may appear on the
TV screen when the TV is turned on while the player’s power is on.
This is not a malfunction of the player or the TV. If this should happen,
turn off the player’s power. Noise may also be generated in the sound
of a radio when the player’s power is on.
Special note regarding use of player in vehicles
CAUTIONS REGARDING DVD PLAYER
When carrying on planes
Heed the airline company’s rules.
When carrying in hospitals
Heed the hospital’s rules.

This product is sold with a power cord appropriate for accessing an
external power source. Make sure to use only an appropriate external
power source, as indicated on the electricity ratings label. If you are
unsure regarding the type of power source in your area, consult an
authorized service provider or the local power company. Refer to en-
closed operating instructions for instructions regarding using batter-
ies with this product.
The DVD player includes a Lithium battery pack. If handled improperly,
this battery pack poses a risk of fire or burns. Do not disassemble,
crush, puncture, short external contacts, or dispose of the battery
pack in fire or water. Do not attempt to open or service the battery
pack. Replace only with a battery pack designed specifically for this
product. Dispose of the battery in a enviromentally safe manner and
recycle whenever possible.
USING AN EXTERNAL POWER SOURCE
If a power cord was not included with your purchase or you have lost the
power cord, you should purchase a power cord approved for use in your
country and properly rated for product voltage and current requirements
(refer to product electrical rating label). The power cord voltage and cur-
rent rating should be greater than said ratings for the product.
Furthermore, power cord wire must be a minimum 0.75mm
2
/18AWG with
a recommended length between 5 and 6.5 feet (1.5 to 2 meters). Contact
your authorized service provider regarding further questions about power
cord selection and use.
USE AN APPROVED POWER CORD
BATTERY WARNING
Il y a danger d’explosion s’il y a remplacement incorrect de la batterie.
Remplacer uniquement avec une batterie du même type ou d’un type
recommandé par le constructer. mettre au rébut les batteries usagées
conform ément aux instructions du fabricant.
ATTENTION
LASER BEAM WARNING
CAUTION - Laser radiation when open and interlock defeated. DO
NOT STARE INTO BEAM.
IMPORTANT SAFETY INFORMATION- PLEASE READ FIRST
This product is fitted with a laser-emitting device. Make sure the device is
shut down prior to opening player lid. Please follow the following precau-
tions when operating. Failure to do so may result in fire, personal injury,
or equipment damage.
OUTDOOR USE WARNING
1. Do not operate controls, make adjustments, or perform procedures other
than as specified in the DVD drive installation guide.
2. Only an authorized service technician should perform repairs.
LASER EMISSIONS WARNING
To reduce the risk of fire or electric shock, do not expose this product to
rain or moisture.
3. All DVD-equipped systems comply with appropriate safety standards,
including IEC 825. The installed laser device complies with Class 1
government laser performance standards. This laser device does not
emit hazardous light and is fully enclosed during user operation and
maintenance.

Most of Asia (excluding China) and the Americas use the NTSC broad-
casting standard. Europe, Japan and China/Hong Kong use the PAL
broadcasting standard. If you use this product in an area using a
standard different from your own, simply select the appropriate set-
ting on the PAL / NTSC setting located on the back of the base mod-
ule and restart the disc player, otherwise the viewing
image will be very poor.
NTSC / PAL Viewing Area Standards
This product incorporates copyright protection technology
that is protected by method claims of certain U.S. Patents
and other intellectual property rights owned by Macrovision
Corporation and other rights owners. Use of this copyright
protection technology must be authorized by Macrovision
Corporation, and is intended for home and other limited
viewing uses only unless otherwise authorized by
Macrovision Corporation. Reverse engineering or disas-
sembly is prohibited.
It’s forbidden by law to copy, broadcast, show, broadcast
on cable, play in public, and rent copyrighted material with-
out permission. DVD video discs are copy protected, and
any recordings made from these discs will be distorted.
WARNING SYMBOLS IN THIS MANUAL
This owner’s manual employs four different symbols to
indicate the different types of warning message:
indicates a warning or notice regarding product operation.
indicates to the presence of important operating and main-
tenance (servicing) instructions.
indicates of the presence of uninsulated dangerous volt-
age within the product’s enclosure.
The double-square symbol indicates a classification of
IEC 417 No.5172,to identify equipment meeting the safety
requirements of DOUBLE INSULATION specified for Class
II equipment. It can in no way be confused with the
manufacturer’s name or other identifications.
Manufactured under License from Dolby Laboratories.
According to copyright laws, copyrighted publications may not be reproduced,
transmitted, displayed or rented in any form or by any means, without prior permission.
DVD discs have been equipped with a protective design against copying, so that cop-
ied images will show distortions.
The copyright protection technology applied in this product is protected by American
patent right and by intellectual property right protection of Macrovision and other owners.
Any use of this copyright protection technology must be approved by Macrovision,
otherwise the player may only broadcast at private homes or for a limited audience.
Decoding or breaking of the code is strictly prohibited.
“Dolby“ and the double-D symbol are trademarks of Dolby Laboratories.
DTS is a registered trademark of Digital Theater System( U.S.A.)
Confidential Unpublished Works 1992-1997 Dolby Laboratories, Inc. All rights
reserved.
c

Table of Contents:
1. Dear Customer .........................................................6
2. Package Contents ....................................................6
3. Quick Start Guide..................................................... 8
4. Player Functions ....................................................10
5. Player Controls.......................................................11
6. Remote Control Buttons ......................................... 19
7. System Setting .......................................................31
8. Changing Settings During Play ..............................41
9. Programmed Play...................................................45
10. Connecting AV Peripherals ....................................47
11. Setting the Password and Rating ...........................51
12. Rechargeable Battery Installation and Use ............55
13. DVD Precautions and Simple Maintenance ...........57
14. Player Specifications...............................................59

6
2
Package Contents
Before using this player, please make sure that you
received all the following items in good order with your
purchase. Some of the items listed here may not come
standard with your player and are offered for optional
purchase. For addition optional equipment and ac-
cessories for the DVD player, visit the Audiovox web
site at www.audiovox.com or contact Customer Ser-
vice at 1-800-290-6650.
1
Dear Customer:
Thank you for your purchase of this portable DVD
player. This product incorporates the latest digital
audio / video (AV) technologies to give you the ulti-
mate in listening and viewing pleasure. Before use,
may we recommend you familiarize yourself with
the user’s manual. The manual discusses, player
operation,the use of remote control,system setup
and player maintenance. If you are interested in a
specific topic(s), please refer to the Table of
Contents.
If you should want to start using this DVD player
quickly, please skip to page 8 : Quick Starting
Guide.

7
2. Package Contents
Package Contents
1. DVD Player - one
2.AC/DC Power Adapter - one
3. Audio Signal Cable - one
4. Video Signal Cable - one
5. S-Video Signal Cable - one
6. Earphones - one
7. Power Cord - one
8. Wireless Remote Control - one
9. CR 2025 Battery for Remote Control - one
10. Users Manual - one
11. Rechargeable Lithium Battery Pack
12. Vehicle Power Adapter
13. Battery Charger
NOTE:
This DVD player can utilize a Digital Optical
Fiber Signal Cable for improved audio
signal output.This cable can be purchased
at your local electronics store.

8
Quick Start Guide
3
If you want to use rechargeable batteries for this DVD
player, please first read the instructions on page 55.
3 . Quick Start Guide
Connecting to an External Power Source
Connect the power cord (provided
with the player) to the side input plug
and to a wall outlet. The use of any
other power supply device may result
in unstable voltage or power spikes
that could damage the player. Do not
use the provided power cord with any other devices. The
transformer on the end of the power cord will feel slightly
warm during player operation or when plugged into a
socket. This is normal and no cause for alarm. When the
player is not in use, always unplug the transformer from
the power source.
Press the open button on the left to open
the internal CD player cover
Never press the OPEN but-
ton on the left during player
operation. During play, first
press the STOP button to
cease play and then open
the CD cover.
Never look directly at the laser-emitting device while
the CD player cover is open to prevent eye damage by
the laser light.
The cover opens to a maximum 180 only. Do not
try to open it any further. The player’s liquid crystal
display (LCD) is located on the reverse side of the
cover. Take care not to scratch
or mar the screen with sharp
objects. Close the cover when
the player is not in use.
Open the protective cover

9
3 . Quick Start Guide
Inserting a DVD disc
Align the center of the DVD disc with the center hole of the
DVD player. Gently press down on the DVD to snap the
disc into place. Close the player cover. Make sure that the
laser-emitting device is never bumped
or contaminated by dust, etc. When the
DVD player is not in use, try to keep
the cover closed as much as possible
to avoid contamination by dust.
Slide the side power switch to on/off
This switch is spring-loaded and will re-
turn to its middle position once
switched on. Sliding the switch once
again in the same direction will turn
power off.
The DVD player will immediately start
Playing the DVD program
When you want to stop , press the stop button and slide
the ON/OFF switch to the left to shut off power and then
close the cover.
In most cases, the DVD already inserted
into the player will begin playing automati-
cally when power is turned on. If you in-
sert a DVD and close the player cover
after turning on the power, the DVD
should also begin to play automatically.
To stop play, press the stop button. Remember to turn
off player power as well .
After pressing the stop button the loaded disc will con-
tinue spinning.
Press the (PLAY) button on the player face

10
Player Functions
4
1
2 4
3 5
6
6 ¥»¾÷ªº¥\¯à²¤
Multiple DVD Format Com-
patibility
This DVD player can play the
following disc formats: DVD,
VCD , music CD and MP3. The
player automatically recog-
nizes the appropriate format,
so all you have to do is put in
the disc, sit back and enjoy.
4. Player Functions
Large Active Liquid Crystal
Display (LCD) Screen
This DVD player comes with a
7-inch large format LCD
screen. The screen affords
high-resolution, low glare, zero
radiation emissions, and high
clarity. Further, the screen sup-
ports a 16:9 display format
compatible with that used by
the most advanced DVD
output. The RGB true color dis-
play delivers accurate and rich
on-screen images.
Onboard Two Channel Speak-
ers and Earphone Plug
Two onboard speakers allow
you to enjoy this DVD player
without cumbersome add-ons.
You can plug in your ear-
phones to enjoy high clarity
sound or enjoy a program with-
out bothering those around
you.The onboard earphone
plug is an industry standard
3.5mm plug,compatible with all
the best earphones available in
the market.
Digital Signal Output
This DVD player provides a
fully digital output, allowing full
enjoyment from DVDs with sur-
round sound or DTS when the
player is connected to a digital
amp. The resulting 5.1
channel, theater sound, is on
par with the best movie
theaters.
Broad Signal I/O Capabilities
Through the AV plug the DVD
player can output to a broad
spectrum of devices, including
television monitors, amplifiers,
tape recorders, and video
projectors. Similarly, the DVD
player can receive signals from
an array of devices, including
VCRs, video cameras, and
even amplifiers, for broadcast
over its internal speakers, ear-
phones and LCD monitor.
Automatic Power Saving
Design
On battery power, when your
player has been shut off for a
while, the player automatically
enters the power saving mode.
The power used in this mode
is minute, but it is still sufficient
to keep the player on active
standby, ready to restart im-
mediately upon power on.
Please refer to page 16 for fur-
ther information.

11
1
4
5
7 ¥D¾÷ªº¦U³¡¦ì»¡©ú (¤@)
5. Player Controls (1)
Player Controls (1)
Active Liquid Crystal Display
This player is equipped with a 7-inch, 16:9, non-radiation emitting
large screen TFT panel.The display delivers colors that are sharp
and vivid.
“ BRIGHTNESS “Button
Turning the “ BRIGHTNESS “button allows you to adjust the bright-
ness level of the LCD screen.
“ COLOR “Button
Turning the” COLOR “button will allow you to adjust the on-screen
color balance.
2
3
“ DISPLAY MODE “Button
Pressing the “ DISPLAY MODE “button will cause the screen to
display size ratio information. You may choose between 16:9 dis-
play, cinema mode, normal display and off. Continuing to press
the “ DISPLAY MODE “ button will cycle you through the choices.
The default value is 16:9.
23 4
1

12
1
2
3
5. Player Controls (2)
Player Controls (2)
“ ENTER “Button and Direction Selection
The “ ENTER “ button has two functions. The first
function is to confirm selections within the setup
mode (please refer to page 31, System Settings).
The up, down, left or right buttons are pushed to
choose a selection and then the “ ENTER “ button is
pressed down to confirm the setting. The second
function is to confirm a title selection after pressing
the “ Title “or “ MENU “button. You can scroll through
the choices (please refer to the next section) and
once the selection is made the “ ENTER “button is
pressed and the selection is executed. The “ EN-
TER “ button is also available on the remote control.
Refer to page 24 for relevant instructions.
“ RETURN “Button
After pressing “ SETUP “and making relevant selections within this mode,
press” RETURN “to return to the next highest level within the mode. The
“ RETURN “button is also available on the remote control. Refer to page
23 for relevant instructions.
“ MENU “Button
The vast majority of DVDs are designed to permit users to choose from
various “ chapters “or “ sections ”.Pressing the “ MENU “ button will allow
you access to the main menu screen containing the names of available
chapter sections on the DVD. Scroll through the menu using the up,
down, left, right buttons through to choose the desired chapter (or other
selection), then press” ENTER “to confirm. Some DVDs come with vari-
ous levels of selection options. Follow on-screen instructions and select
the desired item. This button is also available on the remote control.
Refer to page 23 for relevant instructions.
When you push the “ MENU “button longer than 1 second, the player will
automatically enter the GUI (Graphical User Interface) mode. For de-
tailed instructions please refer to page 29, Remote Control Buttons.
“ SETUP “Button
After pressing the “ SETUP “button you can select various user prefer-
ences by following the on-screen instructions.
“ TITLE “Button
While in play, the DVD player will operate interactively with the installed
DVD. Pressing the “ TITLE “button during play of some discs will result
in the name of the title, or the publishers name to be displayed. Regard-
less of the display, follow subsequent on-screen instructions regarding
buttons to be pushed next. The “ TITLE “button is also available on the
remote control. Refer to page 23 for relevant instructions.
4
5
1
2
3 5
4

13
7 ¥D¾÷ªº¦U³¡¦ì»¡©ú (¤T)
5. Player Controls (3)
Player Controls (3)
3
“ “STOP Button
Pressing the stop button will stop play, although the disc will remain in
motion. Pressing the button soon after pressing stop will cause the
player to pick up at the place just left off (i.e. memory play). Pressing the
. button twice will cause play to cease and the memory play function to
be disabled. The button is also available on the remote control. Refer to
page 25 for relevant instructions.
After pressing the button the disc will remain in motion. If the player is
running on battery, be aware that player is consuming battery power.
“ “ PAUSE Button
Pressing the button will pause play. If a music CD is paused, the music
will temporarily stop. If a video disc is played, the screen will temporarily
freeze. Pressing the “ PAUSE “button again will advance the video out-
put frame by frame, one push one frame, but a music CD will be restored
to normal play. During pause, pressing the button will immediately dis
-
able pause and return video and audio output to normal play.
While paused, the disc will still rotate, but as there are no contact parts,
you need not worry that an extended pause will cause damage to the
disc as happens with conventional magnetic music tape. However, do
remember that while in pause, the player is still drawing the same amoun
t
of power as in play mode. This button is also available on the remote
control. Refer to page 25 for relevant instructions.
“ “PLAY Button
Pressing the button will immediately play the disc installed in your DVD
player. This button is also available on the remote control. Refer to page
25 for relevant instructions.
4
5
34 5
1 2
1
2
Directional keys “ , , , “
Press the key to execute the directional key
function. In addition,you can use the directional keys
to scroll through options on the menu to choose
song while playing VCD 2.0 disc.
Fast forward ,Reverse ,Next ,Prev
Press the “ “ key down for about 2 seconds if you
want to operate fast forward function during playing.
You will see the signal “ x2 “ shown at right
bottom corner of the screen, the screen images
will move forward at 2x speed. By pressing the
“ “ two or three times will increase speed to 4x
and 8x respectively and four times to circle through
this function. Using the same method to operate
“ “, “ “, “ “ key. Press “ “ PLAY key to
restore speed to normal play. The sound will dis-
appear while operating “ fast forward “ and “ re-
verse “ functions. These keys are also available on
the remote control.

14
Player Controls (4)
2
Earphone Jack
You can plug in a 3.5 mm standard earphone plug and enjoy high qual-
ity sound, or you can connect large earphones with an intermediary
plug for even higher audio quality .
The player’s speakers will automatically disable once earphones have
been plugged in. Prior to removing earphones, please check that the
volume levels are low enough to prevent unnecessary shock to the speak-
ers and people around you as well.
Furthermore, the earphone jack can also transmit digital optical fiber
signals.
6
6
5. Player Controls (4)
1 2
Volume Control Knob
This knob is used to control output volume to both the speaker and
earphones. Take care not to have the volume up too high while lis-
tening with earphones to protect your hearing and to prevent distrac-
tion while performing other tasks. When audio is routed to other
devices, the volume control no longer functions and volume adjust-
ment must be assumed by the secondary device (such as an
amplifier).
1
OPEN Button to open the internal player cover
Press the “ OPEN “button to open the internal
player cover and change discs. Make sure that the
cover is kept closed. As long as the cover is open,
the DVD player will not start broadcasting.
WARNING:Do not over extend the cover to avoid
breaking the hinge.
1. When playing a Disc ( DVD/VCD/CD ),
please adjust the volume between” 0 “to” 8 “ to
get the best sound performance. To avoid dam-
aging the speakers, please do not adjust the
volume too high, such that, the sound of the
speakers is distorted.
NOTE: For some low sound level recorded disc,
you may need to adjust the level above” 8 “ .
2. Before using earphone, please make sure
that the volume is turning to” 0 “first, then slowly
turn up the volume to your most comfortable
sound level.

15
2
7 ¥D¾÷ªº¦U³¡¦ì»¡©ú (¤-)
5. Player Controls (5)
INPUT - OUTPUT Switch
Moving the switch either to the left or right will set the player to provide
input or output signals (refer to section 1). When the switch is set to the
left (OUTPUT), the player will output AV signals to outside sources.
When set to the right (INPUT), the player will input AV signals from
outside devices.
Player Controls (5)
In the” INPUT “mode the player will accept inputs from an amplifier, VCR,
tape recorder, video camera etc. for broadcast on its onboard LCD screen
and speakers. Input signals are given precedence over any disc currently
running on the player.
1
AV Signal Jacks
Depending on the position of the” INPUT OUT-
PUT “switch, the DVD player can accept exter-
nal inputs and provide an output signal through
the standard AV jacks.
When “ INPUT “ is selected (right) on the “ OUT-
PUT INPUT “switch the player is ready to accept
data input from an outside source. When “ OUT-
PUT “is selected (left) the data may be sent to a
variety of devices, including television, amplifier,
VCR, tape recorder, video camera, laser disc
player, and so on. During output the player will
continue to display video on its screen and broad-
cast sound from the speakers.
Please note when installing the AV wires that the
white wire is designated for the left speaker, the
red wire for the right speaker, and the yellow wire
is for the video signal.
3
For higher quality video output the player provides an S-Video output
port. Any device capable of accepting an S-Video signal can receive
data through this port. Note that the S-Video port handles only the video
signal. Audio channels will still use the audio jacks.
S-VIDEO Output Port
2
3
1
Important: Once set to
the “ INPUT “position, all
player sound and video out-
put will cease in preparation
for external AV input.
Therefore, during normal
operation, please make sure
this setting is on” OUTPUT “.

16
1
2
7 ¥D¾÷ªº¦U³¡¦ì»¡©ú (¤»)
5. Player Controls (6)
DC IN Power Jack
This DVD player is supplied with an AC/DC adapter
for use in the home or for long-periods. Plug one
end into a power socket and the other into the DC
IN power jack for immediate use.
Power ON/OFF Switch and System Lock
This switch turns the player on and off. Pushing
the switch once to the left turns the player on. Push-
ing once again to the left turns the player off.
Player Controls (6)
Important: Use only the Audiovox ap-
proved adapter. Use of other adapter may
damage the player.
2
1
A note regarding automatic power saving
Once power has been shut off on the main player unit,
the system enters wait mode and is prepared to respond
immediately to a power on request. In wait mode, the
system uses only a minimum amount of electricity and
the LCD status window on the front of the main player
module will read “ OFF “ (please refer to page 17 for
further information). The player may be turned back on
using the “ POWER “command on the remote control or
by switching the” ON/OFF “button on the left side of the
player.When running on battery power, once the player
has been off for a period of some time, power consump-
tion will be even further reduced (sleep mode) and the
LCD status window on the front of the main player will
display no message. To start the player again you must
push the “ POWER “button on the remote control, or
the switch the “ ON/OFF “button on the player.
If you plan to suspend use of the player for a significant
period of time, it is recommended that the power cord
(or batteries) be removed to prevent unnecessary power
drain.
Once the player has been switched on and the protective cover
opened, the LCD screen will display a welcome message. This alone
consumes significant power. If you are running on batteries and not
planning on playing a disc immediately, it is recommended that you
do not open the cover in order to save power.
If you press the“ ON/OFF “switch to the right to “ HOLD “position, it
will lock the system in place. At this point the player is locked and
pressing any key will have no effect on the player.

17
1
2
3
4
5
6
2
1
7 ¥D¾÷ªº¦U³¡¦ì»¡©ú (¤C)
5. Player Controls (7)
Player Controls (7)
Play Mode LCD Screen
The Play Mode LCD Screen is located in the
front section of the DVD player and programmed
to display a variety of display data, including
chapter number, play time, repeat mode, bat-
tery status, charge mode and so on.
When power to the player has been removed,
the screen will display “ OFF “(please refer to
page 16 for further instructions).
When running on battery power and main power
has been switched off for five minutes, the LCD
screen will go fully blank. Please refer to page
16 for further information regarding automatic
power saving features.
Disc Type
The DVD player automatically detects the type of disc installed
at any given time and will display the type of disc on the LCD
screen - ( DVD, VCD, CD, etc.) If the player is currently in the
“ Stop “ mode, the disc type will flash.
Chapter Number and Play Time
Regardless of the type of disc played, the chapter number
and chapter time elapsed will be displayed (hours, minutes,
seconds) .
When play is paused, numbers in this area will flash.

18
3
4
5
6
7 ¥D¾÷ªº¦U³¡¦ì»¡©ú (¤C)
5. Player Controls (7)
Battery Status
This symbol displays the charge level currently remaining in the installed battery. Please
refer to the chart on the right to determine reserve levels indicated by each display level.
If the battery symbol is flashing this indicates that battery reserves are at 10 percent or
less. Recharging is recommended at this point. A battery kept at low reserves for an
extended period of time is subject to damage and a shorter life span. Please refer to page
55 for a description of how to recharge, as well as important information regarding battery
usage and maintenance.
Angle Symbol
Some DVDs offer a selection of viewing angles for certain chapters. This symbol will light
up to indicate that the current chapter has more than one angle from which to choose.
Different angles can be chosen using the “ ANGLE “button on the remote control (refer to
page 29).
Repeat Mode Display
Once a repeat function has been chosen for a disc (please refer to page 22), the Repeat
Mode Display will indicate which option has been selected (see right).
Virtual Surround Mode
Pressing the “ Q “ key on the remote control will change the system’s normal two channel
sound into a surround sound system. When activated, “ ON “will be displayed on the LCD
screen. The “ Q “ surround function creates a synthesized three-dimensional surround
sound. With the hook-up of external speakers you can fully enjoy this sound effect
experience. Please refer to page 28.
Level...........Reserve Power
3.................Fully Charged
2.......................70%
1.......................30%
Flash...............< 10%
Display..........Repeat Mode
TITLE...............Title (DVD)
1.............Current Chapter/Song
ALL..............Enter Disc
A-B.......Between Two Points

19
6
8 »»±±¾¹ªº¦U«öÁ仡©ú
6. Remote Control Buttons
Remote Control Buttons
The remote control included with this DVD player offers conve-
nience as well as some special functions that can be accessed
only through the remote control. Therefore, please take care not
to loose or damage your remote. Also, when you take your DVD
player out for a spin, don’t forget to pack the remote as well.
To work the remote control, please make sure you are in front of
the player, preferably not further than 23 feet (7 meters) away.
Pickup is contained within a sixty-degree radius. In small spaces,
you may be able to bounce the signal off other objects if a direct
path is blocked.

20
8 »»±±¾¹ªº¦U«öÁ仡©ú (Äò)
1
2
3
6. Remote Control Buttons
3
1
2
1: [SHIFT] + [GUI]
2:[SHIFT] + [S-TITLE]
3:[SHIFT] + [AUDIO SET]
4:[SHIFT] + [TITLE]
5:[SHIFT] + [ ]
6:[SHIFT] + [RETURN]
7:[SHIFT] + [ ]
8:[SHIFT] + [ENTER]
9:[SHIFT] + [ ]
0:[SHIFT] + [ ]
C:[SHIFT] + [SETUP]
+10:[SHIFT] + [MENU]
Number Keys
Pressing the number keys will enter the pressed num-
bers into the player module. In most cases the numbers
are used to select disc chapters. For example, to select
song number three on a disc, press “ 3 “. To select a
song above the number 9, press “ +10 “and the appro-
priate number. To select, for example, number 23, press
“ +10 “twice and then ” 3 “.
When executing system setting commands, occasion-
ally the entry of numbers is required, for example for
entry of a password number, setting language
preferences, etc. Refer to page 31 for a more complete
description of system setting operations.
“ POWER “Button
This switch turns the player on and off. When player power is off, it is in the wait mode,
awaiting instructions from the remote. In wait mode the player consumes only a small
amount of power, however, if you don’t plan to play a disc immediately, it is recom-
mended that you pull out the power cord or remove the battery to save power.
Once the power has been switched on and the player’s cover opened, the LCD will
display a welcome message. This alone consumes significant power. If you are run-
ning on batteries and not planning on playing a disc immediately, it is recommended
that you do not open the cover in order to save power.
C - (SHIFT + SETUP) (Clear) Button
During operation of the DVD player you will need to enter
numbers regularly. If you wish to clear numbers in the screen,
press the “ C “ button. Also, during execution of any setting
for which a graphic appears on-screen, simply hit these but-
tons if you wish to clear the numbers, setting, or graphic.
/