• 5 •
CONTAINS SEALED, NON-SPILLABLE LEAD-ACID BATTERY. MUST BE DISPOSED OF PROPERLY.
WARNING: Possible explosion hazard. Contact with battery acid may cause severe burns and blindness.
Keep out of reach of children.
1. IMPORTANT SAFETY INSTRUCTIONS
WARNING – When using this product, basic precautions should always be followed, including the following:
1.1
Read all the instructions before using the product. Failure to do so could result in serious injury or death.
1.2
To reduce the risk of injury, close supervision is necessary when the product is used near children.
1.3
Do not put ngers or hands into the product.
1.4
Do not expose the power pack to rain or snow.
1.5
Use of an attachment not recommended or sold by the power pack manufacturer may result in a risk of
re, electric shock, or injury to persons.
1.6
To reduce risk of damage to the electric plug and cord, pull the plug rather than the cord when
disconnecting the power pack.
1.7
Do not use a battery pack or appliance that is damaged or modied. Damaged or modied batteries may
exhibit unpredictable behavior resulting in re, explosion or risk of injury.
1.8
Do not operate the power pack with a damaged cord or plug, or a damaged output cable.
1.9
Do not disassemble the power pack, take it to a qualied service person when service or repair is required.
Incorrect reassembly may result in a risk of re or electric shock.
1.10
To reduce the risk of electric shock, unplug the power pack from the outlet before attempting any
instructed servicing.
1.11
WARNING – RISK OF EXPLOSIVE GASES.
a.
WORKING IN VICINITY OF A LEAD ACID BATTERY IS DANGEROUS. BATTERIES GENERATE
EXPLOSIVE GASES DURING NORMAL BATTERY OPERATION. FOR THIS REASON, IT IS OF
THE UTMOST IMPORTANCE THAT YOU FOLLOW THE INSTRUCTIONS EACH TIME YOU USE
THE POWER PACK.
b.
To reduce risk of battery explosion, follow these instructions and those published by battery manufacturer
and manufacturer of any equipment you intend to use in vicinity of the battery. Review cautionary markings
on these products and on engine.
2. PERSONAL PRECAUTIONS
2.1
Consider having someone close enough by to come to your aid when you work near a lead-acid battery.
2.2
Have plenty of fresh water and soap nearby in case battery acid contacts skin, clothing, or eyes.
2.3
Wear complete eye protection and clothing protection. Avoid touching eyes while working near battery.
2.4
If battery acid contacts skin or clothing, wash immediately with soap and water. If acid enters eye,
immediately ood eye with running cold water for at least 10 minutes and get medical attention immediately.
2.5
NEVER smoke or allow a spark or ame in vicinity of battery or engine.
2.6
Be extra cautious to reduce risk of dropping a metal tool onto battery. It might spark or short-circuit
battery or other electrical part that may cause explosion.
2.7
Remove personal metal items such as rings, bracelets, necklaces, and watches when working with a
lead-acid battery. A lead-acid battery can produce a short-circuit current high enough to weld a ring or
the like to metal, causing a severe burn.
2.8
When charging the internal battery, work in a well ventilated area and do not restrict ventilation in any way.
2.9
Under abusive conditions, liquid may be ejected from the battery; avoid contact. If contact accidentally
occurs, ush with water. If liquid contacts eyes, additionally seek medical help. Liquid ejected from the
battery may cause irritation or burns.
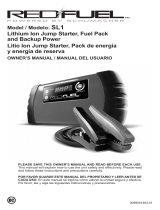
Jump Starter and DC Power Source
OWNERS MANUAL
PLEASE SAVE THIS OWNERS MANUAL AND READ BEFORE EACH USE.
This manual will explain how to use the jump starter safely and effectively. Please
read and follow these instructions and precautions carefully.
FOR MODELS
DSR141
DSR141G
DSR156