Page is loading ...

MANUAL - DJLIGHT85LED
2
©Copyright LOTRONIC 2018
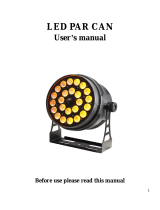
INSTRUCTIONS FOR USE
LIGHT STAND
WITH PAR PROJECTOR, STROBE, MOON & LASER
Safety Recommendations
• Please read the instructions carefully. They contain important information about the installation, operation and
maintenance.
• Keep this User Manual for future reference. If you sell the unit to another user, be sure that he also receives this
instruction booklet.
• Unpack and check the unit carefully that it has not been damaged during transport before using the unit.
• Before operating, ensure that the voltage and frequency of power supply match the power requirements of the
unit.
• The unit is for indoor use only in a dry location.
• It is essential that the unit is earthed. Only connect to a wall outlet with earth connection.
• The unit must be installed in a location with adequate ventilation, at least 0.5m from adjacent surfaces. Be sure
that no ventilation slots are blocked.
• Disconnect mains power before fuse replacement or servicing.
• Make sure there are no inammable materials close to the unit during operation.
• In the event of serious operating problem, stop using the unit immediately.
• The light sources of the light eects are not replaceable. If a light source is faulty, the light eect must be dis-
carded.
• Do not touch any wires during operation as high voltage might be causing electric shock.
• The product is for decorative purposes only and not suitable as a household room illumination.
DISCONNECT DEVICE
Where the MAINS plug or an appliance coupler is used as the disconnect device, the disconnect device shall
remain readily operable.
Installation of the units
Before positioning the light stand, ensure the stability of the installation site. Drive the screw into the screw
hole on the stand. Make sure that the units can’t fall from the stand. The manufacturer cannot be held res-
ponsible for damages due to bad installation of the units.
Connections
7
1. Power supply input: Attach the IEC mains cable here. Built-in fuse
2. DMX input: 3-pin XLR connector for DMX512 signal input
CAUTION
DO NOT OPEN THE HOUSING
SHOCK HAZARD
EN

MANUAL - DJLIGHT85LED
3
www.ibiza-light.com
3. DMX output: 3-pin XLR connector for DMX512 signal output
4. LED display: Display of the functions and menu buttons to control the operating mode
5. MENU buttons: See below for operation
6. Mic: Built-in microphone for sound controlled operation
7. Light stand socket: Tighten the screw to secure the controller bar to the light stand
MENU BUTTONS
You can set the operating mode of the unit via the 4 function buttons on the controller bar. Press the MENU
button to display the dierent functions (see table below for a detailed description of the functions). Use the
UP and DOWN arrow buttons to make your selection. Once you have chosen your desired function, press the
ENTER button to conrm the change.
LCD Display
d001-512 DMX Control
chnd Choose DMX Channels
Chnd 3ch 3
11ch 11
AT01-AT07 Auto (Built-in Program)
S_01-S_32 Speed
So01-So03 Sound
Sn01-Sn09 Sensitivity adjustable
slav Slave
Operation
DMX address code setting: Press “MENU” button. When the digital LED displays d001-d512, press “UP” or
“Down” to set the address code. The code ranges from 001-512.
When controlling the unit(s) with a DMX controller, each unit must be set to a specic DMX address. You can set
either all units to the same DMX address or you can set every unit to a dierent DMX address. If all units are set
to the same DMX address, they are all synchronized and operate the same way.
If every unit has its own DMX address, they will receive the DMX signal that is specic to their address and you
can control every unit separately. The DMX address is determined by the number of channels. The units can
work either in 3-channel or 11-channel mode. If you set the starting address to 1, the second unit must be set
to 12 (1+11 in 11-CH mode), etc.
Connection of Signal Cable
You can use the 3-pin XLR cable to connect the OUT socket of the rst light and the IN socket of the following
light. Connect all the lights as below:
A DMX signal terminator is recommended on the last unit of the chain. DMX terminator is a XLR connector with
a 120Ω resistor between the pin 2 and pin 3 of the XLR connector

MANUAL - DJLIGHT85LED
4
©Copyright LOTRONIC 2018
Remote Control:
1. ON/OFF
2. Auto mode: Press this button rst and then select one of the modes via the
button 5
3. Music-controlled modes:
Music 1 Button: So.01=AT01 (Whole Unit)
Music 2 Button: So.02=AT05 (Par+Laser +Strobe)
Music 3 Button: So.03=AT06 (Moon+Laser+Strobe)
4. Strobe eect
5. Cycles through the various auto modes:
AT01 Whole Unit
AT02 Par Light (Jump Change )
AT03 Par+Moon+Laser
AT04 Par+Moon+ Strobe
AT05 Par+Laser +Strobe
AT06 Moon+Laser+Strobe
AT07 Par+Moon+Laser + Strobe
6. Ajustment of the speed in Auto mode or adjustment of the mic sensitivity when in music-controlled mode
7. Increases/reduces the strobe speed
3-CH Operation
CH1
0-9 Black Out
10-39 AT01 Whole Unit
40-69 AT02 Par Light (Jump Change )
70-99 AT03 Par+Moon+Laser
100-129 AT04 Par+Moon+ Strobe
130-159 AT05 Par+Laser +Strobe
160-189 AT06 Moon+Laser+Strobe
190-219 AT07 Par+Moon+Laser + Strobe
CH2
0-9 Black Out
10-89 So.01 Corresponding AT01
90-169 so.02 Corresponding AT05
170-255 So.03 Corresponding AT06
CH3 0-255 Speed & Sensitivity
11CH Operation
CH1 0-255 Dimmer
Master Dimmer for Moon Light
CH2 0-255 Red
CH3 0-255 Green
CH4 0-255 Blue
CH5 0-255 White
AU TO
ST ROBE
PR O LIGH T
SP EED/ SEN
RE MOTE
NO .A 23
SP EED/ STR OBE
MU SIC
1
MU SIC
2
MU SIC
3
ON /OFF
1
2
3
4
5
6
7

MANUAL - DJLIGHT85LED
5
www.ibiza-light.com
CH6 0-255 Red
Par Light
CH7 0-255 Green
CH8 0-255 Blue
CH9 0-255 White
CH10
0-63 Laser_O Laser O
64-127 Laser_R Motor On at the same time
128-197 Laser_G Motor On at the same time
198-255 Laser_RG Motor On at the same time
CH11
0-9
«White Color (Strobe) «
White Color O
10-255 White Color ,Strobe (slow to fast)
BATTERY WARNING
This symbol indicates that used batteries should not be disposed of with household waste but depo-
sited in separate collection points for recycling
ATTENTION
Danger of explosion if battery is incorrectly placed.
Only replace by the same or equivalent type.
WARNING
• Do not swallow the battery. Danger of chemical burns.
• (The supplied remote control of) This product contains a button cell. In case of ingestion, it might cause
serious internal burns within only 2 hours that might lead to death.
• Keep new and old batteries out of the reach of children.
• If the battery compartment doesn’t close properly, stop using the product and keep it out of the reach of
children.
• If you are in doubt whether the batteries have been swallowed or introduced into any other part of the body,
contact immediately a doctor.
Care
Before cleaning the unit, disconnect it if from the mains. Do not use aggressive cleaning agents. Use a clean
cloth to wipe any dust or dirt from the product. We are not liable for damage arising from incorrect handing,
improper use or wear and tear. We reserve the right to make technical modications.
Specications
Power supply ...................................................................................................................110-240~50/60Hz
Consumption .........................................................................................................................................60W
Laser ........................................................................................Green: 30mW 532nm; Red: 100mW 650nm
Strobe ....................................................................................................................... 120x white SMD LEDs
PAR.............................................................................................................................. 12 x 1W RGBW LEDs
Moon ...................................................................................................................... 60 x 5mm RGBWA LEDs
Beam angle ............................................................................................................................................25°
Operation ......................................................................................... Auto, sound, DMX512, remote control
Max. height of the stand ...................................................................................................................202cm
Total dimensions ............................................................................................................... 74 x 21 x 202cm
Total weight ............................................................................................................................................5kg
Correct Disposal of this product
This marking indicates that this product should not be disposed with other household wastes throughout the EU. To
prevent possible harm to the environment or human health from uncontrolled waste disposal, recycle it responsibly
to promote the sustainable reuse of material resources. To return your used device, please use the return and collec
-
tion systems or contact the retailer where the product was purchased. They can take this product for environmental
safe recycling.

MANUAL - DJLIGHT85LED
12
©Copyright LOTRONIC 2018
Afstandsbediening
1. Aan/uit
2. Auto mode: Druk eerst deze toets en kies daarna een modus via de toets 5.
3. Geluidsbestuurde modi
Music 1: So.01=AT01 (alle toestellen)
Music 2: So.02=AT05 (Par+Laser +Strobe)
Music 3: So.03=AT06 (Moon+Laser+Strobe)
4. Strobe eect
5. Loopt door de verschillende auto modi:
AT01 Alle toestellen
AT02 Par Light (Jump Change )
AT03 Par+Moon+Laser
AT04 Par+Moon+ Strobe
AT05 Par+Laser +Strobe
AT06 Moon+Laser+Strobe
AT07 Par+Moon+Laser + Strobe
6. Snelheidsinstelling in auto modus en gevoeligheidsinstelling van de microfoon in geleuidsbestuurde modus.
7. Verhoogt/mindert de snelheid van de stroboscoop
3-kanaals modus
CH1
0-9 Black Out
10-39 AT01 alle toestellen
40-69 AT02 Par Light (Jump Change )
70-99 AT03 Par+Moon+Laser
100-129 AT04 Par+Moon+ Strobe
130-159 AT05 Par+Laser +Strobe
160-189 AT06 Moon+Laser+Strobe
190-219 AT07 Par+Moon+Laser + Strobe
CH2
0-9 Black Out
10-89 So.01 zoals AT01
90-169 so.02 zoals AT05
170-255 So.03 zoals AT06
CH3 0-255 Snelheid & gevoeligheid
11-kanaals modus
CH1 0-255 Dimmer
Master dimmer voor Moon
CH2 0-255 Rood
CH3 0-255 Groen
CH4 0-255 Blauw
CH5 0-255 Wit
AU TO
ST ROBE
PR O LIGH T
SP EED/ SEN
RE MOTE
NO .A 23
SP EED/ STR OBE
MU SIC
1
MU SIC
2
MU SIC
3
ON /OFF
1
2
3
4
5
6
7

MANUAL - DJLIGHT85LED
20
©Copyright LOTRONIC 2018
AU TO
ST ROBE
PR O LIGH T
SP EED/ SEN
RE MOTE
NO .A 23
SP EED/ STR OBE
MU SIC
1
MU SIC
2
MU SIC
3
ON /OFF
1
2
3
4
5
6
7
Daljinski upravljalnik:
1. VKLOP/IZKLOP
2. Samodejni način: Najprej pritisnite ta gumb in nato s tipko 5 izberite enega od
načinov
3. Način zvočne kontrole:
Tipka Music 1: So.01=AT01 (elotna enota)
Tipka Music 2: So.02=AT05 (Par+Laser +Strobo)
Tipka Music 3: So.03=AT06 (Moon+Laser+Strobo)
4. Strobo efekt
5. Cikli skozi različne samodejne načine:
AT01 Celotna enota
AT02 Par (skokovite spremembe )
AT03 Par+Moon+Laser
AT04 Par+Moon+ Strobo
AT05 Par+Laser +Strobo
AT06 Moon+Laser+Strobo
AT07 Par+Moon+Laser + Strobo
6. Nastavitev hitrosti v samodejnem načinu ali prilagoditev občutljivosti mikrofona v zvočnem načinu
7. Povečanje/zmanjšanje hitrosti strobo
3-CH Delovanje
CH1
0-9 Black Out
10-39 AT01 Celotna enota
40-69 AT02 Par Light (skokovite spremembe)
70-99 AT03 Par+Moon+Laser
100-129 AT04 Par+Moon+ Strobo
130-159 AT05 Par+Laser +Strobo
160-189 AT06 Moon+Laser+Strobo
190-219 AT07 Par+Moon+Laser + Strobo
CH2
0-9 Black Out
10-89 So.01 Ustrezno AT01
90-169 so.02 Ustrezno AT05
170-255 So.03 Ustrezno AT06
CH3 0-255 Hitrost in občutljivost
11CH Delovanje
CH1 0-255 Zatemnitev
Master zatemnitev za Moon efekt
CH2 0-255 Rdeča
CH3 0-255 Zelena
CH4 0-255 Modra
CH5 0-255
Bela

MANUAL - DJLIGHT85LED
28
©Copyright LOTRONIC 2018
Telecomandă:
1. Pornire/Oprire
2. Mod automat: Apăsați acest buton prima dată și apoi selectați unul din moduri
apăsând butonul 5.
3. Moduri controlate de muzică:
Buton Music 1: So.01=AT01 (Toată unitatea)
Buton Music 2: So.02=AT05 (Efect Par+ Laser +Stroboscop)
Buton Music 3: So.03=AT06 (Efect Moon+ Laser+Stroboscop)
4. Efect stroboscop
5. Delarea prin modurile automate:
AT01 Toată unitatea
AT02 Efect de lumină Par (Jump Change )
AT03 Efect Par+ Efect Moon+ Laser
AT04 Efect Par+ Efect Moon+ Stroboscop
AT05 Efect Par+ Laser +Stroboscop
AT06 Efect Moon+ Laser+Stroboscop
AT07 Efect Par+ Efect Moon+ Laser + Stroboscop
6. Reglarea vitezei în modul automat sau reglarea sensibilității microfonului în modul controlat de muzică
7. Crește/reduce viteza stroboscopului
Funcționare 3-CH
CH1
0-9 Black Out
10-39 AT01 Toată unitatea
40-69 AT02 Efect de lumină Par (Jump Change)
70-99 AT03 Efect Par+ Efect Moon+ Laser
100-129 AT04 Efect Par+ Efect Moon+ Stroboscop
130-159 AT05 Efect Par+ Laser +Stroboscop
160-189 AT06 Efect Moon+Laser+Stroboscop
190-219 AT07 Efect Par+ Efect Moon+Laser + Stroboscop
CH2
0-9 Black Out
10-89 So.01 Corespunde cu AT01
90-169 so.02 Corespunde cu AT05
170-255 So.03 Corespunde cu AT06
CH3 0-255 Viteză & Sensibilitate
Funcționare 11CH
CH1 0-255 Regulator de intensitate
Regulator de intensitate Master pentru efectul Moon
CH2 0-255 Roșu
CH3 0-255 Verde
CH4 0-255 Albastru
CH5 0-255 Alb
AU TO
ST ROBE
PR O LIGH T
SP EED/ SEN
RE MOTE
NO .A 23
SP EED/ STR OBE
MU SIC
1
MU SIC
2
MU SIC
3
ON /OFF
1
2
3
4
5
6
7

©Copyright LOTRONIC 2018
View the product on our website
Imported from China by LOTRONIC S.A.
Avenue Zénobe Gramme 9
B-1480 Saintes
www.ibiza-light.com
/