Page is loading ...
Making Your World
A Little Easier.‘”
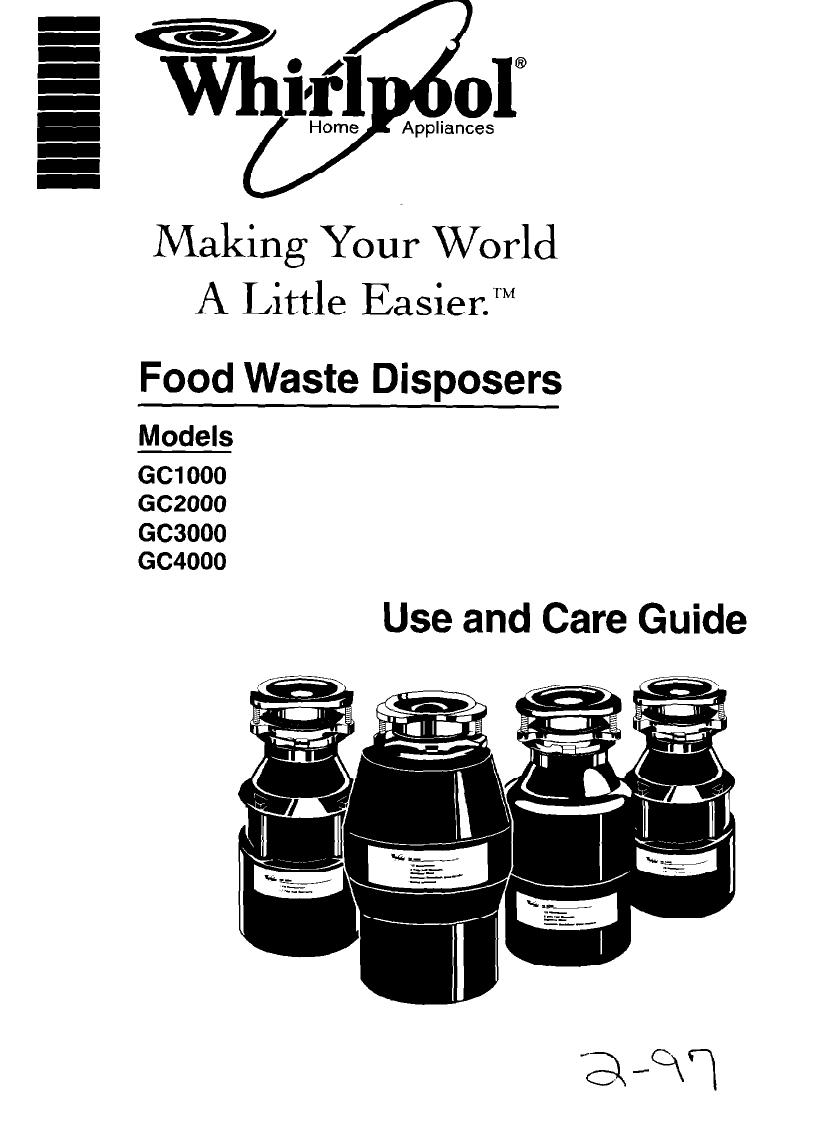
Food Waste Disposers
Models
GCI 000
GC2000
GC3000
GC4000
Use and Care Guide

IMPORTANT
SAFETY
INSTRUCTIONS
WARNING - When using electric appliances, basic precautions should always
be followed, including the following:
1. Read all the instructions before using the appliance.
2. To reduce the risk of injury, close supervision is necessary when an appliance
is used near children.
3. Do not put fingers or hands into a waste disposer.
4. Turn the power switch to the off position before attempting to clear a jam or
remove an object from the disposer.
5. When attempting to loosen a jam in a waste disposer, use a long wooden
object such as a wooden spoon or the wooden handle of a broom or mop.
6. When attempting to remove objects from a waste disposer use long-handled
tongs or pliers. If the disposer is magnetically actuated, nonmagnetic tools
should be used.
7. To reduce the risk of injury by materials that may be expelled by a waste
disposer, do not put the following into a disposer:
a) Clam or oyster shells.
b) Drain cleaner.
c) Glass, china, or plastic.
d) Large whole bones. e) Whole corn husks.
f) Metal, such as bottle caps, tin cans, or aluminum foil.
8. When not operating a disposer, leave the drain cover in place to reduce the
risk of objects falling into the disposer.
9. Electrically ground disposer. See Installation Instructions for details.
SAVE THESE INSTRUCTIONS
GROUNDING INFORMATION
Electrical Shock Hazard
Electrically ground disposer.
Failure to do so can result in death or electrical shock.
I
I 1
For detailed instructions see Installation Instructions. ALL ELECTRICAL CONNEC-
TIONS MUST CONFORM WITH LOCAL CODES. This disposer is Listed by
Underwriters Laboratories, Inc.
2
TABLE OF CONTENTS
Page
Important Safety Instructions
.....................................
.2
Grounding Instructions
..........................................
.2
Product Registration Card
.........................................
.
Operating Instructions
...........................................
.4
CareandCleaning
...............................................
.
When You Need Service or Assistance
.............................
.7
Warranty
............................................
..BackCove r
PRODUCT
REGISTRATION CARD
Before you use your disposer, please fill out and mail your product registration card.
This card will enable us to contact you in the unlikely event of a product safety
notification and assist us in complyin
with the provisions of the Consumer Product
Safety Act. THIS CARD DOES NO+ VERIFY YOUR WARRANTY.
Keep a copy of the sales receipt showing the date of purchase and/or date of
installation of your disposer. PROOF OF PURCHASE WILL ENSURE YOU OF
IN-WARRANTY SERVICE.
Write down the following information. You will need it if your disposer ever requires
service.
Model Number*
Serial Number’
Date Purchased
Date Installed
Dealer’s Name
Address
Phone
‘Model and Serial Numbers are located on a label near the bottom of the disposer.
3
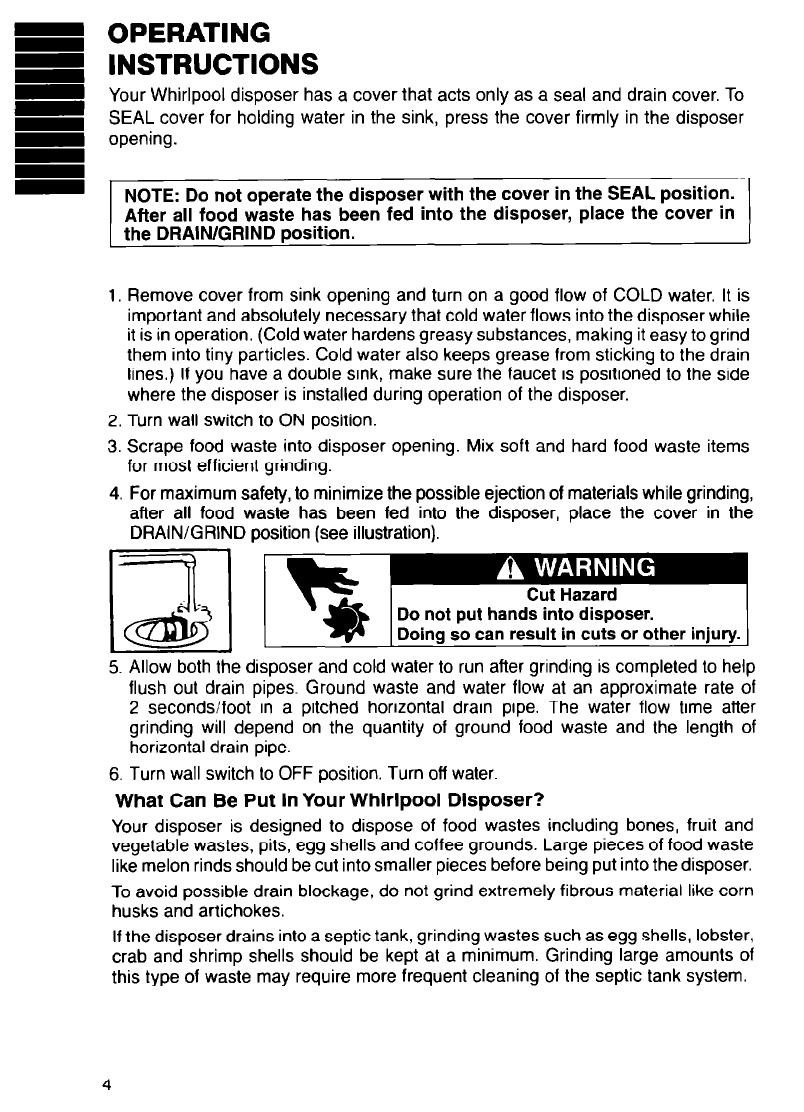
OPERATING
INSTRUCTIONS
Your Whirlpool disposer has a cover that acts only as a seal and drain cover. To
SEAL cover for holding water in the sink, press the cover firmly in the disposer
opening.
NOTE: Do not operate the disposer with the cover in the SEAL position.
After all food waste has been fed into the disposer, place the cover in
the DRAIN/GRIND position.
1. Remove cover from sink opening and turn on a good flow of COLD water. It is
important and absolutely necessary that cold water flows into the disposer while
it is in operation. (Cold water hardens greasy substances, making it easy to grind
them into tiny particles. Cold water also keeps grease from sticking to the drain
lines.) If you have a double sink, make sure the faucet is positioned to the side
where the disposer is installed during operation of the disposer.
2. Turn wall switch to ON position.
3. Scrape food waste into disposer opening. Mix soft and hard food waste items
for most efficient grinding.
4. For maximum safety, to minimize the possible ejection of materials while grinding,
after all food waste has been fed into the disposer, place the cover in the
DRAIN/GRIND position (see illustration).
Do not put hands into disposer.
Doing so can result in cuts or other injury.
5. Allow both the disposer and cold water to run after grinding is completed to help
flush out drain pipes. Ground waste and water flow at an approximate rate of
2 seconds/foot in a pitched horizontal drain pipe. The water flow time after
grinding will depend on the quantity of ground food waste and the length of
horizontal drain pipe.
6. Turn wall switch to OFF position. Turn off water.
What Can Be Put In Your Whirlpool Disposer?
Your disposer is designed to dispose of food wastes including bones, fruit and
vegetable wastes, pits, egg shells and coffee grounds. Large pieces of food waste
like melon rinds should be cut into smaller pieces before being put into the disposer.
To avoid possible drain blockage, do not grind extremely fibrous material like corn
husks and artichokes.
If the disposer drains into a septic tank, grinding wastes such as egg shells, lobster,
crab and shrimp shells should be kept at a minimum. Grinding large amounts of
this type of waste may require more frequent cleaning of the septic tank system.
4
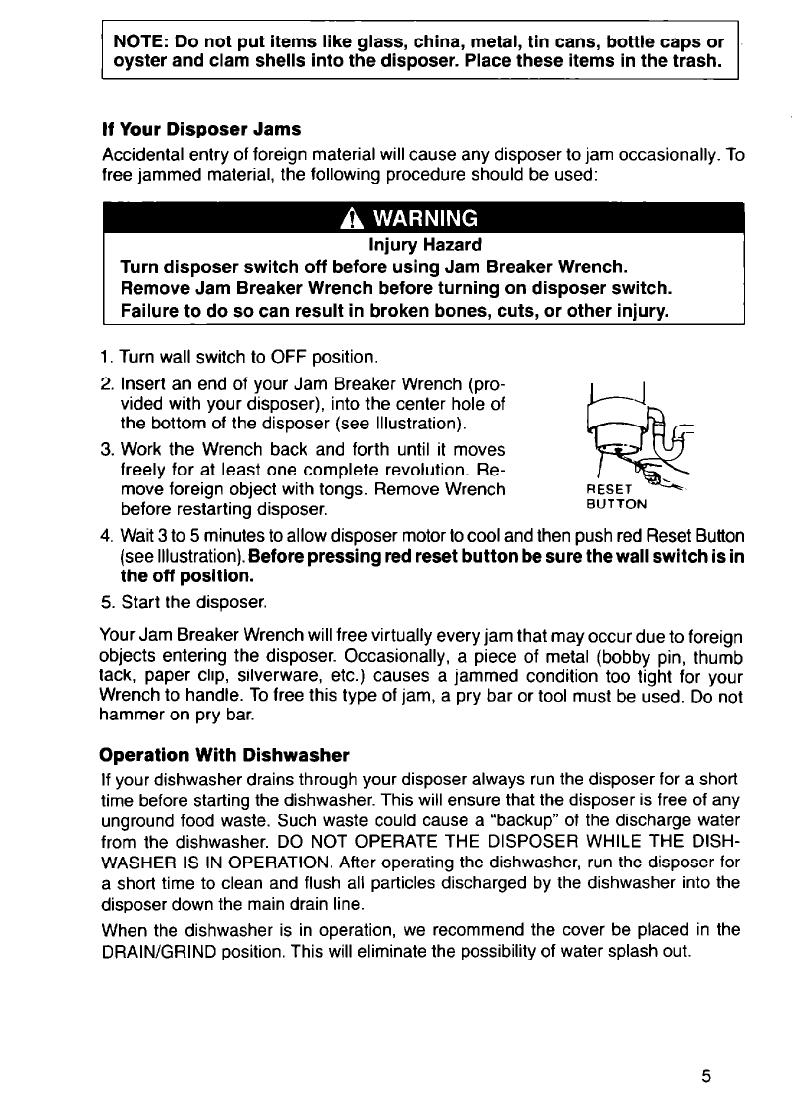
NOTE: Do not put items like glass, china, metal, tin cans, bottle caps or
oyster and clam shells into the disposer. Place these items in the trash.
It Your Disposer Jams
Accidental entry of foreign material will cause any disposer to jam occasionally. To
free jammed material, the following procedure should be used:
Injury Hazard
Turn disposer switch off before using Jam Breaker Wrench.
Remove Jam Breaker Wrench before turning on disposer switch.
Failure to do so can result in broken bones. cuts. or other iniurv.
1. Turn wall switch to OFF position.
2. Insert an end of your Jam Breaker Wrench (pro-
vided with your disposer), into the center hole of
..I
the bottom of the disposer (see Illustration).
-
3. Work the Wrench back and forth until it moves
freely for at least one complete revolution. Re-
move foreign object with tongs. Remove Wrench
b
RESET -
before restarting disposer.
BUTTON
4. Wait 3 to 5 minutes to allow disposer motor lo cool and then push red Reset Button
(see Illustration). Before pressing red reset button be sure the wall switch is in
the off position.
5. Start the disposer.
Your Jam Breaker Wrench will free virtually every jam that may occur due to
foreign
objects entering the disposer. Occasionally, a piece of metal (bobby pin, thumb
tack, paper clip, silverware, etc.) causes a jammed condition too tight for your
Wrench to handle. To free this type of jam, a pry bar or tool must be used. Do not
hammer on pry bar.
Operation With Dishwasher
If your dishwasher drains through your disposer always run the disposer for a short
time before starting the dishwasher. This will ensure that the disposer is free of any
unground food waste. Such waste could cause a “backup” of the discharge water
from the dishwasher. DO NOT OPERATE THE DISPOSER WHILE THE DISH-
WASHER IS IN OPERATION. After operating the dishwasher, run the disposer for
a short time to clean and flush all particles discharged by the dishwasher into the
disposer down the main drain line.
When the dishwasher is in operation, we recommend the cover be placed in the
DRAIN/GRIND position. This will eliminate the possibility of water splash out.
5
USE
ENERGY
WISELY
A food waste disposer uses a negligible amount of energy. Total energy require-
ments associated with operating a food waste disposer will be minimized by fol-
lowing the recommendations in this Use and Care Guide.
CARE AND
CLEANING
The unique design of the grinding elements of the disposer create a whirling water
action which keeps the grinding chamber always clean and free of odors.
After some use a brown discoloration may appear on the face of the grinding disc.
This is normal. It is a surface discoloration only and will not affect the life or per-
formance of the disposer.
Do not “store” food waste in the disposer between grindings. This can lead to
odors, a clogged drain or a jam.
Use COLD water only when operating the disposer. Cold water hardens greasy
substances, making it easy to grind them into tiny particles. Cold water also keeps
grease from sticking to the drain lines.
Odors coming from your disposer are usually from food waste left inside the dis-
poser as a result of insufficient water to flush the disposer. To clean, the following
procedure should be used:
Turn wall switch to OFF position. Place cover in the SEAL position and fill sink half
way with lukewarm water. Add one cup baking soda and mix to form a solution.
Turn on the disposer; remove cover from sink. This will flood the inside of the
disposer to wash away particles loosened in the cleaning operation. The baking
soda will freshen the inside of the disposer.
NOTE: NEVER use chemical or solvent drain compounds in the disposer.
Your WHIRLPOOL@ disposer is permanently lubricated and will never need addi-
tional lubrication
6
WHEN YOU
NEED SERVICE OR ASSISTANCE
Follow These Steps
1. If your disposer should fail to operate, review the following list before calling your
dealer. You could save the cost of a service call.
Turn wall switch to OFF position and manually use the Jam Breaker Wrench to
turn the grind wheel, making sure it is free to rotate.
NEVER PUT YOUR HANDS
IN THE DISPOSER.
If the grind wheel does not turn freely, the disposer is
probably jammed and you should follow the procedures outlined on page 5.
JAMS OF ANY NATURE ARE NOT CONSIDERED A PRODUCT DEFICIENCY
AND ARE NOT COVERED BY IN-WARRANTY SERVICE OR LABOR.
Has a fuse blown: or is the circuit breaker open?
Is the switch controlling the disposer turned to the ON position?
Is the red Reset Button on the bottom of the disposer pushed in?
2. If the problem is not due to one of the above items, call the Whirlpool Consumer
Assistance Center: 1-800-253-l 301.
3. If you are not satisfied with the action taken, contact the Major Appliance
Consumer Action Program (MACAP). MACAP is a group of independent con-
sumer experts that voices consumer views at the highest levels of the major
appliance industry. Contact them only when the dealer, authorized servicing
outlet and Whirlpool Corp. have failed to resolve your problem.
Major Appliance Consumer Action Program
20 North Wacker Drive
Chicago, IL 60606
MACAP will in turn inform us of your action.
In all correspondence about your disposer, please include:
l
Date
l
Your Name, Address and Telephone Number
l
Type of Appliance
l
Brand
l
Model Number
l
Serial Number
l
Date Purchased
l
Dealer from Whrch Purchased (include address)
l
Servicing Agent (include name and address if different from dealer’s)
l
Location of Appliance
l
A Clear Description of the Problem and the Service Required

WHIRLPOOL@ Disposer Warranty
Models GCI 000, GC2000,
GC3000 and GC4000
I
1
I
I
I
I
I
1
I
I
I
I
1
I
I
I
I
DNE YEAR FULL
WARRANTY
q
ROM DATE OF
,NSTALLATlON
q
OR MODELS:
Xl 000
3c2000
IWO YEAR FULL
WARRANTY
FROM DATE OF
INSTALLATION
FOR MODEL:
3c3000
WHIRLPOOL WILL
WHIRLPOOL WILL
PAY FOR:
NOT PAY FOR:
Replacement parts and A. Service call to:
repair labor to correct
1. Correct the installation of the
defects in materials or
disposer.
workmanship. Service
2. Instruct you how to use the
must be provided by an
disposer.
authorized Whirlpool
3. Replace house fuses or
service company.
correct house wiring.
4. Correct house plumbing.
B. Repairs when disposer is used
in other than normal home use.
rHREE YEAR FULL
WARRANTY
FROM DATE OF
INSTALLATION
FOR MODEL:
GC4000
C. Damage resulting from accident,
alteration, misuse, abuse,
improper installation or installa-
tion not in accordance with local
electrical or plumbing codes.
D. Replacement parts or repair labor
costs for units operated outside
the United States.
E. Pickup and delivery. This product
is designed to be repaired in the
home.
F. Repairs to parts or systems
caused by unauthorized modifica-
tions made to the appliance.
WHIRLPOOL DOES NOT ASSUME ANY RESPONSIBILITY FOR INCIDENTAL OR
CONSEQUENTIAL DAMAGES. Some states do not allow the exclusion or limitation of
incidental or consequential damages, so this exclusion or limitation may not apply to you.
This warranty gives you specific legal rights and you may also have other rights which vary
from state to state.
If you need service or assistance, first see the “When You Need Service or Assistance”
section of this book. After checking ‘Service and Assistance,” additional help can be found
by calling our Consumer Assistance Center telephone number 1-800-253-l 301, from
anywhere in the U.S.
Whirlpool
Benton Harbor, Michigan, U.S.A. 49022
@Registered Trademark of Whirlpool
Specifications subject to change without notice
Part No. 7161914211596
0 Whirlpool 1996
/
