ICP DAS USA tM-7522 Quick Start

Type
Quick Start
tM-752N series
For tM-752N Series
English/ Dec. 2011/ Version 1.0
What’s in the shipping
package?
The package includes the following items:
Quick Start Guide
(This Document)
DC Connector
Power cable
Connecting the Power and Host PC
Prepare for device:
NS-205PSE or NS-205 (optional): Ethernet Switch/Hub.
tM-7561 (optional): USB to RS-485 Converter.
1
tM-752N
Series Quick Start Guide
1. Check Init/Run switch
is on Run position.
2. Connect both the tM-
sub network or the same Ethernet Switch, and power the tM-
752N on.
752N and your computer to the same
2
tM-752N
Series Quick Start Guide
3. Connect the tM-752N module:
Connect the tM-752N to the RS-485 network as follows:
Test your tM-752N:
1. Execute the “Terminal.exe”.
The Terminal.exe is located at:
http://ftp.icpdas.com/pub/cd/tinymodules/napdos/software/
2. Check that the configuration of the COM Port is correct and
then click the “Open COM” button.
(Default Settings: 115200,8,N,1)
Double-Click
Click
3
tM-752N Series Quick Start Guide
3. Type a string in the send field then click the “Send” button. If
a response is received, it will be displayed in the received field.
Click
Res
p
onded Messa
g
e
(Take tM-7522 for example)
Step 1: Retrieve the Module Name of the tM-752N module
Type the command Æ $00M
Check that the module returns Æ !007522
Step 2: Change the Module Address of the tM-752N module
Type the command Æ $00A02
Check that the module returns Æ !00
Step 3: Retrieve the Module Name of the tM-752N module
Type the command Æ $02M
Check that the module returns Æ !027522
Step 4: Retrieve the Module Name of the tM-752N module
Type the command Æ $00M
Check that the module returns Æ (No response)
4
tM-752N Series Quick Start Guide
1. Make sure your PC has workable network settings.
2. Disable or well configure your Windows firewall and Anti-Virus
firewall first, else the “Search Servers” may not work.
3. Execute the “eSearch.exe”. The eSearch.exe is located at:
http://ftp.icpdas.com/pub/cd/tinymodules/napdos/software/esearch/
4. Click the “Search Servers” button to search your tM-752N.
5. Double click the name of tM-752N to open the configure server
dialog box.
6. Contact your Network Administrator to obtain a correct
network configuration (such as IP/Mask/Gateway). Enter
the network settings and then click “OK”. The tM-752N will
use the new setting 2 seconds later.
Configuring Ethernet Settings
Double-Click
Click
Assi
n a new
IP address
5
tM-752N Series Quick Start Guide
7. Wait 2 seconds and then click the “Search Servers” button
again to ensure the tM-752N is working well with new
configuration.
8. Click the “Web” button to link the tM-752N web server.
\
2. Click your tM-752N on the list
1. Click
9. Enter the password and click the “Submit” button to enter the
configuration web page. (The factory default password: admin)
3. Click
6
tM-752N Series Quick Start Guide
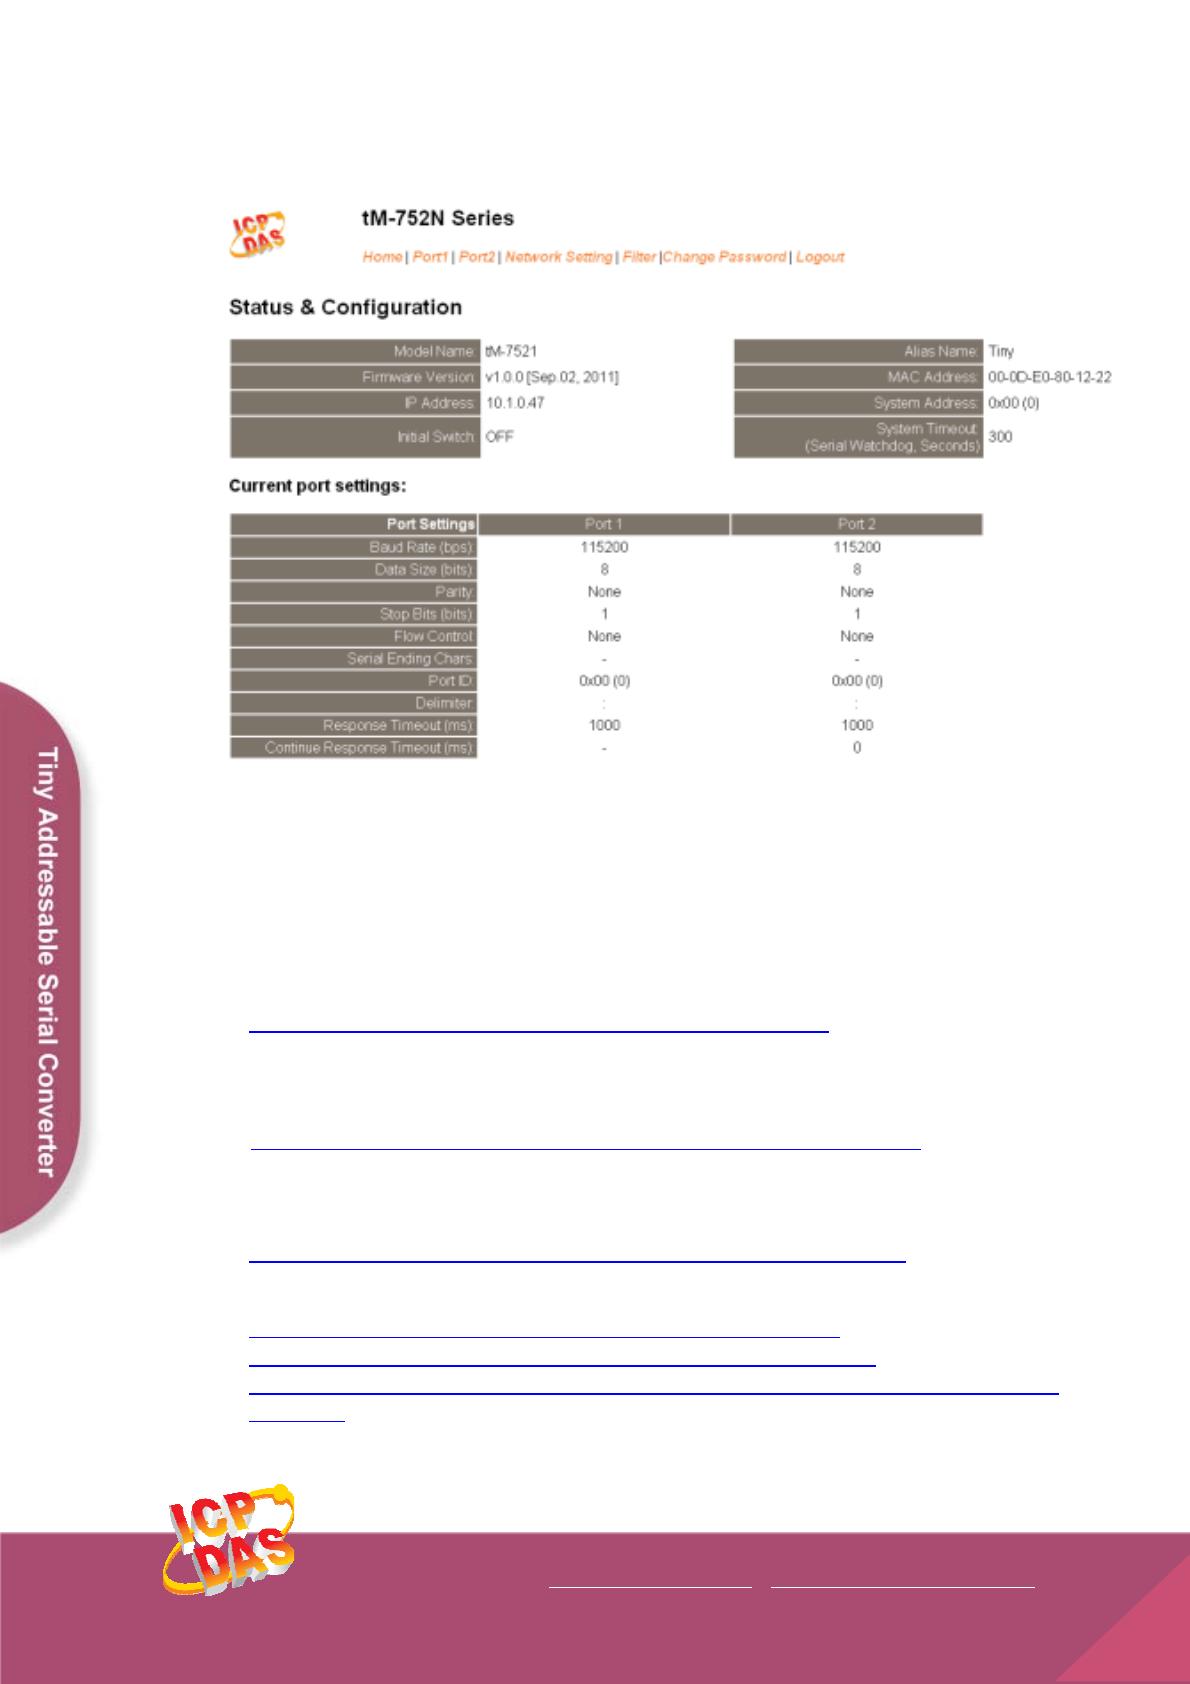
10. Besides the DCON command, you can configure all settings
via web browser.
Related Information
tM-752N Series Product page:
http://www.icpdas.com/products/Industrial/pds/tM-752N.htm
tM-752N Documentations:
CD:\Napdos\tM-752N\document\
http://ftp.icpdas.com/pub/cd/tinymodules/napdos/tM-752N/document/
tM-752N firmware:
CD:\Napdos\tM-752N\Firmware\
http://ftp.icpdas.com/pub/cd/tinymodules/napdos/tM-752N/firmware/
NS-205PSE, NS-205 and tM-7561 page (optional):
http://www.icpdas.com/products/Switch/industrial/ns-205.htm
http://www.icpdas.com/products/Switch/industrial/ns-205pse.htm
http://www.icpdas.com.tw/product/solutions/industrial_communication/converter/tm-
7561.html
Copyright @ 2011 by ICP DAS Co., Ltd. All Rights Reserved.
7
ICP DAS Web Site: http://www.icpdas.com
Contact Us (E-Mail): [email protected]
  • Page 1 1
  • Page 2 2
  • Page 3 3
  • Page 4 4
  • Page 5 5
  • Page 6 6
  • Page 7 7

ICP DAS USA tM-7522 Quick Start

Type
Quick Start

Ask a question and I''ll find the answer in the document

Finding information in a document is now easier with AI