Page is loading ...

PAGE 1
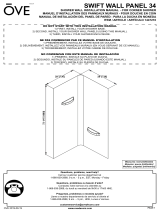
DALIA 40x32
INSTALLATION MANUAL - SHOWER ENCLOSURE
MANUEL D’INSTALLATION - CABINE DE DOUCHE
MANUAL DE INSTALACIÓN - PUERTA DE DUCHA
An installation video guide can be found on our Youtube channel:
Search for MENARDS DALIA
Un guide d’installation video est disponible sur notre chaîne Youtube:
Recherchez le terme MENARDS DALIA
Una guía de instalación de vídeo está disponible en nuestro canal de Youtube:
Búsqueda el término MENARDS DALIA
www.youtube.com/user/ovedecors1
OVE 2019-03-26
Questions, problems, need help?
Call our customer service department at
1-866-839-2888, 9 a.m. - 5 p.m., EST, Monday - Friday
Questions, problèmes ou besoin d’aide?
Contactez notre service à la clientèle au
1-866-839-2888, du lundi au vendredi de 9h00 à 17h00 HNE.
Preguntas, problemas o necesita ayuda?
Llame a nuestro departamento de servicio al cliente al
1-866-839-2888, 9 am. – 5 pm., HDE, Lunes a Viernes.

PAGE 2
An installation video guide can be found on our Youtube channel:
Search for MENARDS DALIA
Un guide d’installation video est disponible sur notre chaîne Youtube:
Recherchez le terme MENARDS DALIA
Una guía de instalación de vídeo está disponible en nuestro canal de Youtube:
Búsqueda el término MENARDS DALIA
www.youtube.com/user/ovedecors1
DO NOT START WITH THIS INSTALLATION MANUAL
1) FIRST, INSTALL YOUR SHOWER BASE (AN INSTALLATION MANUAL CAN BE FOUND IN THE
SHOWER BASE PACKAGE).
2) SECOND, INSTALL YOUR SHOWER WALL PANELS (AN INSTALLATION MANUAL CAN BE FOUND
IN THE WALL PANELS PACKAGE).
3) THIRD, INSTALL YOUR SHOWER ENCLOSURE (USING THIS MANUAL).
NE PAS COMMENCER PAR CE MANUEL D’INSTALLATION
1) PREMIÈREMENT, COMMENCEZ PAR INSTALLER VOTRE BASE DE DOUCHE (UN MANUEL
D’INSTALLATION EST CONTENU DANS L’EMBALLAGE DE LA BASE DE DOUCHE).
2) INSTALLEZ PAR LA SUITE VOS PANNEAUX MURAUX DE DOUCHE
(UN MANUEL D’INSTALLATION EST CONTENU DANS L’EMBALLAGE DES PANNEAUX MURAUX).
3) TROISIÈMEMENT, INSTALLEZ VOTRE CABINE DE DOUCHE (EN SUIVANT LES INSTRUCTIONS
CONTENUES DANS CE MANUEL).
NO COMIENZAN CON ESTE MANUAL DE INSTALACIÓN
1) PRIMERO, INSTALANDO PRIMERO SU PLATO DE DUCHA (UN MANUAL DE INSTALACIÓN ESTÁ
CONTENIDA EN EL PAQUETE DE PLATO DE DUCHA).
2) SEGUNDO, INSTALE LOS PANELES DE PARED, SI CORRESPONDE (SIGUIENDO LAS
INSTRUCCIONES DE ESTE MANUAL).
3) TERCERO, INSTALE SU PUERTA DE DUCHA (SIGUIENDO LAS INSTRUCCIONES DE ESTE
MANUAL).

PAGE 3
TABLE OF CONTENT
TABLE DES MATIÈRES
TABLA DE CONTENIDOS
TABLE OF CONTENT ..........................................................................3
TABLE DES MATIÈRES ..............................................................................3
TABLA DE CONTENIDOS ...........................................................................3
SAFETY INFORMATION .............................................................................4
INFORMATION SUR LA SÉCURITÉ ...........................................................4
INFORMACIÓN DE SEGURIDAD ...............................................................4
SAFETY NOTICE .........................................................................................5
AVIS DE SÉCURITÉ ....................................................................................5
AVISOS DE SEGURIDAD ............................................................................5
PREPARATION ............................................................................................5
PRÉPARATION ............................................................................................5
PREPARACIÓN ...........................................................................................5
PACKAGE CONTENT ..................................................................................6
CONTENU DE L’EMBALLAGE ...................................................................6
CONTENIDO DEL PAQUETE ......................................................................6
PART LIST ...................................................................................................8
LISTE DES PIÈCES .....................................................................................8
LISTA DE PIEZAS ........................................................................................8
SUPPLIED HARDWARE LIST .....................................................................9
QUINCAILLERIE FOURNIE .........................................................................9
CONTENIDO DE HARDWARE ....................................................................9
TOOLS REQUIRED (not supplied) .............................................................9
OUTILS REQUIS (non fournis) ..................................................................9
HERRAMIENTAS NECESARIAS (no incluido) ..........................................9
REVERSIBILITY .........................................................................................10
RÉVERSIBILITÉ ........................................................................................10
REVERSIBILIDAD .....................................................................................10
SHOWER DIMENSIONS ............................................................................11
DIMENSIONS DE LA DOUCHE .................................................................11
DIMENSIONES DE LA DUCHA .................................................................11
SHOWER INSTALLATION: OVERVIEW ...................................................12
INSTALLATION DE LA DOUCHE: VUE D’ENSEMBLE ............................12
MONTAJE DE LA DUCHA: VISIÓN GENERAL ........................................12
WALL TRACKS INSTALLATION ...............................................................13
INSTALLATION DES GLISSIERES ...........................................................13
INSTALACIÓN DE LOS RIELES ...............................................................13
FIXED PANELS INSTALLATION ...............................................................15
INSTALLATION DE PANNEAUX FIXES ...................................................15
INSTALACION DE PANELES FIJOS ........................................................15
SHOWER DOOR INSTALLATION .............................................................16
INSTALLATION DE LA PORTE DE DOUCHE ..........................................16
INSTALACIÓN DE LA PUERTA DE LA DUCHA .......................................16
FIXED PANELS INSTALLATION ...............................................................18
INSTALLATION DES PANNEAUX FIXES .................................................18
INSTALACION DE PANELES FIJOS ........................................................18
HANDLE INSTALLATION ..........................................................................19
INSTALLATION DE LA POIGNÉE .............................................................19
INSTALACIÓN DE LA MANIJA .................................................................19
CLAMP INSTALLATION ............................................................................20
INSTALLATION DES PINCES ...................................................................20
INSTALACION DE LA ABRAZADERA ......................................................20
SEAL STRIPS INSTALLATION .................................................................22
INSTALLATION DE BANDES D’ÉTANCHÉITÉ ........................................22
INSTALACIÓN DE LAS TIRAS DEL SELLO ............................................22
SUPPORT BARS INSTALLATION ............................................................23
INSTALLATION DES BARRES DE SOUTIEN ..........................................23
INSTALACIÓN DE LAS BARRAS DE APOYO .........................................23
SHELVES CABINET INSTALLATION .....................................................27
INSTALLATION DU CABINET À ÉTAGÈRES ..........................................27
INSTALACIÓN DEL GABINETE ESTANTES ............................................27
SEALING ....................................................................................................33
SCELLAGE ................................................................................................33
SELLADO ..................................................................................................33
CARE AND MAINTENANCE .....................................................................34
TRAITEMENT ET ENTRETIEN .................................................................34
CUIDADO Y MANTENIMIENTO ................................................................34
LIMITED Product Warranty ......................................................................35
Garantie LIMITÉE du produit ...................................................................35
Garantía LIMITADA de productos ...........................................................35

PAGE 5
SAFETY NOTICE
AVIS DE SÉCURITÉ
AVISOS DE SEGURIDAD
PREPARATION
PRÉPARATION
PREPARACIÓN
NOTICE
• Anymodicationoralterationfromwhatisspeciedinthisinstructionmanualwillvoidanyandallwarrantyonthisproduct.
• The distributor is not responsible for any damage to the unit or personal property caused by improper installation. If you disregard
instructional warnings, you will void your warranty and possibly deal with water damage.
• Consult the distributor’s website for any additional information or question on this product’s installation.
AVIS
• Toutemodicationoualtérationapportéeauxindicationsdonnéesdansleprésentmanueld’instructionsannuletoutegarantieassociée
à ce produit.
• Le distributeur n’est pas responsable pour les dommages sur le produit ou sur la personne causés par une installation inadéquate. Si
vous ne tenez pas compte des indications du manuel d’instruction, vous annulerez votre garantie et vous vous exposerez à des dommages
causés par les fuites d’eau.
•Pour de plus amples renseignements sur l’installation du produit ou si vous avez des questions, veuillez consulter le site du distributeur.
ATENCIÓN
• Cualquier modicación o alteración con respecto a lo especicado en este manual de instrucción anulará toda la garantía de este
producto.
• El distribuidor no se hace responsable por cualquier tipo de daño a la unidad o propiedad personal ocasionado por una instalación
inadecuada. Ignorar estas instrucciones anulará la garantía y ocasionará daños potenciales por agua en su hogar.
•Consulte el sitio web del distribuidor para cualquier información adicional o pregunta sobre la instalación de este producto.
You will need at least two people to install this unit properly.
Before beginning assembly of product, make sure all parts are present. Compare parts with package contents list and hardware contents list.
If any part is missing or damaged, do not attempt to assemble the product.
Estimated Assembly Time: Shower (2 h)
2 personnes sont requises pour installer le produit correctement et sécuritairement.
Avant de commencer l’installation du produit, soyez assuré d’avoir toutes les pièces. Comparez les pièces avec les listes fournies. S’il y a des
pièces manquantes ou endommagées, ne tentez pas d’assembler le produit.
Temps de montage estimé: douche (2 h)
Necesitará al menos dos personas para instalar esta unidad de forma adecuada.
Antes de comenzar a ensamblar el producto, asegúrese de tener todas las piezas. Compare las piezas con la lista del contenido del paquete
y la lista de aditamentos. No intente ensamblar el producto si falta alguna pieza o si estas están dañadas.
Tiempo estimado de ensamblaje: Ducha (2 h)

PAGE 6
PACKAGE CONTENT
CONTENU DE L’EMBALLAGE
CONTENIDO DEL PAQUETE
A
S
B
F
D
C
O
E
H
G2
J
L
M
K
N
R
P2
Q
I
G1
P1

PAGE 7
A
x2
B
x1
C
9x
D
3x
E
1x
F
2x
G1+G2
1x
H
2x
I
2x
J
1x
K
1x
L
1x
M
2x
N
1x
O
1x
P
2x
Q
2x
R
1x
S
1x
PACKAGE CONTENT
CONTENU DE L’EMBALLAGE
CONTENIDO DEL PAQUETE

PAGE 9
SUPPLIED HARDWARE LIST
QUINCAILLERIE FOURNIE
CONTENIDO DE HARDWARE
TOOLS REQUIRED (not supplied)
OUTILS REQUIS (non fournis)
HERRAMIENTAS NECESARIAS (no incluido)
Screw
Vis
Tornillo
ST4x25mm
2+1
Wall Anchor
Ancrage mural
Tarugo
ø8x80mm
11+2
Cap
Capuchon
Capuchón
9+2
Fitting
Raccord
Accesorio
9+2
Screw
Vis
Tornillo
ST4x70mm
11+2
Pencil
Crayon
Lápiz
Screwdriver
Tournevis
Destornillador
Drill and drill bits
Perceuse et forets
Taladro con brocas
ø1/8” (3mm) & ø5/16” (8mm)
Level
Niveau
Nivel
Measuring Tape
Ruban à mesurer
Cinta medidora
Silicone
Silicone
Silicona
Rubber mallet
Maillet en caoutchouc
Mazo de goma
Cutter
Exacto
Cuchilla
Safety glasses
Lunettes de Sécurité
Anteojos de seguridad
Allen key
Clé Allen
Llave Allen
2.5mm & 5mm
Ratchet
Clé à rochet
Llave de trinquete
5mm Bit socket
Screw
Vis
Tornillo
ST4x10mm
9+2
Hinge cap
Capuchon pour charnière
Capuchón de bisagra
10+2
3/8” (9mm)
2 3/8” (60mm)
Wood block
Bloc de bois
Bloque de madera
2x
GG
FF
EE
DDCCBB
AA

PAGE 10
REVERSIBILITY
RÉVERSIBILITÉ
REVERSIBILIDAD
A B
This instruction is drawn up for a door opening from right to left (see illustration A).
For an installation for a door opening from left to right (see illustration B), use the same instructions, but switch
aroundthepanels:mirroreect.
Utilisez ces instructions pour une ouverture de la porte de droite à gauche (illustration A).
Pour une installation de gauche à droite (illustration B), suivez ces mêmes instructions mais permuter l’emplacement
despanneaux:eetmiroir.
Estas instrucciones fueron elaboradas para una abertura de puerta de derecha a izquierda (ilustración A).
Para una abertura de izquierda a derecha (ilustración B), siga estas mismas instrucciones, pero cambie el lugar
para la ubicación del riel: efecto espejo.
Install the shower head on the door’s side as shown in the illustration! This will reduce the risk of leaking.
¡Instale la cabeza de la ducha hacia el lado de la puerta como se muestra! Esto reducirá el riesgo de escape de
agua.
Installezlepommeaudedoucheducôtédelaportetelqu’illustré,andediminuerlesrisquesdefuites.
FAQ
Q: If the shower head is installed on the
other wall, will it leak?
A: It is possible to install your shower
head on the other side, but we strongly
recommend to install it as illustrated.
FAQ
Q: Y’aura t-il fuite si la pomme de
douche est installée sur l’autre mur?
R: Il est possible d’installer votre
pomme de douche de l’autre côté, mais
nous vous recommandons fortement de
l’installer comme illustré.
FAQ
P: ¿Habrá una fuga si la cabeza de
ducha está instalada en la otra pared?
R: Es posible instalar su cabezal
de ducha en el otro lado, pero le
recomendamos encarecidamente que
lo instale como se muestra.

PAGE 12
SHOWER INSTALLATION: OVERVIEW
INSTALLATION DE LA DOUCHE: VUE D’ENSEMBLE
MONTAJE DE LA DUCHA: VISIÓN GENERAL
B
33 1/4”[845]
20”[508]
16”[406]
27 3/8”[695]
32 5/8”[828]
6”[152]
6”[152]
1/2”[13]
40 3/8”[1025]
39 13/16”[1012]
32 1/16”815]
Drywall
Placoplâtre
Paneles de yeso
Stud
Montant
Soportes
Waste pipe rough-in
Ouverture pour tuyau d’évacuation
Apertura de la tubería de descarga
3/4”[19]
2 1/2”[64]
31 11/16”[805]
39 5/8”[1006]
8 1/4”[210]
FAQ
Q: What thickness of cement must I apply?
A: Between 1” and 1 1/2”.
Q: Is the base installed on the studs or on the drywall?
A: On the studs.
FAQ
Q: Quelle épaisseur de ciment dois-je appliquer ?
R: Entre 1” et 1 1/2”.
Q: La base est-elle installée sur les montants ou sur les murs de
placoplâtre?
R: Sur les murs montants.
FAQ
P: ¿Qué espesor de cemento debo aplicar?
R: Entre 1 “y 1 1/2”.
P: ¿Está instalada la base en los soportes o en el panel de yeso?
R: En los soportes.
Wall panel
Panneau mural
Panel de pared
A
Drywall
Placoplâtre
Paneles de yeso
Furring strip board
Planche à fourrure
Tablero de la piel
Stud
Montant
Soportes
Shower base
Base de douche
Plato de ducha
Cement
Ciment
Cemento
Drain
Drain
Desagüe
Waste pipe
Tuyau d’évacuation
Tubería de desagüe
Stud
Montant
Soportes
A. Before you start the installation of your shower enclosure, consult the illustration A below showing a side-view of the completed installation.
B. Illustration B shows the recommended wall structure and measurements for the shower installation.
NOTE: Customer must follow and comply with the local and national building and plumbing code. All illustrations in this manual are for reference
only and do not take precedent on any code or regulation. This product should be installed by a professional.
A. Avant de commencer l’installation de votre cabine de douche, consultez l’illustration A ci-dessous montrant une vue latérale de l’installation terminée.
B. L’illustration B montre la structure de paroi recommandée et les mesures pour l’installation de la douche.
REMARQUE: Le client doit suivre et se conformer scrupuleusement aux codes locaux et nationaux de construction et de plomberie. Toutes les
illustrations de ce manuel ne sont faites que pour référence et ne prennent aucun précédent sur aucun code ou règlement. Ce produit doit être
installé par un professionnel.
A. Antes de iniciar la instalación de la cabina de ducha, ver Figura A muestra una vista lateral de la instalación se haya completado.
B.LaguraBmuestralaestructuradelaparedrecomendadoymedidasparalainstalacióndeladucha.
NOTA: El cliente debe seguir y cumplir con los códigos de construcción locales y nacionales y fontanería. Todas las ilustraciones de este manual
son indicativos y se comprometen ningún precedente para cualquier código o reglamento. Este producto debe ser instalado por un profesional.
Furring strip board
Planche à fourrure
Tablero de la piel

PAGE 13
A A
3/4”[19] 3/4”[19]
A A
ø1/3”
8mm
ø1/3”
8mm
#1
A. Position the wall tracks (A) onto the base and wall panels. The outer edge of the wall tracks (A) should be located at 3/4” (19mm) from the base edge,
and the wall tracks (A) should be leveled.
B. Marked the location of the 3 holes inside the wall tracks (A). Mark the top contour of the wall tracks (A). Remove the wall tracks and drill guide holes.
A. Positionnez les glissières murales (A) sur la base et les panneaux muraux. Le bord extérieur des glissières (A) doit être situé à 3/4” (19mm) du bord de la
base et les glissières (A) doivent être nivelés.
B. Marquez l’emplacement des 3 trous à l’intérieur des glissières (A). Marquez le contour supérieur des glissières (A). Retirez les glissières et percez les trous
de guidage.
A. Coloque las pistas de la pared (A) a la plato de ducha y paneles de pared. El borde exterior de las vías de la pared (A) debe ubicarse a 3/4” (19mm) del
borde de la base, y las vías de la pared (A) deben estar niveladas.
B.Señalólaubicacióndelos3oriciosdentrodelasvíasdelapared(A).Marqueelcontornosuperiordelasvíasdelapared(A).Retirelaspistasdelapared
ylosoriciosdeguíadeltaladro.
WALL TRACKS INSTALLATION
INSTALLATION DES GLISSIERES
INSTALACIÓN DE LOS RIELES
A
B
C
A
B
C

PAGE 14
WARNING!
If there are no studs aligned to the wall track behind the
drywall, use the wall anchors to ensure the screws won’t
become loose.
AVERTISSEMENT!
S’il n’y a pas de montants alignés derrière le mur de
placoplâtre, utilisez les ancrages muraux pour vous
assurer que les vis ne se desserreront pas.
¡ADVERTENCIA!
Si no hay clavos alineados en el camino de la pared
detrás de los paneles de yeso, anclajes de pared uso
para asegurar que los tornillos no liberarán.
A A
#2
A. Place the wall tracks (A) back at their marked location and screw them to the walls using the screws (BB).
NOTE: In the instance where there are no studs located behind the wall tracks (A), please use the provided anchors (AA).
A.Remettrelesglissières(A)àleuremplacementmarquéetxez-lesauxmursàl’aidedesvis(BB).
REMARQUE: S’il n’y a pas de montants situés derrière les glissières (A), veuillez utiliser les ancrages fournies (AA).
A. Coloque las vías de la pared (A) en su lugar marcado y atorníllelas a las paredes con los tornillos (BB).
NOTA: En el caso en que no haya clavos situados detrás de las vías de la pared (A), utilice los anclajes suministrados (AA).
WALL TRACKS INSTALLATION
INSTALLATION DES GLISSIERES
INSTALACIÓN DE LOS RIELES
BB
BB
A A
AA
AA

PAGE 15
#3
A.Cutthexedandsidepanelsbottomsealstrips(P1&P2)totheindicatedsizesbelow.
B.Installthesealstrips(P1&P2)atthebottomofthexedandsidepanels(B&K).
C.Insertthexedpanels(B&K),intotheirrespectivewalltracks(A).
A.Coupezlesbandesd’étanchéitéinférieuresdespanneauxxeetlatéral(P1&P2)auxlestaillesindiquéesci-dessous.
B.Installezlesbandesd’étanchéité(P1&P2)aubasdespanneauxxeetlatéral(B&K).
C.Insérezlespanneauxxe&latéral(B&K)dansleursglissièrerespectives(A).
A.Cortedelajuntainferiordelpaneljoyelpanellateral(P1&P2)enlostamañosindicadosacontinuación.
B. Instalar las tiras de obturación (P1 & P2) en la parte inferior de los paneles (B & K).
C.Insertelospanelesjos(B&K)ensurespectivaparedpistas(A).
FIXED PANELS INSTALLATION
INSTALLATION DE PANNEAUX FIXES
INSTALACION DE PANELES FIJOS
9 1/2”[240]
1 5/8”[40]
24 5/8”[625]
1 1/2”[37]
P2 P1
P2
P1
B K
B
A
K
A
A
B
B
C C

PAGE 16
#4
A. Disassemble the hinges (M). Be careful not to lose any pieces.
B.Installtherstpartofthehingesontothexedpanel(B).Ensurethatthehingesaretightlyscrewedinplace.Usearatchettostronglytightentheblots.
C.Itisrecommendedthatyouusetwowoodblocsofwidth=23/8”(60mm)andheight=3/8”(9mm)tosteadilyholdupthedoorpanel(M)tonishthehinge
installation.
A. Démonter les charnières (M). Faire attention de ne pas perdre de morceaux.
B.Installezlescharnières(M)surlepanneauxe(B).Assurez-vousquelescharnièressontbienvisséesenplace.
C. Il est recommandé d’utiliser deux blocs de bois de largeur = 2 3/8 “(60mm) et de hauteur = 3/8” (9mm) pour maintenir le panneau de la porte (M).
A. Retire las bisagras (M). Tenga cuidado de no perder piezas.
B.Instalarlasbisagras(M)enelpaneljo(B).Asegúresedequelasbisagrassevuelvenmásestrictas.
C. Se recomienda el uso de dos bloques de ancho de madera = 2 3/8 “(60 mm) y la altura = 3/8” (9mm) para mantener el panel de la puerta (M).
SHOWER DOOR INSTALLATION
INSTALLATION DE LA PORTE DE DOUCHE
INSTALACIÓN DE LA PUERTA DE LA DUCHA
M
M
B
J
Wood block
Bloc de bois
Bloque de madera
2 3/8” x 3/8”
60x9mm
GG
C
B
A

PAGE 17
#5
A. Align the holes of the door panel (J) to the corresponding holes of the hinges (M), and install the hinges. Ensure that the hinges are tightly screwed in
place. Use a ratchet to strongly tighten the blots.
B. Install the magnetic seal strips (I) onto the door panel (J) and the side panel (K).
C.Adjustthexedpanel(B)andthesidepanel(K)toyieldatightdoorseal.
A. Alignez les trous de la porte (J) aux trous correspondants des charnières (M), puis intallez les charnières. Assurez-vous que les charnières sont bien vissées
en place.
B. Installez les bandes d’étanchéité magnétique (I) sur le panneau de porte (J) et le panneau latéral (K).
C.Ajustezlepanneauxe(B)etlepanneaulatéral(K)pourobtenirunjointétanche.
A.Alinearlosagujerosenlapuerta(J)alosoriciosdebisagracorrespondientes(M),acontinuación,intallezbisagras.Asegúresedequelasbisagrasse
vuelven más estrictas.
B. Instalar bandas de junta magnética (I) en el panel de la puerta (J) y el panel lateral (K).
C.Elajustedelospanelesjo(B)ylateral(K)paraobtenerunsellohermético.
SHOWER DOOR INSTALLATION
INSTALLATION DE LA PORTE DE DOUCHE
INSTALACION DE LA PUERTA DE DUCHA
J
I
I
K
KJ
I
B
J
M
B
A
B
C

PAGE 18
A A
ø1/8”
3mm
ø1/8”
3mm
#6
A-B.Fixthepanels(B&K)bydrillingguideholesthroughthewalltracks(A)andscrewingtheminplaceusingttings(EE)andscrews(DD).
A-B. Fixez les panneaux (B & K) en perçant les trous de guidage à travers les glissières (A) et en les vissant en place à l’aide des raccords (EE) et des vis (DD).
A-B.Fijelospaneles(B&K)porlaperforacióndeoriciospilotoatravésdelaspistasdepared(A)yatornilladoensulugarutilizandolosaccesorios(EE)y
los tornillos (DD).
FIXED PANELS INSTALLATION
INSTALLATION DES PANNEAUX FIXES
INSTALACION DE PANELES FIJOS
A A
B B
DD
EE
DD
EE

PAGE 19
#7
A. Cover the screws (DD) using the covers (FF).
B. Install the handle (N).
A. Recouvrir les vis (DD) à l’aide des capuchons (FF).
B. Installer la poignée (N).
A. Cubra los tornillos (DD) con los capuchónes (FF).
B. Instalar el mango (N).
HANDLE INSTALLATION
INSTALLATION DE LA POIGNÉE
INSTALACIÓN DE LA MANIJA
N
A
A
B
FF
FF

PAGE 20
ø1/8”
3mm
ø1/8”
3mm
Q
B
K
#8
A-B-C. Disassemble the clamps (Q). Place them in the opening at the bottom of the panels (B & K). Drill guide holes into the shower base.
A-B-C. Démontez les pinces (Q). Placez-les dans l’ouverture au bas des panneaux (B & K). Percez les trous de guidage dans la base de la douche.
A-B-C.Quitelasabrazaderas(Q).Coloqueenlaaberturaenlaparteinferiordelospaneles(B&K).Perforeoriciosguíaenlabasedeladucha.
CLAMP INSTALLATION
INSTALLATION DES PINCES
INSTALACION DE LA ABRAZADERA
A
B B
C C

PAGE 21
Q
Q
Q Q
B
K
#9
A. Fix the clamps (Q) using the screws (CC).
B-C. Reassemble the clamps (Q) and tightly tighten them. Do not forget the plastic gaskets keeping the glass panels separated from the metal clamps.
A. Fixez les pinces (Q) à l’aide des vis (CC).
B-C. Remontez les pinces (Q) et les serrer. N’oubliez pas les joints en plastique qui maintiennent les panneaux de verre séparés des pinces métalliques.
A. Haga las abrazaderas (Q) para los tornillos (CC).
B-C. Volver a colocar las pinzas (Q) y apretarlos. Recuerde sellos de plástico que sujetan los paneles de vidrio separados clips metálicos.
CLAMP INSTALLATION
INSTALLATION DE PINCE
INSTALACION DE LA ABRAZADERA
HELPFUL HINT!
Add a drop of silicone in the holes
before inserting the screws.
ASTUCE!
Ajoutez une goutte de silicone dans les
trous avant de visser.
¡CONSEJO!
Añadir una gota de silicona en los
agujeros antes de atornillar.
A
CC
BB
A
CC
CC

PAGE 23
#11
A.Loosenandmounttheanchors(F)andthexedpanelbrackets(H)ontothesupportbars(G1&G2).
B. Adequately position the support bars in place, atop the panels (B & K), by loosely installing the brackets (H). Do not forget the plastic gaskets keeping the
glass panels separated from the metal brackets.
A.Desserrezetmontezlesancrages(F)etlessupportsdepanneauxe(H)surlesbarresdesupport(G1&G2).
B. Placez correctement les barres de support en place, au dessus des panneaux (B & K), en installant les supports (H) de façon lâche. N’oubliez pas les joints
en plastique qui maintiennent les panneaux de verre séparés des supports métalliques.
A.Aojarymontarlosanclajes(F)ylossoportesdepaneljo(H)enlasbarrasdesoporte(G1&G2).
B. Lugar correctamente las barras de soporte en su lugar, por encima de los paneles (B & K), mediante la instalación de los soportes (H) sin apretar. No se
olvide de los precintos de plástico que mantienen los soportes metálicos paneles de vidrio separados.
SUPPORT BARS INSTALLATION
INSTALLATION DES BARRES DE SOUTIEN
INSTALACIÓN DE LAS BARRAS DE APOYO
F
H
G2
G2
H
G2
F
H
G1
G1
H
G1
B K
CC
BB
AA

PAGE 24
#12
A. Trace the anchors (F) contour onto the wall.
B. Completely disassemble the support bars (G1 & G2). Then place the anchors (F) back at their marked location and trace the inner hole position onto the wall.
C. Drill a guide hole at the marked location of the anchors (F) center hole.
A. Tracez le contour des ancrages (F) sur le mur.
B. Démontez complètement les barres de support (G1 & G2). Ensuite, placez les ancrages (F) à leur emplacement marqué et tracez la position du trou intérieur
sur le mur.
C. Percez un trou de guidage à l’endroit marqué du trou central de l’ancrage (F).
A. Traza alrededor de los anclajes (F) en la pared.
B. Completamente desmontar las barras de soporte (G1 & G2). A continuación, coloque los anclajes (F) a su ubicación marcada y marcar la posición del
agujero interior en la pared.
C.Hagaunagujeropilotoenellugarmarcadoconeloriciocentraldelanclaje(F).
SUPPORT BARS INSTALLATION
INSTALLATION DES BARRES DE SOUTIEN
INSTALACIÓN DE LAS BARRAS DE APOYO
F
F
F
F
ø1/3”
8mm
ø1/3”
8mm
CC
BB
AA
/