Page is loading ...

jaclo industries | 129 Dermody Street Cranford, NJ 07016
p 908.653.4433 | 800.852.3906 f 908.653.1717 | 800.852.4133
8.07.18
Confidence from start to finish.®
JACLO.COM | PG 1
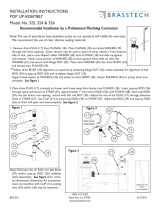
INSTALLATION INSTRUCTIONS
Uptown Contempo Widespread Faucets
Part #’s: 8880-****, 8881-****
8880 8881
C T630 T462
L T632 T638 T459
T672
Handle Options
SQC TSQ630 TSQ462
SQL TSQ632 TSQ638 TSQ459
TSQ672
Handle Options

jaclo industries | 129 Dermody Street Cranford, NJ 07016
p 908.653.4433 | 800.852.3906 f 908.653.1717 | 800.852.4133
8.07.18
JACLO.COM | PG 2
17
15
14
16
COMPONENT PARTS
Hidden Aerator - 9880-AER
8880 Low Profile Spout - 8880-SPOUT-LL-** / 8881-SPOUT-LL-**
Lift Rod - 9880-ROD-**
Handles - VARIES ON MODEL
Round or Square Valve Escutcheon - VARIES ON MODEL
Valve Body Cold - 11833-0 OR 11835-0 (FOR L & C HANDLE ONLY)
Valve Body Hot - 11832-0 OR 11834-0 (FOR L & C HANDLE ONLY)
Valve Body Nut (2)
Cock Nut - A438-0
Hose (2) - 5130-0
Washer - PART OF SPOUT
Brass Nut - PART OF SPOUT
Brass Nipple - PART OF SPOUT
Brass Tee - PART OF SPOUT
Round or Square Spout Escutcheon - VARIES ON MODEL
17
3
5
4
16
15
13
13
13
6
17
15
14
16
4
3
A
2
18
Fiber Washer (2)
19
Hot Hose Fitting - 30823-RGH
Cold Hose Fitting - 30822-RGH
18
19
18 19
2
1
Valve Cup Washer - VALVE CUP WASHER
9/16"
9
87
6
10
11
87
9
13
12
10
11
12
9
8
10
11
7

jaclo industries | 129 Dermody Street Cranford, NJ 07016
p 908.653.4433 | 800.852.3906 f 908.653.1717 | 800.852.4133
8.07.18
JACLO.COM | PG 3
FIGURE 5
HOT COLD
FIGURE 1
FIGURE 3
FIGURE 4
FIGURE 2
Valve Stem
Counter or
Basin
*No top nut used
on any of these
handles
FIGURE 6
Aerator
Key
17
15
14
16
COMPONENT PARTS
Hidden Aerator - 9880-AER
8880 Low Profile Spout - 8880-SPOUT-LL-** / 8881-SPOUT-LL-**
Lift Rod - 9880-ROD-**
Handles - VARIES ON MODEL
Round or Square Valve Escutcheon - VARIES ON MODEL
Valve Body Cold - 11833-0 OR 11835-0 (FOR L & C HANDLE ONLY)
Valve Body Hot - 11832-0 OR 11834-0 (FOR L & C HANDLE ONLY)
Valve Body Nut (2)
Cock Nut - A438-0
Hose (2) - 5130-0
Washer - PART OF SPOUT
Brass Nut - PART OF SPOUT
Brass Nipple - PART OF SPOUT
Brass Tee - PART OF SPOUT
Round or Square Spout Escutcheon - VARIES ON MODEL
17
3
5
4
16
15
13
13
13
6
17
15
14
16
4
3
A
2
18
Fiber Washer (2)
19
Hot Hose Fitting - 30823-RGH
Cold Hose Fitting - 30822-RGH
18
19
18 19
2
1
Valve Cup Washer - VALVE CUP WASHER
9/16"
9
87
6
10
11
87
9
13
12
10
11
12
9
8
10
11
7
17
15
14
16
COMPONENT PARTS
Hidden Aerator - 9880-AER
8880 Low Profile Spout - 8880-SPOUT-LL-** / 8881-SPOUT-LL-**
Lift Rod - 9880-ROD-**
Handles - VARIES ON MODEL
Round or Square Valve Escutcheon - VARIES ON MODEL
Valve Body Cold - 11833-0 OR 11835-0 (FOR L & C HANDLE ONLY)
Valve Body Hot - 11832-0 OR 11834-0 (FOR L & C HANDLE ONLY)
Valve Body Nut (2)
Cock Nut - A438-0
Hose (2) - 5130-0
Washer - PART OF SPOUT
Brass Nut - PART OF SPOUT
Brass Nipple - PART OF SPOUT
Brass Tee - PART OF SPOUT
Round or Square Spout Escutcheon - VARIES ON MODEL
17
3
5
4
16
15
13
13
13
6
17
15
14
16
4
3
A
2
18
Fiber Washer (2)
19
Hot Hose Fitting - 30823-RGH
Cold Hose Fitting - 30822-RGH
18
19
18 19
2
1
Valve Cup Washer - VALVE CUP WASHER
9/16"
9
87
6
10
11
87
9
13
12
10
11
12
9
8
10
11
7
1¼”-1½”Ø
1ӯ
Spout Installation
(Refer to Figure 1 & 2)
Note: Some items have been
pre-assembled at the factory to
ensure quality and t. Some
disassembly may be required
during installation.
1. Loosen brass spout nut (15) slip off
metal spout washer (14).
2. Slip spout assembly through sink basin
or countertop from bottom.
3. Align pop up rod assembly hole in
rear of spout escutcheon with channel
in spout.
4. But metal spout washer (14) up to
bottom of sink basin or countertop
opening to rear to accommodate pop
up rod assembly (3) above brass spout
nut (15).
5. Tighten brass spout nut (15).
6. Attach 3/8” end of hose (13) to hose
tting (18 & 19) on tee (17) starting
with long tting rst and tighten nut.
7. Push pop up rod assembly (3) through
spout escutcheon to sit in channel.
Hose Installation
1. Connect hoses (13) already installed
on spout to valve bodies (7 & 8) and
tighten nuts accordingly.
Aerator Cleaning
ALWAYS REMOVE AERATOR AND
FLUSH THE FAUCET AFTER
INITIAL INSTALLATION
1. Use aerator key supplied with faucet
2. Engage key in aerator. Figure 1.
3. Remove aerator by turning key
counterclockwise
4. Turn on hot and cold water valves
ush lines
5. Reinstall aerator by engaging key
and turning clockwise until tight
6. Check for leaks, re-tighten if
necessary
Valve Installation
(Refer to Figure 3, 4, & 5)
1. Identify hot and cold valve. Hot has
a red sticker and cold has a blue
sticker.
2. Install hot valve on left side of spout
as you are facing the sink.
3. Remove handle (5), escutcheon (6),
top nut and ber washer (10) from
valve body (7 & 8).
4. Discard top nut and ber washer.
5. Loosen bottom valve, nut (9), ber
washer (10), and valve cup washer
(11) all the way down.
6. Place valve body (7 &8) through
deck sink basin or countertop from
bottom.
7. Screw on handle escutcheon (6) on
to valve body stem.
*Note: Adjustments may need to
be made because of differences in
thickness of sink, basin, or
countertop.
8. Using Figure 5 adjust height for
handle selected using “A”
dimension.
9. Place handle (5) on stem testing on/
off position. Tigten handle using
handle installation. Figure 6
*Note: Out ports of both hot and
cold valve bodies (7 &8) should be
facing spout.

jaclo industries | 129 Dermody Street Cranford, NJ 07016
p 908.653.4433 | 800.852.3906 f 908.653.1717 | 800.852.4133
8.07.18
JACLO.COM | PG 4
Handle Installation
1. Install handle onto stem in desired "off"
position.
2. Conrm handle is not binding with
escutcheon. Adjust if necessary.
3. Handles are fastened with a set screw or
top screw. Figure 7.
4. If set screw type, screw, tighten then
press in decorative cap with o-ring.
5. If top screw type, screw, tighten then
press in decorative cap with o-ring.
FIGURE 7
COMPONENT PARTS
4
7
6
5
3
1
2
9
8
10
12
11
13
Drain Assembly
1. Disassemble top ange (2) and drain stopper (1)
from pop-up drain body (6).
2. Loosen mounting nut (5) for desired height.
*Note: This may vary depending on thickness of
sink basin or countertop.*
3. Apply appropiate silicon/putty under lip of top
ange (2).
4. From underneath, insert drain body (6) through
sink basin or countertop and attach top ange (2).
5. Guide sink gasket (3) & plastic washer (4) up snug
to bottom of sink basin or countertop.
6. Test the length needed for drain stopper (1) by
adjusting height of eyelet so it is visible from side
port of ball rod.
7. Align top ange (2) & drain body (6) & tighten nut
(5) securely.
8. Test alignment using ball rod (10) without ball rod
seats (8) to ensure it goes through eyelet of drain
stopper (1).
9. Adjust length of drain stopper (1) (if required) by
loosening the nut & eyelet to desired height. Then
secure back up to bottom of drain stopper (1).
10. Put one ball rod seat (8) before ball in ball rod (10)
concave side toward ball. Push through side port
making sure the ball rod (10) goes through drain
stopper (1) eyelet. Put second seat (8) on+to other
side of ball rod (10) & attach ball rod nut (9). Do
not over tighten.
11. Pushing ball rod (10) down to raise drain stopper
(1) in sink. Test & adjust if necessary.
12. Attach lift rod strap (11) to pop-up rod.
13. Push down on ball rod (10) putting one
end of spring clip (12) on, then put through
appropiate hole in lift rod strap (11). Attach other
end of spring clip (12) & test.
14. Attach tailpiece (7) to drain body (6) using pipe
thread sealing tape on threads.
1 ½”Ø
17
15
14
16
COMPONENT PARTS
Hidden Aerator - 9880-AER
8880 Low Profile Spout - 8880-SPOUT-LL-** / 8881-SPOUT-LL-**
Lift Rod - 9880-ROD-**
Handles - VARIES ON MODEL
Round or Square Valve Escutcheon - VARIES ON MODEL
Valve Body Cold - 11833-0 OR 11835-0 (FOR L & C HANDLE ONLY)
Valve Body Hot - 11832-0 OR 11834-0 (FOR L & C HANDLE ONLY)
Valve Body Nut (2)
Cock Nut - A438-0
Hose (2) - 5130-0
Washer - PART OF SPOUT
Brass Nut - PART OF SPOUT
Brass Nipple - PART OF SPOUT
Brass Tee - PART OF SPOUT
Round or Square Spout Escutcheon - VARIES ON MODEL
17
3
5
4
16
15
13
13
13
6
17
15
14
16
4
3
A
2
18
Fiber Washer (2)
19
Hot Hose Fitting - 30823-RGH
Cold Hose Fitting - 30822-RGH
18
19
18 19
2
1
Valve Cup Washer - VALVE CUP WASHER
9/16"
9
87
6
10
11
87
9
13
12
10
11
12
9
8
10
11
7

jaclo industries | 129 Dermody Street Cranford, NJ 07016
p 908.653.4433 | 800.852.3906 f 908.653.1717 | 800.852.4133
8.07.18
JACLO.COM | PG 5
Over Fifty Years of Excellence
Proud to be an American Company
CARE INSTRUCTIONS
WARRANTY
In order to maintain the high quality nish of JACLO products, please
adhere to the following product care instructions:
Cleaning JACLO products: For routine cleaning, simply use a soft
damp cloth and common household soap, then rinse and dry.
Proper care of your product is important because most water
contains calcium that deposits on surfaces, forming unpleasant spots.
This can be avoided by routine cleaning and drying after every use.
Use only mild soap detergents. JACLO products may be periodically
waxed with non abrasive compounds, such as Flitz® faucet wax.
Residential Warranty: Your new plumbing xture is warrantied by
JACLO INDUSTRIES, 129 Dermody Street, Cranford, NJ 07016.
This warranty is extended to original consumer purchasers only.
This warranty gives you specic legal rights, and you may also have
other rights which vary from state to state.
The product (including the nish on the product but excluding any
custom nishes and any installation hardware not supplied by
JACLO) is warranted to be free from defects in material or
workmanship under normal use and service for the lifetime* of the
xture, so long as the original consumer purchaser owns it.
JACLO's sole obligation under this or any other warranty is limited
to repairing or replacing at JACLO's option, without labor, any part
or parts of the xture which fail to conform to such warranty.
JACLO WILL NOT BE LIABLE FOR ANY CONSEQUENTIAL OR
INCIDENTAL DAMAGES CAUSED BY A BREACH OF THIS OR
ANY OTHER WARRANTY.
Some states do not allow the exclusion of limitation of incidental or
consequential damages, so the above limitation may not apply to
you.
To secure warranty performance, the original consumer purchaser
must have the xture properly and professionally installed in
accordance with all codes and installation instructions.
Items and actions that will void the JACLO warranty are:
• Abuse, misuse, neglect and accidental damage
• Improper cleaning, care and maintenance of the xture
• Alteration of the xture in any way including removal of a ow
regulator/restrictor
All warranty claims must be made in accordance with the JACLO
return policy (see below).
JACLO does not authorize any distributor, retailer or other person
to modify this warranty or assume any liability on its behalf with
respect to it. Any question regarding the operation of warranty
should be addressed to JACLO's warranty department.
*Due to the unpredictable environment, all kitchen drains, strainers
and garbage disposal anges are warrantied for the period of one
year from date of purchase from an authorized JACLO dealer.
Un-lacquered Brass (ULB) is a living nish and is excluded from any
nish warranty.
Commercial Warranty: JACLO offers the above warranty for a
period of one year from date of purchase to purchasers of products
for industrial, commercial, business and all non-private residential
uses.
Never use abrasive cleaners, bleach, disinfectants or cleaning
products containing alcohol, ammonia, hydrochloric or phosphoric
acids as they will damage the product nish.
Please note: Your product warranty may not be valid if the above
cleaning guidelines are not followed.
NEWH
/