Page is loading ...

2000W
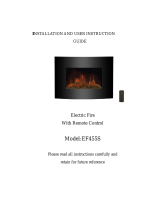
FIREPLACE HEATER
wall mountable wItH curved svelte tempered glass panel
Dekkar
User ManUal
FOR PERSONAL INDOOR USE ONLY
WARNING!
TO REDUCE THE RISK OF FIRE, ELECTRIC SHOCK,
OR PERSONAL INJURY, READ, UNDERSTAND
AND FOLLOW INSTRUCTIONS BEFORE
USING THIS HEATER
Keep this manual in a safe place for future reference
EFH432
Arlec guarantees this product in accordance with the Australian
Consumer Law.
Arlec also warrants to the original first purchaser of this product
(“you”) from a retailer that this product will be free of defects
in materials and workmanship for a period of 12 months from
the date of purchase; provided the product is not used other
than for the purpose, or in a manner not within the scope of the
recommendations and limitations, specified by Arlec, is new and
not damaged at the time of purchase, has not been subjected
to abuse, misuse, neglect or damage, has not been modified or
repaired without the approval of Arlec and has not been used for
commercial purposes (“Warranty”).
If you wish to claim on the Warranty, you must, at your own
expense, return the product, and provide proof of original purchase
and your name, address and telephone number, to Arlec at the
address below or the retailer from whom you originally purchased
the product within 12 months from the date of purchase.
Arlec will (or authorise the retailer to) assess any claim you may
make on the Warranty in the above manner and if, in Arlec’s
reasonable opinion, the Warranty applies, Arlec will at its own
option and expense (or authorise the retailer to) replace the
product with the same or similar product or repair the product and
return it to you or refund the price you paid for the product. Arlec
will bear its own expenses of doing those things, and you must bear
any other expenses of claiming on the Warranty.
The Warranty is in addition to other rights and remedies you may
have under a law in relation to the product to which the Warranty
relates.
Our goods come with guarantees that cannot be excluded under
the Australian Consumer Law. You are entitled to a replacement
or refund for a major failure and for compensation for any other
reasonably foreseeable loss or damage. You are also entitled
to have the goods repaired or replaced if the goods fail to be of
acceptable quality and the failure does not amount to a major failure.
TECHNICAL SPECIFICATIONS
WARRANTY
CPIN002812/2
OPERATION
4
The appliance can be operated either by the switch located on the top right hand side of
the fire or by supplied remote control.
The Main power ON/OFF switch must be first switch on to operate the appliance.
MANUAL OPERATION
1. The switches are located at the top right hand side of the appliance.
2. Press once the Main power ON/OFF switch to turn on the appliance.
3. Press once the O/I button to turn on the flame effect; press again to switch off the
flame effect. A red indicator light will appear to indicate that the function is ON.
4. Press the O/I button for 3 seconds this will operate the dimmer mode.
5. Press once the 1000W button for the low heat settings; press again to switch off
the heat setting.
A red indicator light will appear to indicate that the function is ON.
6. Press once the 2000W button for the high heat settings; press again to switch off
the heat setting. A red indicator light will appear to indicate that the function is ON.
REMOTE OPERATION
1. The Main power ON/OFF switch must be first switch on.
2. It takes some time for the receiver to respond to the transmitter.
Do not PRESS the buttons more than once within two seconds for correct operation.
3. Press once the button ON/OFF on the remote control this turns ON/OFF the appliance
and fire effect.
4. Press once the 1000W button for the low heat settings; press again to switch off
the heat setting.
5. Press once the 2000W button for the high heat settings; press again to switch off
the heat setting.
6. Press the DIMMER button for operate the dimmer mode.
SAFETY CUT-OFF
• Thisapplianceisttedwithasafetycut-offwhichwilloperateiftheheateroverheats
(eg. due to blocked air vents). For safety reasons, the heater will NOT automatically
reset.
• Toresettheappliance,disconnecttheappliancefromthemainssupplyforatleast
30 minutes. Reconnect the supply to the mains and switch on the appliance.
REPLACING THE FLAME EFFECT LAMP
Warning – Always disconnect from the power supply before removing bulb.
Warning – The bulbs reach high temperatures during operation. Allow the bulbs to cool
down after switching off the appliance before changing lamps.
Note: Two people will be required for this process.
• Itisrecommendedthattheheateriscarefullyremovedfromthewallandlaidonitsback
in order to replace the lamp.
• Gentlyslidethefrontglasspaneltowardsthetopoftheheaterandremove.Storetheglass
safely out of the way whilst the bulb is replaced so that it does not get damaged.
• Atthebottomofheater,thereisalampcoverxedbyeightPhilip’sheadscrews,remove
the eight screws and lift off the lamp cover (Fig.5).
• Foraccesstothebottombulbs,carefullyslidetheexiblerotisserietoonesideensuring
that the rubber grommet is not lost (Fig.6).
• Removethedefectivebulbbyunscrewingit.
•
ReplacewithaG9typeglobes,rotatingit.Takecarenottoover-tightenthebulb.
• Rettherotisseriemakingsurethattherubbergrommetiscarefullypushedintotheslotted
hole on the axial bracket.
MAINTENANCE & CLEANING
5
1. Before cleaning, turn off the heater, unplug the power cord and allow the heater to cool.
2. Do not immerse cord, plug or heater into water or other liquid or pour water or other liquid
over the heater.
3. Use a vacuum cleaner to remove dust and dirt from air openings.
4. Clean exterior surfaces using a solution of water and mild detergent with wrung out damp
sponge. Use and wring out the damp sponge and wipe the exterior surface again.
Finally wipe with a dry cloth.
Allow sufficient time to dry before plugging electrical cord into outlet.
5. The tempered glass front panel can be clean with glass cleaner detergents.
6. Any other servicing should be performed by an authorised service representative.
Do not use the heater if it has malfunctioned or become damaged in any way.
Fig. 6Fig. 5
Model
EFH432
Max heater Power
2000W max
Rated Frequency
50Hz
Voltage
220-240V~
Bulb Wattage
40W max/bulb
(3 bulbs)
Bulb Size & Type
G9 Halogen type
CPIN002812/2
For all Sales & Warranty enquiries
ArlecAustraliaPty.Ltd.ACN009322105
(“Arlec”) gives the Warranty.
Building 3, 31 – 41 Joseph Street, Blackburn North, Victoria, 3130
Blackburn North LPO, P.O. Box 1065, Blackburn North, 3130
CustomerService:(03)99825111
NewZealandTollFree:0800003329
Email: [email protected]
USER MANUAL

IMPORTANT SAFEGUARDS
7. Fix the wall bracket using the plug and screws provided.
8.
Carefully lift the heater up ensuring that the top rear ledge of
heater engages the wall bracket (Fig.2) and is sitting centrally.
9. Gentlybringtheheaterlevelwiththewall.
10. Mark the bottom holes position (Fig.3); remove the heater
ensuring that the bottom fixing bracket is rotated up.
Fig.3
11. Drill and fit wall plug.
12. Refit the heater to the wall fixing bracket and rotate the bottom
fixing bracket down again and use the screw provided to
permanently fix the heater in place.
13. Unpack the pebbles from the bag and place them along the light
unit in the desired position.
14.
Place the front glass surround over the front of the fire aligning the
slots in the brackets at each side of the glass panel with the lugs on
the sides of the fire (Fig.4). Two people will make this operation easier.
The heater is now ready for use.
USER MANUAL
1. Do not connect the appliance until properly fixed to the wall
and the instructions is read fully.
2. The minimum distances must be observed (Fig.1).
Fig.1
600mm recommended
Floor Level
300mm minimum
Keep min 900mm
from adjacent
walls or furnishings
3.
For installation of the appliance, care must be taken not to
damage concealed cables. Please be careful while drilling the
holes.
4. This appliance is designed to be permanently fixed to a wall at
a minimum height of 300mm. The wall bracket must be fitted
horizontally and the cable routed to the bottom right of the
heater.
5. A height of 600mm from bottom of heater to floor is
recommended for optimum viewing of fuel bed
(Fig.2 for recommend fixing dimensions).
Fig.2
250mm
For fixing at
recommended
600mm height
500mm
Floor Level
6. For optimum viewing, mark the top four screws fixing positions
on wall in accordance with the recommend fixing dimensions
(Fig.2).
A. Main power
ON/OFF switch
B. Heater and Flame
ON indicator
C. O/I button
D. 1000W heating
ON indicator
E. 1000W heating button
F. 2000W heating
ON indicator
G. 2000W heating button
INSTALLATION
POWER CONTROL PANEL
1
2
2000W
FIREPLACE HEATER
wall mountable wItH curved
svelte tempered glass panel
Dekkar
1. Slide the rear battery cover from the remote and
fit 2 x AAA size batteries, alkaline recommended.
2. Refit rear cover.
REMOTE CONTROL
3
• The main power ON/OFF switch in position O, the heater is OFF.
• When main power ON/OFF switch is at position I, the heater is ready to use.
• When O/I indicator is on, the heater and flame are ON
• When 1000W indicator is on, the heating element and fan are ON (low range, 1000W)
• When 2000W indicator is on, the heating element and fan are ON (high range, 2000W)
•Pleaseretainallpackaginguntilyouhave
checked and counted all the parts and the
contents of the fixing pack against the parts list.
Read all instructions before using this heater.
1. This heater is hot when in use. To avoid burns,
do not let bare skin touch hot surfaces.
Keep combustible material such as drapery
and other furnishings, at least 1 metre from
the heater. When in use keep the mains cord
of the heater from touching the heater body.
Do not drape the cord over the heater while
hot. Extreme caution is necessary when any
heater is used by or near children or invalids
and whenever the heater is left operating
unattended.
2. Always unplug heater when not in use.
3. Do not operate any heater with a damaged
cord or plug or after the heater malfunctions,
has been dropped or damaged in any manner.
Return heater to suitably qualified facility
for examination, electrical or mechanical
adjustment or repair.
4. Do not use outdoors, the product is designed
only for household use.
5. Never locate heater where it may fall into a
bathtub or other water container.
6. Do not run cord under carpet. Do not
cover cord with throw rugs runners, or the
like. Keep cord away from traffic areas to
avoid tripping over.
7. To disconnect heater, turn controls to off, then
remove plug from outlet.
8.Connecttoproperlyearthedsocket-outletof
the appropriate voltage.
9.Donotinsertorallowforeignobjectsto
enter any ventilation or exhaust opening as
this may cause an electric shock or fire, or
damage the heater.
10. To prevent a possible fire, do not block the
grilles in any manner.
11. Do not use in areas where petrol, paint, or
flammable liquids are used or stored.
12. Use the heater only as described in this
manual. Any other use not recommended by
the manufacturer may cause fire, electric
shock, or injury.
13. Do not connect via double adapters or power
boards. Avoid the use of an extension cord
because the extension cord may overheat and
cause risk of fire. However, if this heater is
used with an extension cord, use as short a
cord as practical.
14. Do not use this appliance with a
programmable, timer or any other device that
switches the heater on automatically, since
a fire risk exists if the appliance is covered or
positioned incorrectly.
15. In order to avoid overheating, do not cover
the heater.
16. To eliminate a choking hazard for young
children, remove and safely discard the
protective cover fitted to the power plug of
this heater along with all packaging material
and promotional labels.
17. Fully unwind the cord before first time use
18. There are no user serviceable parts in this
heater; any maintenance other than cleaning
should be performed by an authorised service
representative.
19.Theinstallationofaresidualcurrentdevice
(safety switch) is recommended to provide
additional safety protection using electrical
appliances. It is advisable that a safety switch
with a rated residual operating current not
exceeding 30mA be installed in the electrical
circuit supplying power to the appliance. See
your electrician for professional advice.
20. Keep these instructions handy for future
reference.
WARNING
This heater is for wall mounting only, not to be
used as free standing.
This appliance is not intended for use by persons
(including children) with reduced physical,
sensory or mental capabilities, or lack of
experience and knowledge unless they have been
given supervision or instructions concerning the
use of the appliance by a person responsible for
their safety.
Young Children should be supervised to
ensure that they do not play with the appliance.
The heater must not be located immediately
below or in front of a power outlet.
Do not use this heater in the immediate
surroundings of a bath, shower or swimming pool.
CONTENTS
• Heater.
• Wallxingbracket.
• Fixingscrewsandwallplugs.
• Remotecontrol.
• 1InstructionManual.
A
BCDEFG
Heater and Flame ON/OFF button
1000W heating ON/OFF button
2000W heating ON/OFF button
Flame brightness dimmer button
CPIN002812/2
Fig.4
HELPFUL ADVICE BEFORE FITTING
• Pleaseretainallpackaginguntilyouhavecheckedandcountedall
the parts and the contents of the fixing pack against the parts list.
• Thexingpackcontainssmallitemswhichshouldbekeptaway
from young children.
• Wesuggestthatyouopenthexingpackandplaceallthe
contents into a container, therefore reducing the risk of losing any
small pieces.
CONTENTS
• Heater•Wallxingbracket•Fixingscrewsandwallplugs.
• Remotecontrol•1InstructionManual
BEFORE FIRST USE
Remove any promotional material any packaging from the heater.
Unwind the cord to its full length and place the heater on a firm level
surface in a stable, upright position. Visually inspect the air inlets
and outlets to ensure that there are no blockages.
To avoid overheating do a circuit do not plug the heater into
a circuit that already has other appliance working.
CAUTION: There may be some odour coming from the heater for the very
first time you use it. This is normal during the break-in period or after
long term storage. Make sure the heater is in well ventilated
area and continue running it until the smell goes away.
/