Page is loading ...

Rev F Date: 11.2.2006
R
888 Porter Rd. Muskegon, MI 49441 Phone: 231.798.8888 Fax: 231.798.4960 www.structuralconcepts.com
READ AND SAVE THESE INSTRUCTIONS
OPEN REFRIGERATED SELF-SERVICE MERCHANDISER
Model DO3637R 38 1/8”L x 28 5/8”D x 37 1/4”H (Upper Display Case Only)
38 1/8”L x 28 5/8”D x 61 1/8”H (Upper Display Case + Drop-In Refrigeration Unit)
Model DO4837R 50 1/8”L x 28 5/8”D x 37 1/4”H (
Upper Display Case Only)
50 1/8”L x 28 5/8”D x 61 1/8”H (Upper Display Case + Drop-In Refrigeration Unit)
Model DO3623R 38 1/8”L x 28 5/8”D x 23 1/4”H (Upper Display Case Only)
38 1/8”L x 28 5/8”D x 47 1/8”H (Upper Display Case + Drop-In Refrigeration Unit)
Model DO4823R 50 1/8”L x 28 5/8”D x 23 1/4”H (Upper Display Case Only)
50 1/8”L x 28 5/8”D x 47 1/8”H (Upper Display Case + Drop-In Refrigeration Unit)
Note 1. Internal counter height must be at least 28” for refrigeration and proper air flow space.
Note 2
. Model DO3637R & 3623R: Service Top Cutout dimensions must be 27.15” Wide x 36.65” Long
(with a minimum 1.42” perimeter) for proper clearance and fit of Drop-In Refrigerated Merchandiser.
These combined dimensions require a 30” minimum counter top space for cutout.
Note 3
. Model DO4837R & DO23R: Service Top Cutout dimensions must be 27.15” Wide x 48.65”
Long (with a minimum 1.42” perimeter) for proper clearance and fit of Drop-In Refrigerated
Merchandiser. These combined dimensions require a 30” minimum counter top space for cutout.
SERVICE DROP-IN REFRIGERATED MERCHANDISER
L:\Inst & Oper Man\Oasis\DO(L)37R, DO(L)23R Operr Man 99574.pub
PN 99574
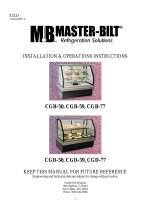
INSTALLATION &
OPERATING MANUAL
Model DO4837R
Model DO3637R

2
TABLE OF CONTENTS
OVERVIEW AND WARNINGS ...………………………..…………………..…….………….....…..
CUSTOMER CABINET PROVISIONS…………………..…………………..…….………….....…..
CLEARANCE AND AIR FLOW ...………………………..…………………..…….………….....…..
VENTING INSTRUCTIONS FOR AIR INTAKE / EXHAUST - DO3637R ……………………..
VENTING INSTRUCTIONS FOR AIR INTAKE / EXHAUST - DO4837R ……………………..
VENTING INSTRUCTIONS FOR AIR INTAKE / EXHAUST - DO3623R ……………………..
INSTALLATION ………………………………………………………………………………………..
START-UP AND OPERATION ..…………………………………………………………………….
MAINTENANCE FUNDAMENTALS ..……………………………………………………………….
REFRIGERATION FUNDAMENTALS ……………….………………………………………..…...
REFRIGERATION SLIDE-OUT EXPLODED PICTORIAL ……………………………………….
TECHNICAL INFORMATION SHEET - MODEL DO3637R ..……………………………..….…
TECHNICAL INFORMATION SHEET - MODEL DO4837R ..……………………………..….…
TECHNICAL INFORMATION SHEET - MODEL DO3623R ..……………………………..….…
TECHNICAL INFORMATION SHEET - MODEL DO4823R ..……………………………..….…
TROUBLESHOOTING ..………………….……………………………………………….………….
CLEANING SCHEDULE ....…………………………………………………...………………….….
CPC® ESC3 CONTROLLER OVERVIEW …………………………………………………………
CPC® ESC3 CONTROLLER OPERATION ……………………………………………………….
CPC® ESC3 SET POINT CHANGING INSTRUCTIONS ….………………………………… …
WARRANTY ……………...…………………...………………………………..……………………..
TECHNICAL SERVICE ..……………………………...……………………………………….…..…
3
4
5
6
7
8
9
10
11-13
14
15
16
17
18
19
20-21
22
23
24
25
26
27
R
888 Porter Rd. Muskegon, MI 49441 Phone: 231.798.8888 Fax: 231.798.4960 www.structuralconcepts.com

3
R
888 Porter Rd. Muskegon, MI 49441 Phone: 231.798.8888 Fax: 231.798.4960 www.structuralconcepts.com
OVERVIEW AND WARNINGS
OVERVIEW
• The Structural Concepts® Oasis® refrigerated self-service cases are designed to
merchandise packaged products at 5° Celsius / 41° Fahrenheit or less product temperatures.
• These cases should be installed and operated according to the following instructions to insure
proper performance.
• This unit is designed for the display of products in ambient store conditions where
temperatures and humidity are maintained at a maximum of 24°C / 75°F and 55% relative
humidity.
WARNING
Risk of Electric Shock.
Disconnect Power Before Servicing Unit
WARNING
ELECTRICAL
HAZARD
WARNING
Hazardous Moving Parts.
Do Not Operate unit with covers removed.
Fan blades may be exposed when deck panel is removed. Disconnect
power before removing deck panel.
CAUTION
Lamps have been treated to resist breakage and must be replaced with a
similarly treated lamp.
WARNING
Evaporator Tray is Hot
WARNING
KEEP HANDS
CLEAR
WARNING
HOT
SURFACE
CAUTION

R
888 Porter Rd. Muskegon, MI 49441 Phone: 231.798.8888 Fax: 231.798.4960 www.structuralconcepts.com
CUSTOMER CABINET PROVISIONS
Customer Cabinet Provisions
• Customer provided cabinet must adhere to the minimum requirements in ANSI/UL Std. 471 and
ANSI/NSF Std. 7.
• Among the factors that are to be taken into consideration when judging the acceptability of a
cabinet or similar enclosure are mechanical strength, resistance to impact, moisture-absorptive
properties, flame resistance, resistance to distortion at temperatures to which the material may
be subjected under conditions of use, and resistance to corrosion.
• Customer provided cabinet or similar enclosure shall have the strength and rigidity necessary to
resist conditions of intended use without increasing the risk of fire or injury to persons due to total
or partial collapse. Cabinet or similar enclosure must be strong enough to hold weight of cabinet
and intended product load. Dry weight (no product in case) exceeds 500 pounds.
• A nonmetallic cabinet or similar enclosure (or part of an enclosure) shall have a flame spread
index of not more than 200 when tested in accordance with the Standard for Tests for Surface
Burning Characteristics of Building Materials, UL 723.
• The cabinet or similar enclosure shall be constructed and assembled to reduce the risk of fire
due to the emission of molten metal, burning insulation, flaming particles, or the like, through
openings onto flammable material, including the surface over which the refrigeration is mounted.
• A sheet metal cabinet or similar enclosure is to be judged for acceptability with respect to its
size, shape, metal thickness. Sheet metal such as galvanized or stainless shall be 0.30 inch (22
gage) or greater.
• Steel enclosures shall be protected against corrosion by metallic or nonmetallic coatings, such
as plating or painting.
• The refrigeration access panel/door shall be arranged so that main power switch, refrigeration
controller and refrigeration package are accessible without removing parts other than access
panel/door.
• A hinged or pivoted panel shall be positioned or arranged so that when it is in an open position
falling or swinging due to gravity or vibration will not cause injury to persons.
• For electrical protection when installed in its intended manner, louvers and other openings in the
enclosure shall be constructed and located to reduce the risk of unintentional contact with mov-
ing, live or hot parts such as fan blades and condensate trays. The minor dimension of such
openings shall not exceed 3 inches—See Table 6.1 for Clearance from Openings. Tools are re-
quired to remove covers, panels or grilles unless interlock is provided.
• Ventilation openings/louvers shall be free of sharp edges and burrs and have spaces large
enough to allow for easy cleaning. Louvers that may be subject to splashes, spills, and overhead
drips shall be of a drip-deflecting design.
4

R
888 Porter Rd. Muskegon, MI 49441 Phone: 231.798.8888 Fax: 231.798.4960 www.structuralconcepts.com
CLEARANCE AND AIR FLOW
5
Service Top Cutout Dimensions
Note: See Manual Cover for DO3637R, DO4837R,
DO3623R & 4823R Service Top Cutout Dimensions.
Clearance Dimensions
The Refrigerated section must maintain airflow clear-
ance. Dimensions are as follow.
1. 4" Minimum Spacing from bottom of refrigeration
frame to bottom of cabinet or floor required for ade-
quate air flow.
2. 9 1/2" Countertop / Facia enclosure space on cabi-
nets or counter to allow for pullout system slide-out.
3. 15" Minimum opening in back of cabinet or counter
(to pull out refrigeration system).
4. Back of counter / cabinet must be vented at specific
sizes to allow for proper air intake and air exhaust.
See Venting Instructions sections for specifics.
5. Obstruction or restriction of air can void warranty.
Note: See Venting Instructions sections (next two
pages) for more specific Air Intake and Air Exhaust
clearance dimensions for Models DO3637R &
DO4837R.
9 1/2” (SEE
NOTE 2)
15”
(SEE NOTES
3 & 4)
4” (SEE NOTE 1)
ABOVE ILLUSTRATION APPLIES TO BOTH
MODELS DO3637R AND DO4837R

R
888 Porter Rd. Muskegon, MI 49441 Phone: 231.798.8888 Fax: 231.798.4960 www.structuralconcepts.com
VENTING INSTRUCTIONS FOR AIR INTAKE / EXHAUST - DO3637R
6
BACK VIEW OF CABINET
AFTER POSITIONED ON
CUSTOMER-SUPPLIED COUNTER/BASE
1
9
”
M
I
N
I
M
U
M
A
I
R
E
X
H
A
U
S
T
S
P
A
C
E
1
3
”
M
IN
I
M
U
M
A
I
R
I
N
T
A
K
E
S
P
A
C
E
9
1
/
2
”
Warning: The minimum intake and exhaust areas must be allowed (as illustrated
below) or case temperatures may fluctuate beyond safe parameters.
F
AC
I
A
E
N
C
L
O
S
U
R
E
1
3
”
M
I
N
I
M
U
M
A
I
R
I
N
T
A
K
E
S
P
A
C
E
1
0
1
/
2
”
M
IN
.
A
I
R
E
X
H
A
U
S
T
S
P
A
C
E
1
5
”
M
I
N
I
M
U
M
M
A
I
N
T
E
N
A
N
C
E
A
C
C
E
S
S
S
P
A
C
E
3
2
”
M
I
N
I
M
U
M
M
A
I
N
T
E
N
A
N
C
E
A
C
C
E
S
S
S
P
A
C
E
9
1
/
2
”
NOTES:
1. BACK OF CABINET MUST BE VENTED A MINIMUM OF 13” x 13” FOR AIR INTAKE.
2. BACK OF CABINET MUST BE VENTED A MINIMUM OF 10 1/2” x 19” FOR AIR EXHAUST.
3. BACK OF CABINET MUST PROVIDE A MINIMUM OF 15” x 32” FOR MAINTENANCE ACCESS. THIS AREA (AS
DIMENSIONED BELOW) WILL ALLOW SERVICE TO SLIDE OUT CONDENSING UNIT.
4. SEE REFRIGERATION FUNDAMENTALS FOR VIEW OF CONDENSING UNIT AFTER SLIDE-OUT.
5. AIR INTAKE
(ILLUSTRATED
BELOW).
6. AIR EXHAUST
(ILLUSTRATED
BELOW).

R
888 Porter Rd. Muskegon, MI 49441 Phone: 231.798.8888 Fax: 231.798.4960 www.structuralconcepts.com
VENTING INSTRUCTIONS FOR AIR INTAKE / EXHAUST - DO4837R
7
BACK VIEW OF CABINET
AFTER POSITIONED ON
CUSTOMER-SUPPLIED COUNTER/BASE
1
5
”
M
I
N
I
M
U
M
A
I
R
E
X
H
A
U
S
T
S
P
A
C
E
9
1
/
2
”
1
9
”
M
I
N
I
M
U
M
A
I
R
E
X
H
A
U
S
T
S
P
A
C
E
4
5
”
M
I
N
I
M
U
M
M
A
I
N
T
E
N
A
N
C
E
A
C
C
E
S
S
S
P
A
C
E
2
5
”
M
I
N
I
M
U
M
A
IR
I
N
T
A
K
E
S
P
A
C
E
9
1
/
2
”
F
A
C
I
A
E
N
C
L
O
S
U
R
E
1
3
”
M
I
N
I
M
U
M
A
I
R
I
N
T
A
K
E
S
P
A
C
E
Warning: The minimum intake and exhaust areas must be allowed (as illustrated
below) or case temperatures may fluctuate beyond safe parameters.
1
5
”
MI
N
I
MU
M
MA
I
N
T
E
N
A
N
C
E
A
C
C
E
S
S
S
P
A
C
E
2
”
NOTES:
1. BACK OF CABINET MUST BE VENTED A MINIMUM OF 13” x 25” FOR AIR INTAKE.
2. BACK OF CABINET MUST BE VENTED A MINIMUM OF 19” x 21” FOR AIR EXHAUST.
3. BACK OF CABINET MUST PROVIDE A MINIMUM OF 15” x 45” FOR MAINTENANCE ACCESS. THIS AREA
(AS DIMENSIONED BELOW) WILL ALLOW SERVICE TO SLIDE OUT CONDENSING UNIT.
4. SEE REFRIGERATION FUNDAMENTALS FOR VIEW OF CONDENSING UNIT AFTER SLIDE-OUT.
5. AIR INTAKE
(ILLUSTRATED
BELOW).
6. AIR EXHAUST
(ILLUSTRATED
BELOW).

R
888 Porter Rd. Muskegon, MI 49441 Phone: 231.798.8888 Fax: 231.798.4960 www.structuralconcepts.com
VENTING INSTRUCTIONS FOR AIR INTAKE / EXHAUST - DO3623R & DO4823R
8
BACK VIEW OF CABINET
AFTER POSITIONED ON
CUSTOMER-SUPPLIED COUNTER/BASE
Warning: The minimum intake and exhaust areas must be allowed (as illustrated
below) or case temperatures may fluctuate beyond safe parameters.
NOTES:
1. BACK OF CABINET MUST BE VENTED A MINIMUM OF 10 1/2” x 11” FOR AIR INTAKE.
2. BACK OF CABINET MUST BE VENTED A MINIMUM OF 3/4” x 15” FOR AIR EXHAUST.
3. BACK OF CABINET MUST PROVIDE A MINIMUM OF 15” x 32” FOR MAINTENANCE ACCESS. THIS AREA
(AS DIMENSIONED BELOW) WILL ALLOW SERVICE TO SLIDE OUT CONDENSING UNIT.
4. SEE REFRIGERATION FUNDAMENTALS FOR VIEW OF CONDENSING UNIT AFTER SLIDE-OUT.
5. AIR INTAKE
(ILLUSTRATED
BELOW).
6. AIR EXHAUST
(ILLUSTRATED
BELOW).

2. Display Case Setup
• SCC® Service Drop-In Refrigerated Merchan-
diser Case consists of two sections: The Upper
Display Case and Drop-In Refrigerated Section.
• As both sections make up one conjoined unit, it
is both large and heavy. A team effort is re-
quired for lowering Case into the Customer Sup-
plied Base.
• After lowering into Base, adjust into position al-
lowing Case to gingerly rest on Counter Top
without marring.
R
888 Porter Rd. Muskegon, MI 49441 Phone: 231.798.8888 Fax: 231.798.4960 www.structuralconcepts.com
INSTALLATION
9
1. Remove Case From Skid
Caution: Case must always remain supported
or center of gravity may allow case to fall. Slide
to rear of skid and tip backward off skid while
maintaining support. See illustration below.
Slide
Skid
Out
F
i
r
m
l
y
H
o
l
d
R
e
a
r
o
f
C
a
s
e
W
h
i
l
e
S
l
i
d
i
n
g
C
a
s
e
O
f
f
F
r
o
m
S
k
i
d
3. Seal Upper Display Case to Base
• NSF® Listed Industrial Grade Silicone Seal-
ant is recommended.
• Clip tip to allow approximately 1/8” to 3/16”
diameter hole.
• Beginning at case
rear, run a consis-
tent, solid bead of
silicone around
entire perimeter.
Drop-In
Refrigerated
Section
Upper
Display
Case
C
u
s
t
o
m
e
r
S
u
p
p
l
i
e
d
B
a
s
e
Seal
Along
Here
Seal
Along
Here

R
888 Porter Rd. Muskegon, MI 49441 Phone: 231.798.8888 Fax: 231.798.4960 www.structuralconcepts.com
START-UP AND OPERATION
Case Start-Up
• Plug cord into a certified electrical outlet with
ground.
• Turn on the Main Power Switch. Switch is in
the Drop-In Refrigerated Section on the rear
right hand side of base.
• The Temperature Control Module (LED) will
illuminate. Evaporator coil fans and the
compressor motor should turn on.
• From the front of the case, raise the deck to
confirm that the coil fans are functioning
properly.
• Turn on the lights. Light Switch is in the Up-
per Display interior of the case at rear right
side (see illustration at right).
• First time lighting may require a short warm
up period for the bulbs. Slightly dim or a
flickering of new bulbs is normal.
Temperature Settings
• This case has been tested to maintain a
temperature at or below 5° Celsius / 41°
Fahrenheit.
• When the merchandiser is in a start up
mode or has been idle for a long period of
time, the unit will require 30 minutes in order
to pull-down to temperature.
• Spirit-Filled Thermometer located in refriger-
ated compartment is for monitoring warmest
air temperature in accordance with NSF®
Std. 7 (see illustration at right).
• The temperature is controlled by a Tempera-
ture Control Module. It is located at the
lower-right area (from the case rear) of the
Drop-In Refrigerated Section. See top-right
illustration for general location.
• If a temperature setting change is
required,refer to the instructions for the
CPC® (ESC3) Temperature Control
Programming operating section of this man-
ual
• Note: See Technical Data section of this
manual for proper settings to maintain prod-
uct temperature per model.
10
—– Main Power “Rocker” Switch —–
OFF
ON
— Upper Display Case & Drop-In Refrigeration Section —
—– Spirit-Filled Thermometer —–
Main
Power
“Rocker”
Switch
Light
Switch
Temperature
Control Module
Spirit-Filled
Thermometer
(see illustra-
tion below)
Shelves
Drop-In
Refrigerated
Section
Deck
Condensate
Pan
Upper
Display
Case

Shelf Assembly
Shelf Bracket
11
R
888 Porter Rd. Muskegon, MI 49441 Phone: 231.798.8888 Fax: 231.798.4960 www.structuralconcepts.com
MAINTENANCE FUNDAMENTALS
Adjustable Shelf
• Adjustment of the angle of the shelves can be
made by pivoting the lower portion of the shelf
bracket in the upright.
• The shelves can be adjusted to an angle of: 0,
5, and 10 degrees.
• See illustration at right.
Shelf Assembly Removal
• Shelves can be removed for cleaning or ad-
justments
• For lighted shelving, turn off power, unplug the
light cord.
• Lift shelf straight up to separate from brackets.
• Remove brackets. Note it may be necessary
to remove the nylon shipping bracket retainer.
Pliers will be required to accomplish this task.
Light Fixtures
Light fixtures are located at the top inside of case
(from the front) and may be provided on the un-
derside of each shelf assembly
Removal of lamp:
• Rotate lamp (1/4 turn) so that pins are aligned
in slots and remove bulb.
Installation of lamp:
• Align pins with slot.
• Insert pins into socket and rotate 1/4 turn to
secure pin contacts in socket.
See illustration at lower right.
Lamp Pins
Light Socket
Light Fixture
Bracket Retainers
Light Fixtures
Adjustment
Notches

12
R
888 Porter Rd. Muskegon, MI 49441 Phone: 231.798.8888 Fax: 231.798.4960 www.structuralconcepts.com
MAINTENANCE FUNDAMENTALS, CONTINUED
Warning, disconnect power before provid-
ing maintenance and service to unit. As-
sembly or disassembly and servicing to be
accomplished by licensed electrical con-
tractor.
Evaporator Coil Fans Access and Removal
• Fans may be accessed by removing Deck
(covering Fan Shroud, Fan Housing and
Coil). See illustrations at right.
Light Ballast Access
Light ballast is located inside the Electrical J-
Box. Electrical J-Box is located at lower-right
side (from the rear) of the Drop-In Refrigerated
Section. See below right illustration for general
location.
Electrical J-Box is assembled with Phillips
screws. To disassemble, simply use Phillips
screwdriver to remove screws.
Removing Rear Doors and Perforated
Acrylic Plenum.
• Note: Doors are not interchangeable.
• There is an Outer and Inner Door. The
Outer door is the right hand door (from
case rear). It can be identified by a stop
located at the lower right hand corner to the
inside of the case.
• The Inner Door is the left hand door (from
case rear).
• See next page for specifics on access to
and removal of thumbscrews, doors and
perforated acrylic plenum.
Fan
Housing
Fan
Shroud
Coil
Inner Door
Outer
Door
Fan Shroud
Coil
Drain
Fan & Housing
Thumb-
screws
holding
Sliding
Doors to
Acrylic
Plenum

13
R
888 Porter Rd. Muskegon, MI 49441 Phone: 231.798.8888 Fax: 231.798.4960 www.structuralconcepts.com
MAINTENANCE FUNDAMENTALS, CONTINUED
Removing the Rear Doors
• Remove Thumbscrews (4 each side).
Thumbscrew removal will allow Rear
Doors to be removed.
• See illustration on this page for locations
of Thumbscrews, Nuts, Perforated
Acrylic Plenum, etc.
• Move the doors toward the center of the
case.
• Starting with the Outer Door (right hand
door from rear of the case), individually
lift each door up toward top of the case
and pivot the bottom of door out.
• Rear Doors (both Outer and Inner) must
be replaced in the same manner in which
they are removed.
Removing Perforated Acrylic Plenum
• After Outer and Inner Doors are re-
moved, the Perforated Acrylic Plenum
pieces can now be removed.
• Slide the Plenum toward the center of
the case.
• Starting with the right hand Plenum, lift
up toward the top of the case and pivot
the bottom Plenum out.
• Perforated Acrylic Plenum pieces must
be replaced in the same manner in which
they are removed.
View of thumbscrew
(4 each side) to be removed.
Shelving
Bracket
View of Thumbscrew
and Nut from Case
Rear. Note: Thumb-
screws are only acces-
sible from front of case.
View of Rear
Outer Door
Additional view of
Thumbscrew and Nut
from Case Rear.
View of Perforated
Acrylic Plenum
Thumbscrew
Upright
Shelving
Lamp

14
R
888 Porter Rd. Muskegon, MI 49441 Phone: 231.798.8888 Fax: 231.798.4960 www.structuralconcepts.com
REFRIGERATION FUNDAMENTALS
Refrigeration Access, Connections &
Servicing
Assembly or disassembly and servicing to
be accomplished by licensed refrigeration
contractor.
• Refrigeration Unit slides directly out from
lower section to allow for servicing.
• Service connections are located in the
Refrigeration Slide-Out (shown at right).
• Refrigeration Unit is equipped with
evaporator pan for case condensation.
Insure evaporator pan is plugged in 110V
receptacle inside base, and positioned
under PVC drain and on base frame.
• When pulling or pushing unit in or out under
the case, use caution to avoid damage to
copper refrigeration lines, hoses and cable.
• Insure that the flexible drain hose is fully
inserted into the slot of hose support for
proper drainage. See illustration on next
page for general location and specifics.
Temperature Control Module
• Temperature Control Module is located in
the Electrical J-Box.
• The temperature is controlled by the
Temperature Control Module. It is located
at lower-right area (from the rear) of the
Drop-In Refrigerated Section. See top-right
illustration for general location.
• If a temperature setting change is required,
refer to the instructions for the CPC®
(ESC3) Temperature Control Programming
operating section of this manual
• Note: See Technical Data section of this
manual for proper settings to maintain
product temperature per model.
Sl
i
d
e
O
u
t f
o
r
Se
r
v
i
c
i
n
g
Electrical
J-Box
Light Ballast
Main Power
Switch
Temperature
Control
Module
Temperature
Control
Module

15
R
888 Porter Rd. Muskegon, MI 49441 Phone: 231.798.8888 Fax: 231.798.4960 www.structuralconcepts.com
REFRIGERATION SLIDE-OUT EXPLODED PICTORIAL
The following images show the various parts pertaining to the Refrigeration
Unit (that is slid directly out from lower section) to be serviced.
Copper
Tubing
Refrigeration
Service Valve
Sight Glass
Capacitor
Condensing Coil
(and internal fan)
Condensing
Unit
Dryer Filter
Flexible Hose
Connections
Electrical
Junction Box
Condensate
Pan
Copper
Tubing
Receiver

16
R
888 Porter Rd. Muskegon, MI 49441 Phone: 231.798.8888 Fax: 231.798.4960 www.structuralconcepts.com
TECHNICAL INFORMATION SHEET - MODEL DO3637R

17
R
888 Porter Rd. Muskegon, MI 49441 Phone: 231.798.8888 Fax: 231.798.4960 www.structuralconcepts.com
TECHNICAL INFORMATION SHEET - MODEL DO4837R

18
R
888 Porter Rd. Muskegon, MI 49441 Phone: 231.798.8888 Fax: 231.798.4960 www.structuralconcepts.com
TECHNICAL INFORMATION SHEET - MODEL DO3623R

19
R
888 Porter Rd. Muskegon, MI 49441 Phone: 231.798.8888 Fax: 231.798.4960 www.structuralconcepts.com
TECHNICAL INFORMATION SHEET - MODEL DO4823R

20
TROUBLESHOOTING
R
888 Porter Rd. Muskegon, MI 49441 Phone: 231.798.8888 Fax: 231.798.4960 www.structuralconcepts.com
Product is Drying Out
Check the relative humidity in the store.
Water on the Floor
Check that all of the hoses are connected.
Check that the drain trap is free of debris.
Excessive Fan Noise
Check that the case is aligned properly.
Check that nothing is obstructing the blade rotation.
Check that the fan shroud is properly secured.
System is not Operating
Confirm the utility power is on.
Check that the MAIN power switch is on.
Check that the unit is properly plugged in.
Check the circuit breaker box for tripped circuits.
Fans Not Working
Check that the MAIN power switch is on.
Determine if there is ice build up blocking the fan.
Case Lights Not Working
Check bulbs for proper installation and connection.
Check for burned out bulbs.
Clean dirt and dust from the bulbs to prevent flickering.
Condensing Unit Not
Operating.
LED dF flashing, Controller is in defrost mode (not an alarm).
Compressor is running in a normal condition.
Check that the power is turned on.
Review factory time settings on the CPC controller.
/