Page is loading ...

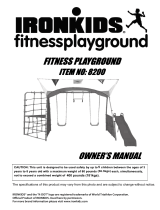
FITNESS PLAYGROUND
ITEM NO: 8200
OWNER’S MANUAL
The specifications of this product may vary from this photo and are subject to change without notice.
IRONMAN, IRONMAN TRIATHLON and M-DOT are registered trademarks of World Triathlon
Corporation. This product is licensed by the IRONMAN TRIATHLON.
CAUTION: This unit is designed to be used safely by up to 6 children between the ages of 3
years to 8 years old with a maximum weight of 80 pounds (36.3kgs) each, simultaneously,
not to exceed a combined weight of 480 pounds (218kgs).

1
IMPORTANT: FOR NORTH AMERICA ONLY
To request product service and order
replacement parts, please call our customer
service department at:
1-866-924-1688
Monday through Friday, 8:00 AM-5:00 PM Pacific Standard Time,
or email us at: service@paradigmhw.com
Please visit our website at www.paradigmhw.com.
Please have the following information ready when requesting for service:
Your name
Phone number
Model number
Serial number
Part number
Proof of Purchase
*Before returning this product to the store please contact customer
service at the contact number.
Paradigm Health & Wellness, Inc.
1189 Jellick Ave.
City of Industry, CA 91748, USA

2
TABLE OF CONTENTS
Warranty -------------------------------------------------------------------------------------------- 3
Important Labels ---------------------------------------------------------------------------------- 4
Important Safety Precautions ------------------------------------------------------------------ 5
Location and Placement of your Fitness Playground ------------------------------------ 6
Tools Required for Assembly ------------------------------------------------------------------ 7
Hardware for Assembly ------------------------------------------------------------------------- 8
Parts Numbers and Illustrations -------------------------------------------------------------- 10
Overview Drawing -------------------------------------------------------------------------------- 18
Assembly Instructions --------------------------------------------------------------------------- 19
Ground Anchor Installation -------------------------------------------------------------------- 36
Parts Request Fax Form ----------------------------------------------------------------------- 38

3
MANUFACTURER’S LIMITED WARRANTY (IRONKIDS FITNESS PLAYGOUND)
Paradigm Health & Wellness warrants to the original purchaser that this product is free from defects in material and
workmanship when used for the purpose intended, under the conditions that it has be installed and operated in
accordance with Paradigm’s Owner’s Manual. Paradigm’s obligation under this warranty applies to the following:
COMPONENT LENGTH OF WARRANTY
Structural Frame Lifetime (1)
All Other Components 180 days (2)
This warranty does not include damage caused by normal wear and tear, weather corrosion, misuse, commercial
use or improper operation. Paradigm will replace free of charge any parts which may prove to be defective under
normal home use. This warranty is offered only to the original purchaser and is not transferable. Proof of original
purchase is required.
Ordering Replacement Parts
Replacement parts can be ordered by calling or emailing our customer service department
service@paradigmhw.com
1-866-924-1688
Monday through Friday, 8:00 AM - 5:00 PM (PST).
When ordering replacement parts please have the following information ready:
1. Owner’s Manual
2. Model Number
3. Description of Parts
4. Part Number
5. Date of Purchase

4
IMPORTANT LABELS

5
IMPORTANT SAFETY PRECAUTIONS
Read all instructions carefully before assembling operating this product. Retain this
owner’s manual and keep the original purchase receipt for future reference.
1. Before you assemble the Fitness Playground, find level ground not less than 6 feet from any
structure or obstruction to the Fitness Playground. Your Fitness Playground must have
clearance on all sides.
2. To prevent serious injury, do not allow children to play on the Fitness Playground until it is
completely installed.
3. Do not install the Fitness Playground over concrete, packed dirt, or any other hard surface. A
fall onto a hard surface can result in serious injury or death to the user.
4. Only adults should assemble or disassemble this Fitness Playground.
5. This product must be anchored.
6. Adult supervision of children is required at all times when on or around this Fitness Playground.
Never leave children unattended.
7. Do not swing too high or at an angle.
8. Do not hang on or climb from structural members of the Fitness Playground.
9. Do not exceed the intended weight limit or maximum number of users for the Fitness
Playground.
10. This product is intended to be used by children between the ages of 3-8 years old.
11. Be sure to observe your children and insure that they have the strength and skills to enjoy all the
rides safely before use on their own.
12. Do not allow children to walk close to, behind, or in front of moving items.
13. Do not allow children to twist the chains on the swing or loop them over the top bar. This may
reduce the strength of the chain.
14. Teach and instruct children not to swing empty seats.
15. Instruct children how to sit in the center of the seats and swing with their full weight on the seat.
16. Warn children not to use the equipment in any manner other than intended.
17. Warn children not to get off the rides while in motion.
18. Warn children to dress appropriately. Loose fitting clothing is potentially hazardous when using
the Fitness Playground.
19. Equipment may be slippery when wet. Do not allow children to use the equipment when wet.
20. Parents should regularly check openings and surfaces, such as slides, for items that may be
hazardous.
21. Parents should check swing chains to insure they are secure and can not be looped back on
themselves.
22. Do not place any part of the body near moving parts.
23. Never slide head first down the slide.
24. Ensure that all swings and chains are secured at both ends.
25. Never attach any materials that are not specifically designed for use with this swing set, such as
jump ropes, pet leashes, rope or cords and other chains as these pose a potential strangulation
hazard.
26. Children must be supervised at all times. No playground is safe without adult supervision.
Play Ground Rules
1. Do not use equipment when wet.
2. No running, pushing, shoving, or roughhousing.
3. Do not use play equipment before reading manual.
4. Always wear proper footwear.

6
CARE AND MAINTENANCE
Check all nuts and bolts by monthly during the usage season for tightness and tighten as required.
It is particularly important that all nuts and bolts are checked prior to the first use each season.
LOCATION AND PLACEMENT OF YOUR FITNESS PLAYGROUND
Proper placement and maintenance of protective surfacing is essential. Be sure to:
z Extend surfacing at least 6 feet (1.83 m) from the equipment in left/right and front of slide
directions.
z Extend surfacing at least 12 feet (3.66 m) from the equipment in front and back directions.
z Fitness Playground must be placed a minimum of 6 feet (1.83 m) in left/right and front of slide
directions and 12 feet (3.66 m) in front and back directions from any structure or obstruction
such as a fence, garage, house, overhanging branches, laundry lines, or electrical wires.
z Do not place your Fitness Playground underneath electrical lines. If you must, ensure that
z there is a minimum overhead clearance of 6 feet (1.83 m) in left/right and front of slide
directions and 12 feet (3.66 m) in front and back directions.
z Do not install Fitness Playground over concrete, asphalt, packed earth, grass, carpet, or any
other hard surface. A fall on to a hard surface can result in serious injury to the user.
z The following diagram shows how much obstacle-free surfacing should be used for the
Fitness Playground.

7
TOOLS REQUIRED FOR ASSEMBLY
Please prepare the following tools prior to assemble this equipment.
Tape Measure
Hammer
Wrench
(Included)
Phillips Screwdriver
Allen Wrench with Phillips Screwdriver M5
(Included)
Allen Wrench M5
(Included)

8
Binder Post & Bolt Set (Preassembled)
M8x15 Bolt
Ø10x50 Sleeve Nut
4 SETS
(Aa1)
(Aa2)
(Aa3)
(Aa4)
(Aa5)
(Da1)
Binder Post & Bolt Set (Preassembled)
M8x15 Bolt
Ø10x50 Sleeve Nut
4 SETS
HARDWARE FOR ASSEMBLY
Hardware used for main frame assembly
Hardware used for playground climbing net assembly
Binder Post & Bolt Set (Preassembled)
M6x12 Bolt
Ø8x50 Sleeve Nut
6 SETS
M6x15 Bolt Set (Preassembled)
2 SETS
M6x65 Bolt Set (Preassembled)
2 SETS
M6x60 Bolt Set (Preassembled)
8 SETS

9
(Da2)
(Da3)
Hardware used for slide assembly
Binder Post & Bolt Set (Preassembled)
M6x12 Bolt
Ø8x52 Sleeve Nut
2 SETS
Binder Post & Bolt Set (Preassembled)
M6x12 Bolt
Ø8x56 Sleeve Nut
4 SETS
M6x36 Bolt Set (Preassembled)
4 SETS
(Xa1)
(Xa2)
M6x42 Bolt Set (Preassembled)
4 SETS
(Xa3)
Binder Post & Bolt Set (Preassembled)
M6x12 Bolt
Ø8x24 Sleeve Nut
10 SETS

10
PARTS NUMBERS AND ILLUSTRATIONS
Parts used for main frame assembly
A1
Top Bar I 1 PC
A2
Top Bar II 1 PC
A3 Leg with Foam 1 PC
A3A
Leg with Foam 1 PC
A4
Leg 1 PC
A4A
Leg 1 PC
A5 Cross Bar 1 PC
A6 Protective Net 1 PC
A7 Protective Net 1 PC

11
Hardware used for main frame assembly
A8
Ground Anchor 5 PCS
A9
Plastic Stick Holder 2 PCS
A10 Plastic Stick Holder 2 PCS
A11
Plastic Stick Holder 2 PCS
A12
Plastic Handle 1 PC
A13
Top Bar III 1 PC
Aa1
Binder Post & Bolt Set
(Preassembled)
M8x15 Bolt
Ø10x50 Sleeve Nut
4 SETS
Aa2
Binder Post & Bolt Set
(Preassembled)
M6x12 Bolt
Ø8x50 Sleeve Nut
6 SETS
Aa3
M6x15 Bolt Set
(Preassembled)
2 SETS

12
Parts used for trapeze assembly
Hardware used for trapeze assembly
Aa4
M6x65 Bolt Set
(Preassembled)
2 SETS
Aa5
M6x60 Bolt Set
(Preassembled )
8 SETS
E1
Trapeze Ring Hanger Handle
(Preassembled)
2 SETS
E2
Cap for Trapeze Ring Tube
(Preassembled)
2 PCS
E3 Trapeze Ring Tube 1 PC
Ea1
Sleeve Nut Set (Preassembled) 2 SETS
Ea2
Eye Bolt Set
(Preassembled)
2 SETS
Ea3 Cap Nut Set (Preassembled) 2 SETS
Ea4 Screw Hook (Preassembled) 2 PCS

13
Parts used for swings assembly
Hardware used for swing seats assembly
J1
Swing Ring 4 PCS
J2 Swing Seat 2 PCS
Ja1
Sleeve Nut Set (Preassembled) 4 SETS
Ja2
Eye Bolt Set
(Preassembled)
4 SETS
Ja3 Screw Hook (Preassembled) 4 PCS
Ja4
Screw Hook Cap Set
(Preassembled)
4 SETS

14
Parts used for playground climbing net assembly
D1
L-Shaped Climbing Net Tube 1 PC
D2
Climbing Net Leg
1 PC
D3
Climbing Net Supporting Tube
2 PCS
D4
Cross Bar
1 PC
D5
Bottom Climbing Net Supporting Tube
2 PCS
D6
Triangle Net
1 PC
D7a
Rope
2 PCS
D7b
Rope
1 PC
D7c
Rope
1 PC

15
Hardware used for playground climbing net assembly
D7d
Rope 1 PC
D7e
Rope 1 PC
D7f Rope 1 PC
D7g
Rope 2 PCS
Da1
Binder Post & Bolt Set
(Preassembled)
M8x15 Bolt
Ø10x50 Sleeve Nut
4 SETS
Da2
Binder Post & Bolt Set
(Preassembled)
M6x12 Bolt
Ø8x52 Sleeve Nut
2 SETS
Da3
Binder Post & Bolt Set
(Preassembled)
M6x12 Bolt
Ø8x56 Sleeve Nut
4 SETS
Da4
Rope Connector
(Preassembled)
32 PCS
Da5
M4x50 Screw (Preassembled)
32 PCS

16
Parts used for slide assembly
X1
Slide Ladder Support Tube 1 PC
X2 Slide Ladder Support Tube 1 PC
X3 Slide Leg Tube 2 PCS
X4 Slide Ladder Step 2 PCS
X5 Connecting Plate 2 PCS
X6 Cap for X1 and X2 (Preassembled) 2 PCS
X7 Cap for X3 (Preassembled) 2 PCS
X8 Slide 1 PC
X9 Slide Ladder Support Tube Cross Bar 2 PCS
X10 Slide Leg Cross Bar 1 PC

17
Hardware used for slide assembly
Parts used for shade assembly
Xa1
M6x36 Bolt Set (Preassembled) 4 SETS
Xa2 M6x42 Bolt Set (Preassembled) 4 SETS
Xa3
Binder Post & Bolt Set
(Preassembled)
M6x12 Bolt
Ø8x24 Sleeve Nut
10 SETS
H1
Sunshade 1 PC
H2
Short Plastic Stick 2 PCS
H3
Long Plastic Stick 2 PCS
H4
Logo 1 PC
H5
Plastic Connector 2 PCS

18
OVERVIEW DRAWING
f
e
Xa3
Xa3
X8
X8
X4
X4
Xa2
Xa2
X4
X4
Xa2
Xa2
Xa2
Xa2
Xa3
Xa3
X1
X1
X6
X6
X6
X6
Xa1
Xa1
Xa1
Xa1
X2
X2
X3
X3
X3
X3
X7
X7
Xa2
Xa2
X5
X5
Xa3
Xa3
Xa3
Xa3
Xa3
Xa3
X9
X9
X10
X10
X9
X9
Xa3
Xa3
Xa3
Xa3
Xa3
Xa3
X7
X7
J1
J1
D3
D3
D6
D6
D4
D4
D1
D1
D2
D2
D3
D3
D7f
D7f
D7g
D7g
D7a
D7a
D7b
D7b
D7c
D7c
D7d
D7d
D7e
D7e
Da4
Da4
D5
D5
J2
J2
J1
J1
D5
D5
J1
J1
J2
J2
J1
J1
Da5
Da5
D7a
D7a
D7g
D7g
A1
A1
A3A
A3A
E1
E1
E3
E3
E1
E1
A2
A2
A3
A3
A4
A4
A4A
A4A
A7
A7
A9
A9
A5
A5
A8
A8
A8
A8
A8
A8
A10
A10
A11
A11
A11
A11
A6
A6
A12
A12
A9
A9
A8
A8
A8
A8
A10
A10
E2
E2
E2
E2
H4
H4
H3
H3
H3
H3
H2
H2
H1
H1
H2
H2
A13
A13
H5
H5
H5
H5
Ja4
Ja4
Ja3
Ja3
Ja2
Ja2
Ja2
Ja2
Ja2
Ja2
Ja2
Ja2
Ja1
Ja1
Ja1
Ja1
Ja1
Ja1
Ja1
Ja1
Ea3
Ea3
Ea1
Ea1
Ea1
Ea1
Ea2
Ea2
Ea2
Ea2
Ea4
Ea4
Da1
Da1
Aa2
Aa2
Aa2
Aa2
Aa5
Aa5
Aa5
Aa5
Aa1
Aa1
Aa3
Aa3
Aa1
Aa1
Aa3
Aa3
Da1
Da1
Da3
Da3
Da3
Da3
Da3
Da3
Da3
Da3
Da2
Da2
Da2
Da2
Aa5
Aa5
Aa2
Aa2
Aa5
Aa5
Aa2
Aa2
Aa2
Aa2
Aa4
Aa4

19
ASSEMBLY INSTRUCTIONS
z Place the playground equipment on level ground, not less than 6 feet (1.8 meters) from any
structure or obstruction such as a fence, garage, house, overhanging branches, laundry lines, or
electrical wires.
z Do not install the playground equipment over concrete, asphalt, packed earth, or any other hard
surface. A fall onto a hard surface can result in serious injury to the user.
TIGHTENING NUTS & BOLTS
z Do not over-tighten the nuts and bolts when you are assembling your playground equipment.
This will allow for some possible adjustments and ease of installation.
z Once you have completed the assembly of the playground equipment, go back over all of the nuts
and bolts and properly tighten all of them before using the playground equipment.
Main Frame Layout
D2
D2
D5
D5
A4
A4
A4A
A4A
D5
D5
D3
D3
D4
D4
D3
D3
D1
D1
A2
A2
A13
A13
A1
A1
A3
A3
A5
A5
A3A
A3A
/