Page is loading ...

READ AND KEEP THIS MANUAL FOR REFERENCE
Printed in Canada 46242I_A
2021-06-29
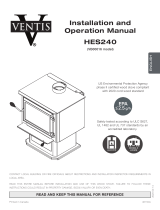
ESCAPE 1200
(DB03182 model)
Wood Stove
Owner's Manual
Part 2 of 2
INSTALLATION AND
OPERATION REQUIREMENTS
MOBILE
HOME
Safety tested according to ULC S627,
UL 1482 and UL 737 standards by an
accredited laboratory.
US Environmental Protection Agency
phase II certified wood stove compliant
with 2020 cord wood standard
CONTACT LOCAL BUILDING OR FIRE OFFICIALS ABOUT RESTRICTIONS AND INSTALLATION INSPECTION REQUIREMENTS
IN LOCAL AREA.
READ THIS ENTIRE MANUAL BEFORE INSTALLATION AND USE OF THIS WOOD STOVE. FAILURE TO FOLLOW THESE
INSTRUCTIONS COULD RESULT IN PROPERTY DAMAGE, BODILY INJURY OR EVEN DEATH.
ENGLISH

ONLINE WARRANTY REGISTRATION
If the unit requires repairs during the warranty period, proof of purchase must be provided.
The purchase invoice must be kept. The date indicated on it establishes the warranty period.
If it can not be provided, the warranty period will be determined by the date of manufacture of the
product. It is also highly recommended to register the warranty online at
https://www.drolet.ca/en/warranty/warranty-registration/
Registering the warranty will help to quickly find the information needed on the unit.
Dealer:
Installer:
Phone Number:
Serial Number:

Page 3
Installation and Operation Manual - Escape 1200
ENGLISH
TABLE DES MATIÈRES
1. CERTIFICATION PLATE .......................................................................................................... 4
2. General Information ................................................................................................................ 6
2.1 Performances ..................................................................................................................... 6
2.2 Specifications ..................................................................................................................... 7
2.3 Dimensions ........................................................................................................................ 8
2.3.1 Stove Dimensions ................................................................................................... 8
2.3.2 Combustion Chamber Dimensions ........................................................................... 9
2.4 EPA loading ......................................................................................................................10
2.4.1 Air control .............................................................................................................10
2.4.2 High burn rate (primary air control open) ..................................................................10
2.4.3 Medium and low burn rate ......................................................................................10
3. Clearances to Combustible Material .................................................................................... 11
3.1 Clearances ........................................................................................................................11
3.1.1 With Heat Shield AC02762 ....................................................................................13
3.1.2 With Lowered Ceiling .............................................................................................14
3.1.3 With Heat Shield AC02762 and Lowered Ceiling ......................................................15
3.1.4 Inside a Combustible Alcove ...................................................................................16
3.1.5 Mobile Home .........................................................................................................16
3.1.6 Mobile Home With Heat Shield AC02762 .................................................................17
4. Floor Protection .................................................................................................................... 18
5. Reducing Wall and Ceiling Clearances Safely .................................................................... 19
5.1 Shield Construction Rules ..................................................................................................19
6. options installation on your product .................................................................................... 22
6.1 Optional Fresh Air Intake Kit Installation ..............................................................................23
6.2 Optional Fire Screen Installation ........................................................................................24
6.3 Optional Blower And Thermodisc Installation .......................................................................25
6.4 Air Tubes And Baffle Installation ..........................................................................................26
6.5 Mobile Home Installation ....................................................................................................28
7. Maintenance/Parts Replacement ......................................................................................... 29
7.1 Replacement .....................................................................................................................29
7.2 Gasket ..............................................................................................................................30
7.3 Door .................................................................................................................................30
7.3.1 Adjustment ............................................................................................................30
7.3.2 Door Alignment ......................................................................................................31
7.3.3 Gasket ..................................................................................................................32
8. Exploded Diagram and Parts List ........................................................................................ 33
DROLET LIMITED LIFETIME WARRANTY...................................................................................36

Page 4 Installation and Operation Manual - Escape 1200
ENGLISH
1. CERTIFICATION PLATE

Page 5
Installation and Operation Manual - Escape 1200
ENGLISH

Page 6 Installation and Operation Manual - Escape 1200
ENGLISH
2. General Information
2.1 Performances
Values are as measured per test method, except for the recommended heating area, firebox volume,
maximum burn time and maximum heat output.
Model Escape 1200 (DB03182)
Combustion type Non-catalytic
Fuel Type Dry Cordwood
Recommended heating area (sq. ft..)1 250 to 1,200 ft2 (23 to 111 m2)
Total firebox volume 1.7 ft3 (0.0481 m3)
EPA loading volume 1.55 ft3 (0.0439 m3)
Maximum burn time15 hours
Maximum heat output (dry cordwood)2 45,000 BTU/h (13.2 kW)
Overall heat output rate (min. to max.)2 3 12,124 BTU/h to 26,700 BTU/h
(3.55 kW to 7.83 kW)
Average overall efficiency3
(Dry cordwood) 74 % (HHV)4 79 % (LVH)5
Optimum efficiency6 80 %
Optimum heat transfer efficiency779 %
Average particulate emissions rate8 1.8 g/h (EPA / CSA B415.1-10)9
Average CO10 74 g/h
1 Recommended heating area and maximum burn time may vary subject to location in home, chimney draft,heat loss factors, climate, fuel type
and other variables. The recommended heated area for a given appliance is dened by the manufacturer as its capacity to maintain a minimum
acceptable temperature in the designated area in case of a power failure.
2 The maximum heat output (dry cordwood) is based on a loading density varying between 15 lb/ft³ and 20 lb/ft³ and reloading intervals ranging
from 60 to 120 minutes. Other performances are based on a fuel load prescribed by the standard without any reloading between start and nish.
The specied loading density varies between 7 lb/ft³ and 12 lb/ft³. The moisture content is between 19% and 25%.
3 As measured per CSA B415.1-10 stack loss method.
4 Higher Heating Value of the fuel.
5 Lower Heating Value of the fuel.
6 Optimum overall efciency at a specic burn rate (LHV).
7 The optimum heat transfer efciency is for the low burn rate and represents the appliance’s ability to convert the energy contained in the wood logs
into energy transferred to the room in the form of heat and does not take into account the chemical losses during combustion.
8 This appliance is ofcially tested and certied by an independent agency.
9 Tested and certied in compliance with CFR 40 part 60, subpart AAA, section 60.534(a)(1(ii) and ASTM E3053-17 based on the ALT-125 sent by EPA
on February 28th, 2018.
10 Carbon monoxide.

Page 7
Installation and Operation Manual - Escape 1200
ENGLISH
2.2 Specifications
Maximum log length11 17 in (432 mm) north-south
Flue outlet diameter 6 in (150 mm)
Recommended connector pipe diameter 6 in (150 mm)
Type of chimney ULC-S629, UL 103 HT (2100 °F)
Minimum chimney height 12 feet
Baffle material Vermiculite
Approved for alcove installation Yes
Approved for mobile home installation12 Yes
Type of door Simple, glazed or not, with cast iron frame
Type of glass Ceramic glass
Blower Optional (up to 100 CFM)
Particulate emission standard13 EPA / CSA B415.1-10
USA standard (Safety) UL 1482, UL 737
Canada standard (Safety) ULC-S627
11 North-south: ends of the logs visible, East-west: sides of the logs visible.
12 Mobile homes (Canada) or manufactured homes (USA): The US Department of Housing and Urban Development describes “manufactured homes”
better known as “mobile homes” as follows; buildings built on xed wheels and those transported on temporary wheels/axles and set on a permanent
foundation. In Canada, a mobile home is a dwelling for which the manufacture and assembly of each component is completed or substantially
completed prior to being moved to a site for installation on a foundation and connection to service facilities and which conforms to the CAN/CSA-
Z240 MH standard.
13 Tested and certied in compliance with CFR 40 part 60, subpart AAA, section 60.534(a)(1(ii) and ASTM E3053-17 based on the ALT-125 sent by
EPA on February 28th, 2018.

Page 8 Installation and Operation Manual - Escape 1200
ENGLISH
2.3 Dimensions
2.3.1 Stove Dimensions
9 1/4"
235mm
18 1/2"
470mm
6 5/8"
170mm
6"
153mm
Figure 1: Top View
15 3/4"
400mm
8 1/2"
216mm
10 1/4"
260mm
30 1/8"
766mm
28 1/8"
715mm
28 7/8"
732mm
20 5/8"
523mm
22 3/4"
578mm
Figure 2: Front View Figure 3: Side View

Page 9
Installation and Operation Manual - Escape 1200
ENGLISH
2.3.2 Combustion Chamber Dimensions
7 5/8"
195mm
12"
305mm
Figure 4: Door Opening
14 1/4"
360mm
11 3/4"
298mm
19 1/8"
484mm
1/4"
6mm
3/16"
5mm
Figure 5: Front View - Combustion Chamber Figure 6: Side View - Combustion Chamber

Page 10 Installation and Operation Manual - Escape 1200
ENGLISH
2.4 EPA loading
The charging methods shown below are those that were used during emissions certification.
2.4.1 Air control
The air control is located underneath the ash shelf. To open the air
control, push the air control handle completely to the left (High).
This will increase the burn rate. To close the air control, push the
air control handle completely to the right (Low). This will decrease
the burn rate.
2.4.2 High burn rate (primary air control open)
Open the air control completely. Place six small pieces (2"x2") of
wood in the firebox crossing them at the greatest possible angle.
Criss cross fifteen kindling wood pieces on the small pieces of wood in three layers at the
greatest possible angle. Tie knot with five sheets of paper and place them on top of the kindling
wood. Light up the paper and let the door ajar at 90° until all the kindling wood is on fire and
the first row of small pieces of wood is on fire too. Close the door.
When there is no more fire in the front of the firebox and there are only faint flames on the wood
in the back of the firebox, break ashes, level the coal bed and put four logs in the firebox. Place
the biggest log (about 5"x5") and a medium log (about 4"x4") on the coal bed with a north-south
orientation. Place two other medium logs on the first two with the greatest possible angle. Their
should be air space between each logs and between the logs and the bricks. Let the door ajar
at 90° for approximately two minutes and then close the door.
2.4.3 Medium and low burn rate
On a 2" coal bed that is still slightly red, place five logs of approximatively 4"x4" or 3"x3" with
a north-south orientation. Place three logs on the coal bed and the other two on top with the
greatest possible angle. Their should be air space between each logs and between the logs
and the bricks. Let the door ajar at 90° for approximately 5 min. Then, close the door with the
primary air control open. Leave to burn with the primary air control open for approximately 10
minutes and then close the primary air control completely for the low burn rate and halfway for
the medium burn rate.

Page 11
Installation and Operation Manual - Escape 1200
ENGLISH
3. Clearances to Combustible Material
The clearances shown in this section have been determined by tests according to procedures
set out in safety standards ULC S627 (Canada), UL 1482 (U.S.A.) and UL 737 (U.S.A.). When
the stove is installed so that its surfaces are at or beyond the minimum clearances specified,
combustible surfaces will not overheat under normal and even abnormal operating conditions.
No part of the stove or flue pipe may be located closer to combustibles than the minimum
clearance figures given.
The clearances to combustible walls may be slightly different in Canada and the U.S.A. and may
also differ depending on whether single or double wall flue pipe is used. Make sure to choose
the correct clearance for the stove location and type of flue pipe.
The clearances of the appliance and the flue pipes must be met individually, meaning the
appliance cannot be installed closer to the combustible materials than the single or double wall
pipe allows. For a safe way to reduce clearances refer to section"5. Reducing Wall and Ceiling
Clearances Safely"
3.1 Clearances
APPLIANCE CLEARANCES WITH SINGLE
WALL PIPE CONNECTOR
APPLIANCE CLEARANCES WITH DOUBLE
WALL PIPE CONNECTOR
Canada USA Canada USA
A14" (356 mm) 12" (305 mm) A6" (152 mm) 6" (152 mm)
B18" (457 mm) 18" (457 mm) B18" (457 mm) 18" (457 mm)
C11" (279 mm) 11" (279 mm) C7" (178 mm) 7" (178 mm)
If the above clearances are met, then the distances measured from the flue outlet will be:
DISTANCES14 FROM PIPE CONNECTOR
WITH SINGLE WALL PIPE CONNECTOR
DISTANCES14 FROM PIPE CONNECTOR
WITH DOUBLE WALL PIPE CONNECTORE
Canada USA Canada USA
D18" (457 mm) 16" (406 mm) D9 ¼" (235 mm) 9 ¼" (235 mm)
E24 ½" (622 mm) 24 ½" (622 mm) E23 ¾" (603 mm) 23 ¾" (603 mm)
F18 ¼" (464 mm) 18 ¼" (464 mm) F13 ½" (343 mm) 13 ½" (343 mm)
14 The pipe distances listed in this table refer to the distances obtained when the stove is installed in accordance with the appliance clearances
above mentioned.

Page 12 Installation and Operation Manual - Escape 1200
ENGLISH
A
B
E
D
CAN
48"
122 cm
US
36"
92 cm
48"
Flush
F
FC
Figure 7: Clearances - Top Figure 8: Clearances - Corner
84"
213 cm
Ve
Ho
N
Figure 9: Clearances - Side

Page 13
Installation and Operation Manual - Escape 1200
ENGLISH
3.1.1 With Heat Shield AC0276215
To reduce the clearances of an appliance using a single wall pipe connector, the use of a heat
shield certified with the single wall pipe connector to be used as close as 6" from combustible
materials must be used. Only in this case, the same clearances as a certified double wall pipe
connector can be used.Refer to the booklet present in the screen options to obtain the dimensions
to be respected.
APPLIANCE CLEARANCES WITH DOUBLE
WALL PIPE CONNECTOR
DISTANCES16 FROM DOUBLE WALL PIPE
CONNECTOR
Canada USA Canada USA
A2 ½" (64 mm) 2 ½" (64 mm) D5 ¾" (146 mm) 5 ¾" (146 mm)
B2 ½" (64 mm) 2 ½" (64 mm) E8 ¼" (210 mm) 8 ¼" (210 mm)
C2 ½" (64 mm) 2 ½" (64 mm) F9" (229 mm) 9" (229 mm)
A
B
E
D
CAN
48"
122 cm
US
36"
92 cm
48"
Flush
F
FC
If the clearance reduction is on the same side as the door handle, position the stove at
a minimum of 6 inches from the side wall (clearance B), otherwise it may be located at
the clearance shown in the table above.
15 Note that to reduce the clearances of an appliance using a single wall pipe connector, the use of a heat shield certied with the single wall pipe
connector to be used as close as 6" from combustible materials must be used. Only in this case, the same clearances as a certied double wall
pipe connector can be used.
16 The pipe distances listed in this table refer to the distances obtained when the stove is installed in accordance with the appliance clearances
above mentioned.

Page 14 Installation and Operation Manual - Escape 1200
ENGLISH
3.1.2 With Lowered Ceiling
APPLIANCE CLEARANCES WITH SINGLE
WALL PIPE CONNECTOR
Canada USA
A14" (356 mm) 14" (356 mm)
B20" (508 mm) 20" (508 mm)
C11" (279 mm) 11" (279 mm)
L72" (1829 mm) 72" (1829 mm)
Ve
Ho
L
APPLIANCE CLEARANCES WITH DOUBLE
WALL PIPE CONNECTOR
Canada USA
A6" (152 mm) 6" (152 mm)
B18" (457 mm) 18" (457 mm)
C8" (203 mm) 8" (203 mm)
L72" (1829 mm) 72" (1829 mm)
If the above clearances are met, then the distances measured from the flue outlet will be:
DISTANCES17 FROM PIPE CONNECTOR
WITH SINGLE WALL PIPE CONNECTOR
DISTANCES17 FROM PIPE CONNECTOR
WITH DOUBLE WALL PIPE CONNECTOR
Canada USA Canada USA
D18" (457 mm) 18" (457 mm) D9 ¼" (235 mm) 9 ¼" (235 mm)
E26 ½" (673 mm) 26 ½" (673 mm) E23 ¾" (603 mm) 23 ¾" (603 mm)
F18 ¼" (464 mm) 18 ¼" (464 mm) F14 ½" (368 mm) 14 ½" (368 mm)
17 The pipe distances listed in this table refer to the distances obtained when the stove is installed in accordance with the appliance clearances
above mentioned.

Page 15
Installation and Operation Manual - Escape 1200
ENGLISH
3.1.3 With Heat Shield AC02762 and Lowered Ceiling
To reduce the clearances of an appliance using a single wall pipe connector, the use of a heat
shield certified with the single wall pipe connector to be used as close as 6" from combustible
materials must be used. Only in this case, the same clearances as a certified double wall pipe
connector can be used. Refer to the booklet present in the screen options to obtain the dimensions
to be respected.
APPLIANCE CLEARANCES WITH DOUBLE
WALL PIPE CONNECTOR
Canada USA
A2 ½" (64 mm) 2 ½" (64 mm)
B2 ½" (64 mm) 2 ½" (64 mm)
C2 ½" (64 mm) 2 ½" (64 mm)
L72" (1829 mm) 72" (1829 mm)
Ve
Ho
L
DISTANCES18 FROM PIPE CONNECTOR
WITH DOUBLE WALL PIPE CONNECTOR
Canada USA
D5 ¾" (146 mm) 5 ¾" (146 mm)
E8 ¼" (210 mm) 8 ¼" (210 mm)
F9" (229 mm) 9" (229 mm)
A
B
E
D
CAN
48"
122 cm
US
36"
92 cm
48"
Flush
F
FC
If the clearance reduction is on the same side as the door handle, position the stove at
a minimum of 6 inches from the side wall (clearance B), otherwise it may be located at
the clearance shown in the table above.
18 The pipe distances listed in this table refer to the distances obtained when the stove is installed in accordance with the appliance clearances
above mentioned.

Page 16 Installation and Operation Manual - Escape 1200
ENGLISH
3.1.4 Inside a Combustible Alcove
See section 3.1 for single wall pipe installation.
APPLIANCE CLEARANCES WITH DOUBLE
WALL PIPE CONNECTOR
Canada USA
A6" (152 mm) 6" (152 mm)
B20" (508 mm) 20" (508 mm)
K48" (1219 mm) 36" (914 mm)
L72" (1829 mm) 72" (1829 mm)
Ve
Ho
L
DISTANCES19 FROM PIPE CONNECTOR
WITH DOUBLE WALL PIPE CONNECTOR
Canada USA
D9 ¼" (235 mm) 9 ¼" (235 mm)
E25 ¾" (654 mm) 25 ¾" (654 mm)
A
B
E
D
K
E
B
3.1.5 Mobile Home
It is strictly forbidden to install a unit with a single wall pipe in a mobile home.
APPLIANCE CLEARANCES WITH DOUBLE
WALL PIPE CONNECTOR
DISTANCES19 FROM PIPE CONNECTOR
WITH DOUBLE WALL PIPE CONNECTOR
Canada USA Canada USA
A6" (152 mm) 6" (152 mm) D9 ¼" (235 mm) 9 ¼" (235 mm)
B22" (559 mm) 22" (559 mm) E27 ¾" (705 mm) 27 ¾" (705 mm)
C10" (254 mm) 10" (254 mm) F16 ½" (419 mm) 16 ½" (419 mm)
19 The pipe distances listed in this table refer to the distances obtained when the stove is installed in accordance with the appliance clearances
above mentioned.

Page 17
Installation and Operation Manual - Escape 1200
ENGLISH
3.1.6 Mobile Home With Heat Shield AC02762
It is strictly forbidden to install a unit with a single wall pipe in a mobile home.
APPLIANCE CLEARANCES WITH DOUBLE
WALL PIPE CONNECTOR
DISTANCES20 FROM PIPE CONNECTOR
WITH DOUBLE WALL PIPE CONNECTOR
Canada USA Canada USA
A3" (76 mm) 3" (76 mm) D6 ¼" (159 mm) 6 ¼" (159 mm)
B3" (76 mm) 3" (76 mm) E8 ¾" (222 mm) 8 ¾" (222 mm)
C3" (76 mm) 3" (76 mm) F9 ½" (241 mm) 9 ½" (241 mm)
A
B
E
D
CAN
48"
122 cm
US
36"
92 cm
48"
Flush
If the clearance reduction is on the same side as the door handle, position the stove at
a minimum of 6 inches from the side wall (clearance B), otherwise it may be located at
the clearance shown in the table above.
20 Les distances de tuyau listées dans ce tableau se réfèrent aux distances obtenues lorsque le poêle est installé en accord avec les dégagements
de l’appareil mentionnés ci-dessus.

Page 18 Installation and Operation Manual - Escape 1200
ENGLISH
4. Floor Protection
This stove is designed to prevent the floor from overheating. However, it must be placed on a
non-flammable surface to protect the floor from hot embers that may fall during loading.
The floor protection must be a continuous, non combustible material, such as steel with a minimum
thickness of 0.015" (0.38 mm) or ceramic tiles sealed together with grout. Cement board, brick, or
any other approved or listed material suited for floor protection. No R factor required.
Any type of tile will require a continuous non combustible sheet beneath to prevent the possibility
of embers falling through to the combustible floor if cracks or separation should occur in the
finished surface. Check local codes for approved alternatives.
No protection is required if the unit is installed on a non-combustible floor (ex: concrete).
FLOOR PROTECTION
Canada USA
G21 8" (203 mm) N/A
H8" (203 mm) N/A
I18" (457 mm)
From door
opening
16" (203 mm) From
door opening
JN/A 8" (203 mm)
K34 ½" (876 mm) 31 ¼ (794 mm)
N22 N/A See note 22
S48 ¾" (1238 mm) 38 ¾" (984 mm)
T34 ½" (876 mm) 27 ½" (698 mm)
U34 ½" (876 mm) 31 ¼ (794 mm)
V66" (1676 mm) 54 3/8" (1381 mm)
H
I
G
J
K
S
Figure 10: Floor Protection
U
T
V
84"
213 cm
Ve
Ho
N
21 The oor protection at the back of the stove is limited to the stove’s required clearance if such clearance is smaller than 8 inches (203 mm).
22 Only required under the horizontal section (Ho) of the connector. Must exceed each side of the connector by at least 2 inches (51 mm).

Page 19
Installation and Operation Manual - Escape 1200
ENGLISH
5. Reducing Wall and Ceiling Clearances Safely
It is often desired to use as little space as possible when installing
a wood stove. To do this, it is possible to reduce the clearances
safely and install the stove closer to the walls by permanently
installing a heat shield between the stove and the flammable
material.
The rules for heat shields are sometimes complicated. Read
and apply the instructions carefully. Some regions may have
different regulations. Consult the local building code or contact
the fire department for restrictions, inspection and installation
requirements in the area.
5.1 Shield Construction Rules
−
Adhesives used in shield construction must not ignite or lose adhesive qualities at temperatures
likely to be encountered.
− Mounting hardware which extends from the shield surface into combustibles may be used only
at the edges of the shield.
− Mounting hardware must allow full vertical ventilation.
A) Minimum clearance between the appliance top and an unshielded combustible ceiling (for a
ceiling 72" from the floor):
43 7/8" (1114 mm)
B) Shield extension above the appliance: 20" (500 mm)
C) Minimum space behind the shield: 1" (25 mm). In Canada 7/8" (21 mm)
D) Clearance along the bottom of the shield: minimum 1" (25 mm) and maximum 3" (75 mm)
E) Minimum clearance along the top of the shield: 3" (75 mm)
F) Mounting hardware must not be located closer than 8" (200 mm) from the vertical centre line of
the appliance.
G) Edge clearance for ceiling shields to side and back walls: 3" (75 mm)
H) Shield extension beyond each side of the appliance: 18" (450 mm).
Figure 11: Heat shield clearances Figure 12: Heat shield clearances

Page 20 Installation and Operation Manual - Escape 1200
ENGLISH
H
H
Figure 13: Heat shield clearances Figure 14: Heat shield clearances
/