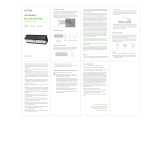
English 01-10 | 日本語 11-20
Solar Motion Sensor Garage Light
User Manual
Model: SY-ZY2101002

1
Thank you for purchasing AGPTEK Solar Motion
Sensor Garage Light.
For optimum performance and safe use, please read
this user manual carefully and keep it for future
reference. If you have any problems, please feel free
to contact our helpful customer service team by
message.
Package Content
Note: Please check the package when receiving the
goods. If any missing or defective parts are found,
please contact us for help.
Garage Light
Solar Panel
Connection
Cord
Remote
Controller
Fixing Bolts
Kit
USB Cable

2
Specifications
Solar Panel
Monocrystalline silicon
6V/4W
Battery Capacity
18650 Lithium battery
3.7V/4400mAh
Working Mode
Remote control/light
sensor/motion sensor
Solar Charging Time
6-8 hours
USB Charging Time
3.5-4 hours
Working Time
Single Color:
8-9h (100% brightness)
30h+ (25% brightness)
Double Color:
3.5-4.5h (100% brightness)
15h+ (25% brightness)
Color Temperature
3000K/4500K/5500K
Lumens
800lm
LED Quantity
120pcs
Brightness
Adjustment
100%/75%/50%/25%
Timing
2H/4H/6H
Material
PC + ABS
Waterproof Level
IP65

3
Working
Temperature
-31
℉
~+113
℉
/-35
℃
~+45
℃
Power Supply
Modes
Solar powered/
USB charging
Remote Control
Distance
8-10 Meters
Remote Controller Introduction
Function Introduction
ON: Press the ON button, and the light is on. (Note: If
NC: Reset
ON: Turn on
OFF: Turn off
W: White light
WY: Warm white light
Y: Warm light
: Brightness +
:
Brightness -
: Light sensor mode
: Motion sensor mode
2H: Timing for 2 hours
4H: Timing for 4 hours
6H: Timing for 6 hours

4
the light was in light sensor control or in timing mode
when it was turned off last time, the light cannot be
turned on by pressing ON button. If you want to force
it on, please press NC button.)
OFF: Press the OFF button and you can turn off the
light in all 3 modes.
Reset Function: Press NC to reset. Clear all previously
memorized working modes and timing modes. The
default mode is constant lighting mode. The
brightness is 50%, no timing, no light sensor and
motion sensor control.
Color Temperature Adjustment: Press W/WY/Y
button to adjust the color temperature. "W"-white
light, "Y"-warm light, "WY"-warm white light.
Brightness Adjustment: Press / to adjust the
brightness of the light according to your needs. There
are 4 levels: 25%, 50%, 75%, 100%.
Timing Function: 3 Timing choices: 2H/4H/6H.
24 Hours cycle timing function. For example, if you
turn on the 2H timing function, the light will
automatically turn off after 2 hours. If you don’t turn
off the timing function, the light will automatically
turn on after 22 hours, and then continue to turn off
after 2 hours, and so on.
Using method: After pressing the corresponding
number button, the light flashes once and the timing
is turned on. After pressing the corresponding number
button again, the light flashes twice and the timing is
turned off.

5
Working Modes Selection:
Light sensor mode. The light will automatically turn
off during the day and charge, and it will automatically
light up in dark.
Using method: Press once and the light flashes
once, indicating that the light sensor control is turned
on. Press again, the light flashes twice, indicating
that the light sensor control is turned off.
Motion sensor mode. Auto-on when human motion is
detected within 180° and 3-5 meters/9.8-16.4 feet,
and auto-off after about 30 seconds of no motion
detected.
Using method: Press once and the light flashes
once, indicating that the motion sensor control is
turned on. Press again, and the light flashes twice,
indicating that the motion sensor control is turned off.

6
Note: Light sensor mode and motion sensor mode
can be used at the same time. If the two modes are
turned on at the same time, the light will not light up
even if motion is detected during the day.
2 Power Supply Modes
Solar Powered: install
the solar panel in a place
exposed to direct sunlight
to charge (6-8 hours).
Off:
Out of
range
30s:
Auto off

7
USB Charging: use 5V/1-
3.6A charging devices to
charge the light (3.5-4
hours).
Recommendations
Please place the solar panel in direct sunlight and
charge it for 4-5 hours before first use.
The solar panel should be placed in a sunny place,
and the angle should be adjusted to obtain
sufficient sunlight.
Please keep the surface of the solar panel clean. It
is recommended to clean it every two months to
make the charging faster.
Attention
Do not disassemble the solar panel and battery
without authorization.
This product contains battery inside, please keep it
away from fire sources to prevent explosions.

8
Troubleshooting
Trouble
Reason
Analysis
Solution
The light
doesn’t
work
Run out of
battery
Connect the solar
panel to the light and
leave it under the
sunlight to charge for
at least 2 hours or
charge the light via
USB charging.
In light
sensor
control
mode, the
light is in
bright place
Cover the solar panel
to turn on the light.
Press the NC button
to restore the factory
default settings.
The
remote
controller
has no
response
Remote
control
distance is
too far
Aim the remote
controller at the
receiver of the light,
and the remote
control distance is
within 8-10 meters.
The remote
controller
runs out of
power
Replace battery.

9
Fail to
charge
Defective
solar panel/
battery
Please contact us for
help.
Dirty solar
panel
Keep the surface of
the solar panel clean.
Battery
life gets
shorter
and
shorter
Solar panel
doesn’t
getting
enough
sunlight to
recharge
Ensure that the solar
panel is installed in a
place that can get
enough sunlight, and
no shelter between
9:00- 15:00 every
day.
If can’t get enough
sunlight on a rainy
day, the solar lamp
will automatically
return to the best
working condition
after the weather
clears up the next
day and obtaining
enough sunlight.
It’s recommended to
clean the solar panel
every 2 months to
make the charging

10
faster. If not cleaned
for a long time, the
solar charging effect
will be affected.
Defective
battery
Please contact us for
help.
The light
keeps
flashing
The light
sensor
control
mode can’t
tell whether
it is day or
night
Cover the solar panel
to create a dark
environment.
Press the NC button
to restore the factory
default settings.
Turn on
the light
after it is
off but
only
lighting
for a
while and
then stop
lighting
Battery
protection
This is the normal
battery low- power
protection function
of the solar lamp,
not a product quality
problem. And it can
be restored to
normal without
maintenance. This is
the same as the
automatic shutdown
of the mobile phone
when it is out of
power.

11
この度は AGPTEK ソーラーモーションセンサーガレージ
ライトをお買い上げいただきありがとうございます。最
適な性能と安全な使用ために、ユーザーマニュアルをよ
くお読みください、また、将来の参照のために保管して
ください。この製品に何か問題がございましたら、ご遠
慮なく support @ agptek.com までご連絡ください。
パッケージ内容
注:商品を受け取る際に、パッケージに欠陥や欠品がな
いか確認してください。欠品や不良部品が見つかった場
合は、当店にご連絡ください。
ソーラーライト
ソーラーパネル
接続コード
リモコン
ねじ袋/ライ
トホルダー
USB ケーブル

12
仕様
ソーラーパネル
単結晶シリコン 6V / 4W
バッテリー容量
18650 リチウム電池
3.7V / 4400mAh
モード
リモコン/光センサー/モーシ
ョンセンサー
ソーラー充電時間
6〜8 時間
USB 充電時間
3.5〜4 時間
ワーキング時間
単色:
8〜9 時間(100%の明るさ)
30 時間以上(25%の明るさ)
ダブルカラー:
3.5-4.5h(100%の明るさ)
15 時間以上(25%の明るさ)
色温
3000K/4500K/5500K
ルーメン
800lm
LED 数量
120pcs
明るさ調整
100%/75%/50%/25%
タイミングモード
2H/4H/6H
材質
PC + ABS
防水レベル
IP65

13
作業温度
-31℉~+113℉ (-35℃~+45℃)
電源モード
ソーラーパワー/ USB 充電
リモコン距離
8〜10 メートル
リモコンの紹介
機能の紹介
ON:ON ボタンを押すとライトが点灯します。(注:前
回消灯したときにライトが光センサー制御またはタイ
NC: リセット
ON: 電源 ON
OFF: 電源 OFF
W: 白色光
WY: 暖かい白色光
Y: 暖色
: 明るさ +
: 明るさ -
: 光センサーモード
: モーションセンサーモード
2H: 2 時間点灯
4H: 4 時間点灯
6H: 6 時間点灯

14
ミングモードであった場合、ON ボタンを押してもライ
トをオンにすることはできません。ライトを強制的にオ
ンにしたい場合 、NC ボタンを押してください。)
OFF: OFF ボタンを押すとライトが消灯します。すべて
の 3 つのモードでライトをオフにすることができます。
リセット機能: NC を押してリセットします。以前に記
憶したすべての作業モードとタイミングモードをクリ
アします。デフォルトのモードは常時照明モードです。
明るさは 50%で、タイミング、光センサー、モーショ
ンセンサー制御はありません。
色温調整: W / WY / Y ボタンを押して色温度を調整し
ます。「W」-白色光、「Y」-暖光、「WY」-暖かい白色
光。
明るさの調整: / を押して、必要に応じてライトの
明るさを調整します。 25%、50%、75%、100%の 4
つのレベルがあります。
タイミング機能: 三つタイミングの選択:2H / 4H / 6H。
24 時間サイクルタイミング機能。 たとえば、2H タイミ
ング機能をオンにすると、2 時間後にライトが自動的に
オフになります。 タイミング機能をオフにしないと、
22 時間後にライトが自動的にオンになり、2 時間後にも
オフになります。
使用方法:対応する数字ボタンを押すと、ライトが 1
回点滅し、タイミングがオンになります。 対応する数
字ボタンをもう一度押すと、ライトが 2 回点滅し、タイ
ミングがオフになります。
動作モードの選択:

15
光センサーモード: 日中は自動的に消灯して充電し、
暗闇では自動的に点灯します。
使用方法: 1 回押すと、ライトが 1 回点滅し、光セ
ンサーコントロールがオンになっていることを示しま
す。 もう一度押すと、ライトが 2 回点滅し、ライト
センサーコントロールがオフになっていることを示し
ます。
モーションセンサーモード: 人間の動きが 180°およ
び 3-5 メートル(9.8-16.4 フィート)以内で検出され
た場合は自動オンになり、動きが検出されなかった約
30 秒後に自動オフになります。
使用方法: 1 回押すと、ライトが 1 回点滅し、モー
ションセンサーコントロールがオンになっていること
を示します。 もう一度押すと、ライトが 2 回点滅し、
モーションセンサーコントロールがオフになっている
ことを示します。

16
注:光センサーモードとモーションセンサーモード
は同時に使用できます。 2 つのモードを同時にオンに
すると、日中に動きを検出してもライトは点灯しません。
2 つの充電モード
ソーラーパワー:直射日
光にさらされる場所にソー
ラーパネルを設置して充電
します(6〜8 時間)。
30 秒:
自動オフ
オフ:
範囲外

17
USB 充電:5V / 1-3.6A 充
電デバイスを使用してライト
を充電します(3.5〜4 時間)。
推奨事項
ソーラーパネルを直射日光に当て、4-5 時間充電して
からご使用ください。
ソーラーパネルは日当たりの良い場所に設置し、十
分な日光が当たるように角度を調整してください。
ソーラーパネルの表面は清潔に保ってください。 充
電を速くするために、2 か月ごとに掃除することをお
勧めします。
ご注意
ソーラーパネルとバッテリーを無断で分解しないで
ください。
本製品には電池が内蔵されていますので、爆発防止
のため、火のそばに近づけないでください。

18
故障かな?と思ったら
故障
原因
対処方法
ライトが
点灯しな
い場合
バ ッ テ リ ー
切れ
ソー ラーパネルをラ
イトに接続し、日光の
下に 置いて少なくと
も 2 時間充電するか、
USB 充電でライトを充
電します。
光 セ ン サ ー
制 御 モ ー ド
で、ソーラー
パ ネ ル は 明
る い 場 所 に
あります
ソー ラーパネルを覆
って ライトをオンに
します。
NC ボタンを押して、工
場出 荷時のデフォル
ト設定に戻します。
リモコン
が反応し
ない
リ モ コ ン の
距 離 が 遠 す
ぎます
リモ コンを光の受信
機に向けると、リモコ
ンの距離は 8〜10 メー
トル以内になります。
リ モ コ ン の
電 力 が 不 足
しています
バッ テリーを交換し
てください。

19
充電でき
ない
ソ ー ラ ー パ
ネル/バッテ
リーの不良
ヘル プが必要な場合
はお 問い合わせくだ
さい.
ソ ー ラ ー パ
ネ
ル は 長 期 間
清
掃 さ れ て い
ま
せん
製品 の充電がより速
くするために、2ヶ月
に一度は、製品の清掃
を行ってください。長
時間清掃しないと、ソ
ーラ ーの充電効 率に
影響が出ます。
バッテリ
ーの寿命
がますま
す短くな
ります
ソ ー ラ ー パ
ネ ル が 充 電
す る の に 十
分 な 日 光 を
浴 び て い な
い
ソーラーパネルは、日
光が 十分に当たる場
所に設置し、毎日 9:
00〜15:00 の間に遮蔽
物が ないことを確認
してください。
雨の 日に十分な日光
が当たらない場合、翌
日天 気が晴れて十分
な日光が当たると、ソ
ーラ ーランプは自動
的に 最高の動作状態
に戻ります。
製品 の充電がより速
くするために、2ヶ月
に一度は、製品の清掃
Page is loading ...
Page is loading ...
/


