Page is loading ...

BERNSTEIN AG . Hans-Bernstein-Straße 1 . 32457 Porta Westfalica . www.bernstein.eu
Seite 1 von 27
0800000892_01 / Stand: 1/ Ausgabedatum: 06.11.2018
Typbezeichnung / Type / Désignation
Komponenten-Piktogramme / Component pictograms / Pictogrammes des composants
Tragsystem / Supension System / Système de suspension
Betriebs- und Montageanleitung
Installation and Operating Instructions
Instructions de service et de montage
Adapter (schmale Profile) /
Adapter (narrow section) /
Adaptateur (profilé étroit)
Kupplung /
Coupling /
Couplage
Winkelkupplung /
Elbow coupling /
Couplage angulaire
Panelkupplung S /
Panel coupling S /
Couplage de panneaux S
Panelkupplung W /
Panel coupling W /
Couplage de panneaux W
Winkel /
Elbow /
Coude
Winkel drehbar /
Elbow, rotary /
Cooude orientable
Reduzierwinkel /
Reducing elbow /
Coude de réduction
Zwischengelenk /
Intermediate joint /
Articulation intermédiaire
Aufsatzgelenk /
Top joint /
Articulation horizontale
orientable
Wandgelenk S /
Wall joint S /
Articulation murale S
Wandgelenk W /
Wall joint W /
Articulation murale W
Standfuß /
Base /
Pied support
Standfuß drehbar /
Base, rotary /
Pied support rotatif
Drehneigungskupplung S/
turn / tift coupling S /
Couplage rotatif à
inclinaison réglable S
Drehneigungskupplung W/
turn / tift coupling W /
Couplage rotatif à
inclinaison réglable W
Weitere Sprachen im Web:
More languages on the Web:
Plus de langues sur le Web:
www.bernstein.eu
Adapterplatte VESA 75/100 /
Adapter plate VESA 75/100 /
Plaque d’adaptateur
VESA 75/100

Seite 2 von 27
0800000892_01 / Stand: 1 / Ausgabedatum: 06.11.2018BERNSTEIN AG . Hans-Bernstein-Straße 1 . 32457 Porta Westfalica . www.bernstein.eu
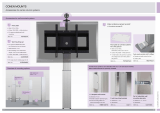
Applikationsbeispiele / Application examples / Exemples d’application
oder
oder
oder
oder
= Diese Komponente kann hängend oder stehend verbaut werden /
This comonent can either be mounted on the wall or be operated as a standing unit /
Ce composant peut être monté au choix de manière verticale ou horizontale
oder / or
oder / or
oder / or
oder / or

Seite 3 von 27
0800000892_01 / Stand: 1/ Ausgabedatum: 06.11.2018BERNSTEIN AG . Hans-Bernstein-Straße 1 . 32457 Porta Westfalica . www.bernstein.eu
Inhaltsverzeichnis / Directory / Sommaire
Inhaltsverzeichnis / Directory / Sommaire ________________________________________________________________________ 3
Aufbau und Gebrauch der Anleitung / Indication and Use of the instructions / Structure et utilisation des instructions __________ 4
Sicherheitshinweise / Safety instructions / Avertissements __________________________________________________________ 4
Mechanische Daten / Mechanische Data / Caractéristiques techniques ________________________________________________ 5
Belastungsdiagramm CS-3000 neXt für statische Belastung / Load diagram for static load capacity CS-3000 neXt
Diagramme de charge pour charge statique CS-3000 neXt __________________________________________________________ 6
Montage und Justage / Installation and adjustment / Montage et ajustage _____________________________________________ 6
Befestigung an Anlage bzw. Maschine / Mounting to plant or machine / Fixation à l'installation ou à la machine _____________ 6
Rohrmontage vertikal / Tube mounting vertically / Montage vertical du tube _________________________________________ 7
Rohrmontage horizontal / Tube mounting horizontally / Montage horizontal du tube __________________________________ 8
Rohrjustage vertikal (auch nachträglich) / Vertical tube adjustment (also possible later) /
Ajustage vertical du tube (également ultérieurement) ____________________________________________________________ 9
Rohrjustage horizontal (auch nachträglich) / Horizontal tube adjustment (also possible later)
Ajustage horizontal du tube (également ultérieurement) ________________________________________________________ 10
Befestigung am Gehäuse / Mounting to enclosure / Fixation au boîtier _______________________________________________ 11
Befestigung am Steuergehäuse mittels Kupplung oder Winkelkupplung /
Mounting to control enclosure by using coupling or elbow coupling /
Fixation au pupitre de commande à l’aide d’un couplage ou couplage angulaire ______________________________________ 11
Dreh-/Neigungskupplung W / Turn/tilt coupling W / Couplage incliné W pour _________________________________________12
Dreh-/Neigungskupplung S / Turn/tilt coupling S / Couplage incliné S pour ___________________________________________12
Befestigung am Steuergehäuse mittels Adapter (schmale Profile) /
Mounting to control enclosure by using adapter (narrow sections)/
Fixation au pupitre de commande à l’aide d’un adaptateur (profils étroits) ___________________________________________13
Befestigung am Steuergehäuse mittels Adapterplatte VESA 75/100 /
Mounting to control enclosure by using adapter plate VESA 75/100) /
Fixation au pupitre de commande à l'aide d'un avec plaque d’adaptateur VESA 75/100 _________________________________ 14
Befestigung am Steuergehäuse mittels Panelkupplung / Mounting to control enclosure by using panel coupling /
Fixation au pupitre de commande à l’aide d’un couplage de panneaux ______________________________________________ 15
Klemmhebel einschrauben / Screwing the clamping lever / Visser le levier de serrage ____________________________________15
Veränderung der Schwergängigkeit / Modification of firmness/ Réglage de précision du fonctionnement ____________________16
Grundeinstellung der Schwergängigkeit (M) /Attitude of the tightness of torque (M) /Réglage du moment de force (M)_________ 17
Grundeinstellung der Schwergängigkeit (M) und der Neigungswinkelbegrenzung /
Attitude of the tightness of torque (M) and the tilt angle limitation /
Réglage du moment de force (M) et la limitation de l'angle d'inclinaison _______________________________________________ 18
Gelenkkappe Montage und Demontage/Joint cap mounting and dismounting/Montage et démontage de la cache d'articulation 19
Zubehör / Accessories / Accessoires ____________________________________________________________________________ 20
Rohrtrennung / Tube Cutoff / Limite de Coupure du Tube___________________________________________________________ 24
Erdung / Earthing / Mise à la terre_______________________________________________________________________________ 25
Erdungsbeispiel / Earthing example / Exemple pour la mise à la terre __________________________________________________ 27

Seite 4 von 27
0800000892_01 / Stand: 1 / Ausgabedatum: 06.11.2018BERNSTEIN AG . Hans-Bernstein-Straße 1 . 32457 Porta Westfalica . www.bernstein.eu
Nicht in Rohre fassen
Das übermäßige Stauchen, Strecken und Knicken von stromführenden Leitungen ist zu vermeiden.
Das Leitungssystem ist regelmäßig auf Scheuerstellen zu überprüfen.
Die Montage bzw. der Anschluss des Leitungssystems ist durch eine Elektrofachkraft durchzuführen.
Dichtungen dürfen bei der Montage nicht beschädigt werden, da ansonsten die technischen Eigenschaften nicht
eingehalten werden können.
Bei der Verwendung der Panelkupplungskomponenten ist darauf zu achten,
dass die Stabilität der Montagefläche für die Montage geeignet ist.
Die Kupplungskomponenten sind für eine mittige Montage am Steuergehäuse ausgelegt.
Außermittige Montage ist nicht zulässig.
Die Anzugsmomente der Schraubverbindungen sind regelmäßig zu überprüfen.
Sicherheitshinweise / Safety instructions / Avertissements
Vorsicht
Vorsicht
Vorsicht
Vorsicht
Vorsicht
Vorsicht
Vorsicht
Vorsicht
Die Reihenfolge der Kapitel ist nicht zwingend die Bedien- oder Montagefolge.
Nicht alle Kapitel gelten für jede Komponente.
Aufbau:
●
Auf dem Titelblatt das Piktogramm für entsprechende Komponenten heraussuchen
●
In den Kapiteln werden jeweils Pictogramme gezeigt, für die der Montageschritt gilt
●
Montage beginnt mit der Anlagen-, Maschinen- oder Wandmontage und dem geltenden Kapitel /
The sequence of the chapters is not necessarily the operation or assembly sequence.
Not all chapters apply for each component.
Indication:
●
Pick out the pictogram for the corresponding component shown on the title page
●
You will see in the chapters pictograms for which the mounting step applies
●
Mounting starts with the plant, machine or wall mounting and the corresponding chapter
L'ordre des chapitres ne correspond pas obligatoirement à la séquence d'assemblage.
Tous les chapitres ne s'appliquent pas à chaque composant.
Structure et utilisation :
●
Sélectionner le pictogramme pour le composant correspondant indiqué à la page du titre
●
Vous voyez dans les chapitres les pictogrammes auxquels s'appliquent l'étape d'assemblage
●
Le montage commence avec le montage de l'installation, de la machine ou au mur et le chapitre correspondant
Aufbau und Gebrauch der Anleitung/ Indication and Use of the instructions /
Structure et utilisation des instructions

Seite 5 von 27
0800000892_01 / Stand: 1/ Ausgabedatum: 06.11.2018BERNSTEIN AG . Hans-Bernstein-Straße 1 . 32457 Porta Westfalica . www.bernstein.eu
Do not reach into the tubes
The excessive crushing, stretching and bending of power lines has to be avoided.
The power line system has to be checked for abrasion points regularly.
Mounting or the electrical connection of the power line system must be carried out by a qualified electrician.
Do not damage seals during installation as otherwise the technical characteristics cannot be complied with.
When using panel coupling components, always ensure that the stability of the mounting surface is suitable
for mounting.
The coupling components are designed for mounting centrally on the control enclosure.
Off-center installation is not permitted.
The tightening torques of the screw connections should be inspected on a regular basis.
Attention
Attention
Attention
Attention
Attention
Attention
Attention
Attention
Ne pas mettre les mains dans les tubes
Evitez de tendre et plier les câbles de distribution électrique
Vérifier l’absence d’abrasion des câbles d’alimentation
Le montage et le raccordement des câbles d’alimentation doit être effectué par du personnel qualifié
Les joints ne doivent pas en aucun cas être blessés lors du montage; à défaut, les caractéristiques techniques
indiquées ne peuvent plus être respectées
Dans le cadre de l'utilisation des composants de couplage de panneau, il faut veiller à ce que la stabilité de la surface
de montage soit adaptée pour le montage
Les composants de couplage doivent être montés de façon centrée sur le pupitre de commande.
Un montage excentré n'est pas permis
Le couple de serrage des éléments vissés doivent être contrôlés régulièrement
Attention
Attention
Attention
Attention
Attention
Attention
Attention
Attention
Werkstoff / Material / Matière:
Komponenten / Components / Composants GD-Al
Dichtungen / Seals / Joints CR (Neoprene / néoprène ) / NBR
Kunststoff / Plastic / Plastique POM
Schutzart / Protection class / Degré de protection IP 65
Mechanische Daten / Mechanical Data / Caractéristiques techniques

0 N
10
0 N
20
0 N
30
0 N
40
0 N
50
0 N
60
0 N
70
0 N
80
0 N
900 N
0 m 0,5 m1 m 1,5 m
100
70
4xM8/ 9
130
80
65
95
4xM8/ 9
50
100
4xM8/ 9
100
70
4xM8/ 9
130
80
65
95
4xM8/ 9
50
100
4xM8/ 9
100
70
4xM8/ 9
130
80
65
95
4xM8/ 9
50
100
4xM8/ 9
100
70
4xM8/ 9
130
80
65
95
4xM8/ 9
50
100
4xM8/ 9
100
70
4xM8/ 9
130
80
65
95
4xM8/ 9
50
100
4xM8/ 9
100
70
4xM8/ 9
130
80
65
95
4xM8/ 9
50
100
4xM8/ 9
Seite 6 von 27
0800000892_01 / Stand: 1 / Ausgabedatum: 06.11.2018BERNSTEIN AG . Hans-Bernstein-Straße 1 . 32457 Porta Westfalica . www.bernstein.eu
Belastungsdiagramm für statische Belastung / Load diagram for static load capacity /
Diagramme de charge pour charge statique
Systembelastung /
System load /
Charge système
ohne Zwischengelenk /
without intermediate joint
sans articulation intermédiaire
Achtung: Befestigungsfläche muss plan und eben sein.
Bei nicht beachten, kann es zu Problemen der Belastbarkeit, Justage und
Schutzart im Gesamtsystem führen. /
Caution: The mounting surface must be smooth and flat.
If not avoided, it is possible that problems of load,
adjustment and protection class arise.
Attention : La face de fixation doit être plat et régulier.
Au cas de non-respect des instructions, des problèmes de charge, d'ajustage et
de degré de protection dans l'ensemble peuvent se produire.
mit Zwischengelenk /
including intermediate joint /
avec articulation intermédiaire
Auslegerlänge /
Length of the extension arm /
Longueur du bras
Montage und Justage / Installation and adjustment / Montage et ajustage
Befestigung an Anlage bzw. Maschine / Mounting to plant or machine /
Fixation à l'installation ou à la machine
1.
2.
3.
4.
5.
6.

.
6
5
5
1
2
3
4
1
2
3
4
6
.
6
5
5
1
2
3
4
1
2
3
4
6
.
6
5
5
1
2
3
4
1
2
3
4
6
.
6
5
5
1
2
3
4
1
2
3
4
6
Seite 7 von 27
0800000892_01 / Stand: 1/ Ausgabedatum: 06.11.2018BERNSTEIN AG . Hans-Bernstein-Straße 1 . 32457 Porta Westfalica . www.bernstein.eu
Hinweis: Montage wird beispielhaft mit der
Komponente „Wandgelenk S“ dargestellt.
Indication: Mounting of the component
“wall joint S” is illustrated below. /
Indication : Le montage est présenté à titre exemple en
utilisant le composant « articulation murale S ».
●
Dichtung
glatt anpressen /
●
Press the seal
smoothly /
●
Presser légèrement
le joint
●
Schrauben 1 – 6 in
Tragrohr bündig bis zur
jeweiligen inneren Fläche
einschrauben
●
Rohr auf Komponente
aufschieben /
●
Fit the screw 1 – 6 into
the support tube until
it is flush to the inner
surface
●
Push the tube onto the
component /
●
Visser les vis 1 – 6 dans le
tube porteur jusqu'à ce
qu'il soit de niveau avec
la face respective
●
Faire glisser le tube sur le
composant
●
Schraube 1 – 2 bis zu
einem spürbaren
Widerstand einschrauben
(Sollte die Dichtung sich
nicht sichtbar stauchen,
das Rohr etwas weiter auf
die Komponente drücken)
●
Schraube 5 – 6 einschrau-
ben und mit Wasserwaage
Tragrohrausrichtung in der
Senkrechten kontrollieren
(siehe Rohrjustage, Seite 8)
●
Schraube 1 – 6 mit 30 Nm
anziehen
Rohrmontage vertikal / Tube mounting vertically /Montage vertical du tube
2.
1.
3.
●
Fit the screw 1 – 2 until a
noticeable resistance
(Should the seal not be
crushed visibly, press
the tube further on the
component)
●
Fit the screw 5 – 6 and
check the vertical support
tube alignment with
a spirit level (see page 8,
Tube adjustment)
●
Tighten the screw 1 – 6
with 30 Nm
●
Visser les vis 1 – 2 jusqu'à
ce que vous ressentiez une
resistance notable
(Si le joint ne se plie pas
visiblement,
faire glisser le tube sur le
composant de nouveau)
●
Visser les vis 5 – 6 et et
contrôler l'alignement
vertical du tube porteur
avec un niveau à bulle
(voir Ajustage du tube,
page 8)
●
Serrer les vis 1 – 6 avec
30 Nm
1.
2.
3.
4.
5.
6.

1
6
5
6
5
4
3
2
1
2
4
3
1
6
5
6
5
4
3
2
1
2
4
3
1
6
5
6
5
4
3
2
1
2
4
3
1
6
5
6
5
4
3
2
1
2
4
3
Seite 8 von 27
0800000892_01 / Stand: 1 / Ausgabedatum: 06.11.2018BERNSTEIN AG . Hans-Bernstein-Straße 1 . 32457 Porta Westfalica . www.bernstein.eu
Rohrmontage horizontal / Tube mounting horizontally / Montage horizontal du tube
2.
1.
3.
Hinweis: Montage wird beispielhaft mit der
Komponente „Wandgelenk W“ dargestellt.
Indication: Mounting of the component
“wall joint W” is illustrated below. /
Indication : Le montage est présenté à titre exemple en
utilisant le composant « Articulation murale W ».
●
Dichtung
glatt anpressen /
●
Press the seal
smoothly /
●
Presser légèrement
le joint
●
Schrauben 1 – 6 in
Tragrohr bündig bis zur
jeweiligen inneren Fläche
einschrauben
●
Rohr auf Komponente
aufschieben /
●
Fit the screw 1 – 6 into
the support tube until
it is flush to the inner
surface
●
Push the tube onto the
component /
●
Visser les vis 1 – 6 dans le
tube porteur jusqu'à ce
qu'il soit de niveau avec
la face respective
●
Faire glisser le tube sur le
composant
●
Schraube 1 – 2 bis zu
einem spürbaren
Widerstand einschrauben
(Sollte die Dichtung sich
nicht sichtbar stauchen,
das Rohr etwas weiter auf
die Komponente drücken)
●
Schraube 5 – 6 einschrau-
ben und mit Wasserwaage
Tragrohrausrichtung in der
Waagerechten kontrollieren
(siehe Rohrjustage, Seite 9)
●
Schraube 1 – 6 mit 30
Nm anziehen
●
Fit the screw 1 – 2 until a
noticeable resistance
(Should the seal not be
crushed visibly, press
the tube further on the
component)
●
Fit the screw 5 – 6 and
check the horizontal sup-
port tube alignment with
a spirit level (see page 9,
Tube adjustment)
●
Tighten the screw 1 – 6
with 30 Nm
●
Visser les vis 1 – 2 jusqu'à ce que
vous ressentiez une resistance
notable
(Si le joint ne se plie pas
visiblement,
faire glisser le tube sur le
composant
de nouveau)
●
Visser les vis 5 – 6 et et contrôler
l'alignement horizontal du tube
porteur avec un niveau à bulle
(voir Ajustage du tube,
page 9)
●
Serrer les vis 1 – 6 avec 30 Nm
1.
2.
3.
4.
5.
6.

1
2 3
4
1
2 3
4
1
2
3
4
6
5
1
2
3
4
6
5
6
6
5
5
1
2 3
4
1
2 3
4
1
2
3
4
6
5
1
2
3
4
6
5
6
6
5
5
Seite 9 von 27
0800000892_01 / Stand: 1/ Ausgabedatum: 06.11.2018BERNSTEIN AG . Hans-Bernstein-Straße 1 . 32457 Porta Westfalica . www.bernstein.eu
Rohrjustage vertikal (auch nachträglich)
Vertical tube adjustment (also possible later)
Ajustage vertical du tube (possible après montage)
Hinweis: Justage wird
beispielhaft mit der
Komponente „Wandgelenk S“
dargestellt. /
Indication: Adjustment of the component
“wall joint S” is illustrated
below. /
Indication : L'ajustage est présenté à
titre exemple en utilisant le
composant
« Articulation murale S ».
nach links auslenken /
Left adjustment /
Ajustement gauche
nach rechts auslenken /
Right adjustment /
Ajustement droit
●
Schraube 3 – 6 lösen
●
Schraube 5 – 6 anziehen bis zur
gewünschten Ausrichtung
●
Schraube 3 – 6 mit 30 Nm festziehen /
●
Loosen the screw 3 – 6
●
Tighten the screw 5 – 6 until the
desired position is reached
●
Tighten the screw 3 – 6 with 30 Nm
●
Desserrer les vis 3 – 6
●
Serrer les vis 5 – 6 jusqu'à l'alignement
souhaité
●
Serrer les vis 3 – 6 avec 30 Nm
●
Schraube 3 – 6 lösen
●
Schraube 3 – 4 anziehen bis zur
gewünschten Ausrichtung
●
Schraube 3 – 6 mit 30 Nm festziehen /
●
Loosen the screw 3 – 6
●
Tighten the screw 3 – 4 until the
desired position is reached
●
Tighten the screw 3 – 6 with 30 Nm
●
Desserrer les vis 3 – 6
●
Serrer les vis 3 – 4 jusqu'à
l'alignement souhaité
●
Serrer les vis 3 – 6 avec 30 Nm
1.
2.
3.
4.
5.
6.

1
2 3
4
1
2 3
4
1
2
3
4
6
5
1
2
3
4
6
5
6
6
5
5
1
2 3
4
1
2 3
4
1
2
3
4
6
5
1
2
3
4
6
5
6
6
5
5
1
2 3
4
1
2 3
4
1
2
3
4
6
5
1
2
3
4
6
5
6
6
5
5
Seite 10 von 27
0800000892_01 / Stand: 1 / Ausgabedatum: 06.11.2018BERNSTEIN AG . Hans-Bernstein-Straße 1 . 32457 Porta Westfalica . www.bernstein.eu
Rohrjustage horizontal (auch nachträglich)/
Horizontal tube adjustment (also possible later) /
Ajustage horizontal du tube (possible après montage)
nach oben auslenken /
Upward adjustment /
Ajustement à la hausse
nach unten auslenken /
Downward adjustment /
Ajustement à la baisse
●
Schraube 3 – 6 lösen
●
Schraube 5 – 6 anziehen bis zur
gewünschten Ausrichtung
●
Schraube 3 – 6 mit 30 Nm festziehen /
●
Loosen the screw 3 – 6
●
Tighten the screw 5 – 6 until the
desired position is reached
●
Tighten the screw 3 – 6 with 30 Nm
●
Desserrer les vis 3 – 6
●
Serrer les vis 5 – 6 jusqu'à l'alignement
souhaité
●
Serrer les vis 3 – 6 avec 30 Nm
Hinweis: Justage wird beispielhaft mit der
Komponente „Wandgelenk W“
dargestellt. /
Indication: Adjustment of the component
“wall joint W” is illustrated below. /
Indication : L'ajustage est présenté à
titre exemple en utilisant
le composant
« Articulation murale W »
●
Schraube 3 – 6 lösen
●
Schraube 3 – 4 anziehen bis zur
gewünschten Ausrichtung
●
Schraube 3 – 6 mit 30 Nm festziehen /
●
Loosen the screw 3 – 6
●
Tighten the screw 3 – 4 until the
desired position is reached
●
Tighten the screw 3 – 6 with 30 Nm
●
Desserrer les vis
●
Serrer les vis 3 – 4 jusqu'à l'alignement
souhaité
●
Serrer les vis 3 – 6 avec 30 Nm
1.
2.
3.
4.
5.
6.

50
100
95
60
40
60
104
24
90
30
50
100
95
60
40
60
104
24
90
30
50
100
95
60
40
60
104
24
90
30
12 x M6 / Ø 6.5
50
100
95
60
40
60
104
24
90
30
50
100
95
60
40
60
104
24
90
30
Seite 11 von 27
0800000892_01 / Stand: 1/ Ausgabedatum: 06.11.2018BERNSTEIN AG . Hans-Bernstein-Straße 1 . 32457 Porta Westfalica . www.bernstein.eu
Befestigung am Gehäuse / Mounting to enclosure / Fixation au boîtier
●
Dichtungen glatt anpressen
●
Rohrmontage siehe Seite 6 und 7
●
Rohrjustage siehe Seite 8 und 9
●
Gehäuse unter die Kupplung heben (abstützen
erforderlich)
●
Sicherungsscheiben auf die Schrauben stecken
●
Schrauben durch das Horizentalprofil in
Kupplung einschrauben und mit 6 Nm
festziehen
Mindestens 4 Verschraubungs-
punkte verwenden:
- 100 x 60 oder
- 95 x 40 oder
- 60 x 60
Teildarstellung
des Steuergehäuses /
Partial representation of the control
enclosure /
Représentation
partielle du pupitre
de commande
1.
2.
4x M6 x 16
Anzugsmoment 6 Nm /
4x M6 x 16
Tightening torque 6 Nm /
4x M6 x 16
Couple de serrage 6 Nm
Befestigung am Steuergehäuse mittels Kupplung oder Winkelkupplung /
Mounting to control enclosure by using coupling or elbow coupling /
Fixation au pupitre de commande à l'aide d'un couplage ou couplage angulaire
Hinweis: Befestigung wird
beispielhaft mit Komponente
„Kupplung“ dargestellt /
Indication: Mounting of the
component “coupling” is
illustrated below
Indication : La fixation est
présenté à titre exemple
en utilisant le composant «
Couplage »
●
Press the seal smoothly
●
Tube mounting see page 6 and 7
●
Tube adjustment see page 8 and 9
●
Presser légèrement les joints
●
Montage du tube voir page 6 et 7
●
Ajustage du tube voir page 8 et 9
At least 4 bolting points must be used:
- 100 x 60 or
- 95 x 40 or
- 60 x 60
Au moins 4 pint de vissage
doit être utilisés :
- 100 x 60 ou
- 95 x 40 ou
- 60 x 60
●
Soulever le boîtier sous
le couplage
(support nécessaire)
●
Fixer les rondelles sur les vis
●
Faire passer les vis à traver le profilé horizontal
dans le couplage et serrer les avec 6 Nm
●
Lift the enclosure
under the coupling (support necessary)
●
Attach the lock washers
to the screws
●
Fit the screws through
the horizontal section into the coupling and
tighten them with 6 Nm
1.
2.
3.
4.
5.
6.

Dreh-/Neigungskupplung W / Turn/tilt coupling W / Couplage incliné W pour
Dreh-/Neigungskupplung S / Turn/tilt coupling S / Couplage incliné S pour
1
2 3
4
1
2 3
4
1
2
3
4
6
5
1
2
3
4
6
5
6
6
5
5
1
2 3
4
1
2 3
4
1
2
3
4
6
5
1
2
3
4
6
5
6
6
5
5
Seite 12 von 27
0800000892_01 / Stand: 1 / Ausgabedatum: 06.11.2018BERNSTEIN AG . Hans-Bernstein-Straße 1 . 32457 Porta Westfalica . www.bernstein.eu
1.
2.
3.
4.
5.
6.
1.
2.
3.
4.
5.
6.

50
100
95
60
40
60
104
24
90
30
50
100
95
60
40
60
104
24
90
30
50
100
95
60
40
60
104
24
90
30
50
100
95
60
40
60
104
24
90
30
50
100
95
60
40
60
104
24
90
30
4 x M6 / Ø 6.5
50
100
95
60
40
60
104
24
90
30
50
100
95
60
40
60
104
24
90
30
Seite 13 von 27
0800000892_01 / Stand: 1/ Ausgabedatum: 06.11.2018BERNSTEIN AG . Hans-Bernstein-Straße 1 . 32457 Porta Westfalica . www.bernstein.eu
Nur in Verbindung mit Kupplungen zu
verwenden. /
Only use in conjuction with couplings. /
A utiliser uniquement en association
avec des couplages.
●
Dichtung auf Adapterunterseite
kleben
●
Adapter mit Sicherungsscheiben
und Schrauben an Kupplung
montieren
1.
2.
●
Gehäuse unter die Kupplung heben (abstützen erforderlich)
●
Sicherungsscheiben auf die Schrauben stecken
●
Schrauben durch das Horizontalprofil in Kupplung
einschrauben und mit 6 Nm festziehen
4x M6 x 16
Anzugsmoment 6 Nm /
4x M6 x 16
Tightening torque 6 Nm /
4x M6 x 16
Couple de serrage 6 Nm
Befestigung am Steuergehäuse mittels Adapter (schmale Profile) /
Mounting to control enclosure by using adapter (narrow sections) /
Fixation au pupitre de commande à l'aide d'unadaptateur (profils étroits)
Teildarstellung
des Steuergehäuses /
Partial representation of the
control enclosure /
Représentation
partielle du pupitre
de commande
●
Adhere the seal to the
underside of the adapter
●
Mount the adapter with lock
washers and screws
to the coupling
●
Coller le joint sur le dessous de
l'adaptateur
●
Monter l'adaptateur au
couplage en utilisant les
rondelles et les vis
4x M6 x 16
Anzugsmoment 6 Nm /
4x M6 x 16
Tightening torque 6 Nm /
4x M6 x 16
Couple de serrage 6 Nm
●
Lift the enclosure under the coupling (support necessary)
●
Attach the lock washers to the screws
●
Fit the screws through the horizontal section into the
coupling and tighten them with 6 Nm
●
Soulever le boîtier sous le couplage (support nécessaire)
●
Fixer les rondelles sur les vis
●
Faire passer les vis à traver le profilé horizontal dans le
couplage et serrer les avec 6 Nm
1.
2.
3.
4.
5.
6.

4xM6x20
SW4
Seite 14 von 27
0800000892_01 / Stand: 1 / Ausgabedatum: 06.11.2018BERNSTEIN AG . Hans-Bernstein-Straße 1 . 32457 Porta Westfalica . www.bernstein.eu
Befestigung am Steuergehäuse mittels Adapterplatte VESA 75/100 /
Mounting to control enclosure by using adapter plate VESA 75/100) /
Fixation au pupitre de commande à l'aide d'un avec plaque d’adaptateur VESA 75/100
1.
2.
3.
4.
5.
6.

60
75
100
60
75
100
Seite 15 von 27
0800000892_01 / Stand: 1/ Ausgabedatum: 06.11.2018BERNSTEIN AG . Hans-Bernstein-Straße 1 . 32457 Porta Westfalica . www.bernstein.eu
Befestigung am Steuergehäuse mittels Panelkupplung/
Mounting to control enclosure by using panel coupling /
Fixation au pupitre de commande à l'aide d'un couplage de panneaux
8 x M5 / Ø 5.5
Mindestens 4 Verschraubungspunkte
verwenden:
- 100 x 100 oder
- 75 x 75
●
Panelkupplung mit Sicherungsscheiben
und Schrauben am Gehäuse montieren
Bei der Verwendung der Panelkupplungskomponenten ist darauf zu achten,
dass die Stabilität der Montagefläche für die Montage geeignet ist.
Vorsicht
Klemmhebel einschrauben / Screwing the clamping lever / Visser le levier de serrage
Bremsstab /
Look Actuator /
Tige de frein
●
Bremsstab in Gewindebohrung einsetzen
●
Klemmhebel einschrauben
Bremsstab /
Look Actuator /
Tige de frein
Hinweis: Befestigung wird beispielhaft
mit der Komponente
„Panelkupplung W“
dargestellt /
Indication: Mounting of the component
“Panel coupling W”
is illustrated below /
Indication : La fixation est présenté à
titre exemple en utilisant le
composant
« Couplage de panneaux W »
●
Insert the Lock Actuator in the threaded bore
●
Screw the clampling lever
●
Mettre la tige de frein dans le perçage taraudé
●
Visser le levier de serrage
When using panel coupling components, always ensure that the stability of the
mounting surface is suitable for mounting.
Attention
Lors de l'utilisation des composants de panneaux, il faut tenir compte que la stabilité de la surface de montage
convient au montage.
Attention
At least 4 bolting points must be used:
- 100 x 100 or
- 75 x 75
Au moins 4 pint de vissage doit être utilisés :
- 100 x 100 ou
- 75 x 75
●
Mount the panel coupling with lock
washers and screws
●
Monter le couplage de panneaux au
boîtier en utilisant les rondelles et les vis
1.
2.
3.
4.
5.
6.

1
2 3
4
1
2 3
4
1
2
3
4
6
5
1
2
3
4
6
5
6
6
5
5
1
2 3
4
1
2 3
4
1
2
3
4
6
5
1
2
3
4
6
5
6
6
5
5
Seite 16 von 27
0800000892_01 / Stand: 1 / Ausgabedatum: 06.11.2018BERNSTEIN AG . Hans-Bernstein-Straße 1 . 32457 Porta Westfalica . www.bernstein.eu
●
Klemmhebel dosiert einschrauben, um Schwergängigkeit
zu erhöhen
●
Klemmhebel lösen, um die Schwergängigkeit zu verringern
●
Eine Grundschwergängigkeit ist konstruktionsbedingt
vorhanden
●
Einstellschraube dosiert einschrauben, um Schwergängigkeit
zu erhöhen
●
Einstellschraube lösen, um die Schwergängigkeit zu verringern
●
Eine Grundschwergängigkeit ist konstruktionsbedingt
vorhanden
Veränderung der Schwergängigkeit / Modification of firmness /
Réglage de précision du fonctionnement
Einstellschraube M6 /
Adjustment screw M6 /
La vis de réglage M6
●
Adjust the clamping lever to increase or decrease resistance
●
Factory preset to optimum torque setting
●
Adjust screw to increase or decrease resistance
●
Factory preset to optimum torque setting
●
Visser le levier pour augmenter la résistance de la rotation
●
Desserrer le levier pour diminuer la résistance de la rotation
●
Une résistance est toujours présente de par la conception
●
Visser la vis de réglage avec modération pour accroître la
butée d'arrêt
●
Desserrer la vis de réglage pour diminuer la butée d'arrêt
●
Une butée d'arrêt de base existe de par la construction

Abb. 1
Abb. 2
Abb. 3
Seite 17 von 27
0800000892_01 / Stand: 1/ Ausgabedatum: 06.11.2018BERNSTEIN AG . Hans-Bernstein-Straße 1 . 32457 Porta Westfalica . www.bernstein.eu
Grundeinstellung der Schwergängigkeit (M) / Attitude of the tightness of torque (M) /
Réglage du moment de force (M)
Achtung!
Die Einstellung darf nur im ausgebautem Zustand der Komponenten durchgeführt werden. Es ist darauf zu achten, dass
die Komponente nach fixieren der Gewindehülse kein Spiel aufweisen und die Gleitlager plan aufliegen.
Sollte die Schwergänigkeit im komplett aufgebautem Zustand durchgeführt werden, übernimmt BERNSTEIN AG keine
Haftung für Bruch-, Personenschäden oder herunterfallen des Systems.
Attention!
The adjustment must be carried out in the not installed condition of the components. It is important to ensure that
the component may have no bearing clearance and the plain bearings rest plan after fixing the threaded sleeve. If the
resistance is accomplished in completely installed condition, accepts BERNSTEIN AG no liability for breakage, personal
injury or fall of the system.
Attention!
Attention ! Le réglage doit être effectué sur le composant démonté. Il importe de voir à ce que le composant ne bouge
plus et que les paliers lisses soient reposés de manière plane une fois que la douille taraudée a été fixée. Si la résistance
est réalisée à l'état complètement monté, BERNSTEIN AG décline toute responsabilité pour dommages de casse et
personnels ou pour chute du système.
5
3
5
2
4
-
+
2
Deckel abschrauben, falls nötig./
Unscrew the cover if necessary. /
Dévisser le couvercle, si nécessaire.
Gewindestift (e) M4 herausdrehen. (Abb.1)/
Unscrew the threaded pin (s) M4 (Abb.1)./
Dévisser la tige (s) taraudée (s) M4 (Abb.1).
Mit Werkzeug Art-Nr. 980 5422 000
Gewindemutter lösen. (Abb.2)
max. 1 Umdrehung gegen den
Uhrzeigersinn/
Loosen threaded nut with tool item no.
980 5422 000. (Abb. 2) max. 1 revolution
anticlockwise./
Desserrer l'écrou taraudé à l'aide de réf.
9805422000. (Abb. 2) un tour maximum en sens
anti- horaire.
Gewünschtes Schwenkmoment durch
Festziehen der Gewindemutter einstellen
(Abb.2). /
Set the desired swing torque by
tightening the threaded nut (Abb.2)./
Régler le couple de rotation souhaité
par serrage de l'écrou taraudé (Abb.2).
Gewindestift M4 bis zum Grund
einschrauben (Abb.3). /
Screw the threaded pin M4 as far as the stop
(Abb.3). /
Visser la tige taraudée jusqu'à ce qu'elle soit
bloquée (Abb.3).
Deckel montieren, falls nötig. /
Mount the cover if necessary. /
Monter le couvercle, si nécessaire.
1.
2.
3.
4.
5.
6.
1.
2.
3.
4.
5.
6.
1.
2.
3.
4.
5.
6.
1.
2.
3.
4.
5.
6.
1.
2.
3.
4.
5.
6.
1.
2.
3.
4.
5.
6.
SW 2
Vorsicht
Attention
Attention

1
2 3
4
1
2 3
4
1
2
3
4
6
5
1
2
3
4
6
5
6
6
5
5
Seite 18 von 27
0800000892_01 / Stand: 1 / Ausgabedatum: 06.11.2018BERNSTEIN AG . Hans-Bernstein-Straße 1 . 32457 Porta Westfalica . www.bernstein.eu
Grundeinstellung der Schwergängigkeit (M) und der Neigungswinkelbegrenzung /
Attitude of the tightness of torque (M) and the tilt angle limitation /
Réglage du moment de force (M) et la limitation de l'angle d'inclinaison
Drehneigungskupplung /
Turn / tilt coupling /
Couplage rotatif à inclinaison réglable
Deckel abschrauben Pos.1/ Pos.5 /
Deckel montieren Pos. 9 / Pos.13/
Unscrew the cover Pos.1/ Pos.5 /
Mount the cover Pos. 9 / Pos.13/
Dévisser le couvercle Pos.1/ Pos.5 /
Monter le couvercle Pos. 9 / Pos.13/
Neigungswinkelbegrenzung abschrauben Pos.2 /
Neigungswinkelbegrenzung montieren Pos. 11 /
Unscrew the tilt angle limiter Pos.2 /
Mount the tilt angle limiter Pos. 11 /
Dévisser le limiteur d'angle d'inclinaison Pos.2 /
Monter le limiteur d'angle d'inclinaison Pos. 11 /
Gewindestifte M4 herausdrehen Pos. 3 / Pos. 6 /
Gewindestift M4 einschrauben Pos.8/ Pos. 10 /
Unscrew the threaded pin M4 Pos. 3 / Pos. 6 /
Screw the threaded pin M4 Pos.8/ Pos. 10 /
Dévisser la tige taraudée M4 Pos. 3 / Pos. 6 /
Visser la tige taraudée jusqu'à Pos.8/ Pos. 10
Mit Werkzeug Art-Nr. 980 5422 000
Gewindemutter lösen. Pos. 4 / Pos.7
max. 1 Umdrehung gegen den
Uhrzeigersinn. Gewünschtes Neigungsmoment
Pos. 4 / Schwenkmoment Pos. 7 durch
Festziehen der Gewindehülse einstellen/
Loosen threaded nut with tool item
no. 980 5422 000. Pos. 4 / Pos. 7 max. 1
revolution anticlockwise. Set the desired
inclination moment Pos.4 / swing torque Pos.7 by
tightening the threaded sleeve /
Desserrer l'écrou taraudé à l'aide de
réf. 9805422000. Pos.4 / Pos. 7 un tour
maximum en sens anti- horaire.Régler le Moment
de pente Pos.4 /couple de rotation Pos.7 souhaité
par serrage de la douille taraudée.
Einsetzbeispiele für Neigungswinkelbegrenzung /
Application examples for tilt angle limiter /
Exemples d'application pour la limitation de l'angle
d'inclinaison
15°
15°
(90°)
15°
(75°)
Hinweis: Die Grundeinstellung wird beispielhaft mit der Komponente DNK S dargestellt. /
Indication: The attitude is illustrated using the component DNK S as an example. /
Indication: Le réglage de base est illustré à l'aide de l'exemple du composant DNK S.

Seite 19 von 27
0800000892_01 / Stand: 1/ Ausgabedatum: 06.11.2018BERNSTEIN AG . Hans-Bernstein-Straße 1 . 32457 Porta Westfalica . www.bernstein.eu
Gelenkkappe Montage und Demontage / Joint cap mounting and dismounting /
Montage et démontage du cache d'articulation
Hinweis: Montage und Demontage wird
beispielhaft mit der Komponente
„Winkelkupplung“ dargestellt /
Indication: Mounting and dismounting of
the component
“elbow coupling” is illustrated
below /
Indication : Le montage et démontage
est présenté à titre exemple en
utilisant le composant
« Couplage angulaire »
Hinweis: Montage und Demontage wird
beispielhaft mit der Komponente
„Winkel“ dargestellt /
Indication: Mounting and dismounting of the
component
“elbow ” is illustrated below /
Indication : Le montage et le démontage
est présenté à titre exemple en
utilisant le composant « Coude ».
2x M5 x 20
SW 4
Anzugsmoment 2 Nm /
2x M5 x 20
SW 4
Tightening torque 2 Nm /
2x M5 x 20
SW 4
Couple de serrage 2 Nm
●
Kappe mit der Lasche an der
Komponente einhaken und auf die
Komponente drücken
●
Schrauben mit 2 Nm festziehen
2x M5 x 20
SW 4
Anzugsmoment 2 Nm /
2x M5 x 20
SW 4
Tightening torque 2 Nm /
2x M5 x 20
SW 4
Couple de serrage
2 Nm
●
Hook the cap to the
component and press
clamp into place
●
Tighten the screw with 2 Nm
●
Poser le cache sur le
composant et accrocher la
languette en pressant
●
Serrer au couple 2 Nm

3
0
°
n
x
3
0
°
=
150°
3
0
°
30°
3
0
°
n
x
3
0
°
=
150°
3
0
°
30°
3
0
°
n
x
3
0
°
=
150°
3
0
°
30°
3
0
°
n
x
3
0
°
=
150°
3
0
°
30°
3
0
°
n
x
3
0
°
=
150°
3
0
°
30°
3
0
°
n
x
3
0
°
=
150°
3
0
°
30°
Seite 20 von 27
0800000892_01 / Stand: 1 / Ausgabedatum: 06.11.2018BERNSTEIN AG . Hans-Bernstein-Straße 1 . 32457 Porta Westfalica . www.bernstein.eu
Entfernen der Schwenkbegrenzung ist mit Hilfsmitteln (z. B. Draht) nachträglich möglich /
Once fitted the swivel angle limiters can removed at any time /
Les limiteurs d'angle d'ouverture peuvent être enlevés ultérieurement avec des moyens auxiliaires (p. ex. avec un fil)
Artikel-Nr. / Article number / N
o
Article Typbezeichnung / Type / Désignation
9806906000 Schwenkwinkelbegrenzung / Swivel angle limiter / Limiteur d’angle d’ouverture
Hinweis: Montage der Schwenkwinkelbegrenzung wird beispielhaft mit der Komponente „Kupplung“ dargestellt. /
Indication: Mounting of the swivel angle limiter is illustrated below by the component “coupling”. /
Indication : Le montage du limiteur d'angle d'ouverture est présenté à titre exemple en utilisant le composant
« Couplage ».
●
Verschlusskappe demontieren
●
Um den Schwenkwinkel
nach links zu begrenzen,
Unterteil Kupplung nach
rechts drehen
●
Um den Schwenkwinkel
nach rechts zu
begrenzen,
Unterteil der Kupplung
nach links drehen
●
Ist die gewünschte
Begrenzung
eingestellt,
Verschlusskappe
wieder montieren
●
Anschlagstein
einsetzen
2b.2a.
1.
4.3.
Zubehör / Accessories / Accessoires
●
Dismounting of the dust cap
●
Démontage du bouchon anti-poussière
●
In order to limit the
swivel angle to the left,
turn the buttom of the
coupling to the right
●
Afin de limiter l'angle
d'ouverture à gauche,
tourner la base du
couplage à droite
●
In order to limit the
swivel angle to the right,
turn the bottom of the
coupling to the left
●
Afin de limiter l'angle
d'ouverture à droite,
tourner la base du
couplage à gauche
●
Insert swivel angle
limiter
●
Insérer le
limiteur d'angle
d'ouverture
●
If the desired
limitation is set, the
dust cap must again
be fitted
●
Si la limitation
souhaitée est réglée,
remettre le bouchon
anti-poussière
/