Electrolux AOFP102U User manual

Type
User manual
PART NO. 595R 05100
VERSION 1 2007.06
INSTALLATION, OPERATING AND MAINTENANCE INSTRUCTIONS
ISTRUZIONI DI INSTALLAZIONE, FUNZIONAMENTO E MANUTENZIONE
INSTRUCTIONS D'INSTALLATION, D'UTILISATION ET DE MAINTENANCE
INSTRUCCIONES DE INSTALACIÓN, USO Y MANTENIMIENTO
BCF 30KG 6 GN1/1 LW (240/3/60Hz) AOFP061U4 AOFP061TU4
BCF 50KG 10 GN1/1 LW (240/3/60Hz) AOFP101U4
BCF 100KG 20 GN1/1 LW (240/3/60Hz) AOFP201RU4 REMOTE
BCF 70KG 10 GN2/1 LW (240/3/60Hz) AOFP102U4
BCF 180KG 20 GN2/1 LW (240/3/60Hz) AOFP202RU4 REMOTE
BCF 30KG 6 GN1/1 LW (208/3/60Hz) AOFP061U, AOFP061TU
BCF 50KG 10 GN1/1 LW (208/3/60Hz) AOFP101U
BCF 100KG 20 GN1/1 LW (208/3/60Hz) AOFP201RU REMOTE
BCF 70KG 10 GN2/1 LW (208/3/60Hz) AOFP102U
BCF 180KG 20 GN2/1 LW (208/3/60Hz) AOFP202RU REMOTE
2Fig.1
8
11
20
23
34
15
16
12
25
24
1
31
2
4
3
5
6
7
9
10
17
18
19
13 14
22
21
26
27
28
30
29
CONTROL PANEL
PANNELLO COMANDI PANNEAU DE COMMANDE
PANEL DE CONTROL
33
32
34
3
USA
1 - ON/OFF switch
2 - “START / STOP" (cycle start / stop) button
3 - “CRUISE CHILLING” button- automatic cycle
(cycle start / stop)
4 - “SOFT chilling cycle” indicator light
5 - “HARD chilling cycle” indicator light
6 - “COOLER" (POSITIVE maintenance cycle)” indicator light
7 - “FREEZING chilling cycle” indicator light
8 - “FREEZER" (NEGATIVE maintenance cycle) indicator light
9 - “Programme selection "turbo cooling, P1 or P2” button
10 - “Turbo cooling” indicator light
11 - “Programme 1” indicator light
12 - “Programme 2” indicator light
13 - "Temperature" button
14 - Temperature display
15 - “Chamber probe temperature” indicator light
16 - “Core probe temperature” indicator light
17 - “HACCP alarm” indicator light
18 - “Service alarms” indicator light
19 - "Electrolux Food Safe Mode 1" indicator light
20 - "Electrolux Food Safe Mode 2" indicator light
21 - "U.S.Standard" indicator light (personalized)
22 - “Time” button
23 - Time display
24 - “Remaining time estimate” indicator light
25 - “Time” (timed cycle) indicator light
26 - “Utility” button
27 - Select “manual defrosting”
28 - Select “core probe temperatures”
29 - Select “UV LAMP" (germicidal cycle)
30 - Select “Standards”
31 - Select “user parameters”
32 - Select “HACCP alarms”
33 - Select “ALARM SERVICE“
34 - “Cycle selection/value modification” button
IT1 - Interruttore ON/OFF
2 - Tasto "START / STOP" (avvio/arresto)
3 - Tasto "CRUISE CHILLING" - CICLO AUTOMATICO
(avvio/arresto)
4 - Led "SOFT chilling" (abbattimento leggero)
5 - Led "HARD chilling" (abbattimento intenso)
6 - Led "COOLER" (ciclo mantenimento positivo
REFRIGERATORE)
7 - Led "BLAST FREEZING" (Ciclo abbattimento
CONGELAMENTO)
8 - Led "FREEZER " (Ciclo mantenimento negativo
CONGELATORE)
9 - Tasto "Program Selection TURBO COOLING, P1 o P2"
(Selezione programma TURBO COOLING, P1 o P2)
10 - Led "TURBO COOLING" (TURBO COOLING)
11 - Led "Program 1" (Programma 1)
12 - Led "Program 2" (Programma 2)
13 - Tasto "Temperatura"
14 - Display Temperatura
15 - Led Temperatura spillone cella
16 - Led Temperatura spillone
17 - Led "Allarme HACCP"
18 - Led "Allarme di servizio"
19 - Led "Electrolux Food Safe Mode 1"
20 - Led "Electrolux Food Safe Mode 2"
21 - Led "U.S.Standard" (personalizzato)
22 - Tasto "Tempo"
23 - Display tempo
24 - Led "Stima tempo residuo"
25 - Led "Tempo" (ciclo a tempo)
26 - Tasto "Utilità"
27 - Selezione "MANUAL DEFROST" (Sbrinamento manuale)
28 - Selezione "Temperature spilloni"
29 - Selezione "Lampada UV" (ciclo germicida)
30 - Selezione "Standard"
31 - Selezione "Parametri utente"
32 - Selezione "Allarmi HACCP"
33 - Selezione "ALLARMI DI SERVIZIO"
34 - Tasti "Selezione cicli/ modifica impostazioni"
4
FR
1 - Interrupteur ON/OFF
2 - Touche START / STOP (marche / arrêt du cycle)
3 - Touche “cruise chilling” - cycle automatique
(marche / arrêt du cycle)
4 - Led "SOFT Chilling" (cycle de refroidissement léger)
5 - Led "HARD Chilling" (cycle derefroidissement poussé)
6 - Led "COOLER" (cycle de maintenance POSITIF)
7 - Led "BLAST FREEZING" (cycle de refroidissement de
congélation)
8 - Led "FREEZER" (cycle de maintenance NÉGATIF)
9 - Touche “sélection programme turbo cooling, P1 ou P2”
10 - Led “turbo cooling”
11 - Led "programme 1"
12 - Led "programme 2"
13 - Touche “température”
14 - Afficheur température
15 - Led “température du compartiment”
16 - Led “température sonde à cœur”
17 - Led "allarme HACCP"
18 - Led “alarmes de service”
19 - Led Electrolux Food Safe Mode 1
20 - Led Electrolux Food Safe Mode 2
21 - Led U.S. Standard (personnalisé)
22 - Touche “temps”
23 - Afficheur temps
24 - Led “estimation temps résiduel”
25 - Led “cycle à temps” (durée du cycle minuté)
26 - Touche “utilité”
27 - Sélection “dégivrage manuel”
28 - Sélection “température sondes à cœur”
29 - Sélection “cycle germicide”
30 - Sélection Standards
31 - Sélection “paramètres utilisateur”
32 - Sélection “alarmes HACCP”
33 - Sélection “ALARM SERVICE”
34 - Touches “sélection cycles / modification valeurs”
ES
1 - Interruptor ON/OFF
2 - Botón START/STOP "inicio/parada"
3 - Botón “cruise chilling” - ciclo automático
("inicio/parada")
4 - Indicador luminoso "SOFT chilling"
(ciclo de enfriamiento SUAVE)
5 - Indicador luminoso "HARD chilling"
(ciclo de enfriamiento INTENSO)
6 - Indicador luminoso "COOLER" (cámara frigorífica" -
ciclo de mantenimiento con frío POSITIVO)
7 - Indicador luminoso "BLAST FREEZING"
(ciclo de enfriamiento o congelación)
8 - Indicador luminoso "FREEZER " (congelador -
ciclo de mantenimiento con frío NEGATIVO)
9 - Botón “selección programa turbo cooling, P1 o P2”
10 - Indicador luminoso “turbo cooling”
11 - Indicador luminoso “programa 1”
12 - Indicador luminoso "programa 2"
13 - Botón “temperatura”
14 - Display temperatura
15 - Indicador luminoso "temperatura de sonda de cámara"
16 - Indicador luminoso "temperatura de sonda pincho"
17 - Indicador luminoso “alarme HACCP”
18 - Indicador luminoso “alarmas de servicio”
19 - Indicador luminoso "modo de seguridad alimentaria 1
de Electrolux"
20 - Indicador luminoso "modo de seguridad alimentaria 2
de Electrolux"
21 - Indicador luminoso "norma EE.UU." (personalizado)
22 - Botón “tiempo”
23 - Display tiempo
24 - Indicador luminoso “estimación tiempo remanente”
25 - Indicador luminoso “ciclo por tiempo”
26 - Botón “utilidad”
27 - Selección "MANUAL DEFROST" (descongelación
manual)
28 - Selección "temperaturas de sonda pincho"
29 - Selección "luces germicidas" (ciclo germicida)
30 - Selección “normativas”
31 - Selección “parámetros usuario”
32 - Selección “alarmas HACCP”
33 - Selección "alarma de servicio"
34 - Botones “selección ciclos / modificación valores”
5
USA ............................................. Page 06 - 27
IT ................................................. Pagina 28 - 50
FR ............................................... Page 51 - 73
ES ............................................... Página 74 - 96
6
SAFETY INSTRUCTIONS......................................................... Page 9
A.1 GENERAL INFORMATION........................................................ Page 10
A.1.1 Foreword ..................................................................................................................... Page 10
A.1.2 Intended use and limitations ...................................................................................... Page 10
A.1.3 Testing ......................................................................................................................... Page 10
A.1.4 General safety rules .................................................................................................... Page 10
A.1.5 Customer's responsibilities ....................................................................................... Page 10
A.1.6 Data plate position ...................................................................................................... Page 10
B.1 DESCRIPTION OF CYCLES..................................................... Page 10
B.1.1 Positive blast chilling .................................................................................................. Page 10
B.1.2 Negative blast chilling or freezing ............................................................................... Page 10
B.1.3 Maintenance cycle or preservation cycle .................................................................... Page 11
B.1.4 Sterilisation cycle (appliances with germicidal light).................................................. Page 11
C.1 ANALYSIS OF USER INTERFACE........................................... Page 11
C.1.1 O•I I = ON / O = OFF ..................................................................................................... Page 11
C.1.2 Start/Stop cycle............................................................................................................. Page 11
C.1.3 Select cycles................................................................................................................ Page 11
C.1.3.1 Chiling with "cruise chilling" key ................................................................................. Page 11
C.1.4 Programs .................................................................................................................... Page 12
C.1.4.1 Chiling with "turbo cooling" ......................................................................................... Page 12
C.1.4.2 Cycles for ice cream.................................................................................................... Page 12
C.1.5 Temperature ................................................................................................................ Page 12
C.1.6 Alarm warning ............................................................................................................. Page 12
C.1.7 Standards .................................................................................................................... Page 12
C.1.8 Time............................................................................................................................. Page 13
C.1.9 Utilities......................................................................................................................... Page 13
USA TABLE OF CONTENTS
7
C.1.9.1 Manual defrosting ....................................................................................................... Page 13
C.1.9.2 Probe temperatures display ....................................................................................... Page 13
C.1.9.3 "UV" Sterilisation cycle................................................................................................. Page 13
C.1.9.4 Reference standard .................................................................................................... Page 14
C.1.9.5 User parameters......................................................................................................... Page 14
C.1.9.6 HACCP ........................................................................................................................ Page 14
C.1.9.7 Service alarms ............................................................................................................ Page 14
C.2 USER INSTRUCTIONS ............................................................ Page 15
C.2.1 Switching on ................................................................................................................ Page 15
C.2.2 Operation..................................................................................................................... Page 15
C.2.2.1Come avviare un ciclo di "cruise cilling" ..................................................................... Page 15
C.2.2.2Selecting a standard cycle .......................................................................................... Page 15
C.2.2.3How to select a "turbo cooling" cycle .......................................................................... Page 15
C.2.2.4Selecting a program.................................................................................................... Page 15
C.2.2.5Modification of chilling time ......................................................................................... Page 16
C.2.2.6Modification of cell temperature .................................................................................. Page 16
C.2.2.7Displaying the temperature setpoint and chilling end time ....................................... Page 16
C.2.2.8Changing the standard selection ............................................................................... Page 16
C.2.2.9Editing USER parameters .......................................................................................... Page 16
C.2.3 Blast chilling/preservation cycle.................................................................................. Page 16
C.2.4 Defrosting.................................................................................................................... Page 17
C.2.5 Germicidal lights (Function for appliance with germicidal light option)..................... Page 17
C.2.6 Product loading and unloading................................................................................... Page 17
C.2.7 Inserting the food (core) probe in the product ............................................................ Page 18
C.3 STARTING THE OPERATING CYCLES................................... Page 18
8
C.4 ALARMS.................................................................................... Page 20
C.4.1 Alarms ......................................................................................................................... Page 20
C.4.1.1HACCP alarms............................................................................................................ Page 20
C.4.1.1.1 Description of alarms .............................................................................................. Page 20
C.4.1.2Service alarms ............................................................................................................ Page 20
C.4.1.2.1 Service alarms not requiring service center assistance......................................... Page 20
C.4.1.2.2 Service alarms requiring service center assistance............................................... Page 21
C.5 HACCP CONNECTIONS (ACCESSORIES)............................. Page 21
D.1 ROUTINE MAINTENANCE ....................................................... Page 21
D.1.1 Precautions for maintenance...................................................................................... Page 21
D.1.2 Cleaning the cabinet and accessories....................................................................... Page 21
D.1.3 Cleaning the food (core) probe ................................................................................... Page 22
D.1.4 Precautions in the event of long periods of non-use.................................................. Page 22
D.2 MAINTENANCE TO BE PERFORMED BY TRAINED
PERSONNEL ONLY.................................................................. Page 22
D.2.1 Periodic cleaning of the condenser ............................................................................ Page 22
D.2.2 Cleaning the evaporator.............................................................................................. Page 22
D.2.3 Fan replacement ......................................................................................................... Page 23
D.3 TROUBLESHOOTING .............................................................. Page 24
D.3.1 Quick troubleshooting guide....................................................................................... Page 24
D.4 WASTE DISPOSAL AND DEMOLITION ................................... Page 24
D.4.1 Waste storage ............................................................................................................. Page 24
D.4.2 Procedure for preliminary dismantling of the appliance ............................................ Page 24
D.5 ENCLOSED DOCUMENTS ...................................................... Page 24
D.6 LIST OF USER PARAMETERS ................................................ Page 25
RECIPE SELECTION................................................................ Page 26
9
SAFETY INSTRUCTIONS
To reduce the risk of fire, electrical shock, or injury when using your appliance, please follow these
basic precautions including the following:
Read all instructions before using your appliance.
This Manual does not cover every possible condition and situation that may occur. Use common sense and caution
when installing, operating and maintaining this appliance.
FOR YOUR SAFETY DO NOT STORE OR USE GASOLINE OR OTHER FLAMMABLE VAPORS AND LIQUIDS
IN THE VICINITY OF THIS OR ANY OTHER APPLIANCE.
The installation of this unit must conform to local codes or, in the absence of local codes, to all National Codes
governing plumbing, sanitation, safety and good trade practices.
BEFORE SERVICING, DISCONNET THE ELECTRICAL SERVICE AND PLACE A RED TAG AT THE DISCONNECT
SWITCH TO INDICATE WORK IS BEING DONE ON THAT CIRCUIT.
NOTICE: CONTACT YOUR AUTHORIZED SERVICE COMPANY TO PERFORM MAINTENANCE AND REPAIRS.
NOTICE: Using any parts other than genuine factory manufactured parts relieves the manufacturer of all warranty and
liability.
NOTICE: Manufacturer reserves the right to change specifications at any time without notice.
WARNING: The equipment warranty is not valid unless the appliance is installed, started and demonstrated under
the supervision of a factory trained installer.
WARNING: The unit must be installed by Personnel who are qualified to work with electricity and plumbing. Improper
installation can cause injury to personnel and/or damage to the equipment. The unit must be installed in accordance
with applicable codes.
SAVE THESE
INSTRUCTIONS
10
Adjust the height and level the appliance by means of the
leveling feet, checking that the door opens and closes properly.
+50 mm
+ 1.97 " -10 mm
- 0.39 "
A.1.6 DATA PLATE POSITION
The data plate with all the appliance specifications is located on
the chilling unit compartment, on the lower left-hand side.
The plate bearing the appliance's PNC code and serial number
is located underneath the logo.
B.1.1 POSITIVE BLAST CHILLING
Positive blast chilling brings the food quickly to a temperature
of 37.4°F (+3°C).
Note that positive blast chilling is suitable for foods that are
going to be consumed within a few days.
There are two types of blast chilling:
“SOFT” CHILLING
“HARD” CHILLING
- “soft” chilling is recommended for foods such as vegetables
or pieces of food that are not very large or thick.
- “hard” chilling is recommended for larger sized pieces of
food.
B.1.2 NEGATIVE BLAST CHILLING OR FREEZING
Freezing allows foods to be preserved for longer periods (weeks
or months).
Quick freezing consists of reaching a negative temperature
(-0.4°F / -18°C) in the center of the product in the shortest
possible time. This ensures that when the product is thawed,
the tissues are not damaged and the food preserves its
aspect and nutritional ingredients.
With this cycle, the temperature of the food goes down to
between -4°F (-20°C) and -0.4°F (-18°C) when frozen.
A.1.1 FOREWORD
The purpose of this manual is to provide the necessary
information for the correct installation, operation, use and
maintenance of the appliance.
Consequently, the manual and all the technical documentation
enclosed with the appliance must be kept with the appliance at
all times so that they can be consulted by the technician or end
user. It is important to inform the appliance user about regulations
concerning safety during and after installation.
Read the instructions in the manual carefully before carrying out
any operation whatsoever on the appliance, as they give important
information about the standards and rules governing its
installation and safe use. Improper installation, adjustment,
alteration, service or maintenance can cause property
damage, injury or death. Failure to observe the instructions
in this manual when carrying out any operations on the
appliance will relieve the manufacturer of all liability. Using
any parts other than factory manufactured parts relieves the
manufacturer of all warranty and liability.
No part of this manual may be reproduced.
A.1.2 INTENDED USE AND LIMITATIONS
This appliance has been designed for the blast chilling and/or
blast freezing and preservation of foods (it rapidly lowers the
temperature of cooked foods in order to preserve their initial
qualities over a period of time and guarantee their durability for
several days). Any other use is to be considered improper.
ATTENTION: The appliance is not suitable for installation outdoors
and/or in environments subject to atmospheric agents (rain,
direct sunlight, etc.).
The manufacturer declines all liability for any improper use of
the product.
A.1.3 TESTING
Our appliances have been designed and optimised with
laboratory testing to give high performance and efficiency. The
product has gone through 100% testing and is ready for use.
The certificates guaranteeing that the tests (visual inspection -
electrical test - functional test) have been passed are included
with the appliance.
A.1.4 GENERAL SAFETY RULES
The appliance is manufactured in compliance with following
directives:
- Hygiene: ANSI / NSF 7
- Safety: UL 471
-CAN / CSA C22.2 No.120 - M91
A.1.5 CUSTOMER’S RESPONSIBILITIES
A fused disconnect switch or a main circuit breaker
(customer furnished) MUST be installed in the electric
supply line for the appliance. It is recommended that
this switch/circuit breaker have lockout/tagout
capability. Before making any electrical connections
to this appliance, check that the power supply is adequate for the
voltage, amperage, and phase requirements on the rating plate.
IMPORTANT:
Level the appliance, otherwise its operation could be com-
promised.
A.1 GENERAL INFORMATION
B.1 DESCRIPTION OF CYCLES
11
B.1.3 MAINTENANCE CYCLE OR PRESERVATION CYCLE
The maintenance cycle is the maintenance of the food at a
chosen temperature so that it does not alter over time, is started
automatically at the end of the blast chilling or freezing cycle.
The preservation cycle is continuous. To interrupt it you have to
stop or make changes to the program.
B.1.4 STERILISATION CYCLE (appliances with germicidal light
option)
The UV lamps have a direct germicidal action and are used to
sterilise the surfaces and air in the appliance chamber. This
function can be used to sterilize kitchen utensils such as knives,
carving forks, etc. (the process should be done in two steps,
turning the utensils over to make sure both sides of utensils are
sterilized) and can be activated at the end of each working day.
Do not use this function if there is food in the chamber.
ATTENTION:
The appliance has a safety device that switches off the lamps
when the doors are opened. This safety device is provided
because exposure to the U. V. rays emitted by the lamps is
harmful and can cause damage to eyes.
C.1.1 O•I I = ON / O = OFF
This button indicates the status of the appliance: I=On,O=Off.
When appliance is switch on, the whole interface lights up.
C.1.2 START/STOP CYCLE
This button starts or stops the selected cycle.
The selected cycle starts immediately when enabled. To stop
the cycle, keep the button pressed for at least 3 seconds.
If the door is closed when a cycle is started the button will light
up continuously. If the door is opened during a cycle it will start
blinking continuously.
1- "PREP" To optimize appliance performance when the need
arises, a preparation cycle can be chosen at the beginning of
a chilling cycle which is signalled on the temperature display
by the message “PREP”.
2- If the chiller has been inactive for a long time, the compressor
will be started by impulses to guarantee maximum efficiency.
C.1.3 SELECT CYCLES
The default setting on the appliance is the SOFT chilling cycle.
Use these buttons to select one of the following
options:
From left to right:
• Positive "SOFT CHILLING"
• Positive "HARD CHILLING"
• Positive "COOLER" maintenance (or preservation)
• Negative "BLAST FREEZING" chilling or freezing
• Negative "FREEZER" maintenance (or preservation)
When choosing a cycle, press the button to move on to
the next option; the options are in a loop and so you can either
scroll forwards or backwards .
C.1.3.1 Chilling with “cruise chilling” key
The “cruise chilling” cycle automatically controls the chilling
process. It sets up the machine to complete the process within
times required by standards while conserving the quality of the
foods (without burning the surface of the foods).
When the cycle is launched, it starts running immediately.
Stopping it requires the button to be held down for at least three
seconds.
When the cycle is started with the door closed the key will light up.
It will instead flash if a cycle is in progress and the door is open.
1- In order to improve machine performance and only if
required, at the start of the chilling cycle, a preparatory cycle
may start. This is indicated
on the temperature display by the message “PREP”.
2- Also, if the chiller is not used for an extended period of time,
the compressor is started in impulses in order to assure
maximum efficiency.
ATTENTION:
The “cruise chilling” cycle works only if the shaft probe is
inserted. If it is not, the cycle automatically changes over to
timed soft positive chilling.
C.1 ANALYSIS OF USER INTERFACE
12
C.1.4 PROGRAMS
Press the button to set the appliance for programs
mode. The appliance switches from standard cycle selection
mode to program mode and vice versa.
From left to right:
- Turbo cooling
- Program P1
- Program P2
Associated with each standard cycle are 2 default programs that
can be varied by the user.
What is a program? For chilling, the user can change both the
chamber temperature and the chilling time and save the changes
in the memory for subsequent retrieval, and for maintenance the
user can set the chamber setpoint.
C.1.4.1 Chilling with "turbo cooling"
The “turbo cooling” cycle allows the user to operate the unit at
temperature between -32,8°F (-36°C) and +37,4°F (+3°C). The
unit runs a cycle continuously and defrosting is managed
automatically.
To select this type of cycle, refer to paragraph C.1.4.
C.1.4.2 Cycles for ice cream
By enabling the parameter “EICE” (EICE = y), the machine is
set up to run two ice cream cycles. Programmes “P1” and “P2”
are disconnected from the normal logic and become two
specific cycles for ice cream. They are no longer assigned to
the selected standard cycle. When this cycle is selected, the
LEDs for the standards cycles are off.
• cycle "P1": time-controlled or shaft probe-controlled chilling.
After chilling, the machine switches over automatically to
conservation at a temperature of 6,8°F (-14°C).
• cycle "P2": “turbo cooling” chilling with a cell temperature
of 3,2°F (-16°C)
N.B.: to modify the “EICE” parameter, refer to paragraph
C.1.9.5.
C.1.5 TEMPERATURE
The temperature display can display both the chamber tempe-
rature and the food (core) probe temperature.
If a cycle is running (i.e. positive or negative maintenance, timed
positive blast chilling or timed freezing), the temperature
displayed is the chamber temperature.
If a food (core) probe cycle is running, the food (core) probe
temperature will be displayed by default.
Press the button in chilling cycles to switch between
chamber temperature and food (core) probe temperature.
The indicator light shows which of the two temperatures is being
displayed at that time:
- if the food (core) probe temperature is displayed, the FOOD
CORE PROBE TEMPERATURE INDICATOR LIGHT switches
on
- if the chamber temperature is displayed the CHAMBER TEM-
PERATURE INDICATOR LIGHT switches on
Only one or the other can be enabled at one time. Both will not
active at the same time.
C.1.6 ALARM WARNING
The following indicator lights light up when an alarm occurs:
When an HACCP alarm occurs, the indicator light
1- blinks continuously if the alarm is current. To
check the type of alarm, scroll to the utility section
(§ C.1.9) with the keys.
2- stays on continuously if the alarm has ended but
must still be addressed by the user.
When a service alarm occurs, the indicator light
1- blinks continuously if the alarm is current. To
check the type of alarm, scroll to the utility section
(§ C.1.9) with the keys.
2- stays on continuously if the alarm has ended but
must still be addressed by the user.
The type of alarm can be displayed by using the “Utilities menu”
functions (see sections C.1.9 for an explanation of the Utilities
menu, and section C.4 for instructions on how to display the
alarm types and descriptions of the alarms).
C.1.7 STANDARDS
The Standard indicator light is normally off. It lights up only when
the Reference Standard option is entered with the UTILITIES
button.
From left to right, the lights are: Electrolux Food Safe Mode 1,
Electrolux Food Safe Mode 2, U.S. Standard .
To display the appliance Standard setting, use the “Utilities
menu” functions (see sections C.1.9 and C.1.9.4).
13
C.1.8 TIME
During a chilling cycle: the time display shows the total or
remaining chilling time.
During holding cycle: the display shows the hour.
During “turbo cooling” cycle: the display shows:
°°°° “ = two hours left until start of defrosting
" °°° " = 1.5 hours left until start of defrosting
" °° " = 1 hour left until start of defrosting
" ° " = 0.5 hours left until start of defrosting
The TIMED CYCLE INDICATOR LIGHT lights up only
when a timed blast chilling cycle is running.
During the cycle selection phase it indicates the chilling time.
The “estimated remaining time” LED comes on as soon
as the electronic card calculates the time remaining until the
end of cooking with shaft probe. Once it has been measured,
the time is shown on the time display.
C.1.9 UTILITIES
When the button is pressed it lights up behind. Use the
buttons to scroll backwards and forwards and select
the utility. Press to confirm.
After entering the “Utilities” menu, the system will go back to the
main menu if no button is pressed for 5 seconds.
See below for a DESCRIPTION OF THE UTILITIES FUNCTIONS.
C.1.9.1 MANUAL DEFROSTING
If the appliance is in the right conditions (indicator light
or or with the appliance on stand-by), this function
enables a manual defrosting cycle. The display shows the
message “dEfr” throughout the entire cycle.
If a manual defrosting is not possible (during a chilling cycle) the
message “ UTIL NONE” will appear on the display.
The selection is enabled only in preservation/maintenance and
when selecting the operating cycle.
When the defrosting is finished the system will go back to the
main configuration.
C.1.9.2 PROBE TEMPERATURES DISPLAY
This function displays the probe temperatures, if there is more
than one probe inserted in the product.
If just one probe is used, see section C.1.5 for instructions on
how to display the temperature.
C.1.9.3 "UV"STERILIZATION CYCLE
(Function for appliances with germicidal light option)
The UV lamps have a direct germicidal action and are used to
sterilize the surfaces and air in the chamber of the appliance
(see section B.1.4)
To active "UV", no cycles must be running. When the cycle is
running the “TEMPERATURE” display shows the chamber
temperature. When the cycle is finished the system goes back
to the main menu.
If a sterilization cycle is not possible because of the status of the
appliance, the message “UTIL NONE” will appear on the display.
14
C.1.9.4 REFERENCE STANDARD
The machine can be set to 3 different Standards:
1.Electrolux Food Safe Mode 1
2.Electrolux Food Safe Mode 2
3.U.S. Standard
The default setting for the appliance is the NSF rule number
seven, which states that the product is chilled from 140°F/60°C
to 39.2°F/4°C in 240'.
Section C.2.2.6 describes how to change the STANDARD (e.g.
to go from the Electrolux Food Safe Mode 1 to the Electrolux Food
Safe Mode 2).
THE REFERENCE STANDARD SELECTION CAN BE
CHANGED ONLY WHEN THERE IS NO CYCLE RUNNING. If a
chilling cycle is running the system will automatically exit the
utility.
The Standard indicator light is normally off. It lights up only when
the Reference Standard option is entered with the UTILITIES
button.
Mode setting "U.S. Standard" is conformed to the requirements
of NSF 7.
Limits are: NSF 7
- soft chilling = 240 minutes; 140 (+60) / 39.2 (+4)
- hard chilling = 240 minutes; 140 (+60) / 39.2 (+4)
Example of NATIONAL SANITATION FOUNDATION:
A positive blast chilling cycle with probe ends correctly if the
39.2°F (4ºC) is reached within 240'. The chilling then proceeds
either until the maintaining temperature set by the manufacturer
is reached or the user presses STOP.
The user can edit the parameter settings in the U.S. Standard
option (CbSt , CCEt, CctI, CFEt, CftI) either in USER PARAMETERS,
section C.1.9.5, or by selecting the utility directly (see section
below for instructions on how to edit the U.S. Standard
parameters).
Editing USER parameters
To edit a parameter, select the utility:
press the button;
• the display blinks to show that the parameter is in ‘edit’ mode;
press the buttons to change the value within the
setting range;
press the button to confirm the settings; if a selection is not
made after 5 seconds, the last value displayed will be confirmed
automatically, or press again.
NOTE: the parameters can be edited ONLY if no cycle is running.
If a cycle is running, the utility will enable only the display of the
parameters.
The system exits the function automatically after 12 seconds if
nothing else is pressed.
C.1.9.5 USER PARAMETERS
For displaying/editing the operating parameters:
the “TEMPERATURE” display shows the parameter label;
the “TIME” display shows the value associated to the parameter;
scroll the parameters;
The system exits the function automatically after 12 seconds if
nothing else is pressed.
C.1.9.6 HACCP
Displays the chamber high temperature alarm and the blast
chilling cycle end error alarm (see section C.4. for all information
on alarms).
C.1.9.7 SERVICE ALARMS
The SERVICE ALARM function stores and displays all the
alarms, except for the chamber high temperature alarm and the
blast chilling cycle end error alarm (see sections C.4.1 for all
information on alarms).
Standard Chilling start
temperature Chilling end
temperature Chilling time
Electrolux Food Safe M 1 +145.4ºF (+63ºC
)
+50ºF (+10ºC) 110 minutes
Electrolux Food Safe M 2 +158ºF (+70ºC) +37.4ºF (+3ºC) 90 minutes
U.S.Standard CbSt ºC CCEt ºC CCtI minutes
Standard Chilling start
temperature Chilling end
temperature Chilling time
Electrolux Food Safe M 1 +145.4ºF (+63ºC
)
-0.4ºF (-18ºC) 270 minutes
Electrolux Food Safe M 2 +158ºF (+70ºC) -0.4ºF (-18ºC) 240 minutes
U.S.Standard CbSt ºC CFEt ºC CFtI minutes
BLAST CHILLER
BLAST FREEZER
15
Before using the appliance, clean the chamber with a detergent
solution, as there may still be condensation in the chamber left
over from the final testing by the manufacturers (see section D.1
for further information).
C.2.1 SWITCHING ON
Switch on the fused disconnet switch or the main circuit breaker
switch and press the I = ON button to start the appliance. The
I = ON indicator light lights up to signal that the appliance is
powered up.
C.2.2 OPERATION
C.2.2.1 Starting a “cruise chilling” cycle
To start the automatic “cruise chilling” (positive) cycle, insert
the core probe in the product and press the button .
The cycle starts immediately when activated. To stop it, keep
the button pressed for at least 3 seconds.
IMPORTANT: The “cruise chilling” cycle is not
activated when the appliance is in “programme selection”
status ..
..
.
C.2.2.2 Selecting a standard cycle
The default setting on the appliance is the SOFT chilling cycle.
Use these buttons to select one of the following
options:
From left to right:
• Positive "SOFT CHILLING"
• Positive "HARD CHILLING"
• Positive "COOLER" maintenance (or preservation)
• Negative "BLAST FREEZING" chilling or freezing
• Negative "FREEZER" maintenance (or preservation)
When choosing a cycle, press the button to move on to the
next option; the options are in a loop and so you can either scroll
forwards or backwards .
If you want another cycle, keep pressing the button until
the indicator light for the chosen cycle turns orange, and start it
by pressing the button.
IMPORTANT:The appliance recognizes automatically when the
food (core) probe is inserted in to the product. If the probe hasn’t
been inserted in to the product, a timed cycle will start
automatically.
It is necessary to wait 2 minutes after the end of the preparation
cycle for the automatic recognition (see section below).
C.2.2.3 How to select a “turbo cooling” cycle
To select the “turbo cooling” cycle, press the key ; the
LED will turn orange.
To start the cycle press the key .
C.2.2.4 Selecting a program:
First of all, the user has to decide what kind of cycle to launch
(SOFT, HARD, etc.) and then select the program.
Go through the following steps:
• Select the type of cycle;
• Press the program select button ; the program indicator
light lights up.
• press the select button until the chosen program
indicator light switches on.
• if the type of program is right, start it by pressing button .
if not
• keep pressing the select button until the chosen
C.2 USER INSTRUCTIONS
16
program indicator light switches on.
• to start the program, press the button.
The user can edit some of the cycle parameters and save the
changes:
- for blast chilling, the user can edit the chamber chilling time/
setpoint and save it in the memory, from where it can
subsequently be retrieved (see section C.2.2.3 and C.2.2.4).
- for positive maintenance, the user can set the chamber
setpoint.
C.2.2.5 Modification of chilling time
Chilling time is modifiable in the following cases:
1) during setting of a programme (P1 or P2)
2) during the selection phase of a chilling cycle
3) during actual chilling (can only be decreased).
For modification, proceed as follows:
press the key for two seconds;
the display will flash to show that modification phase is active;
set the desired value using the keys ;
press the key to confirm the value. Confirmation
will take place automatically after five seconds of inactivity.
C.2.2.6 Modification of cell temperature
• Chilling cycles: the set point can be modified only during
selection of a custom cycle or during “turbo cooling”.
Holding cycles (all).
In all cases proceed as follows:
• press the key for two seconds;
• the display will flash to show that modification phase is active;
• set the desired value using the keys ;
press the key to confirm the value.
If a selection is not made after 5 seconds, the last value
displayed will be confirmed automatically.
C.2.2.7 Displaying the temperature setpoint and chilling end
time
When a cycle is running, the user can view the temperature
setpoint and chilling end time by pressing buttons
and simultaneously.
C.2.2.8 Changing the Standard selection
To select a Standard, e.g. the Electrolux Food Safe Mode 2,
press the button, press the button until the
Standard utility is selected,
press the button to enter, press the button to select
the Standard either press the button again to
confirm the selection or it will be confirmed automatically if
nothing is pressed for 12 seconds.
C.2.2.9 Editing USER parameters
To edit a parameter, select the utility:
press the button;
• the display blinks to show that the parameter is in ‘edit’ mode;
press the buttons to change the value within the
setting range;
press the button to confirm the settings; if a selection is not
made after 5 seconds, the last value displayed will be confirmed
automatically, or press again.
NOTE: the parameters can be edited ONLY if no cycle is running.
If a cycle is running, the utility will enable only the display of the
parameters.
See section D.6 for the “List of user parameters”.
C.2.3 BLAST CHILLING/PRESERVATION CYCLE
When the chilling or freezing cycle has finished, the appliance
will automatically go into the preservation stage. It is important
for the chilled food to be kept in an appropriate way, maintaining
a preservation temperature suitable for the type of food chilled.
17
C.2.4 DEFROSTING
If the appliance is in the right conditions (indicator light
or or with the appliance on standby), this function
enables a manual defrosting cycle. The display shows the
message “dEfr” throughout the entire cycle.
If a manual defrosting is not possible (during a chilling cycle) the
message “UTIL NONE” will appear on the display.
The selection is enabled only in preservation/maintenance and
when selecting the operating cycle.
When the defrosting is finished the system will go back to the
main configuration. The cycle times and the intervals between
defrostings are preset by the manufacturer.
- Manual defrosting
To start a manual defrosting, proceed as follows:
PRESS THE BUTTON; THE DEFROSTING INDICATOR
LIGHT WILL TURN ORANGE, THE REST WILL STAY GREEN.
• PRESS AGAIN TO CONFIRM.
To shorten the defrosting time, the function can be run with the
door open, or a manual defrosting can be started with the chiller
door open; in this way the chiller internal fans will start up to draw
air into the chamber from the outside, thus shortening the
defrosting times.
For further information see following section.
MANUAL DEFROSTING
If the appliance is in the right conditions (indicator light
or or with the appliance on stand-by), this function
enables a manual defrosting cycle. The display shows the
message “dEfr” throughout the entire cycle.
If a manual defrosting is not possible (during a chilling cycle) the
message “UTIL NONE” will appear on the display.
The selection is enabled only in preservation/maintenance and
when selecting the operating cycle.
When the defrosting is finished the system will go back to the
main configuration.
Before each defrosting, remove the drain plug from the bottom
of the chamber. Replace the plug after defrosting.
C.2.5 GERMICIDAL LIGHTS (Function for appliances with
germicidal light option)
To enable the lights, the appliance must be switched on but with
no cycle running.
Press using the button to select the cycle.
The corresponding indicator light turns orange;
press the button again to confirm the selection and
start the cycle by pressing the button.
You are advised to run a germicidal cycle at the start of the day
before using the appliance, and another one at the end of the day
after cleaning the chamber.
For further information see sections B.1.5 and C.1.9.6.
ATTENTION: The cycle will not be enabled if the chamber
temperature is less than 59°F (15°C) or if the door is open.
THE EFFICIENT OPERATION OF THE APPLIANCE IN THE BLAST
CHILLING AND FREEZING CYCLES DEPENDS ON THE
FOLLOWING FACTORS:
C.2.6 PRODUCT LOADING AND UNLOADING
Use kitchen gloves when loading and unloading food. It is not
advisable to keep the food covered during the chilling cycle in
order to facilitate chilling. An even distribution of the food inside
the chamber allows good air circulation and therefore better
preservation of the food.
In any case, do not leave the door open longer than necessary
when removing or loading food.
At the end of the cycle, open the door and remove the probe,
putting it back in its original position (remember that the pans
are cold, therefore use gloves).
- Type of tray to be used. It is advised to use shallow trays (i.e.
with sides no higher than 2.5"/65 mm) to allow good air circulation
around the product (the greater the surface area of the food
exposed to the air, the shorter the chilling time). You are advised
to clean the trays and tray support surfaces thoroughly to avoid
food contamination. You are also advised to put the food in the
chiller in the same tray that it was cooked in.
18
C.2.7 INSERTING THE FOOD (CORE) PROBE IN THE PRODUCT
Make sure the probe is clean and sterilized whenever inserting
it in food, and always take care when handling the probe,
because it has a sharp point.
Using the food (core) probe in the chilling cycles guarantees
good results. To be certain of this, it is important to position the
probe correctly, i.e. right at the center of the largest piece of food,
making sure it doesn’t come out the other side and being very
careful not to touch the tray.
To get familiar with the chiller's electronic board as quickly as
possible, we have provided a series of step-by-step instructions
on how to enable the various functions.
When switched on, the appliance sets up for the SOFT chilling
cycle by default.
You can now select the cycle by pressing the button,
according to the following instructions:
-Hard chilling:
PRESS THE BUTTON UNTIL THE
LIGHT TURNS ORANGE
PRESS THE CYCLE BUTTON
IF THE PROBE HASN'T BEEN INSERTED IN THE PRODUCT,
THE CYCLE WILL BE TIMED.
-Hard chilling with chilling end time change:
PRESS THE BUTTON UNTIL THE
LIGHT TURNS ORANGE
IF YOU WANT TO CHANGE THE CHILLING END TIME
PRESS THE BUTTON FOR 2 SECONDS
PRESS THE BUTTON TO SELECT THE VALUE.
IF A SELECTION IS NOT MADE AFTER 5 SECONDS THE
LAST VALUE DISPLAYED WILL BE CONFIRMED
AUTOMATICALLYYOR YOU CAN CONFIRM BY
PRESSING THE BUTTON AGAIN.
PRESS THE CYCLE BUTTON
-Hard chilling with program select:
PRESS THE BUTTON UNTIL THE
LIGHT TURNS ORANGE
PRESS THE “SELECT PROGRAM” BUTTON
INDICATOR LIGHT LIGHTS UP
PRESS THE BUTTON UNTIL THE
THE INDICATOR LIGHT TURNS ORANGE
IF THE PROGRAM SELECTED IS OK
PRESS THE CYCLE BUTTON
C.3 STARTING THE OPERATING CYCLES
19
IF YOU WANT TO CHANGE THE TYPE OF PROGRAM
PRESS THE BUTTON UNTIL THE
INDICATOR LIGHT TURNS ORANGE
PRESS THE CYCLE BUTTON
-Hard chilling with program select and chilling
time change:
PRESS THE BUTTON UNTIL THE
LIGHT TURNS ORANGE
PRESS THE “SELECT PROGRAM” BUTTON
INDICATOR LIGHT LIGHTS UP
PRESS THE BUTTON UNTIL THE
LIGHT TURNS ORANGE
IF THE PROGRAM SELECTED IS OK
PRESS THE CYCLE BUTTON
IF YOU WANT TO CHANGE THE TYPE OF PROGRAM
PRESS THE BUTTON FOR 2 SECONDS
PRESS THE BUTTON TO SET THE CHOSEN TIME
EITHER PRESS THE BUTTON AGAIN TO SAVE THE
NEW SETTING OR IT WILL BE CONFIRMED
AUTOMATICALLYIF NOTHING IS PRESSED FOR 5
SECONDS, AND THEN
PRESS THE CYCLE BUTTON
IF YOU WANT TO CHANGE THE CHAMBER TEMPERATU
RE
PRESS THE BUTTON FOR 2 SECONDS
SET THE CHOSEN TIME
EITHER PRESS THE BUTTON AGAIN TO SAVE THE
NEW SETTING OR IT WILL BE CONFIRMED
AUTOMATICALLYIF NOTHING IS PRESSED FOR 5
SECONDS, AND
THEN PRESS THE CYCLE BUTTON.
- TURBO COOLING cycle:
PRESS THE “SELECT PROGRAM” BUTTON,
THE TURBO COOLING LED LIGHTS UP
PRESS THE “CYCLE START” BUTTON.
20
C.4.1 ALARMS
The electronic board manages two kinds of alarm system:
- HACCP for monitoring and storing high temperature alarms.
HACCP alarm states are signalled by the sounding of the
buzzer, the blinking of the red HACCP indicator light and the
appearance of an alarm message on the display.
- SERVICE ALARMS for storing and managing all the alarms on
the electronic board (except the high temperature and blast
chilling cycle end error alarms).
C.4.1.1 HACCP ALARMS
For managing the chamber high temperature alarm and the
blast chilling cycle end error alarm.
If there is no current alarm: the “TEMPERATURE” display
reads ‘none’, and the “TIME” display is switched off.
If there is a current alarm the “TEMPERATURE” display shows
the alarm number “ AL 1”, AL 2", etc., and the “TIME” display
gives the description of the alarm (see section below).
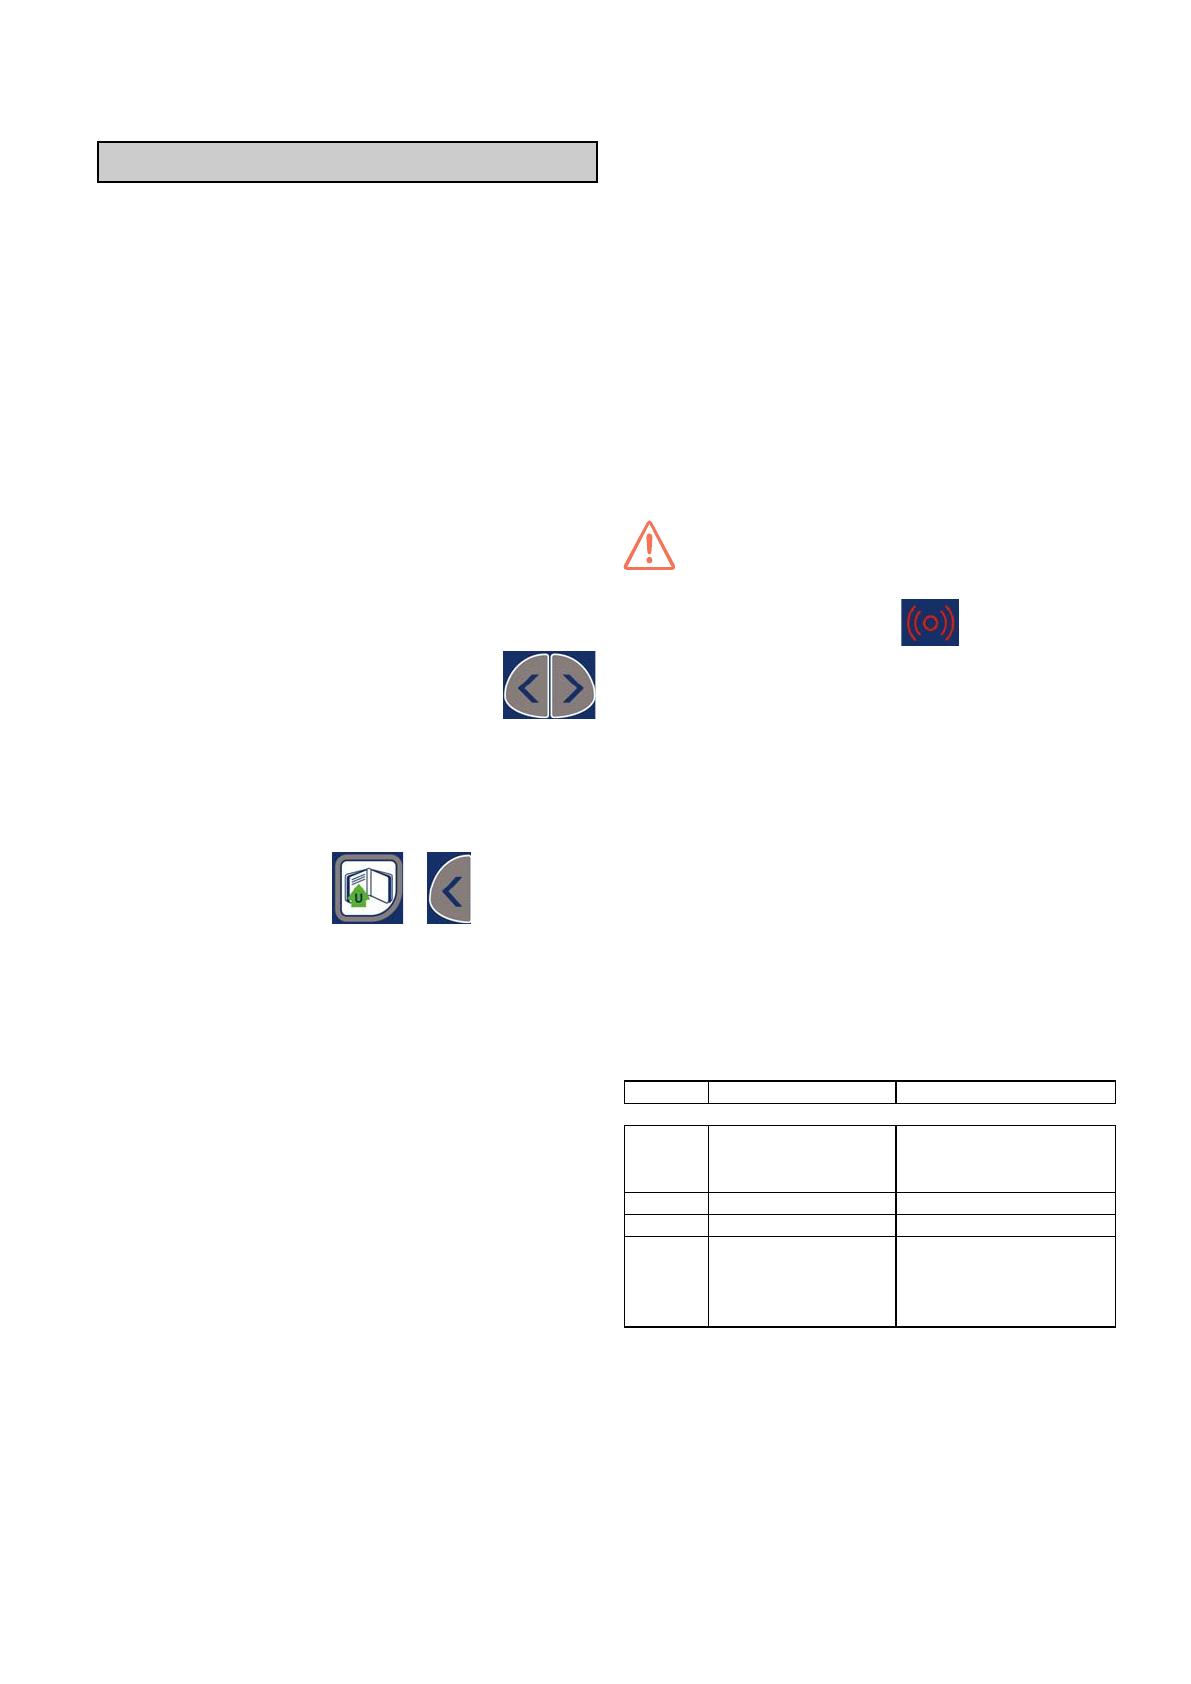
To display the alarm, enter the utility and use the
buttons to scroll until the messages appear: “AL 1”, “AL 2” and
so on.
After displaying the last alarm, the ‘——’ message will appear
on the alarm display, and if nothing is pressed for 12 seconds
the unit will automatically go back to the main menu.
To cancel the alarms, press + together for 5
seconds.
ATTENTION: The reset function is disabled if the operator did not
see the stored alarms. When the reset function is enabled the
message “RES” appears on the TEMPERATURE display.
C.4.1.1.1 DESCRIPTION OF ALARMS
- HIGH TEMPERATURE ALARM
The display shows:
• the “Batch (number) Ht (maximum temperature reached) °F/
°C Start Date Time End —-”, if the alarm is still active
e.g. Batch 01 Ht 59°F / 15°C Start 25-10-01 15.48 End ——
• the “Batch (number) Ht (maximum temperature reached) °F/
°C Start Date Time End Date OrTime”, if the alarm has ended
e.g. Batch 01 Ht 59°F / 15°C Start 25-10-01 15.48 End 25-10-
01 17.48
where:
Start Date Time indicates the start of the alarm, End Date Time
indicates the end of the alarm (“Date” format: DD-MM-YY, “Time”
format: HH.MM; ).
- CHILLING CYCLE END ERROR ALARM
This check ensures that a food (core) probe blast chilling/
freezing cycle ends correctly.
If a cycle does not end correctly, a “Chilling time out of limits”
alarm is generated and the display reads:
Batch (number) Ot (chilling time)MIN Start Date Time End date
Time”
e.g. BATCH1 Ot 250MIN Start 25-10-01 15.48 End 25-10-01
19.58.
where (number) indicates the current day’s batch number, Start
Date Time indicates the cycle start and End Date Time the cycle
end.
WHAT IS A BATCH NUMBER? Each blast chilling cycle (SOFT/
HARD chilling, freezing) will be identified by a progressive
number(1,2, ... ), known as the “BATCH NUMBER”. This refers
to the current day and will be reset to ‘0’ at the start of each new
calendar year.
N.B. There are no cycle end alarms in timed chilling/freezing.
IMPORTANT:
in the event of a power failure, the display shows the “no
power” alarm with red indicator . This alarm can be
displayed by scrolling with the utility keys. The appliance will
then restart from exactly where it stopped.
C.4.1.2 SERVICE ALARMS
There are two types of service alarm:
- type “b” (user) which do not require service center assistance
(see section C.4.1.2.1) and do not shut down the appliance;
In the event of alarm”B2", the time display will show the
message “door”. When the alarm ceases (because the door
is closed), the message disappears.
- type “E” (non-user) for which you are advised to call the service
center for assistance (see section C.4.1.2.2), but which do not
shut down the appliance.
When alarms “E2” occurs, the machine will stop the cycle in
progress and return to stand-by It will be possible to restart the
cycle again when the temperature of the evaporator returns to
the proper level resulting in cessation of the alarm.
C.4.1.2.1 Service alarms not requiring service center
assistance
C.4 ALARMS
SYMBOL DESCRIPTION ACTION
b1 Condenser temperature
high Clean condenser; check air
circulation around
condenser
b2 Door open Close door
b3 Memory full Reset HACCP alarms
b4 Power failure Check plug properly
inserted in power supply
socket;
Check electrical system
  • Page 1 1
  • Page 2 2
  • Page 3 3
  • Page 4 4
  • Page 5 5
  • Page 6 6
  • Page 7 7
  • Page 8 8
  • Page 9 9
  • Page 10 10
  • Page 11 11
  • Page 12 12
  • Page 13 13
  • Page 14 14
  • Page 15 15
  • Page 16 16
  • Page 17 17
  • Page 18 18
  • Page 19 19
  • Page 20 20
  • Page 21 21
  • Page 22 22
  • Page 23 23
  • Page 24 24
  • Page 25 25
  • Page 26 26
  • Page 27 27

Electrolux AOFP102U User manual

Type
User manual

Ask a question and I''ll find the answer in the document

Finding information in a document is now easier with AI