DE8

BLACK DECKER DE8, PD1820L Owner's manual

  • Hello! I am an AI chatbot trained to assist you with the BLACK DECKER DE8 Owner's manual. I’ve already reviewed the document and can help you find the information you need or explain it in simple terms. Just ask your questions, and providing more details will help me assist you more effectively!
www.blackanddecker.eu
PD1820L
Operating instructions in the back / Betriebsanleitung im Anhang /
Mode d'emploi au dos / Istruzioni d’uso sul retro /
Bedieningsinstructies achteraan / Instrucciones de funcionamiento en la parte posterior /
Instruções de funcionamento na parte posterior / Användaranvisningar på baksidan /
Instrukser for bruk på baksiden / Betjeningsvejledning på bagsiden /
Käyttöohjeet takana / Οδηγίες λειτουργίας στο πίσω μέρος
2
ENGLISH
(Original instructions)
Intended use
Your Black & Decker Dustbuster® handheld vacuum cleaner
has been designed for vacuum cleaning purposes. This
appliance is intended for household use only.
Read all of this manual carefully before operating
the appliance.
Safety instructions
@
Warning! Read all safety
warnings and all in-
structions.
Failure to follow
the warnings and instructions listed
below may result in electric shock,
re and/or serious injury.
@
Warning!
When using battery-
powered appliances, basic safety
precautions, including the follow-
ing, should always be followed to
reduce the risk of re, leaking bat-
teries, personal injury and material
damage.
u
Read all of this manual carefully before
using the appliance.
u
The intended use is described in this
manual. The use of any accessory
or attachment or the performance
of any operation with this appliance
other than those recommended in this
instruction manual may present a risk
of personal injury.
u
Retain this manual for future refer-
ence.
Using your appliance
u
Do not use the appliance to pick up liq-
uids or any materials that could catch
re.
u
Do not use the appliance near water.
u
Do not immerse the appliance in water.
u
Never pull the charger lead to discon-
nect the charger from the socket. Keep
the charger lead away from heat, oil
and sharp edges.
u
This appliance can be used by children
aged from 8 years and above and
persons with reduced physical, sen-
sory or mental capabilities or lack of
experience and knowledge if they have
been given supervision or instruction
concerning use of the appliance in a
safe way and understand the hazards
involved. Children shall not play with
the appliance. Cleaning and user
maintenance shall not be made by
children without supervision.
Inspection and repairs
u
Before use, check the appliance for
damaged or defective parts. Check for
breakage of parts, damage to switches
and any other conditions that may af-
fect its operation.
u
Do not use the appliance if any part is
damaged or defective.
u
Have any damaged or defective parts
repaired or replaced by an authorized
repair agent.
u
Regularly check the charger lead for
damage. Replace the charger if the
lead is damaged or defective.
u
Never attempt to remove or replace
any parts other than those specied in
this manual.
3
ENGLISH
(Original instructions)
Additional safety instruc-
tions
After use
u
Unplug the charger before cleaning the
charger or charging base.
u
When not in use, the appliance should
be stored in a dry place.
u
Children should not have access to
stored appliances.
Residual risks.
Additional residual risks may arise when
using the tool which may not be included
in the enclosed safety warnings. These
risks can arise from misuse, prolonged
use etc.
Even with the application of the relevant
safety regulations and the implementa-
tion of safety devices, certain residual
risks can not be avoided. These include:
u
Injuries caused by touching any rotat-
ing/moving parts.
u
Injuries caused when changing any
parts, blades or accessories.
u
Injuries caused by prolonged use
of a tool. When using any tool for
prolonged periods ensure you take
regular breaks.
u
Impairment of hearing.
u
Health hazards caused by breathing
dust developed when using your tool
(example:- working with wood, espe-
cially oak, beech and MDF.)
Batteries and chargers
Batteries
u
Never attempt to open for any reason.
u
Do not expose the battery to water.
u
Do not expose the battery to heat.
u
Do not store in locations where the
temperature may exceed 40°C.
u
Charge only at ambient temperatures
between 10°C and 40°C.
u
Charge only using the charger provid-
ed with the appliance. Using the wrong
charger could result in an electric
shock or overheating of the battery.
u
When disposing of batteries, follow
the instructions given in the section
"Protecting the environment".
u
Do not damage/deform the battery
pack either by puncture or impact, as
this may create a risk of injury and re.
u
Do not charge damaged batteries.
u
Under extreme conditions, battery
leakage may occur. When you notice
liquid on the batteries carefully wipe
the liquid off using a cloth. Avoid skin
contact.
u
In case of skin or eye contact, follow
the instructions below.
Warning!
The battery uid may cause
personal injury or damage to property. In
case of skin contact, immediately rinse
with water. If redness, pain or irritation
occurs seek medical attention. In case of
eye contact, rinse immediately with clean
water and seek medical attention.
4
ENGLISH
(Original instructions)
Chargers
Your charger has been designed for a
specic voltage. Always check that the
mains voltage corresponds to the voltage
on the rating plate.
Warning!
Never attempt to replace
the charger unit with a regular mains
plug.
u
Use your Black & Decker charger only
to charge the battery in the appliance
with which it was supplied. Other bat-
teries could burst, causing personal
injury and damage.
u
Never attempt to charge nonrecharge-
able batteries.
u
If the supply cord is damaged, it must
be replaced by the manufacturer or
an authorised Black & Decker Service
Centre in order to avoid a hazard.
u
Do not expose the charger to water.
u
Do not open the charger.
u
Do not probe the charger.
u
The appliance/battery must be placed
in a well ventilated area when charg-
ing.
Electrical safety
Symbols on the charger
Read all of this manual carefully before using the
appliance.
#
This tool is double insulated; therefore no earth wire
is required. Always check that the power supply
corresponds to the voltage on the rating plate.
$
The charging base is intended for indoor use only.
Maintenance
Your Black & Decker cordless appliance has been designed
to operate over a long period of time with a minimum of main
-
tenance. Continuous satisfactory operation depends upon
proper tool care and regular cleaning.
Warning! Before performing any maintenance on cordless
appliances:
u Run the battery down completely if it is integral and then
switch off.
u Unplug the charger before cleaning it. Your charger does
not require any maintenance apart from regular cleaning.
u Regularly clean the ventilation slots in your appliance/
charger using a soft brush or dry cloth.
u Regularly clean the motor housing using a damp cloth. Do
not use any abrasive or solvent-based cleaner.
Protecting the environment
Z
Separate collection. This product must not be
disposed of with normal household waste.
Should you nd one day that your Black & Decker product
needs replacement, or if it is of no further use to you, do not
dispose of it with household waste. Make this product avail
-
able for separate collection.
z
Separate collection of used products and packaging
allows materials to be recycled and used again.
Re-use of recycled materials helps prevent environ
-
mental pollution and reduces the demand for raw
materials.
Local regulations may provide for separate collection of elec
-
trical products from the household, at municipal waste sites or
by the retailer when you purchase a new product.
Black & Decker provides a facility for the collection and
recycling of Black & Decker products once they have reached
the end of their working life. To take advantage of this service
please return your product to any authorised repair agent who
will collect them on our behalf.
5
(Übersetzung der ursprünglichen
Anweisungen)
DEUTSCH
ENGLISH
(Original instructions)
You can check the location of your nearest authorised repair
agent by contacting your local Black & Decker ofce at
the address indicated in this manual. Alternatively, a list of
authorised Black & Decker repair agents and full details of our
after-sales service and contacts are available on the Internet
at: www.2helpU.com
Guarantee
Black & Decker is condent of the quality of its products and
offers an outstanding guarantee. This guarantee statement is
in addition to and in no way prejudices your statutory rights.
The guarantee is valid within the territories of the Member
States of the European Union and the European Free Trade
Area.
If a Black & Decker product becomes defective due to faulty
materials, workmanship or lack of conformity, within 24
months from the date of purchase, Black & Decker guarantees
to replace defective parts, repair products subjected to fair
wear and tear or replace such products to ensure minimum
inconvenience to the customer unless:
u The product has been used for trade, professional or hire
purposes;
u The product has been subjected to misuse or neglect;
u The product has sustained damage through foreign
objects, substances or accidents;
u Repairs have been attempted by persons other than
authorised repair agents or Black & Decker service staff.
To claim on the guarantee, you will need to submit proof of
purchase to the seller or an authorised repair agent. You can
check the location of your nearest authorised repair agent
by contacting your local Black & Decker ofce at the address
indicated in this manual. Alternatively, a list of authorised
Black & Decker repair agents and full details of our after-
sales service and contacts are available on the Internet at:
www.2helpU.com
Please visit our website www.blackanddecker.co.uk to register
your new Black & Decker product and to be kept up to date
on new products and special offers. Further information on the
Black & Decker brand and our range of products is available
at www.blackanddecker.co.uk
Do not forget to register your product!
www.blackanddecker.co.uk/productregistration Register your
product online at www.blackanddecker.co.uk/productreg-
istration or send your name, surname and product code to
Black & Decker in your country.
Bestimmungsgemäße Verwendung
Der Handstaubsauger Black & Decker Dustbuster® wurde
zum Saugen von Schmutz entwickelt. Dieses Gerät ist nicht
für den gewerblichen Einsatz vorgesehen.
Lesen Sie diese Anleitung vollständig und
aufmerksam durch, bevor Sie das Gerät
verwenden.
Sicherheitshinweise
@
Achtung! Lesen Sie
sämtliche Sicherheit-
swarnungen und Anwei-
sungen.
Die Nichteinhaltung
der nachstehend aufgeführten
Warnungen und Anweisungen
kann einen elektrischen Schlag,
Brand und/oder schwere Verlet-
zungen verursachen.
@
Achtung!
Beachten Sie beim
Umgang mit akkubetriebenen
Geräten stets die grundlegenden
Sicherheitshinweise, einschließlich
der folgenden. Dadurch verhindern
Sie weitgehend das Entstehen
von Bränden, das Auslaufen von
Akkus sowie Sach- und Personen-
schäden.
u
Lesen Sie diese Anleitung vollständig
und aufmerksam durch, bevor Sie das
Gerät zum ersten Mal verwenden.
België/Belgique Black & Decker (Belgium) N.V. Tel. +32 70 220 065
Nieuwlandlaan 7 Fax +32 70 225 585
I.Z. Aarschot B156 Tel. +32 70 220 064
3200 Aarschot Fax +32 70 222 441
Danmark Black & Decker Tel. 70 20 15 10
Sluseholmen 2-4, 2450 København SV Fax 70 22 49 10
Internet: www.blackanddecker.dk
Deutschland Black & Decker GmbH Tel. 06126 21-0
Black & Decker Str. 40, D - 65510 Idstein Fax 06126 21-2980
Ελλάδα Black & Decker (Ελλάς) Α.E. Τηλ. 210 8981-616
Στράβωνος 7 & Λεωφ. Βουλιαγμένης 159 Φαξ 210 8983-570
166 74 Гλυφάδα - Αθήνα www.blackanddecker.com
España Black & Decker Ibérica, S.C.A. Tel. 934 797 400
Parc de Negocis “Mas Blau” Fax 934 797 419
Edicio Muntadas, c/Bergadá, 1, Of. A6
08820 El Prat de Llobregat (Barcelona)
France Black & Decker (France) S.A.S. Tel. 04 72 20 39 20
5 allée des Hêtres Fax 04 72 20 39 00
B.P. 30084
69579 Limonest Cédex
Helvetia ROFO AG Tel. 026-6749391
Gewerbezone Seeblick Fax 026-6749394
3213 Kleinbösingen
Italia Black & Decker Italia Srl Tel. 039-23871
Viale Elvezia 2 Fax 039-2387592
20052 Monza (MI) Numero verde 800-213935
Nederland Black & Decker Benelux Tel. +31 164 283 065
Joulehof 12, 4622 RG Bergen op Zoom Fax +31 164 283 200
Norge Black&Decker Tlf. 45 25 13 00
Postboks 4613, Nydalen Fax 45 25 08 00
0405 Oslo www.blackanddecker.no
Österreich Black & Decker Vertriebsges.m.b.H Tel. 01 66116-0
Oberlaaerstraße 248, A-1230 Wien Fax 01 66116-614
Portugal Black & Decker Tel. 214667500
Centro de Escritórios de Sintra Avenida Fax 214667580
Almirante Gago Coutinho, 132/134,
Edifício 142710-418 Sintra
2710-418 Lisboa
Suomi Black & Decker Oy Puh. 010 400 430
Tekniikantie 12, 02150 Espoo Faksi 0800 411 340
Almirante Gago Coutinho, 132/134,
Edifício 142710-418 Sintra
2710-418 Lisboa
Sverige Black & Decker AB Tel. 031-68 60 60
Box 94, 431 22 Mölndal Fax 031-68 60 80
Türkiye KALE Hırdavat ve Makina A.Ş. Tel. 0212 533 52 55
Defterdar Mah. Savaklar Cad. No:15 Fax. 0212 533 10 05
Edirnekapı / Eyüp / İstanbul 34050
United Kingdom Black & Decker Tel. 01753 511234
210 Bath Road Fax 01753 551155
Slough, Berkshire SL1 3YD
Middle East & Africa Black & Decker Tel. +971 4 8863030
P.O.Box - 17164 Fax +971 4 8863333
Jebel Ali (South Zone), Dubai,
UAE
17
PD1820L
(H1)
Voltage / Spannung / Tension / Tensione / Spanning / Voltaje / Tensão /
Spänning / Spenning / Spænding / Jännite / Τάση
V
dc
18
Battery / Akkus / Batterie / Batteria / Laden / Batería / Bateria /
Batteriet / Batteriet / Batteriet / Akun / Μπαταρίες
Typ.
Li-Ion
Weight / Gewicht / Poids / Peso / Gewicht / Peso / Peso / Vikt / Vekt / Vægt /
Paino / Βάρος
kg
1.53
Charger / Ladegerät / Chargeur / Alimentatore / Lader / Cargador / Carregador
/ Laddare / Lader / Lader / Laturi / Φορτιστής
S010QV2300040
Input voltage / Eingangsspannung / Tension d’entrée / Tensione in ingresso /
Ingangsspanning / Voltaje de entrada / Tensão de entrada / Inspänning /
Inngangsspenning / Indgangsspænding / Syöttöjännite / Τάση εισόδου
V
ac
100-240
Output voltage / Ausgangsspannung / Tension de sortie /
Tensione erogata / Uitgangsspanning / Voltaje de salida /
Voltagem de saída / Utspänning / Utgangsspenning /
Udgangsspænding / Lähtöjännite / Τάση εξόδου
V
dc
23
Current / Ausgangsstrom / Courant de sortie / Corrente erogata /
Uitgangsstroom / Corriente de salida / Corrente de saída / Utström /
Utgangsstrøm / Udgangsstrømstyrke / Latausvirta / Ρεύμα εξόδου
mA
400
Approximate charge time / Ungefähre Dauer des Ladevorgangs / Durée
approximative de charge
/ Tempo di carica approssimativo / Oplaadtijd ca. /
Tiempo de carga aproximado / Tempo de carga aprox. / Laddningstid cirka /
Omtrentlig ladetid / Ladetid ca. / Arvioitu latausaika / Χρόνος φόρτισης κατά
προσέγγιση
h
4
Weight / Gewicht / Poids / Peso / Gewicht / Peso / Peso / Vikt / Vekt / Vægt /
Paino / Βάρος
kg 0.21
Technical data - Technische Daten - Caractéristiques techniques -
Dati tecnici - Technische gegevens - Características técnicas -
Dados técnicos - Tekniska data - Tekniske data - Tekniske data -
Tekniset tiedot - Τεχνικά χαρακτηριστικά
16
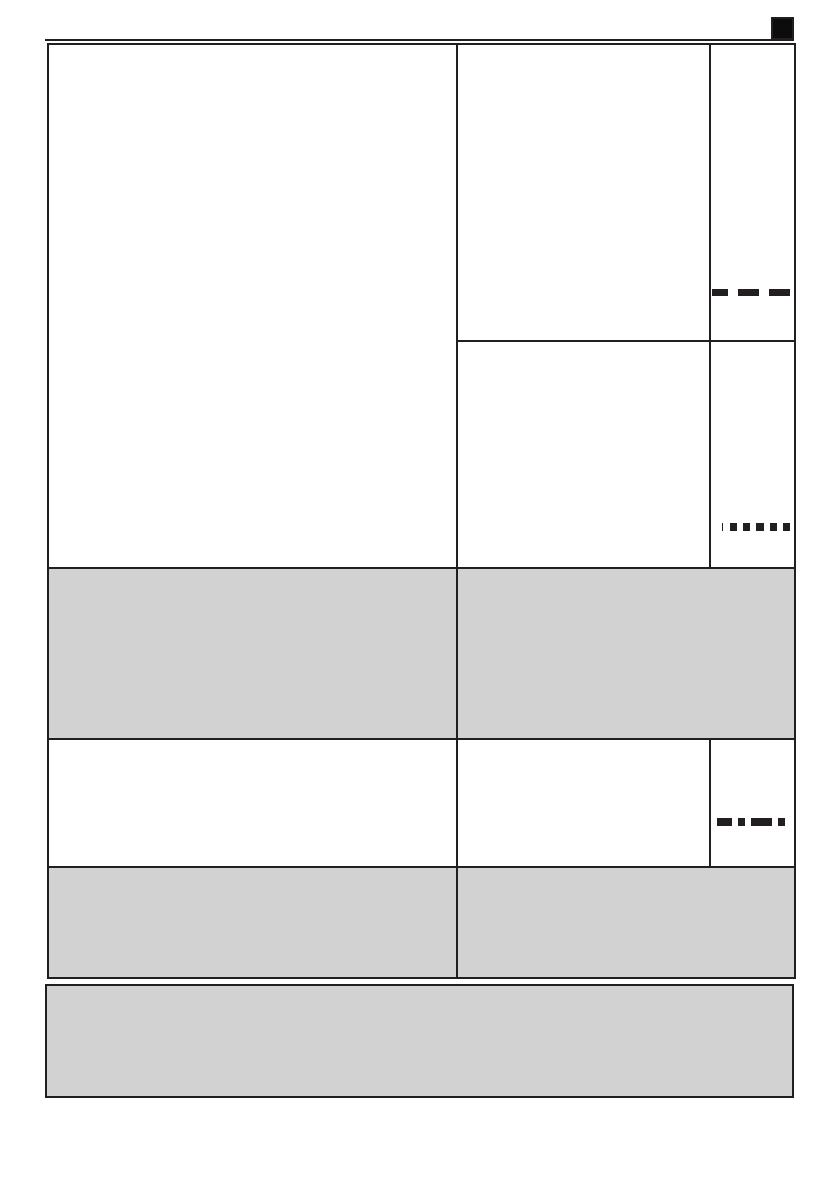
LED paterns / LED-Muster / Modes des témoins
lumineux / Leggenda dei LED / LED-patronen /
Patrones de los LED / Padrões do LED / LED-bilder
/ LED-mønstre / LED-mønstre / LED-kuviot / Μοτίβο
λυχνίας LED
Sollution / Lösung / Solution / Soluzione / Oplossing / Solución
/ Solução / Lösning / Løsning / Løsning / Ratkaisu / Λύση
Battery hot / Akku heiß / Batterie chaude / Batteria
calda / Accu heet / Batería caliente / Bateria quente
/ Varmt batteri / Batteri varmt / Varmt batteri / Akku
kuumentunut / Ζεστή μπαταρία
Allow to cool before continuing. / Lassen Sie das Gerät abkühlen, bevor Sie fortfahren. /
Laissez refroidir avant de continuer. / Lasciare che si raffreddi prima di continuare. / Laat
het apparaat afkoelen voor u verder gaat.
/ Antes de continuar, deje que se enfríe. / Deixe
que arrefeça antes de continuar.
/ Låt svalna innan du fortsätter. / La det avkjøles før du
fortsetter.
/ Lad dem køle af, inden der fortsættes. / Anna jäähtyä ennen jatkamista. /
Περιμένετε μέχρι να μειωθεί η θερμοκρασία πριν συνεχίσετε.
LED Patern : charging / LED-Muster : Laden /
Modes des témoins lumineux : Charge / Leggenda
dei LED : Carica / LED-patronen : Bezig met
opladen / Patrones de los LED : Cargando /
Padrões do LED : A carregar / LED-bilder :
Laddning / LED-mønstre : Lading / LED-mønstre :
Oplader / LED-kuviot : Lataa / Μοτίβο λυχνίας LED :
Φόρτιση /
Sollution / Lösung / Solution / Soluzione / Oplossing / Solución
/ Solução / Lösning / Løsning / Løsning / Ratkaisu / Λύση
Battery fault / Akku defekt / Problème de batterie /
Batteria guasta / Accufout / Error de la batería /
Anomalia da bateria / Batterifel / Batterifeil /
Batterifejl / Akkuvirhe / Βλάβη μπαταρίας
- Ensure correct charger is being used. Retry charging procedure. If fault continues, return unit to
an authorised Black & Decker service centre.
- Stellen Sie sicher, dass das richtige Ladegerät verwendet wird. Wiederholen Sie den
Ladevorgang. Geben Sie das Gerät bei einer Black & Decker Werkstatt ab, wenn der Fehler
weiterhin auftritt.
- Veillez à utiliser le chargeur adéquat. Recommencez la procédure de charge. Si le problème
persiste, conez l'appareil à un Centre de réparation agréé Black & Decker.
- Accertarsi che venga usato l'alimentatore corretto. Riprovare la procedura di carica. Se il guasto
persiste, portare l'apparecchio presso un centro assistenza Black & Decker autorizzato.
- Zorg dat de correcte lader wordt gebruikt. Probeer het apparaat opnieuw op te laden. Als de fout
terugkeert, moet u het apparaat terugbrengen naar een erkend Black & Decker servicecentrum.
- Compruebe que se está utilizando un cargador correcto. Vuelva a intentar el proceso de carga.
Si el error persiste, envíe la unidad a un centro de mantenimiento Black & Decker autorizado.
- Certique-se de que está a utilizar o carregador correcto. Repita o carregamento. Se a anomalia
continuar, leve a unidade a um centro de assistência autorizado da Black & Decker.
- Se till att rätt laddare används. Prova att ladda igen. Om felet fortfarande uppstår lämnar du in
enheten hos en auktoriserad Black & Decker-verkstad.
- Sørg for at riktig lader brukes. Prøv ladeprosedyren på nytt. Hvis feilen vedvarer, leverer du
enheten til et autorisert Black & Decker-servicesenter.
- Sørg for, at der bruges en korrekt oplader. Prøv opladningsproceduren igen. Hvis fejlen ikke
forsvinder, skal enheden indleveres til et autoriseret Black & Decker-servicecenter.
- Varmista käyttäväsi oikeaa laturia. Yritä latausta uudelleen. Jos vika jatkuu, toimita yksikkö
valtuutettuun Black & Decker –huoltoon korjattavaksi.
- Διασφαλίστε ότι χρησιμοποιείται ο σωστός φορτιστής. Επαναλάβετε τη διαδικασία φόρτισης.
Εάν η βλάβη επιμένει, επιστρέψτε τη μονάδα σε ένα εξουσιοδοτημένο κέντρο επισκευών της Black
& Decker.
Charger fault / Ladegerät defekt / Problème de
chargeur / Alimentatore guasto / Laderfout / Error
del cargador / Anomalia do carregador / Laddarfel
/ Laderfeil / Opladerfejl / Laturivirhe / Βλάβη
φορτιστή
Troubleshooting - Problembehebung - Dépannage -
Ricerca guasti - Problemen oplossen - Solución de problemas -
Resolução de problemas - Felsökning - Problemløsing -
Fejlnding - Vianmääritys - Αντιμετώπιση προβλημάτων
(Übersetzung der ursprünglichen
Anweisungen)
DEUTSCH
10
ENGLISH
(Original instructions)
Features
This tool includes some or all of the following features.
1. On/off power switch
2. Removable handle
3. Handle release ring
4. Hose
5. Transparent door
6. LED charging indicator
7. Battery housing
8. Door latch
9. Bowl release button
10. Removable dust bowl
11. Accessory clip
12. 2-in-1 combi nozzle accessory
13. Crevice tool
14. Charging base
15. Accessory storage mount
Replacing the lters
The lters should be replaced every 6 to 9 months and when-
ever worn or damaged.
Replacement lters are available from your Black & Decker
dealer (cat. no. VF90):
Battery
Z
If you want to dispose of the product yourself, the
battery must be removed as described below and
disposed of in accordance with local regulations.
u Run the battery down completely.
u Remove the dust bowl.
u Remove the two screws from inside the tunnel that the
hose ts into and lift off the battery housing.
u Detach all lead connections from the battery pack.
u Carefully remove the cover which hold the battery pack in
place.
u Remove battery pack and place in suitable packaging to
ensure that the terminals cannot be short-circuited.
u Take the battery to your service agent or to a local recy-
cling station.
Once removed, the battery cannot be retted.
Merkmale
Dieses Gerät verfügt über einige oder alle der folgenden
Merkmale:
1. Ein-/Ausschalter
2. Abnehmbarer Griff
3. Grifösering
4. Saugschlauch
5. Durchsichtige Klappe
6. LED-Ladeanzeige
7. Akkugehäuse
8. Klappenverriegelung
9. Entriegelungstaste für den Auffangbehälter
10. Abnehmbarer Staubbehälter
11. Zubehörclip
12. 2-in-1-Kombidüse
13. Fugendüse
14. Ladestation
15. Zubehörfachhalterung
Ersetzen der Filter
Die Filter sollten alle 6 bis 9 Monate ersetzt werden, bei sich-
tbaren Verschleißspuren oder Beschädigungen auch früher.
Ersatzlter erhalten Sie im Black & Decker Fachhandel
(Katalognr. VF90):
Akku
Z
Wenn Sie das Gerät selbst entsorgen, müssen Sie
den Akku wie unten beschrieben herausnehmen
und ihn gemäß der Abfallentsorgungssatzung Ihrer
Gemeinde entsorgen.
u Entladen Sie den Akku vollständig.
u Entfernen Sie den Staubbehälter.
u Lösen Sie die beiden Schrauben im Saugschlauchkanal,
und heben Sie das Akkugehäuse ab.
u Trennen Sie alle Leitungen vom Akku.
u Nehmen Sie die Abdeckung ab, unter der der Akku ange-
bracht ist.
u Entfernen Sie den Akku, und verpacken Sie diesen in
einem geeigneten Behälter, sodass die Kontakte nicht
kurzgeschlossen werden können.
u Bringen Sie den Akku zu einer Vertragswerkstatt bzw.
einer Rücknahmestelle in Ihrer Nähe.
Ein entnommener Akku kann nicht wieder eingesetzt werden.
8
Re-assemble after cleaning the lter or continue to wash.
Setzen Sie die Teile nach dem Reinigen des Filters zusammen, oder fahren Sie mit der Reinigung fort.
Réassemblez après le nettoyage du ltre ou poursuivez le nettoyage.
Riassemblare dopo la pulitura del ltro oppure continuare a lavare.
Monteer alles opnieuw na het reinigen van het lter of was het apparaat verder.
Vuelva a montarlo tras la limpieza o continúe limpiándolo.
Voltar a montar após a limpeza do ltro ou continuar a limpeza.
Montera ihop efter rengöring av ltret eller fortsätt rengöra.
Sett sammen igjen etter rengjøring av lteret, eller fortsett å vaske.
Saml igen efter rengøring af lter, eller fortsæt med skylning.
Kokoa laite suodattimen puhdistuksen jälkeen tai jatka pesua.
Επανασυναρμολογήστε μετά τον καθαρισμό του φίλτρου ή συνεχίστε με την πλύση.
Dry thoroughly /
Gründlich trocknen /
Séchez complètement /
Asciugare completamente /
Grondig drogen /
Séquelo bien /
Secar totalmente /
Torka noga /
Tørk godt /
Tør omhyggeligt /
Kuivaa huolellisesti /
Στεγνώστε καλά
Wash - Reinigen - Nettoyage - Lavaggio -
Wassen - Limpieza - Lavagem - Rengör -
Vask - Skylning - Pesu - Πλύσιμο
1 2
3 4 5
7
Clean lter - Filter reinigen - Nettoyage du ltre - Pulitura del ltro -
Filter reinigen - Limpieza del ltro - Limpar ltro - Rengör ltret -
Rengjør lteret - Rengøring af lter - Suodattimen puhdistus -
Καθαρισμός φίλτρου
Rotate bowl /
Behälter drehen /
Pivotez le récipient /
Ruotare il contenitore /
Compartiment draaien /
Gire el recipiente /
Rodar depósito /
Rotera behållare /
Vri oppsamleren /
Roter beholder /
Pyöritä astiaa /
Περιστρέψτε τη λεκάνη
3
5
1
2
4
6
6
Emptying - Leeren - Vidage - Svuotamento - Legen -
Vaciado - Esvaziar - Tömma - Tømme - Tømning -
Tyhjentäminen - Άδειασμα
1 2
In order to keep the suction force optimised, the lters must be cleared regularly during use.
Damit das Gerät stets die bestmögliche Saugkraft erzeugt, müssen die Filter während des Gebrauchs regelmäßig gereinigt werden.
Pour conserver la force d'aspiration maximale, les ltres doivent être nettoyés régulièrement.
Per poter mantenere la massima forza aspirante, pulire regolarmente i ltri durante l’impiego.
Voor een optimale zuigkracht moeten de lters tijdens het gebruik regelmatig worden gereinigd.
Para que el aparato conserve toda su fuerza de succión, es necesario limpiar los ltros periódicamente durante su uso.
Para garantir uma potência de sucção optimizada, os ltros devem ser limpos regularmente durante a utilização.
Filtren bör rengöras regelbundet för att optimera sugkraften.
For å opprettholde best mulig sugekraft må ltrene rengjøres regelmessig under bruk.
For at sikre optimal sugeeffekt skal ltrene rengøres regelmæssigt under brug.
Jotta imuteho pysyisi mahdollisimman hyvänä, suodattimet on puhdistettava säännöllisesti käytön aikana.
Για να κρατήσετε τη βέλτιστη δύναμη απορρόφησης, καθαρίζετε τα φίλτρα τακτικά κατά τη χρήση.
3 4
Removing the handle /
Entfernen des Griffs /
Retrait de la poignée /
Distacco del manico /
De handgreep verwijderen /
Extracción de la empuñadura /
Remoção do manípulo /
Ta bort handtaget /
Fjerne håndtaket /
Afmontering af håndtaget /
Kahvan irrottaminen /
Αφαίρεση της λαβής
1
1 2
Connecting to the handle /
Anschließen an den Griff /
Raccordement à la poignée /
Collegamento del manico /
De handgreep aansluiten /
Conexión de la empuñadura /
Ligação ao manípulo /
Ansluta till handtaget /
Koble til håndtaket /
Tilslutning til håndtaget /
Kahvan kytkeminen /
Σύνδεση στη χειρολαβή
2
Accessories - Zubehörteile - Accessoires - Accessori -
Accessoires - Accesorios - Acessórios - Tillbehör -
Tilbehør - Tilbehør - Lisävarusteet - Αξεσουάρ
1 2
Connecting to the hose /
Anschließen an den
Saugschlauch /
Raccordement au exible /
Collegamento del tubo /
De slang aansluiten /
Conexión de la manguera /
Ligação ao tubo /
Ansluta till slangen /
Koble til slangen /
Tilslutning til slangen /
Letkun kytkeminen /
Σύνδεση στον ελαστικό
σωλήνα
4
On /
Ein /
Marche /
Acceso /
Aan /
Encendido /
Ligar /
På /
På /
Tændt /
Päällä /
Ενεργοποίηση
Use - Verwendung - Utilisation - Utilizzo - Gebruik -
Uso - Utilização - Användning - Bruk - Anvendelse -
Käyttö - Χρήση
LED paterns - LED-Muster - Modes des témoins lumineux - Leggenda dei LED -
LED-patronen - Patrones de los LED - Padrões do LED - LED-bilder -
LED-mønstre - LED-mønstre - LED-kuviot - Μοτίβο λυχνίας LED
Battery low / Akku schwach / Batterie faible / Batteria semi
scarica / Accu bijna leeg / Batería baja / Bateria fraca / Kort
batteritid /
Lavt batterinivå / Lav batteriladning / Akun varaustaso alhainen
/ Χαμηλή στάθμη μπαταρίας
Battery empty / Akku leer / Batterie épuisée / Batteria scarica /
Accu leeg / Batería vacía / Bateria vazia / Tomt batteri /
Batteri tomt / Aadet batteri / Akku tyhjä / Άδεια μπαταρία
Battery hot / Akku heiß / Batterie chaude / Batteria calda / Accu
heet / Batería caliente / Bateria quente / Varmt batteri / Batteri
varmt / Varmt batteri / Akku kuumentunut / Ζεστή μπαταρία
3
Charging / Laden / Charge / Carica / Bezig met opladen /
Cargando / A carregar / Laddning / Lading / Oplader /
Lataa / Φόρτιση
LED paterns - LED-Muster - Modes des témoins lumineux - Leggenda dei LED -
LED-patronen - Patrones de los LED - Padrões do LED - LED-bilder -
LED-mønstre - LED-mønstre - LED-kuviot - Μοτίβο λυχνίας LED
Battery fault / Akku defekt / Problème de batterie / Batteria
guasta / Accufout / Error de la batería / Anomalia da bateria /
Batterifel / Batterifeil / Batterifejl / Akkuvirhe / Βλάβη μπαταρίας
Battery hot / Akku heiß / Batterie chaude / Batteria calda / Accu
heet / Batería caliente / Bateria quente / Varmt batteri / Batteri
varmt / Varmt batteri / Akku kuumentunut / Ζεστή μπαταρία
Charger fault / Ladegerät defekt / Problème de chargeur /
Alimentatore guasto / Laderfout / Error del cargador / Anomalia
do carregador / Laddarfel / Laderfeil / Opladerfejl / Laturivirhe /
Βλάβη φορτιστή
The appliance can be left connected to the charger and may become warm during use.
Das Ladegerät kann am Gerät angeschlossen bleiben und während des Betriebs warm werden.
L'appareil peut rester branché au chargeur et peut devenir chaud pendant l'utilisation.
L’elettrodomestico può essere lasciato collegato indenitamente all’alimentatore e potrebbe riscaldarsi durante
l'impiego.
Het apparaat kan aangesloten blijven op de lader en kan warm worden tijdens gebruik.
El aparato se puede dejar conectado al cargador y es posible que se caliente durante el uso.
O aparelho pode ser deixado ligado ao carregador e poderá aquecer durante a utilização.
Apparaten kan lämnas ansluten till laddaren hur länge som helst och kan bli varm vid användning.
Apparatet kan bli værende tilkoblet til laderen og kan bli varmt under bruk.
Apparatet kan være tilsluttet til laderen og kan blive varmt under brugen.
Laite voidaan jättää laturiin ja saattaa lämmetä käytössä.
Η συσκευή μπορεί να μείνει συνδεδεμένη στο φορτιστή και μπορεί να ζεσταθεί κατά τη χρήση.
2
Charging - Laden - Charge - Carica - laden -
Carga
- Carregar - Ladda - Lade - Opladning -
lataaminen - Φόρτιση
1 2
3
4
5
Remove tag /
Lasche entfernen /
Retirer l'étiquette /
Togliere la linguetta /
Tag verwijderen /
Retirar la etiqueta /
Retirar a ta /
Ta bort märke /
Fjern etikett /
Fjern mærket /
Poista tunniste /
Αφαίρεση ετικέτας
Off /
Aus /
Arrêt /
Spento /
Uit /
Apagado /
Desligar /
Av /
Av /
Slukket /
Pois päältä /
Απενεργοποίηση
The light will go out when charging is complete.
Nach dem vollständigen Laden des Akkus erlischt die Leuchte.
Le témoin s'éteint quand la charge est terminée.
La spia si spegne quando la carica è completa.
Het lampje gaat uit wanneer het laden is voltooid.
La luz se apagará cuando se haya completado la carga.
A luz apagar-se-á quando o carregamento terminar.
Lampan slocknar när laddningen är klar.
Lyset slukkes når ladingen er fullført.
Lampen slukkes, når opladningen er fuldført.
Valo sammuu, kun lataus on valmis.
Η λυχνία θα σβήσει, όταν ολοκληρωθεί η φόρτιση.
9061xxxx REV-0
08/2014
Operating Instructions
Betriebsanleitung
Mode d'emploi
Istruzioni d’uso
Bedieningsinstructies
Instrucciones de funcionamiento
Instruções de Funcionamento
Användaranvisningar
Instrukser for bruk
Betjeningsvejledning
Käyttöohjeet
Οδηγίες λειτουργίας
/