Drolet AUSTRAL III WOOD STOVE Assembly Instructions
- Type
- Assembly Instructions
This manual is also suitable for
Drolet AUSTRAL III WOOD STOVE: Experience the warmth and beauty of a wood-burning stove with exceptional heating performance. Crafted with heavy-duty cast iron, this stove boasts a large viewing window, allowing you to enjoy the mesmerizing flames. Its advanced burn technology ensures efficient combustion, providing consistent and long-lasting heat. Equipped with a convenient ash drawer for easy cleaning, the Drolet AUSTRAL III enriches your home with both ambiance and reliable warmth.
Drolet AUSTRAL III WOOD STOVE: Experience the warmth and beauty of a wood-burning stove with exceptional heating performance. Crafted with heavy-duty cast iron, this stove boasts a large viewing window, allowing you to enjoy the mesmerizing flames. Its advanced burn technology ensures efficient combustion, providing consistent and long-lasting heat. Equipped with a convenient ash drawer for easy cleaning, the Drolet AUSTRAL III enriches your home with both ambiance and reliable warmth.


-
 1
1
-
 2
2
-
 3
3
-
 4
4
-
 5
5
-
 6
6
-
 7
7
-
 8
8
-
 9
9


Drolet AUSTRAL III WOOD STOVE Assembly Instructions
- Type
- Assembly Instructions
- This manual is also suitable for
Drolet AUSTRAL III WOOD STOVE: Experience the warmth and beauty of a wood-burning stove with exceptional heating performance. Crafted with heavy-duty cast iron, this stove boasts a large viewing window, allowing you to enjoy the mesmerizing flames. Its advanced burn technology ensures efficient combustion, providing consistent and long-lasting heat. Equipped with a convenient ash drawer for easy cleaning, the Drolet AUSTRAL III enriches your home with both ambiance and reliable warmth.
Ask a question and I''ll find the answer in the document
Finding information in a document is now easier with AI
Related papers
-
Drolet BLACKCOMB II WOOD STOVE Owner's manual
-
Drolet HT-3000 WOOD STOVE Owner's manual
-
Drolet ESCAPE 2100 WOOD STOVE Owner's manual
-
 Drolet DB03016 Owner's manual
-
Drolet ESCAPE 1500 WOOD STOVE Owner's manual
-
-
-
 Drolet ATLAS WOOD BURNING COOKSTOVE User manual
-
Drolet DB03105 Owner's manual
-
Drolet AUSTRAL III WOOD STOVE Assembly Instructions


Other documents
-
Century FW3500 Owner's manual
-
 Ventis HES240 Wood Stove User manual
-
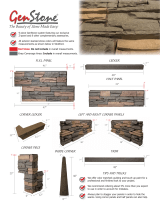 GenStone SSKP-4 Dimensions Guide
-
-
-
 CFM Corporation 2462 User manual
-
Vermont Casting Fan 2462 User manual
-
 Regency Fireplace Products F2100M User manual
-
DutchWest 2461 Installation guide
-
Regency SC100L User manual


