Page is loading ...

C O M P U T E R S N E T W O R K S S O L U T I O N S
..
Vig870G
Motherboard
Manual

Viglen, EMC and the ‘CE’ mark
CE Marking
European standards are being harmonised across borders. If products comply with the
same standards in all European countries, product exporting and importing is made
simple - paving our way to a common market. If you buy a product with a 'CE' mark on it
(shown below), on the box, in the manual, or on the guarantee - it complies with the
currently enforced directive(s).
Introduction to EMC
EMC (Electromagnetic Compatibility) is the term used to describe certain issues with RF
(Radio Frequency) energy. Electrical items should be designed so they do not interfere
with each other through RF emissions. El.g. If you turn on your microwave, your
television shouldn't display interference if both items are CE marked to the EMC
directive.
If emitted RF energy is not kept low, it can interfere with other electrical circuitry - E.g.
Cars Automatic Braking Systems have been known to activate by themselves while in a
strong RF field. As this has obvious repercussions ALL electrical products likely to
cause RF related problems have to be 'CE' marked from 1st January 1996 onwards.
If a product conforms to the EMC directive, not only should its RF emissions be very low,
but its immunity to RF energy (and other types) should be high. The apparatus has to
resist many 'real world' phenomena such as static shocks and mains voltage transients.

Viglen’s Environment laboratory
To gain a 'CE' mark, the Viglen computer range has had to undergo many difficult tests
to ensure it is Electromagnetically Compatible. These are carried out in the in-house
'Environment lab' at Viglen Headquarters. We have made every effort to guarantee that
each computer leaving our factory complies fully with the correct standards. To ensure
the computer system maintains compliance throughout its functional life, it is essential
you follow these guidelines.
Install the system according to Viglen’s instructions
If you open up your Viglen:
Keep internal cabling in place as supplied.
Ensure the lid is tightly secured afterwards
Do not remove drive bay shields unless installing a 'CE' marked peripheral in its
place
The clips or ‘bumps' around the lips of the case increase conductivity - do not
remove or damage.
Do not remove the ferrite ring from the L.E.D cables.
Only use your Viglen computer with 'CE' marked peripherals
This system has been tested in accordance with European standards for use in
residential and light industrial areas-this specifies a 10 meter testing radius for emissions
and immunity. If you do experience any adverse effects which you think might be
related to your computer, try moving it at least 10 meters away from the affected item. If
you still experience problems, contact Viglen’s Technical Support department who will
put you straight through to an EMC engineer - s/he will do everything possible to help. If
modifications are made to your Viglen computer system, it might breach EMC
regulations. XMA take no responsibility (with regards to EMC characteristics) of
equipment which has been tampered with or modified.
This symbol on the product or on its packaging indicates that the product shall
not be collection point for recycling of electrical and electronic equipment. By
ensuring this product is disposed of correctly, you will help prevent potential
negative consequences for the environment and human health, which could be
treated as household waste. Instead it shall be handed over to the applicable
otherwise be caused by inappropriate waste handling of this product. The recycling of
materials will help to conserve natural resources. For more detailed information about
recycling of this product, please contact your local city office, your household waste
disposal service or XMA Ltd.
Copyrights and Trademarks
Please note
The material in this manual is subject to change without notice.

Trademarks
Microsoft, Windows 7, Windows 8/8.1, Windows 10 and MS-DOS are registered
trademarks of Microsoft Corporation. IBM PC, XT, AT and PS/2 are trademarks of
International Business Machines Corporation. Core i3/i5/i7
TM
and Pentium® are
registered trademarks of Intel® Corporation. All other trademarks are acknowledged.
Genie, Vig, Viglen, and Omnino are trademarks of XMA Limited.
Copyright and Patents
This manual and all accompanying software and documentation are copyrighted and all
rights reserved. This product, including software and documentation, may not, in whole or
in part, be copied, photocopied, translated or reduced to any electronic or machine-
readable form, without prior written consent except for copies retained by the purchaser
for backup.
© Copyright 2016 XMA Limited
All Rights Reserved
Vig870G
Manual Version 1.0
Liability
No warranty or representation, either expressed or implied, is made with respect to this
documentation, its quality, performance, merchantability or fitness for a particular
purpose. As a result, the documentation is licensed as is, and you, the licensee, are
assuming the entire risk as to its quality and performance. The vendor reserves the right
to revise this operation manual and all accompanying software and documentation and
to make changes in the content without obligation to notify any person or organisation of
the revision or change.
In no event will the vendor be liable for direct, indirect, special, incidental or
consequential damages arising out of the use or inability to use this product or
documentation, even if advised of the possibility of such damages. In particular, the
vendor shall not have liability for any hardware, software or data stored or used with the
product, including the costs of repairing, replacing or recovering such hardware,
software or data.

Contents
CE Marking................................................................................................................................. 2
Introduction to EMC .................................................................................................................. 2
Viglen’s Environment laboratory .............................................................................................. 3
Please note ................................................................................................................................ 3
Trademarks ................................................................................................................................ 4
Copyright and Patents ............................................................................................................... 4
Liability ...................................................................................................................................... 4
3.4 Introduction .................................................................................................................... 7
3.5 Feature Summary............................................................................................................ 8
1.1.1 CPU and chassis fan connectors (2-pin CPU_FAN, 4-pin CHA_FAN).......................... 10
1.1.2 ATX power connectors (2-pin EATXPWR) .................................................................. 10
1.1.3 Intel® LGA1151 CPU socket ........................................................................................ 10
1.1.4 DDR4 DIMM slots ....................................................................................................... 10
1.1.5 Speaker connector (4-pin SPEAKER) .......................................................................... 10
1.1.6 System panel connector (10-1 pin PANEL) ................................................................ 10
1.1.7 USB 3.0 connector (20-1 pin USB3_12) ..................................................................... 11
1.1.8 Intel® Q270 Serial ATA 6.0Gb/s connectors (7-pin SATA6G_1~4) ............................. 11
1.1.9 Chassis intrusion connector (4-1 pin CHASSIS) .......................................................... 11
1.1.10 Clear RTC RAM (2-pin CLRTC) ................................................................................. 11
1.1.11 Front panel audio connector (10-1 pin AAFP) ........................................................ 11
1.1.12 Serial port connector (10-1 pin COM1) .................................................................. 12
1.1.13 NFC connector ........................................................................................................ 12
1.1.14 USB 2.0 connector (10-1 pin USB910) .................................................................... 12
3.6 Rear panel connectors .................................................................................................. 13
1.1.15 DC power connector port. ...................................................................................... 13
1.1.16 LAN (RJ-45) port. ..................................................................................................... 13
1.1.17 Line Out port (lime) ................................................................................................ 13
1.1.18 Microphone port (pink) .......................................................................................... 14
1.1.19 USB 3.0 ports. ......................................................................................................... 14
1.1.20 Display Port. ............................................................................................................ 14
1.1.21 HDMI port. .............................................................................................................. 14
System Board Options .......................................................................................................... 15
3.7 Upgrades ....................................................................................................................... 15
3.8 Upgrade Procedures ..................................................................................................... 16
1.1.22 Upgrading the CPU ................................................................................................. 16
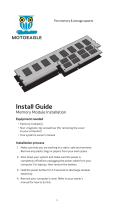
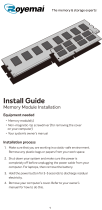
1.1.23 Installing & Removing Memory Modules ............................................................... 21
Chapter 2 Solving Problems ............................................................................................ 23
3.9 Technical Support ......................................................................................................... 23
2.1.1 Technical Support contact details .............................................................................. 23
2.1.2 Resetting the System ................................................................................................. 23
3.10 Troubleshooting Procedures ......................................................................................... 24

3.11 Problems & Suggestions ............................................................................................... 25
Chapter 3 System BIOS ...................................................................................................... 27
3.12 What is the BIOS? ......................................................................................................... 27
3.13 The Power-On sequence ............................................................................................... 27
3.14 Managing and updating BIOS ....................................................................................... 28
3.1.1 Introduction ............................................................................................................... 28
3.1.2 BIOS Update Instructions Using the Built-in EFI Shell ................................................ 28
3.1.3 BIOS Update Instructions under DOS ........................................................................ 31
3.15 Main menu .................................................................................................................... 33
System Language [English] ...................................................................................................... 33
System Time [xx:xx:xx] ................................................................................................. 33
Security ........................................................................................................................... 33
3.4.1 Advanced Menu Screen ............................................................................................. 34
3.4.2 CPU configuration ............................................................................................... 36
3.4.4 Trusted computing.............................................................................................. 36
3.4.3 SATA Configuration ............................................................................................. 37
3.4.5 AMT Configuration ............................................................................................. 37
3.4.6 AMT Configuration (CIRA Configuration) ........................................................... 38
3.4.7 AMT Configuration (ASF Configuration) ............................................................. 38
3.4.8 AMT Configuration (OEM Flag Settings) ............................................................. 38
3.4.9 Super IO Configuration ........................................................................................... 39
3.4.10 Hardware monitor ................................................................................................ 39
3.15.11 S5 RTC wake settings....................................................................................... 40
3.15.12 CSM Configuration .......................................................................................... 40
3.15.13 Chipset ............................................................................................................ 41
3.15.14 Security menu ................................................................................................. 41
3.15.15 Security menu (Secure Boot) .......................................................................... 42
3.15.16 Secure Boot (Key Management) ..................................................................... 42
3.15.17 Boot menu ....................................................................................................... 43
3.15.18 Exit menu ........................................................................................................ 44
3.15.18.1 Restore defaults ........................................................................................... 44
3.15.18.2 Save Changes & Reset.................................................................................. 44
3.15.18.3 Discard Changes & reset .............................................................................. 44
3.5 Windows UEFI mode for Windows 10 .......................................................................... 45
3.6 BIOS Settings for Windows 7 Operating System (Non UEFI Mode) .............................. 45
4.0 :Suggestions ................................................................................................................... 46
4.1 Questionnaire ............................................................................................................... 46
4.2 Notes ............................................................................................................................. 48

Motherboard Overview
3.4 Introduction
This manual describes the Viglen Vig870G motherboard inside your computer. The
motherboard is the most important part of your computer. It contains the CPU, memory
and graphics circuitry that make the computer work in the correct manner.
The Vig870G motherboard is a Thin Mini ITX form factor offering, integrated Graphics
via DisplayPort and HDMI, High Definition Audio via 2 flexible audio jacks and integrated
10/100/1000 network connection, as well as 4 USB 3.0 to enrich your multimedia
creation experience.
The Vig870G Motherboard supports 7
th
and 6
th
generation Intel Core i3, i5, and i7
processors, as well as being Microsoft Windows 7, 8.1 and Windows 10 WHQL certified.
This manual contains technical information about the Viglen Vig870G motherboard and
other hardware components inside your computer. If you are new to computers, we
recommend that you read the user guide first. If you are an experienced computer user,
this manual should provide all the information you will need to perform simple upgrades
and maintenance.
We hope that this manual is both readable and informative. If you have any comments
for suggestions about how we could improve the format, then please fill out the form at
the back of the manual and send it to us.
Above all we hope that you enjoy using your Viglen computer.

3.5 Feature Summary
Motherboard Form Factor
Thin Mini-ITX Form Factor (6.7 inch x 6.7 inch (17 x 17 cm)
Motherboard chipset
Intel® Q270 KBL PCH
CPU connector type
LGA1151 Kabylake-S/Skylake-S Processor
Number of CPUs supported
1
Supported CPU types (C,
P3 or P4 etc)
7
th
and 6th Generation Core™ i7/Core™ i5/Core™
i3/Pentium®/Celeron® Processors Supports Intel® 14nm CPU
Supports Intel® Turbo Boost Technology 2.0
* The Intel® Turbo Boost Technology 2.0 support depends on the CPU
Supported CPU speeds
CPU No.
CPU speed
Cache
Cores/
Threads
Intel® Core™ i7 Desktop Processor
i7-7700K
4.50 GHz
8 MB
4/8
Intel® Core™ i5 Processor
i5-7600K
4.20 GHz
6
4/4
Intel® Core™ i3 Processor
i3-6300
4.00 GHz
4
2/4
Number of PCI-E slots
1 x PCIe 3.0/2.0 x4 (black)
1 x M.2 Slot (PCIe Gen3x1 supports NGFF-2230, E-KEY)
1 x M.2 Slot (PCIe Gen3x4 or SATA 6GB/x1, supports NGFF-2260/2280, M-KEY
On board video fitted?
Type
Integrated with CPU
On-board audio type?
Realtek ALC887+ALC105
Front facing audio header
Yes
Audio Upgradeable?
Via PCI
On-board network type?
1* Gb LAN Intel I219LM
Number of network
connections?
1
Number of SATA Channels
2 x SATA 6Gb/s ports
Internal connectors
1 x 2-pin power connector
1* SYS_FAN & 1* CPU_FAN
1 x CPU fan header
1* SATA Power
1 x System fan header
1* COM (RS232)
4 x SATA 6Gb/s connectors
1* MON_SW / 1* Clear CMOS header
2 x M.2 slot
1* 12V/19V IN ( 1 x 2 Pin )
1 x SATA power connector
1* SYS_FAN & 1* CPU_FAN
5 x USB 2.0 headers
1* SATA Power
1 x USB 3.0 connector
1* COM (RS232)
1 x Front panel header
Rear I/O connectors
1* Display Port 1.2 +HDMI 1.4
1 * DC_IN Jack ( 12V/19V )
1* RJ45
1* Mic In / 1* Line Out
4* USB 3.0
Memory type
Max 32GB, DDR4 SoDIMM 2400 MHz Non-ECC, Unbuffered Memory
Number of memory sockets
2
Maximum memory support
32GB
BIOS
N/A
Integrated Trusted Platform
Module (TPM)
Onboard TPM 2.0 IInfineon SLB9665
MTBF

System Board Connectors
Figure 1: System Board Components
1
Front panel audio connector
21
CPU fan connector
2
Speaker cable connector
22
System panel
3
Mic in
23
Monitor power switch connector
4
Line out
24
LVDS connector
5
Display port/ HDMI port
25
LCD_VCC connector
6
Gbe LAN port
26
Flat panel display connector
7
USB 3.0
27
LCD_VCC connector
8
USB 3.0
28
Back light brightness switch
9
Battery cable connector
29
USB2 Header
10
Clear CMOS jumper
30
USB2 Header
11
DC power in
31
CPU socket
12
2Pin power connector
32
M.2 slot X1
13
USB3 header
33
Serial port cable connector
14
USB2 header
34
M.2 slot X4
15
System fan connector
35
Digital mic connector
16
SATA 6GB/s
17
SATA 6GB/s
18
Hard disk power connector
19
Sodimm slot 1
20
Sodimm slot 2
Table 1: System Board Components

1.1.1 CPU and chassis fan connectors (2-pin CPU_FAN, 4-pin CHA_FAN).
Connect the fan cables to the fan connectors on the motherboard, ensuring that the
black wire of each cable matches the ground pin of the connector.
NOTE: Do not forget to connect the fan cables to the fan connectors. Insufficient air flow
inside the system may damage the motherboard components. These are not jumpers!
Do not place jumper caps on the fan connectors! The CPU_FAN connector supports a
CPU fan of maximum 1A (12 W) fan power.
1.1.2 ATX power connectors (2-pin EATXPWR)
Correctly orient the ATX power supply plugs into these connectors and push down firmly
until the connectors completely fit.
1.1.3 Intel® LGA1151 CPU socket
Install Intel® LGA1151 CPU into this surface mount LGA1151 socket, which is designed
for 6th Generation Intel® Core™ i7 / i5 / i3, Pentium®, and Celeron® processors.
1.1.4 DDR4 DIMM slots
Install 4 GB, 8 GB, and 16 GB unbuffered non-ECC DDR4 DIMMs into these SODIMM
sockets.
1.1.5 Speaker connector (4-pin SPEAKER)
The 4-pin connector is for the chassis-mounted system warning speaker. The speaker
allows you to hear system beeps and warnings.
1.1.6 System panel connector (10-1 pin PANEL)
This connector supports several chassis-mounted functions.

1.1.7 USB 3.0 connector (20-1 pin USB3_12)
This connector allows you to connect a USB 3.0 module for additional USB 3.0 front or
rear panel ports. With an installed USB 3.0 module, you can enjoy all the benefits of
USB 3.0 including faster data transfer speeds of up to 5 Gbps, faster charging time for
USB-chargeable devices, optimized power efficiency, and backward compatibility with
USB 2.0.
1.1.8 Intel® Q270 Serial ATA 6.0Gb/s connectors (7-pin SATA6G_1~4)
These connectors connect to Serial ATA 6.0 Gb/s hard disk drives via Serial ATA
Gb/s signal cables
NOTE: When using PCI cards on shared slots, ensure that the drivers support “Share
IRQ” or that the cards do not need IRQ assignments. Otherwise, conflicts will arise
between the two PCI groups, making the system unstable and the card inoperable.
1.1.9 Chassis intrusion connector (4-1 pin CHASSIS)
This connector is for a chassis-mounted intrusion detection sensor or switch. Connect
one end of the chassis intrusion sensor or switch cable to this connector. The chassis
intrusion sensor or switch sends a high-level signal to this connector when a chassis
component is removed or replaced. The signal is then generated as a chassis intrusion
event.
By default, the pins labelled “Intruder” are shorted with a jumper cap. Remove the
jumper caps only when you intend to use the chassis intrusion detection feature.
1.1.10 Clear RTC RAM (2-pin CLRTC)
This header allows you to clear the CMOS RTC RAM data of the system setup
information such as date, time, and system passwords
To erase the RTC RAM:
1 Turn OFF the computer and unplug the power cord.
2 Use a metal object such as a screwdriver to short the two pins.
3 Plug the power cord and turn ON the computer.
4 Hold down the <Del> key during the boot process and enter BIOS setup to re-
enter data
1.1.11 Front panel audio connector (10-1 pin AAFP)
This connector is for a chassis-mounted front panel audio I/O module that supports
either HD Audio or legacy AC`97 audio standard. Connect one end of the front panel
audio I/O module cable to this connector.
NOTE: We recommend that you connect a high-definition front panel audio module to
this connector to avail of the motherboard’s high-definition audio capability.
If you want to connect a high-definition front panel audio module to this connector, set
the Front Panel Type item in the BIOS setup to [HD Audio]. If you want to connect an
AC’97 front panel audio module to this connector, set the item to [AC97]. By default, this
connector is set to [HD Audio

1.1.12 Serial port connector (10-1 pin COM1)
Connect the serial port module cable to this connector, then install the module to a slot
opening at the back of the system chassis.
1.1.13 NFC connector
Connect a NFC module to this connector to allow Near field communication devices to
connect to each other.
1.1.14 USB 2.0 connector (10-1 pin USB910)
This connector is for USB 2.0 ports. Connect the USB module cable to this connector,
then install the module to a slot opening at the back of the system chassis. This USB
connector complies with USB 2.0 specifications and supports up to 480Mbps connection
speed

3.6 Rear panel connectors
Figure 2: Rear panel connectors
1
DC in power connector
2
USB3 ports
3
GBE Ethernet LAN port
4
Display port connector
5
HDMI ports
6
Line out port
7
Mic in port
Table 2: Rear panel connectors
1.1.15 DC power connector port.
This 15-pin port is for a VGA monitor or other VGA-compatible devices.
1.1.16 LAN (RJ-45) port.
This port allows Gigabit connection to a Local Area Network (LAN) through a network
hub.
RJ-45 LAN Connector LEDs
The two LEDs are built into the RJ-45 LAN connector located on the back panel. These
LEDs indicate the status of the LAN as shown in Table 1.
Figure 3: RJ-45 LAN Connector
1.1.17 Line Out port (lime)
This port connects to a headphone or a speaker. In the 4.1, 5.1 and 7.1-channel
configurations, the function of this port becomes Front Speaker Out.

1.1.18 Microphone port (pink)
This port connects to a microphone.
1.1.19 USB 3.0 ports.
These 9-pin Universal Serial Bus (USB) ports are for USB 3.0 devices.
NOTE: Due to the limitation of USB 3.0 controller, USB 3.0 devices can only be used
under Windows OS environment and after the USB 3.0 driver installation.
We strongly recommend that you connect USB 3.0 devices to USB 3.0 ports for faster
and better performance from your USB 3.0 devices.
1.1.20 Display Port.
This port is for any Display Port compatible device.
1.1.21 HDMI port.
This port is for a High-Definition Multimedia Interface (HDMI) connector, and is HDCP
compliant allowing playback of HD DVD, Blu-ray, and other protected content.

System Board Options
3.7 Upgrades
The Vig870G motherboard is supports Intel® Core i3, i5, i7 and Pentium processors in
the LGA1151 socket. RAM can be upgraded to a maximum of 32GB using DDR4
2400MHz Non ECC Unbuffered SODIMMs.
WARNING!
Unplug the system before carrying out the procedures described in this chapter.
Failure to disconnect power before you open the system can result in personal
injury or equipment damage. Hazardous voltage, current, and energy levels are
present in this product. Power switch terminals can have hazardous Voltages
present even when the power switch is off.
The procedures assume familiarity with the general terminology associated with
personal computers and with the safety practices and regulatory compliance
required for using and modifying electronic equipment.
Do not operate the system with the cover removed. Always replace the cover
before turning on the system.
As the colours of the wires in the mains lead of this computer may not correspond with the
coloured markings identifying the terminals in your plug precede as follows:
The wire which is coloured green-and-yellow must be connected to the terminal in the plug
which is marked by the letter E or by the safety Earth symbol Q or coloured green or green-and-
yellow.
The wire which is coloured blue must be connected to the terminal which is marked with the letter
N or coloured black.
The wire which is coloured brown must be connected to the terminal which is marked with the
letter L or coloured red.
CAUTION!
The Viglen Vig870G motherboard and
associated components are sensitive electronic
devices. A small static shock from your body can
cause expensive damage to your equipment.

3.8 Upgrade Procedures
Make sure you are earthed and free of static charge before you open the computer case.
If you are unsure about upgrading your computer, return it to Viglen so a qualified engineer
can perform the upgrade.
Steps to take to prevent static discharge:
1. The best way to prevent static discharge is to buy an anti-static strap from your local
electrical shop. While you are wearing the strap and it is earthed, static charge will be
harmlessly bled to ground.
2. Do not remove the component from its anti-static protective packaging until you are
about to install it.
3. Hold boards by the edges - try not to touch components / interface strips etc.
NOTE: We recommend that you return your computer to the service department for
upgrading. Any work carried out is fully guaranteed. Upgrades should only be carried out
by persons who are familiar with handling ic's, as incorrect installation will invalidate the
guarantee.
1.1.22 Upgrading the CPU
CAUTION!
Before installing or removing a processor, make sure the AC power has been removed by
unplugging the power cord from the computer; the standby power LED should not be lit.
Failure to do so could damage the processor and the board.
To install a processor, follow these instructions:
1. Unlatch the processor socket lever by pushing it down and away from the socket.
Figure 4: Unlatch the socket lever

2. Rotate the socket lever to lift the load plate away from the socket (Figure 5, A). Make
sure that the load plate is in the fully open position (Figure 5, B) while being careful not
to damage adjacent components. Do not touch the socket contacts.
Figure 5: Lift the load plate
3. Remove the processor from its protective cover. Hold the processor only at the edges,
being careful not to touch the bottom of the processor (see Figure 6).
Figure 6: Remove the processor from the protective cover
Remove the processor from the protective cover
Note: Do not discard the processor cover. Always replace the processor cover if you
remove the processor from the socket.

4. Hold the processor with your thumb and index finger oriented as shown in Figure 7 to
align your fingers with the socket finger cut-outs. Make sure that the processor Pin 1
indicator (gold triangle) is aligned with the Pin 1 chamfer on the socket (Figure 7, B)
and that the notches on the processor align with the posts on the socket (Figure 7, C).
Lower the processor straight down without tilting or sliding it in the socket (Figure 7,
A).
Figure 7: Install the processor

5. Carefully lower the socket lever (Figure 8) while making sure that the front edge of
the load plate slides under the shoulder screw cap as the lever is lowered. Latch the
socket lever under the load plate tab (Figure 8, C, and D). The socket cover (Figure
8, B) will pop off as shown.
Figure 8: Secure the load plate in place
6. Pick up the socket cover and remove it from the desktop board.

Connecting the Processor Fan Heat Sink Cable
Connect the processor fan heat sink power cable to the 4-pin processor fan header (see
Figure 9). A fan with a 4-pin connector as shown in Figure 9 is recommended.
1. Make sure the four hooks are in the proper position before you install the cooler.
Figure 9: Connecting the processor fan
/