Page is loading ...

PIVOT
FRAME
JIG

-1-
☎
Dear Customer
Thank you for purchasing this Trend product.
We hope you enjoy many years of creative and
productive use of this product.
Please remember to return your guarantee card
within 14 days of purchase.
CONTENTS
TECHNICAL DATA _____________________1
SAFETY _____________________________2
– General ____________________________2
– Routing Safety _______________________3
– Additional Safety Rules for Router Cutters __3
– Using Routers In A Fixed Position _______4
– Useful Advice When Routing ____________4
ITEMS ENCLOSED ____________________5
INTRODUCTION_______________________6
– Suitable Routers______________________6
PIVOT JIG MODES_____________________7
DESCRIPTION OF PARTS_______________8
ASSEMBLY___________________________9
– Mini-Pivot & Ski Frame ________________9
– Beam Trammel Mode ________________10
OPERATION _________________________11
– Mini-Pivot Trammel Mode _____________11
– Producing Circular Disc Work Surface____12
– Setting-up Mini-Pivot Configuration ______13
– Annular Disc Work __________________14
– Simple Ski Mode ____________________14
– Guided Planing Mode ________________15
– Mounting The Workpiece ______________16
ADVANCED APPLICATION _____________17
– Mini-Pivot Mode - off centre work ____17-18
ACCESSORIES ______________________19
MAINTENANCE ______________________19
– Cleaning ___________________________19
– Lubrication _________________________19
RECYCLING _________________________19
GUARANTEE ________________________19
SPARE PARTS _______________________20
– Spare Parts List & Diagram ____________20
PIVOT FRAME JIG
If you require further technical
information or spare parts, please call
our technical support department on
01923 224681.
The following symbols are used throughout this
manual:
Denotes risk of personal injury, loss of
life or damage to the tool in case of non-
observance of the instructions in this
manual.
Denotes risk of electric shock.
Refer to the instruction manual of
your power tool.
This unit must not be put into service until it has
been established that the power tool to be
connected to this unit is in compliance with
98/37/EC (identified by the CE marking on the
power tool).
TECHNICAL DATA
Min. cutting dia. 10mm
Max. cutting dia. 320mm
Weight 1.4kg

-2-
SAFETY
Observe the safety regulations in
the instruction manual of the Power
Tool to be used or connected to this
attachment. Also observe any
applicable additional safety rules.
Read the following safety
instructions before attempting to
operate this product.
PLEASE KEEP THESE
INSTRUCTIONS IN A SAFE
PLACE.
The attention of UK users is drawn
to The Provision and Use of Work
Equipment Regulations 1998, and
any subsequent amendments.
General
■ Disconnect power tool, when not
in use. Before servicing and
when changing accessories such
as cutters. Disconnect power tool
and attachment from power
supply. Ensure the machine is
switched off before plugging tool
in or connecting to a power
supply.
■ Always mount the power tool,
accessory or attachment in
conformity with the present
instructions.
■ Keep children and visitors away.
Do not let children or visitors
touch the tool, accessory or
attachment. Keep children and
visitors away from work area.
■ Make the workshop child proof
with padlock and master switch.
■ Dress properly. Do not wear
loose clothing or jewellery, they
can be caught in moving parts.
Rubber gloves and non-skid
footwear is recommended when
working outdoors. Wear
protective hair covering to
contain long hair.
■ Consider working environment.
Do not use the product in the
rain or in a damp environment.
Keep work area well lit. Do not
use power tools near gasoline or
flammable liquids. Keep
workshop at a comfortable
temperature so your hands are
not cold.
■ The accessory or attachment
must be kept level and stable at
all times.
■ Keep work area clean. Cluttered
workshops and benches can
cause injuries
■ Use the attachment with the
power tools and accessories
specified in this manual only. Do
not force the tool or attachment
to do a job for which it is not
designed.
■ Secure idle tools. When not in
use, tools should be stored in a
dry and high or locked up place,
out of reach of children.
■ For best control and safety use
both hands on the power tool
and attachment. Keep both
hands away from cutting area.
Always wait for the spindle and
cutter to stop rotating before
making any adjustments.
■ Always keep guards in place and
in good working order.
■ Remove any nails, staples and
other metal parts from the
workpiece.
■ Maintain tools and cutters with
care. Keep cutters sharp and
clean for better and safer
performance. Do not use
damaged cutters. Follow
instructions for lubricating and
changing accessories. Keep
handles dry, clean and free from
oil and grease.
■ Maintain accessories. Do not use
damaged accessories. Only use
accessories recommended by
the manufacturer.
■ Check damaged parts. Before
operation inspect the
attachment, the power tool, the
cable, extension cable and the
plug carefully for signs of
damage. Check for alignment of
moving parts, binding, breakage,
mounting and any other
conditions that may effect its
operation. Have any damage
repaired by an Authorised
Service Agent before using the
tool or accessory.
■ Do not use tool if switch does
not turn it on or off. Have
defective switches replaced by
an Authorised Service Agent.
■ Don't over reach. Keep proper
footing and balance at all times.
■ Don’t abuse the cable. Never
carry power tool or accessory by
cord or pull it to disconnect from
the socket. Keep cord from heat,
oil and sharp edges. Always trail
the power cord away from the
work area.
■ Connect dust extraction
equipment. If devices are
provided for the connection of
dust extraction and collection
facilities, ensure these are
connected and properly used.
■ Check all fixing and fastening
nuts, bolts and screws before
use to ensure they are tight and
secure. Periodically check when
machining over long periods.
■ Stay alert. Watch what you are
doing. Use common sense. Do
not operate tools when you are
tired, under the influence of
drugs or alcohol.
■ Personal Protective Equipment
(PPE). All PPE must meet
current UK and EU legislation.
■ Do not leave tools running
unattended. Do not leave tool
until it comes to a complete stop.
■ Always clamp workpiece being
machined securely.
Routing Safety
■ Disconnect router power tool.
When not in use, before
servicing and when changing
accessories such as cutters,
disconnect router and
attachment from power supply.
■ Ensure router cutter has stopped
rotating before changing it.
Never use the spindle lock as a
brake.
■ Remove adjusting keys and
spanners. Form the habit of
checking to see that keys and
adjusting spanners are removed
from the router tool, cutter and
attachment before turning router
on. Make sure cutter can rotate
freely.
■ Check all ball bearing and blade
fixing screws before use to
ensure they are tight and secure.
Periodically check when
machining over long periods.
■ When using a template guide
bush ensure it cannot come into
contact with collet and nut.
■ Noise. Take appropriate
measures for the protection of
hearing if the sound pressure of
PIVOT FRAME JIG

-3-
85dB(A) is exceeded. Routing
sound pressure may exceed
85dB(A), so ear protection must
be worn.
■ Eye protection. Wear safety
goggles, spectacles or visors to
protect the eyes from ejected
waster particles.
■ Respiratory protection. Wear a
face or dust mask, or powered
respirator. Dust masks/filters
should be changed regularly.
■ Do not switch router on with the
cutter touching the workpiece.
■ The direction of routing must
always be opposite to the
cutter's direction of rotation.
■ After work, release the router
plunge and allow spindle to stop
rotating before putting machine
down.
■ Check before cutting that there
are no obstructions in the path of
the router. When cutting through
the full thickness of the
workpiece, ensure there are no
obstacles beneath workpiece,
and that a sacrificial work
surface is used.
Additional Safety Rules For
Router Cutters
■ Cutting tools are sharp. Care
should be taken when handling
them.
■ Always use cutters with a shank
diameter corresponding to the
size of the collet installed in your
tool.
■ Always run router cutters at the
spindle speed recommended
and marked accordingly. Ensure
cutter has reached correct speed
before entering workpiece.
Recommended speeds can be
found on the packaging, in cutter
instructions or in the Trend
Routing Catalogue.
■ Always use router cutters in a
router. Router cutters must not
be used in a drill. Drill and boring
bits must not be used in a router.
■ Never use cutters with a
diameter exceeding the
maximum diameter indicated in
the technical data.
■ Do not drop cutters or knock
them against hard objects. Do
not use cutters that are
damaged.
■ Cutters should be kept clean.
Resin build up should be
removed at regular intervals with
Resin Cleaner
®
. The use of a dry
lubricant (Trendicote® PTFE) will
act as a preventative. Do not use
PTFE spray on plastic parts.
■ Cutter shanks should be inserted
into the collet to the mark line on
the shank. This ensures that at
least 3/4 of the shank length is
held in the collet. Do not over-
tighten the collet nut as this will
score the shank and create a
weakness and fracture point.
■ Observe the correct assembly
instructions in the router
instruction manual for fitting the
collet and nut. Observe the
router power tool manual
instructions on fitting cutters
correctly.
■ It is advisable to periodically
check the collet and collet nut. A
worn, distorted or damaged
collet can cause vibration and
damage the shank, and should
be replaced. Worn collet nuts
should be replaced.
■ Do not take deep cuts in one
pass; take several shallow or
light passes to reduce the side
load applied to the cutter. Too
deep a cut in one pass can stall
the router.
■ Very small diameter cutters must
be handled and used with care.
■ Always return cutter to its
packaging after use.
Using Routers In A Fixed
Position
■ After work, release the router
plunge to protect the cutter.
■ Always use a push-stick or push-
block for last 300mm of the cut.
■ Whenever possible use a work
holding device or jig to secure
component being machined.
■ Ensure attachment is securely
fitted to the workbench, with
table surface at approximately
hip height.
■ Ensure a No-Volt Release Switch
is fixed to or adjacent to the
attachment and that it is used
correctly.
■ Check the direction of the
workpiece is always opposite to
the cutter's direction of rotation.
■ Do not use awkward or
uncomfortable hand positions.
■ Do not reach underneath table or
put your hands or fingers at any
time in the cutting path while tool
is connected to a power supply.
Useful Advice When
Routing
■ Judge your feed rate by the
sound of the motor.
■ Feed the router at a constant
feed rate. Too slow a feed rate
will result in burning.
■ Take many light passes rather
than one deep cut to reduce the
side load applied to both router
and router cutter.
■ Trial cuts should be made on
waste material before starting
any project.
■ When using some attachments
including a router table or
dovetail jig, the use of a fine
height adjuster is highly
recommended.
■ When using a template guide
bush, ensure there is sufficient
clearance between cutter tip and
inside each of bush. Ensure
cutter and guide bush are
concentric.
Version 2.0 10/2002
PIVOT FRAME JIG

PIVOT FRAME JIG
PIVOT
FRAME
JIG
GUARANTEE
-4-
ITEMS ENCLOSED
x2
x1
x4
x1
x16
x8
x1
x4
x4
x1
x1
x1
x1
x1

-5-
PIVOT FRAME JIG
INTRODUCTION
The Pivot Frame Jig is a versatile device which
permits the user to carry out a wide variety of router
activities. It has four distinct modes of operation:
1. Mini-Pivot Mode
In its mini-pivot form, it allows a number of small
diameter trammel operations to be executed,
normally extremely difficult to perform, to the
same degree of accuracy and repeatability with
any form of machinery normally available to the
home workshop.
2. Beam Trammel Mode
Conversion to a standard beam-trammel mode
permits extension of the range to the maximum
permitted by the router fence-rods used.
3. Guided Ski Mode
The jig may also be used in a ‘ski-mode’ guided
by external battens. This permits the router to
be used at a constant ‘ride-height’ above the
workpiece (which may be set by the user). This
feature permits planingand thicknessing of long
lengths of irregular stock timber and also a
number of guided edging and grooving
operations.
4. Freehand Ski Mode
The jig may also be used in a freehand ski-mode.
In this mode, the jig will execute planing and
thicknessing of relatively small stock material, but
can also be used in conjunction with a router
guide-bush and template for internal or external
profiling operations.
In all modes the jig also functions as an anti-
tipping device.
Suitable Routers
In this manual, assembly and operation of the jig is
described and illustrated in conjunction with the
Trend T5E router.
PFJ/SET/1 can be operated directly with any of the
following 8mm rod diameter routers:
Trend T3, T5
AEG OF450S, OFE710
Atlas Copco OFS50, 720, OFSE850, 1000
Black & Decker SR100
DeWalt DW613, 614, 615
Draper R850V
Einhell EOF850SP
Elu MOF 96, 96(E) Mk 1 & 2
Ferm FBF-6E, FBF-8E
Hitachi FM8, M8, M8V
Holzher 2335, 2336, 2356
Kango R8550S
Nu-tool NPT850
Performance Power 1020W
Perles Eurotool OF808(E)
Power Devil PDW5026, PDW5027
Ryobi R150, R151, R155, RE155K
Stayer PR50
Virutex FR77, 78C
Wickes 900W
The following machines can be used with the jig but
will not accept the fine adjuster unless a slight
modification is made:
Black & Decker BD780(E), KW779, 780(E), 800(E),
850ET
Bosch GOF900A, 900ACE
Elu MOF69
Makita 3620
Wherever possible use the longest rods available,
i.e. Ref. ROD/8X500 are 500mm long and 8mm
diameter.
PFJ/SET/2 can be used directly with the Trend T9,
Felisatti R346EC.
PFJ/SET/3 can be used directly with the Elu
MOF131, 177 and 177(E), DeWalt DW624, 625EK,
629 and Mafell L065E.
The Bosch GOF 1300ACE can also be fitted but will
not allow fitment of the fine adjuster.
When using the larger routers, the longer 500mm
guide rod bars of 10mm diameter Ref. ROD/10X500
should be used. Care must be taken when using the
heavier routers to reduce bar flex.
Do not mount any power tool
not specified in the lists above.
Pivot Frame Jig - PFJ/SET/1
Using Min. Max.
Accessory cutting dia. cutting dia.
Ref. ROD/8X500
Mini Pivot 10mm 320mm
Beam Trammel 170mm 1050mm
Pivot Frame Jigs - PFJ/SET/2 & PFJ/SET/3
Using Min. Max.
Accessory cutting dia. cutting dia.
Ref. ROD/10X500
Mini Pivot 10mm 320mm
Beam Trammel 186mm 1050mm

PIVOT FRAME JIG
PIVOT JIG MODES
-6-
Mini-Pivot Mode
Guided Ski Mode
Freehand Ski Mode
Beam Trammel Mode
The jig will not be complete
in its mini-pivot mode
without a machined disc of
min. thickness 15mm. In
view of the wide variety of
operations which may be
performed, it is not practical
to supply discs with the kit.
It is very simple for the user
to make discs as required,
using the jig itself.
workpiece
template
MDF disc
batten
workpiece
batten

PIVOT FRAME JIG
-7-
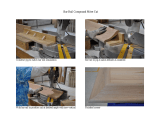
DESCRIPTION OF PARTS
Using the drawing below as a
guide to assemble the jig.
1 Pivot bar
2 Nylon shoe
3 Threaded shoe stud
4 Shoe locking knob
5 Spacer
6 Rod locking knob
7 Nut
8 Long adjuster stud
9 Short adjuster stud
10 Knurled adjuster
11 Trammel pivot knob
12 Trammel pivot stud
13 Accessory Rods - suggested accessory Refs. ROD/8X500 or ROD/10X500

PIVOT FRAME JIG
-8-
ASSEMBLY
Mini-Pivot & Ski Frame
■ Screw the four studs into the larger-diameter
end of the four shoes. The stud should be
screwed almost to the bottom of the shoe, but
must not be allowed to protrude beyond the
end. The fit of the stud in the shoe may be
tight. In this case, the stud may be held in
soft vice jaws. Repeat the operation for the
remaining three studs and shoes.
■ Fit the shoe/stud assembly to the outer-most
holes in the pivot bars, using three shoe
spacers per assembly. The spacers are
intended to offer a choice of ‘ride-height’ of
the router above the workpiece. Finally,
screw the shoe locking knob hand tight on to
the spacer.
■ Screw the four guide rod locking knobs lightly
into the tapped holes immediately above the
fence rod holes, from the same side as the
knobs which lock the shoe assemblies. Slide
the fence rods into the router and temporarily
lock in position with the locking knobs which
form part of the router.
■ Slide a completed pivot bar assembly on to
each end of the fence rods, and temporarily
lock in position by means of the guide rod
locking knobs.
■ The next step is to allow fitment of the fine
adjuster. The M6 stud is threaded onto the
tapped hole and an M6 locking nut is
tightened against router base. If your router
does not have a tapped hole in the edge of
the base similar to the Trend T5 then the
router base must be drilled out and a thread
tapped. The following routers will need
modification:
Black & Decker BD780, 780E, KW779,
KW780(E), 800(E), 850ET
Bosch GOF 900A, 900ACE,
Elu MOF69 and Makita 3620
The edge of the router base must be drilled in
the correct central position to align with the
hole in the pivot bar when fitted on to the
guide rails. The pivot bar can be used as a
drilling jig. The hole diameter must be 5.0mm
and 6.0mm deep. An M6 x 1.0mm pitch tap
must then be used to thread the hole.
■ For the Hitachi M8, M8V the base of the
router has a recess which will accept a M6
nut so giving the same facility as a threaded
hole.
In the freehand ski-frame mode, it
may be found preferable on occasion
to work with the shoes reversed on
the studs, ie. with the large flanges
in contact with the worktop. This is
best effected by removing the shoes,
reversing and re-fitting them to the
same end of the studs. Do not wind
the shoes along the full length of the
studs, as unnecessary wear of the
nylon screw-threads will occur.
ADJUSTER STUD
SHORT OR LONG
M6 NUTS
ADJUSTER KNOB
KNURLED
POSITION 1
POSITION 2
SLIDE TO
PAIRS OF M6 NUTS

-9-
PIVOT FRAME JIG
Beam Trammel Mode
Remove the entire adjuster assembly and its
associated pivot bar assembly, leaving the
remaining pivot bar assembly in position.
The trammel pivot stud has a point ground at
one end. This point may be used as a fulcrum
on soft timbers or where a high degree of
precision is not required. However, the user
should be aware that it is possible for the point
to leave its indentation during machining, with
adverse effect upon the workpiece. Wherever
possible, the stud should be used in conjunction
with a bored hole, thereby ensuring precision
and workpiece safety and also allowing both
hands free to control the router if necessary. In
such cases, the pointed end of the stud is
screwed into the pivot knob, to avoid accidental
contact by the user. Run two plain nuts loosely
on to the stud, almost to the knob and use one
to lock the knob in position. Screw the assembly
vertically into the central tapped hole in the
remaining pivot bar, with the knob on the same
side as the shoe and fence rod locking knobs.
Keep screwing until the stud protrudes below the
bar by approximately 12mm and use a spanner
to lock the stud to the bar with the remaining nut.
Remove both shoe assemblies from the pivot
bar.
The jig is now in its most elementary beam
trammel mode. This set-up will provide the
maximum machining radius for any given fence
rod length, since both the router and the single
pivot bar may be positioned at the extreme ends
of the rods. This arrangement requires the
router to ride with its base plate in contact with
the top face of the workpiece.
BLOCK
SPACER
WORKPIECE
WORKTOP
AND WASHER
LOCKNUTS
BAR
PIVOT
WORKPIECE
ASSEMBLY
PIVOT STUD
PIVOT BAR
In many cases it will be useful
to lock the stud in position with
a washer and pair of locknuts
beneath the worktop.
Ensure electric cord of router
does not foul the rods of the jig.

PIVOT FRAME JIG
-10-
OPERATION
Mini-Pivot Trammel mode
This is the basic operating mode of the device,
enabling the user to execute a number of
controlled small diameter trammel applications
which would otherwise be extremely difficult. It
is important that the user fully understands the
operating principle of the device before
proceeding further:
The normal mode of operation of a router in
beam trammel mode. In this configuration, the
pivot point is placed outside the area covered by
the base of the router, enabling circles or parts
of circles to be cut by swinging the router on the
pivot. This method cannot be used however for
the cutting of circles of small diameter, since this
would require the pivot point to be placed within
the area covered by the router baseplate.
The Mini-Pivot configuration creating an artificial
or ‘imaginary’ pivot. This is done by mounting
the router over a circular disc ‘work-surface’ on
four nylon guide shoes which engage its rim.
For convenience this item will be referred to as
the 'primary disc'. The guide shoes are held in
position by a pair of pivot bars, which are
themselves attached to the router fence rods
enabling the entire assembly, including the
router, to be rotated on the disc.
The arrangement is shown in outline plan-view.
It can be seen from this drawing that the position
of the router on the rods can be adjusted so that
the cutter follows a pre-determined circular path
about an imaginary pivot at the centre of the
disc.
PATH
CUTTER
PIVOT
TRAMMEL
SHOE PATH
CUTTER PATH
PIVOT
IMAGINARY
In its simplest arrangement, the workpiece may
be directly mounted on the disc but it will be
seen that the system is highly versatile and
many other mounting arrangements are
possible. For the moment it is perhaps
sufficient to note that, for example, a rough-sawn
workpiece may be fixed to the disc by any
convenient means, and machined internally or
externally to a high order of accuracy. The
minimum machined diameter is limited only by
the strength and general behaviour of the
workpiece. The maximum available diameter is
limited only by the length of the guide rods, since
the disc may be made any required size.
Select an adjuster stud, long or short as
preferred. Pass the stud through the central
horizontal hole in one of the pivot bars and fit
two M6 Nuts loosely on the stud, inside the pivot
bar. Screw the stud into the tapped hole on the
end flange of the router base as far as it will go.
Use the spanner to lock the stud in position with
the innermost nut. Screw the knurled adjuster
knob on to the free end of the stud, until it bears
lightly against the pivot bar. The knurled knob
may now be used for fine adjustment of the
router on the fence rods and may be locked in
any desired position by means of the free plain
nut inside the pivot bar. Use of the hexagon nut
in conjunction with the knurled knob will clearly
lock the position of the router on the guide rods
by itself. The knobs on the router should always
be used for added security. It is often
convenient to add pairs of locknuts on both sides
of the pivot bar. This enables the router position
on the guide rods to be pre-set in two positions,
for repeat work.

PIVOT FRAME JIG
Producing a Circular Disc Work
Surface
The first application for mini-pivot work is
necessarily the construction of a primary disc of
suitable size. For this purpose, the jig will be
required in its beam trammel mode. Initially
however, the router alone is used in conjunction
with a simple jig. This is simply a scrap panel
with a rectangular cutaway at one corner, used
to locate the position of the router.
Where it is desired to maximise the working
range in mini-pivot mode, the diameter of the
primary disc is made equal to the guide rod
length.
MDF is an excellent material for the disc, since it
is flat, smooth, of constant thickness and
dimensionally stable. The minimum thickness
which may be used is 15mm.
A piece of MDF which will accommodate the
required diameter is selected, and the centre
found and carefully marked. A hole 6 mm
diameter is now drilled, to accommodate the
pivot assembly. It may be noted at this point
that the inherent accuracy of the jig is of a very
high order. In the mini-pivot mode, this accuracy
is however, critically dependent upon that of the
disc. It is therefore extremely important that the
disc is machined as accurately as possible. It
may well be that the throat capacity of any
available drill-press is insufficient to enable the
drilling of the centre hole to be carried out by this
means.
Freehand operation is not advised, since it is
important that the hole is drilled precisely at right
angles to the face of the stock material
moreover, it is also possible to drill oversize
when working freehand. Given however, that the
stock material is squared-off to begin with, it is a
simple matter to use the router as a drill press.
The router is placed in the desired position on
the workpiece, possibly with the aid of a scribing
point held in the collet. The jig is then brought
up to the router and cramped in position. The
router is then fitted with the required cutter and
the hole bored. Note that sideways pressure on
the router is required to keep it in position during
machining.
It is equally important, for maximum accuracy,
that the pivot stud fits the hole fairly tightly. Any
play arising from a slightly oversize hole may
however, be removed by wrapping thin plastic
adhesive tape around the end of the bolt until
the fit is satisfactory.
The jig may now be used in the simple beam
trammel mode to profile the workpiece to the
diameter required. If desired, the adjuster may
be used on the free end, but is not strictly
necessary. The disc may be machined directly
from rectangular stock, in which case, a small-
diameter 6.35mm (1/4”) straight cutter should be
used (eg. Trend Ref. C008 or 3/22X1/4TCT), to
reduce loading and minimise dust. A better
method is to profile the disc slightly oversize with
a scroll saw or similar device and use the router
only to generate the final profile. In this case,
finish will be improved with a larger diameter
cutter.
Cutting should be carried out in a series of
passes, gradually increasing the depth of cut. It
is important that the disc blank is fixed firmly to a
flat worktop before routing the profile. This can
be done with two woodscrews on a diameter of
the disc, at some personal ‘standard’ radius.
WORKPIECE
PRESSURE
ON ROUTER
SIDEWAYS
WORKPIECE
CRAMPED TO
SCRAP PANEL
321
TAPE
90¡
-11-

It is suggested that a few experimental cuts are
taken, with a small cutter (of more or less any
type, as long as it has a bottom-cut facility), on
scrap timber. This may be attached to a
sacrificial piece of hardboard, which is then
attached to the primary disc, with fillets of hot-
melt glue. The purpose of the hardboard is to
avoid possible damage to the surface of the disc
by over-depth cutting. A very good exercise in
this respect is to machine a full circular hole of
about 50mm diameter in one workpiece and then
machine another into a disc which fits it exactly.
Note that for operations of this kind, the mini-
pivot assembly may be removed from the disc
for the purpose of a trial fit, then replaced for
further machining, with no loss of accuracy. The
workpiece must of course, be left in its original
position on the disc.
If some means of accurate measurement of disc
diameter (eg. vernier caliper) is available, trial
fits are unnecessary, since the adjuster knob and
locking nut can be used in conjunction with
feeler gauges (available from most auto parts
suppliers) to adjust the router position directly.
PIVOT FRAME JIG
-12-
Setting-up the Mini-Pivot
Configuration
At this stage, the disc may be left attached to the
worktop for the moment in order to assemble
and get the general feel of the mini-pivot
configuration. For this purpose, the jig should be
re-assembled in accordance with the assembly
instructions, but (temporarily) without the lateral
adjuster stud and knob. This is because the
stud does impart a slight frictional resistance to
the movement of the pivot bars on the rod and it
is important, at least to begin with, that the user
gets the feel of the shoes against the disc.
The jig is placed over the disc such that the
flanges of the shoes rest on the top of the disc
and the smaller diameter of the shoes bears
against the edge of the disc. In this position, the
bars are locked on to the rods. It should be
possible to rotate the jig on the disc freely,
without any undue play in the system. Some
slight resistance to motion will be felt; this is
normal. The shoes must always be tight on the
pivot bars; they are not meant to rotate on their
threaded studs.
Of particular interest is the ability to cut a
complete circle without changing operator
position, i.e. there is no need to walk round the
work. This feature should be practiced
somewhat, since it is necessary to get used to
the idea of controlling the plunge locking knob at
the same time.
Please note that the router cable can
get in the way of the shoes, unless it
is held by an overhead mount.
If this standard is adhered to for all primary discs
made, it becomes a simple matter to fix any disc
to a worktop with matching holes. After initial
making of the disc, an excellent method of
subsequent fixing is to bore out and counterbore
the holes, to accept flat-topped bolts, which may
also be passed through the worktop. Accurate
router boring and counterboring may be
implemented with the jig.
WORKTOP
DETAIL
DISC
DISC
BATTEN

Simple Ski-Mode
In its standard mini-pivot assembly configuration,
the jig may be used without the guide disc in a
completely freehand mode on a flat worktop. In
this way, it may be used to plane the surface of
a small piece of material of irregular thickness
and finish, then reverse it and machine it down
to a pre-determined thickness.
It may also be used in conjunction with a
template and guide bush or ball bearing guide
for profiling. For any of these operations, the jig
operates the router in a completely stable anti-
tipping configuration.
Moreover, the router ride-height may be adjusted
to suit the workpiece, by means of the spacers.
The size of work which may be handled is
limited only by the length of the fence rods and
can be maximised by moving the router to one
end of the rods. Since the ride-height is fixed,
the router plunge facility can be used for
freehand lettering etc. even in uneven
-13-
PIVOT FRAME JIG
WORKPIECE
CUTOUTS
MACHINED
DISC
ANNULAR
FILLETS
GLUE
In some applications, it is inconvenient to mount
the disc to a flat worktop. Instead, the disc may
be screwed to a substantial batten, which may
then be held in a vice, or the jaws of a
Workmate
®
. It will also be found helpful to cut
away a fairly substantial slot in the centre of the
batten, to give clearance for bolts which are
fitted to the disc in certain advanced
applications.
With large discs, it may sometimes be necessary
to place additional temporary support blocks
beneath the disc, to avoid undue strain on the
batten.
Annular Disc Work
Where the thickness of the workpiece is beyond
the capacity of the shoe spacers, an annular
disc may be used. Discs of this type are easily
machined with the jig, the inner cut-out being
taken in either beam trammel or mini-pivot
mode, dependent upon dimensions. Both the
disc and the workpiece are mounted on a flat
worktop. The arrangement allows the disc
thickness to be added to available ride-height.
A very powerful additional facility with discs of
this type is the machining of circular holes or
slots etc., in very large workpieces, such as
kitchen worktops requiring cutouts for essentially
circular plumbing or other fixtures. This is
effected by mounting the disc on the workpiece
in the desired position, with screws if possible,
but otherwise by adhesive means and using the
pivot frame to cut such holes or shapes as are
required.
A simple way of locating the disc is to draw a
pencil circle on the workpiece with a compass, of
a slightly smaller diameter than the internal
diameter of the disc and use this for visual
location. Clearly, if the workpiece is actually
fixed in its final position, for example, against a
wall, the arrangement is necessarily limited to
operations which are not too close to the wall.
On the other hand, if the workpiece can be
removed from its location and treated as a
‘bench job’, the system is immediately much
more flexible. Where the workpiece completely
supports the disc, any convenient disc size may
be used. It is quite feasible to allow the disc to
overhang the workpiece slightly when working
near an edge or a corner however. But in this
case, for safety reasons, the disc should be as
small as the required work will allow and both
the workpiece and the disc must be very well-
supported.

PIVOT FRAME JIG
-14-
workpieces (eg. rustic nameplates).
A particular advantage of the ‘open’ construction
of the pivot frame, is the ability to see the
workpiece clearly, with the router assembly riding
well above the workpiece. This can be of
particular advantage for work against a template,
where the cut needs to be ‘stopped’ by visual
inspection.
Guided Planing Mode
This machining mode is essentially an extension
of the foregoing arrangement and permits
planing of long work, together with a facility for
machining parallel grooves or edge-mouldings.
It requires a flat work surface and two straight-
edged battens of constant thickness, which may
be fixed to a flat work surface (cramping is quite
suitable), such that the straight edges are
separated by a fixed distance and are parallel.
The jig is adjusted so that the flanges of the
nylon shoes ride on the battens and the smaller
diameter of the shoes bears against the edges
of the battens. Ride-height is determined initially
by the depth of the battens, but may be modified
by suitable arrangement of the shoe spacers.
The workpiece may be attached to the worktop
by fillets of hot-melt glue. Where the workpiece
is uneven on both surfaces (e.g. it may be
twisted), it may be packed with small pieces of
veneer at the high spots, until it cannot be
rocked on the worktop; the glue fillets may then
be applied.
It is recommended that the largest diameter
bottom-cut router cutter available is used for this
operation. The use of routers limited to 1/4"
diameter shanks will reduce the possibilities but,
for example, a 25.4mm (1") diameter cut will be
obtained from straight two-flute cutter Trend Ref.
4/08X1/4TC and a 30mm cut from scribing ovolo
cutter Trend Ref. 6/5X1/4TC, both available with
1/4" shank.
To begin, the jig should be moved over the work
with the cutter stationary, in order to find the
highest point; depth of cut may then be set with
reference to this point. It is recommended that
several passes are made over the work with a
very small depth of cut (no greater than 0.5mm),
gradually clearing the high-spots and eventually
arriving at a flat smooth surface.
The router may be left to slide freely on its rods
and guided by means of its plunge knobs for this
operation, since it will stay in place at any set
position, provided the cut is light. If the cut is too
deep, the router may take control and pull itself
across the work off-line.
For the final cut in particular, which should be no
greater than 0.2mm, the router should be locked
on the rods for each pass, and moved across
the work by means of the locking knobs on a
pivot bar and not by the handles on the router
itself. This will eliminate any tendency for over-
depth cutting due to hand-pressure ‘springing’
the guide rods.
Another possibility with the system is that of
machining straight parallel grooves, either
continuous or stopped, with any of a number of
straight or profiling cutters.
It is not wise to rely on accurate tracking of the
system along both parallel battens for work of
this nature, where positional accuracy of the
router is of importance. The work is better
carried out by preferential pressure on one
batten only.
Moreover, it is perfectly possible for even a stout
batten to spring slightly in the centre under
pressure, if it is cramped at the ends only. An
additional cramp or two towards the centre will
CUTTER
FLAT-BOTTOMED
STOCK
WARPED
PACKING
VENEER
FILLET
GLUE

-15-
PIVOT FRAME JIG
Mounting the Workpiece
Wherever possible, the safety of the workpiece
should be ensured by fixing to the disc or
worktop by the most positive means allowable.
Double-sided tape Trend Ref. DS/TAPE, may be
used for many applications, particularly where
the surfaces to be joined are flat, smooth and
not porous or dusty.
STUDDING
DISC
SECONDARY
PRIMARY OR
WORKPIECE
DISC
ALLOY
WORKPIECE
BLANK
PROFILE
PROPOSED
BLANK
WORKPIECE
WORKTOP
GLUE FILM
SHIM
Fillets of hot-melt glue, applied with a gun at
convenient places, can be very effective.
Where the central portion of a given workpiece is
that which is finally required (ie. the scrap
material occurs at the edges), the system can be
very useful. The system is best used with ‘glue-
film’, which is essentially hot-melt glue in sheet
form.
considerably reduce the problem.
Where work of the highest accuracy is required,
the clamp guide is strongly recommended. This
is available in three lengths (Trend Refs. CG/24,
CG/36 and CG/50) and furnishes a straight edge
which is both straight and parallel to very close
tolerances. It is used in conjunction with an
extra pivot bar and shoe assembly.
Wherever possible, regardless of operating
mode of the jig, it is advisable to set the depth of
the final cut off the workpiece and operate the jig
from the pivot bars rather than the plunge knobs,
to avoid over-depth cutting due to flexing of the
rods under hand pressure.
In many cases, this will not be possible and
there is consequently some risk of indentation of
the workpiece as the initial plunge is taken
(particularly with profiling cutters). It is possible
to alleviate the problem with an extra
attachment, easily home-made. This comprises
a small block of wood, of appropriate thickness,
clamped to the guide rods with a single
woodscrew, as close to the router as operation
will allow.
BLOCK
SPACER
BLOCK
CLAMPING

PIVOT FRAME JIG
-16-
ADVANCED APPLICATION
Mini Pivot Mode - Off-Centre Work
For decorative applications, the scope of the
Pivot Frame Jig may be considerably extended.
By mounting the workpiece in various positions
on the main disc and using the mini-pivot facility
to cut circles or parts of circles many designs
can be achieved.
A highly-versatile arrangement may be created
by machining a 6mm slot in the disc (referred to
from now on as the ‘primary disc’). The slot is
used to mount a ‘secondary disc’, preferably in
birch plywood, of about half the diameter of the
primary disc and about 9mm thick on to the
latter, via a central 6mm bolt, nut and washer.
Thus, the secondary disc may be rotated on the
primary disc to any desired angular position
relative to the mini-pivot centre and may also be
offset from this centre by any desired amount.
The secondary disc may be marked out with the
aid of rule and compasses into any number of
equal angular divisions, 24 being fairly versatile
since it allows the disc to be divided into 2, 3, 4,
6, 8, 12 or 24 equal sectors.
From these divisions, the disc may be drilled on
its edge with a series of holes of equal depth (it
is very easy to set up the router to do work of
this kind). The holes may be used in conjunction
with a simple stop block and metal rod. Exactly
the same idea may be applied to beam trammel
work. In this case, the trammel pivot is mounted
on a flat worktop and the secondary disc run in a
slot on the same worktop, a suitable distance
away from the trammel pivot. The workpiece is
mounted on the secondary disc by any preferred
means.
It is a simple matter to cut tubes (or parts of
tubes), of a depth limited only by the reach of
the cutter, for inlay purposes. For example,
imagine that a tube of contrasting timber is
required to be glued precisely into an aperture
which has been machined by a 3.2mm (1/8")
diameter cutter eg. Trend Ref. C001 or
3/10X1/4TCT. This can be done by fixing a
suitable offcut of timber to the centre of the MDF
disc and setting the Mini-Pivot system to two
positions in succession, to machine the outer
and inner diameters in turn.
Note that, if the same 3.2mm (1/8") dia. cutter is
used, the router will need to be moved along the
rods by 6.35mm (1/4") or in fact just slightly less,
to allow a little gluing clearance.
The work discussed thus far in this section is
obviously limited by the size of the primary disc,
since the top flanges of the mini-pivot shoes
must be allowed sufficient clearance to do their
job. It may seem at first sight that this
represents a limitation of the system, but in fact
it doesn’t.
EXAMPLES
SECONDARY
DISC
6mm.SLOT
STOP
BLOCK
WORKPIECE
PRIMARY
DISC
INDEXING
HOLES
INDEXING
BLOCK
SLOTTED WORKTOP
TRAMMEL
PIVOT
CUTTER
PATH
WORKPIECE
SECONDARY
DISC

PIVOT FRAME JIG
-17-
PIVOT
WORKPIECE
SUPPORT
WORKPIECE
WORKPIECE
DISC
ANNULAR
SUPPORT BATTEN
This arrangement is but a variation of the
‘secondary disc’ system discussed earlier. Note
however, that the annular primary disc may be
required to overhang its support batten by a
considerable amount and may thus require extra
support. This can often be provided by the
workpiece itself.
Both arrangements require that the workpiece is
cramped firmly to the worktop during machining.
In a lateral sense, the cramping can be more or
less anywhere convenient.
The Pivot Frame Jig may be used in its linear
and mini-pivot modes to generate decorative
panel mouldings (of particular interest to
furniture restorers). Linear lengths of moulding
are easily produced as ‘cut-offs’ from a single
sheet of stock. Generally, a small-radius ovolo
cutter (typically Trend Ref. 7/01) will be required.
Radiused parts may also be machined from a
single piece of timber, but require the workpiece
to be moved between individual operations. The
method illustrated will also ensure that the grain
of the timber can be arranged to provide
maximum strength.
Only a simple user-modification is required to
enable the jig to cut radial patterns. The primary
disc is furnished with a number of holes (24 will
be found useful) equally spaced around the
periphery, such that they fall under the central
hole in either of the pivot bars. A peg may now
be passed through the hole in the pivot bar such
that it engages with any of the holes in the disc,
thus temporarily locking the router in position.
It was pointed out in the applications section that
the primary disc, in the form of an annular ring,
could be mounted over a large workpiece for the
purpose of machining cutouts in the latter. In
this case, the annular disc is mounted over a
pair of parallel battens, such that a workpiece, in
the form of a long strip of timber, may be slid
between them and cramped in a series of
predetermined positions.
In this way, the workpiece does not impede the
path of the nylon shoes (since they ride above
it), thus enabling repeated decorative patterns to
be cut. The principle is easily extended to deal
with essentially circular workpieces (eg. mirror-
frames, with the addition of a further pivoted
disc, to provide accurate positioning of the
workpiece).
TRIM
POINT
SEPARATION
GRAIN
WORKPIECE
MOVE
SAND AWAY
STOCK
DISC
CRAMPING
STRIP
BATTEN
WORKPIECE
SPACER
FLAT WORKTOP

PIVOT FRAME JIG
-18-
CUTTER
CUTTER PATH
WOOD SPACER
BRACKET
ANGLE
WORKPIECE
SECONDARY DISC
ACCESSORIES
‘Decorative Routing Jigs and Techniques’ Book -
Ref. DRJT/BOOK.
Pack of 8 spacers, 3mm thick - Ref. PJ/1
Long rods 8mm x 500mm - Ref. ROD/8x500
Long rods 10mm x 500mm - Ref. ROD/10x500
MAINTENANCE
The jig has been designed to operate over a
lond period of time with a minimum of
maintenance. Continual satisfactory operation
depends upon proper tool care and regular
cleaning.
Cleaning
■ Regularly clean the bars with a soft cloth.
Keep rods and studs free of resin build up.
Lubrication
■ Your jig requires no additional lubrication.
RECYCLING
The jig, accessories and packaging should be
sorted for environmentally friendly recycling.
GUARANTEE
The jig carries a manufacturers guarantee in
accordance with the conditions on the enclosed
guarantee registration card.
WORKPIECE
ROUTER MOVEMENT
PEG
INDEXING
RADIAL PATTERN
INDEXING HOLES
Radial slots may now be machined in the
workpiece, their length being determined by
pairs of locknuts on the adjuster. The adjuster
must be fitted to the pivot bar not occupied by
the peg. The fit of the peg must be such as to
minimise movement of the pivot frame on the
primary disc.

PIVOT FRAME JIG
-19-
PFJ - SPARE PARTS LIST
v2.0 08/2002
No. Qty. Desc. Ref.
1 2 PFJ/SET/1 Main Bar for Trend T5 WP-PJ/01
2 2 PFJ/SET/3 Main Bar for Elu MOF177 WP-PJ/02
3 4 Delrin
®
Shoe M8 WP-PJ/03
4 1 Short Stud M6 x 180mm WP-PJ/04
5 1 Long Stud M6 x 180mm WP-PJ/05
6 1 Knurled Nut M6 WP-PJ/06
7 4 Stud M8 x 75mm WP-PJ/07
8 1 Trammel Stud M6 x 50mm WP-PJ/08
9 2 PFJ/SET/2 Main Bar for Trend T9 WP-PJ/09
10 16 Spacer 8mm OD x 6mm thick WP-RR/50
11 4 Locking Knob M6 x 10mm WP-KNOB/01
12 1 Lobe Knob M8 WP-KNOB/06
13 1 Knob M6 WP-KNOB/08
14 8 Nut Hex M6 WP-NUT/06
15 1 Manual MANU/PFJ
/