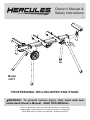
Hercules Item 64751-UPC 193175310385 Owner's manual
- Category
- Power tools
- Type
- Owner's manual
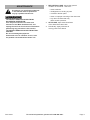
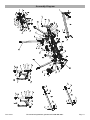
Hercules Item 64751-UPC 193175310385 is a PROFESSIONAL ROLLING MITER SAW STAND with a maximum load of 550 lb and a maximum extension of 98-1/2". It is designed to be used with a miter saw (not included) and features adjustable workpiece supports and extension arms. The stand is easy to set up and use, and it folds up for easy storage.
Hercules Item 64751-UPC 193175310385 is a PROFESSIONAL ROLLING MITER SAW STAND with a maximum load of 550 lb and a maximum extension of 98-1/2". It is designed to be used with a miter saw (not included) and features adjustable workpiece supports and extension arms. The stand is easy to set up and use, and it folds up for easy storage.


-
 1
1
-
 2
2
-
 3
3
-
 4
4
-
 5
5
-
 6
6
-
 7
7
-
 8
8
-
 9
9
-
 10
10
-
 11
11
-
 12
12


Hercules Item 64751-UPC 193175310385 Owner's manual
- Category
- Power tools
- Type
- Owner's manual
Hercules Item 64751-UPC 193175310385 is a PROFESSIONAL ROLLING MITER SAW STAND with a maximum load of 550 lb and a maximum extension of 98-1/2". It is designed to be used with a miter saw (not included) and features adjustable workpiece supports and extension arms. The stand is easy to set up and use, and it folds up for easy storage.
Ask a question and I''ll find the answer in the document
Finding information in a document is now easier with AI
Related papers
Other documents
-
U S GENERAL 59445 Owner's manual
-
WARRIOR Item 56478-UPC 193175440112 Owner's manual
-
Bauer 58654 Owner's manual
-
PowerTec MT4008 Owner's manual
-
Chicago Electric 62750 Owner's manual
-
-
-
-
Central Machinery 1 HP 7 In. x 12 In. Hydraulic Feed Metal Cutting Band Saw Owner's manual
-