Netgear GA511 Installation guide

Type
Installation guide

This manual is also suitable for

Netgear GA511 - Gigabit Ethernet PC Card is a high-speed network adapter designed to connect your computer to a wired network. With its Gigabit Ethernet connectivity, it offers fast data transfer speeds of up to 1000 Mbps, making it ideal for demanding applications such as online gaming, HD video streaming, and large file transfers. Additionally, it supports advanced features like auto-negotiation for optimal speed and duplex mode selection, as well as Wake-on-LAN (WoL) for remote wake-up of your computer.

Netgear GA511 - Gigabit Ethernet PC Card is a high-speed network adapter designed to connect your computer to a wired network. With its Gigabit Ethernet connectivity, it offers fast data transfer speeds of up to 1000 Mbps, making it ideal for demanding applications such as online gaming, HD video streaming, and large file transfers. Additionally, it supports advanced features like auto-negotiation for optimal speed and duplex mode selection, as well as Wake-on-LAN (WoL) for remote wake-up of your computer.

)NSTALLATION'UIDE
NETGEAR 10/100/1000 Mbps Gigabit CardBus Adapter GA511
Start Here
Before you begin installation, check the Package Contents section in your Reference
Manual located on your NETGEAR Adapter Resource CD. Advanced configuration
options are also covered in the Reference Manual.
Estimated Completion Time: 15 minutes.
Verify that System Requiremets are Met
Before installing the GA511, please make sure that your computer meets the following
minimum system requirements:
A notebook PC with a Pentium
®
300 MHz or higher compatible processor with an
available CardBus slot
A CD-ROM drive
64 MB of memory
At least 5 MB of disk space
Windows Vista, XP Home, Windows XP Professional, 2000, Me, 98SE (2nd edition),
Windows 2000 Professional, Windows 2000 Server, or Windows 2000 Advanced
Server. Some versions of Windows may ask for the Windows operating system
installation files to complete the installation of the GA511 driver software.
Important Vista Users! If you are installing the GA511 on a system running Windows
Vista, install the GA511 Gigabit CardBus Adapter first, as shown in Step 2a., and restart
your computer. Then, install the GA511 software, as shown in Step 1 (a through e).
Install the GA511 Gigabit CardBus Adapter
1. First, install the GA511 software.
a. Power on your notebook, let the operating system boot up completely, and log in
as needed.
b. Insert the NETGEAR Adapter Resource CD into your CD-ROM drive. The
Adapter Resource CD main page will load.
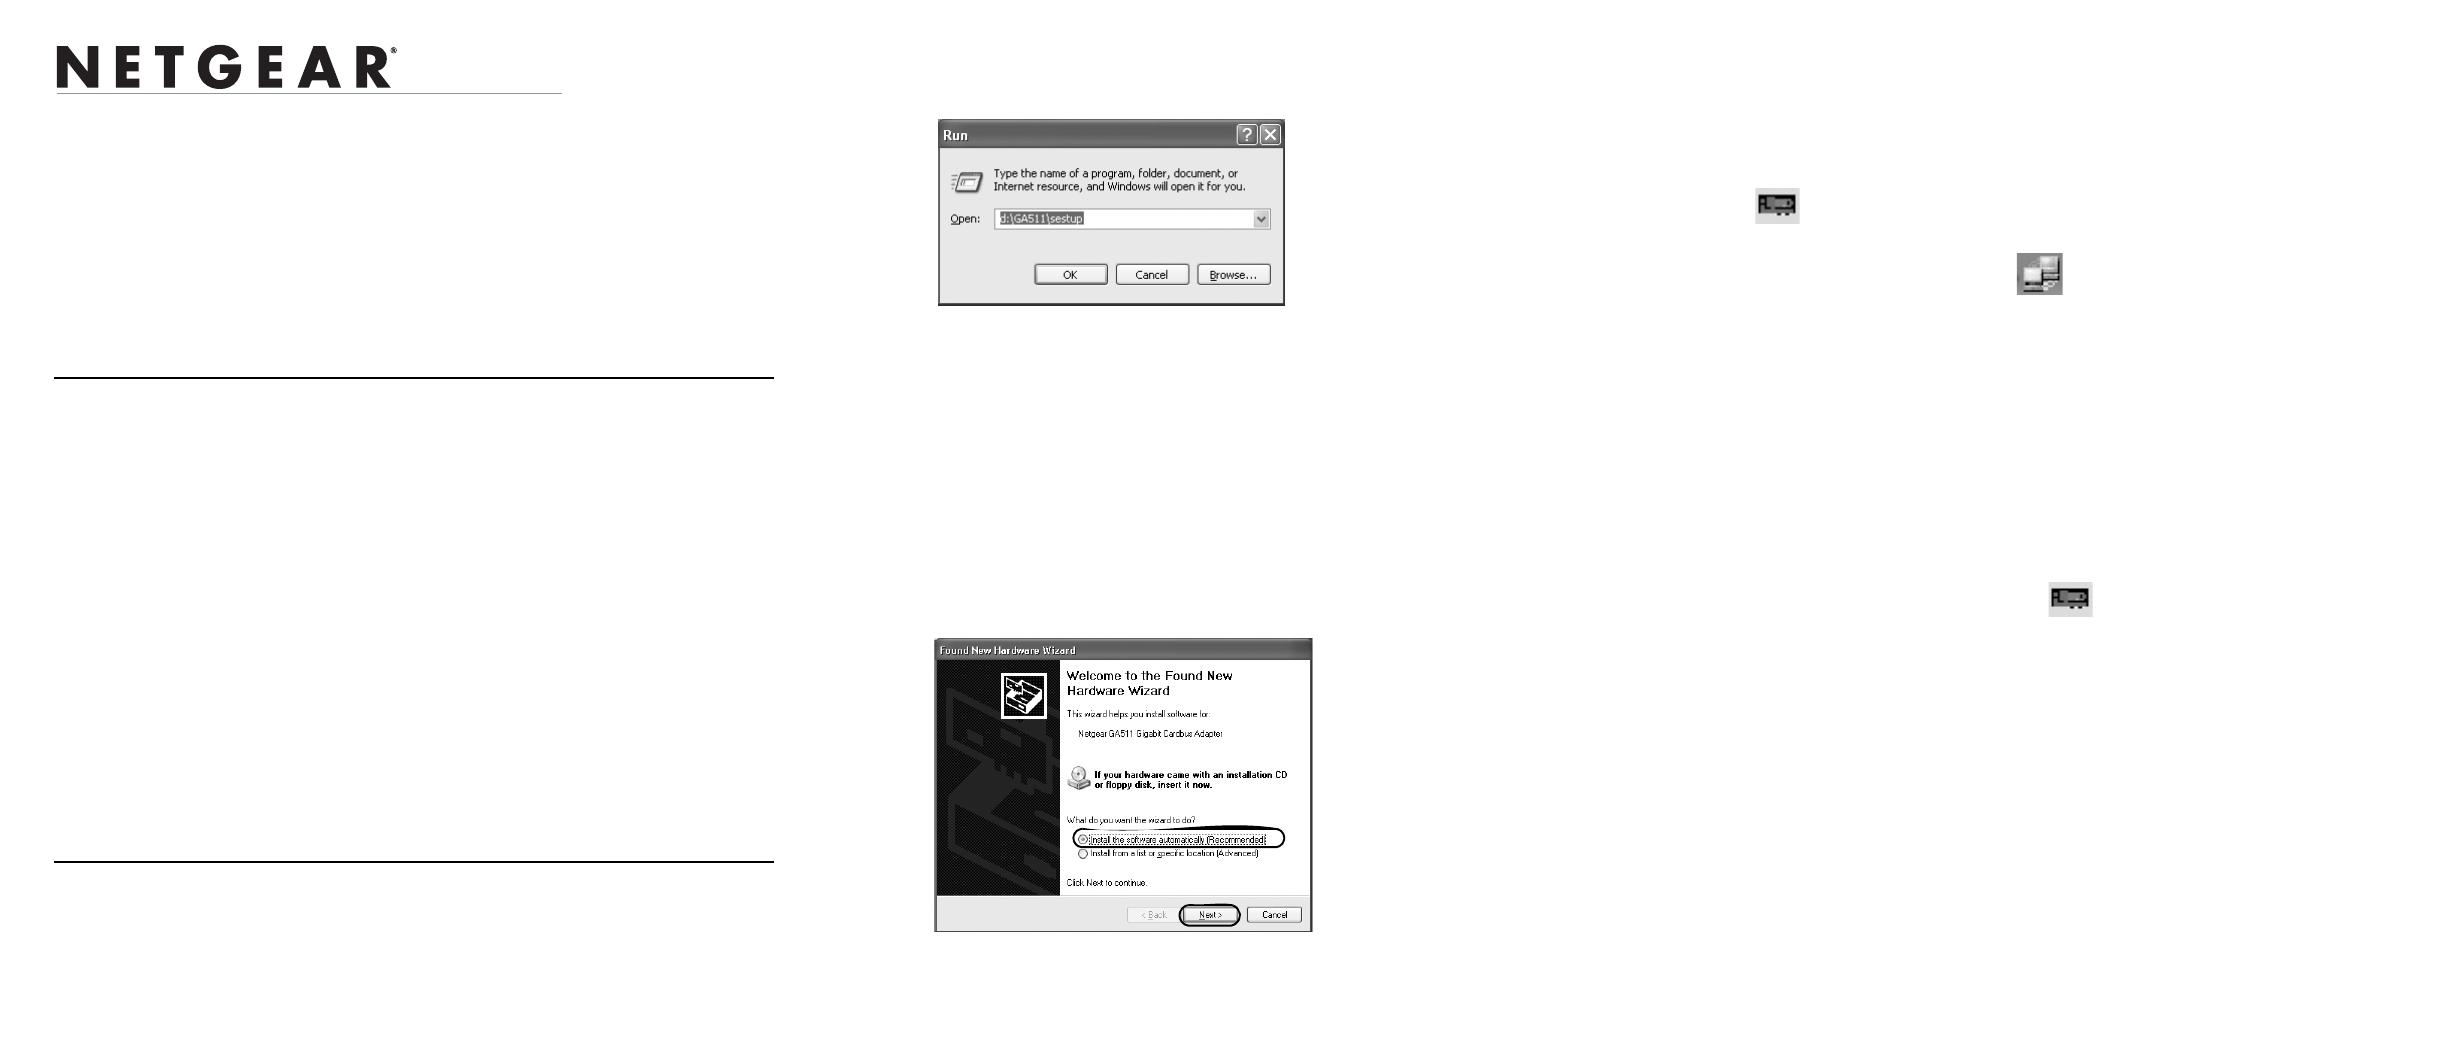
c. From the Windows Start menu, select Run. The Run dialog box opens.
d. Enter the path to the GA511 setup.exe file on the CD. For example, if your
CD-ROM is drive D, enter D:\GA511\setup as the path. Then, click OK.
e. Follow the InstallShield Wizard steps. Click Finish when done. Remove the
NETGEAR Adapter Resource CD. If prompted, restart your computer.
Now, the GA511 driver and utility software are installed.
2. Next, install the GA511 Gigabit CardBus Adapter.
a. Locate an available CardBus slot on the side of your notebook. Hold the PC Card
with the NETGEAR logo facing up and insert it into the CardBus slot.
Note: Do not use excessive force, but make sure the card is fully inserted into the slot.
b. Follow the Found New Hardware Wizard steps.
c. Accept the Install the software automatically setting, and click Next to
proceed.
Note: If Windows Vista, XP or 2000 displays a Windows XP Logo Testing or a
Digital Signature Not Found warning, click Continue Anyway or Yes to proceed.
d. Click Finish to complete the installation. If prompted to restart your computer,
power down and restart the notebook. You will see the GA511 Smart Wizard icon
in the system tray on the lower right side of the Windows task bar.
3. Now, configure the GA511.
a. Double-click the connection icon in the Windows system tray to open the
Windows network connection page.
If the connection icon is not visible, you can change the connection properties by
going to Start > Control Panel > Network Connections.
b. Double-click on the NETGEAR GA511 Gigabit CardBus Adapter connection.
c. Click Configure.
d. Click Properties and configure the GA511 according to your network
requirements.
For assistance with configuring the network settings, please see the networking
tutorials on the NETGEAR Adapter Resource CD.
4. Finally, verify network connectivity.
a. Click the GA511 Smart Wizard icon on the lower right side of the
Windows task bar.
b. Verify that the GA511 status information matches your network.
Note: If you are unable to connect, see the the Troubleshooting section below or the
troubleshooting tips in the Reference Manual on the NETGEAR Adapter Resource CD.
April 2007
This symbol was placed in accordance with the European Union Directive
2002/96 on the Waste Electrical and Electronic Equipment (the WEEE
Directive). If disposed of within the European Union, this product should be
treated and recycled in accordance with the laws of your jurisdiction
implementing the WEEE Directive.
© 2007 by NETGEAR, Inc. All rights reserved. NETGEAR and the NETGEAR logo are registered trademarks
of NETGEAR, Inc. in the United States and/or other countries. Other brand and product names are trademarks or
registered trademarks of their respective holders. Information is subject to change without notice.
GA511 Smart Wizard Utility
The GA511 Smart Wizard utility provides a convenient way to check the status of the
adapter without needing to view the LEDs on the top of the adapter itself. Click the
GA511 Smart Wizard utility icon to view the current status.
If the utility is not displayed on the taskbar, you can start it by going to Start > Programs >
NETGEAR GA511 Adapter > GA511 Smart Wizard Utility. Then, click Details to view
the adapter settings.
Troubleshooting
If you have trouble setting up your GA511, check the tips below. You can also consult
more extensive troubleshooting procedures on the NETGEAR, Inc. support website at
http://kbserver.netgear.com/products/GA511.asp.
Symptom Cause Solution
The Adapter LED
lights are not lit.
The GA511 is not
inserted into the slot
properly or the
GA511 software is
not loaded.
Make sure the notebook is fully powered
on.
Remove and reinsert the GA511.
Check the Windows device manager to
see if the GA511 Gigabit CardBus Adapter
is recognized and enabled. Reload the
GA511 software, if necessary.
The Link/Act LED
light is lit, but the
100/1000 LED is
not lit.
The GA511 is
operating at 10
Mbps.
The computer is connected to a router or
other network device that is operating at
10 Mbps.
If you connect to a 100 Mbps device, the
100/1000 LED will be amber.
If you connect to a 1000 Mbps device, the
100/1000 LED will be green.
The 100/1000
LED is blinking
intermittently.
There is a problem
with the link such as
a speed mismatch,
possible bad cable,
bad connector, or
configuration
mismatch.
Check the network cable and make sure it
is functioning properly.
Try plugging the network cable into a
different port on the router attached to the
gigabit Ethernet adapter.
Technical Support
Thank you for selecting NETGEAR products.
After completing setup and configuration, locate the serial number on the bottom label of
the GA511 Gigabit CardBus Adapter and use it to register your product at
http://www.netgear.com/register.
Registration on the web site or over the phone is required before you can use our
telephone support service. The phone numbers for worldwide regional customer support
centers are on the Warranty and Support Information card that came with your product.
Go to http://www.netgear.com/support for product updates and web support.
  • Page 1 1
  • Page 2 2

Netgear GA511 Installation guide

Type
Installation guide
This manual is also suitable for

Netgear GA511 - Gigabit Ethernet PC Card is a high-speed network adapter designed to connect your computer to a wired network. With its Gigabit Ethernet connectivity, it offers fast data transfer speeds of up to 1000 Mbps, making it ideal for demanding applications such as online gaming, HD video streaming, and large file transfers. Additionally, it supports advanced features like auto-negotiation for optimal speed and duplex mode selection, as well as Wake-on-LAN (WoL) for remote wake-up of your computer.

Ask a question and I''ll find the answer in the document

Finding information in a document is now easier with AI