Page is loading ...

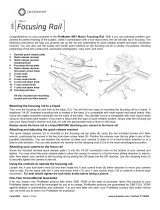
Congratulations on your purchase of this ProMaster CT75K Cine tripod kit. Please read these instructions
thoroughly to ensure proper assembly, operation, and adjustment of your new tripod kit. With proper use and
adjustments your Cine tripod kit will provide many years of excellent service.
ASSEMBLY
Attaching the handles
When you unpack the kit you will notice the CH75 Cine Head is already attached to the CT75 Cine Legs. One
Handle (6) is already installed on the head. Check inside the carry bag for the second handle. Unzip the inside
compartment. You will find one Handle (6) along with an allen wrench. Set the wrench aside. You do not
need it for installing the handle. Notice the two Handle Connection Ports (4) on the CH75 head, one of which
is open. Simply turn the knob on the handle and thread it into the connection port. It is normally ideal to
install each handle so the bend in it creates a position pointing slightly down from the head. Notice the ribbing
around each Handle Connection Port (4) and on the mating side of each handle. This means you can position
each handle in a place you find most comfortable. It is OK to install just one handle on the left or right side of
the head or both at the same time. Customize your CT75K to your liking!
Mounting the Quick Release platform to your camera
Locate the Quick Release Plate (1). It should already be connected to the top of the head. Simply turn the
Quick Release Knob (3) to loosen the head's quick release jaws and remove the Quick Release Plate (1). The
plate comes with two camera attachment screws, a male ¼"-20 screw and a 3/8" male screw. Use whichever is
correct for your camera and remove the other screw from the plate. You can store it in the zippered
compartment inside your carry bag. Align the quick release plate screw with the female threaded port on the
bottom of your camera and orient the plate so it lines up with the direction of your lens (in a front-to-back
orientation). Tighten the screw so the platform is snug. You can use a coin or flat head screwdriver to aid in
tightening this screw.
Mounting your camera
The Quick Release Knob (3) should already be loose from removing the plate. It opens the jaws of the quick
release receiver on the CH75 head. Place your camera onto the head with the Quick Release Plate (1) inside of
the channel. Notice the plate has two protruding bolts on its bottom side. These bolts create safety stopping
points to help prevent the plate (and camera) from sliding off the head. Now start to tighten the Quick Release
Knob (3) but not to make the plate completely tight yet. You want to be able to slide the plate with some
resistance.

Now you can try different positions for the plate and the camera/lens you are using to find a good balance
point on the head. Start in the center, tighten the Quick Release Knob (3) and check the balance of the rig with
the head's Drag Control (5) loose. If the rig is not well balanced, loosen the Quick Release Knob (3) slightly,
slide the camera forward or back a bit, tighten the knob and test the balance again. Repeat this process until
you have the best balance point. Now, look at the scale next to the plate and record the number the plate
marker is pointing to. You can use this to quickly set up the same camera and lens combination again in the
future. Warning: always have a hand on your camera when you loosen the Quick Release Knob to prevent
accidental dropping and damage.
TRIPOD OPERATION
Adjusting and extending the legs
Unhook the Leg Connection Clip (13) and pull out on all of the legs to form the basic tripod. Notice the
Spreader (11). It adds stability to your tripod. There are 3 Spreader Levers (12), which can be opened. When
they are opened you can further stretch the legs out into a wider stance. This wider stance, with the Spreader
(11) fully extended, is the most stable position for your tripod kit, regardless of the height you are using.
To extend the length of any leg twist the Leg Lock (9) counterclockwise, extend that particular leg section,
and then tighten the Leg Lock (9) by turning it clockwise until it stops. Each leg section can be adjusted to
any position along its length. This way you can adjust each leg differently over uneven ground to make the
tripod level. A level tripod will be the safest and most stable way to shoot.
Using the bowl adapter
Loosen the Bowl Handle (10) slightly. Grasp the CH75 head and move it around on the bowl adapter to find a
level position. Watch the bubble level on the lower part of the head to guide your positioning. Once you have
found a level point, hold the head in place and tighten the Bowl Handle (10).
Using the CH75 Cine head
With your camera mounted to the CH75 head loosen the Panning Control Knob (8) to allow a side-to-side,
rotational movement of the head and camera or tighten it in place to avoid accidental side-to-side movement.
Notice the panning action of the head is smooth. Practice making soft starts and stops to your panning
movements to achieve professional looking results.
Two knobs control the tilting motion of the CH75 head. The Tilt Control Knob (7) can be loosened to allow a
tilting motion forward and back for the head and your camera. Tighten the Tilt Control Knob (7) to keep the
camera in place. The Drag Control (5) allows the tilting motion to be controlled for the weight of the
particular camera and lens you are using. Turn the Drag Control (5) towards its + or - side to tighten or loosen
the drag. Once you find the best amount of drag for your camera you can use the Tilt Control Knob (7) to turn
on or off the tilt control all together. The head will keep the same drag amount as you use the Tilt Control
Knob (7). Similar to the panning control, practice soft starts and stops to your tilting motion.
You may choose to loosen the panning and tilting control at the same time. This is a situation in which using
two hands on both handles can be extremely helpful for the best control of your camera. The more you
practice soft starts, soft stops, and smooth, even motion with your CH75 head, the better your video footage
will become.
Using the accessory port
One 3/8” threaded, female Accessory Port (2) is located in the CH75 head. Use this to connect accessories
such as flex arms, spigots, etc. With these accessories mounted you can hold an item such as an external video
monitor or LED light. Whatever you connect will move with your camera as you control the CH75 head.

Using the feet
At the bottom of each of the 3 tripod legs you will find Double Spiked Feet (14) with round rubber covers.
The rubber covers are great for general purpose use indoors and outdoors. If you are on uneven or difficult
terrain (hillsides, icy ground, etc...) you can remove the rubber covers to expose sharp, hardened spikes which
will dig into the ground to provide better stability. This kit also includes 3 Footprint Pads (15), which can be
applied over the double spiked feet. Place the yoke of the Foot Print Pad (15) between a Double Spiked Foot
(14) on one leg and pull on the handle of the Footprint Pad (15) to bring it up and over the protruding portion
of the lower leg. Apply one Footprint Pad (15) per tripod foot. The footprint pads provide a very large surface
area to make contact with the floor or ground. They have the ability to self-level somewhat due to their ability
to rotate. They can also help soften vibration in the floor.
ONE YEAR UNCONDITIONAL WARRANTY
If for any reason, this ProMaster product fails within ONE YEAR of the date of purchase, return this product
to your ProMaster dealer and it will be exchanged for you at no charge. ProMaster products are guaranteed for
ONE FULL YEAR against defects in workmanship and materials. If at any time after one year, your
ProMaster product fails under normal use, we invite you to return it to ProMaster for evaluation.
Made in China
WWW.PROMASTER.COM | FAIRFIELD, CT 06825

/
