Fagor SF-700CB Operating instructions

Category
Tumble dryers
Type
Operating instructions
ES MANUAL DE INSTALACIÓN Y UTILIZACIÓN
PT GUIA DE INSTALAÇÃO E DE UTILIZAÇÃO
FR GUIDE DINSTALLATION & DUTILISATION
EN INSTALLATION & OPERATING INSTRUCTIONS
DE INSTALLATIONS- UND GEBRAUCHSANLEITUNG
CS NÁVOD K INSTALACI A OBSLUZE
HU ÜZEMBEHELYEZÉSI ÉS HASZNÁLATI ÚTMUTATÓ
NL INSTALLATIE & GEBRUIKSHANDLEIDING
SK INŠTALAČNÁ A POUŽÍVATEĽSKÁ PRÍRUČKA
Secadora de condensación
Máquina de secar roupa com condensador
Sèche-linge à condenseur
Condenser tumble dryer
Kondensationswäschetrockner
Sušička na prádlo
Légkivezetéses szárítógép
Droogtrommel met condensatie
Sušièka bielizne s kondenzátorom
20
EN
21
EN
1 - INSTALLATION
2 - USE
1.5 - COMBINED WASHER/DRYER INSTALLATION
An adaptation kit is available from your dealer.
This is used to mount your tumble dryer
above your washing machine.
— Check that the kit is compatible with your washing
machine.
— For safety reasons, fitting must be performed by a
qualified professional.
1.6 - M
ODIFYING THE DOOR OPENING DIRECTION
(Fig. 2.2 - 2.3)
To alter the direction the door opens as follows:
— Remove the 4 screws in the front panel holding the
hinges and .
Important:
Check the labels on your textiles:
— Reverse the hinge and fasten it back on.
— Reverse the bolt and fix it on the door.
— Fasten the hinge screws and .
— Screw the screw the opposite side to the bolt.
— Reverse the lock with the hide and lock .
During the laboress to disassembly and
reassembly of the door, you must take the
door horizontally.
Normal
drying
Gentle
drying
Do not tumble dry
Do not tumble-dry:
Clothing including rubber like materials (for exam-
ple: shower caps, waterproof clothing and textiles,
linings, pillows etc.).
Chlorofibres (Thermolactyl* for example)
(
*Registered trademark).
Items containing underwiring that could become
detached.
— Bulky items (duvets, eiderdowns, etc.).
— Laundry that has not been spun.
— Laundry cleaned with inflammable chemicals.
R
ECOMMENDED LOADS:
— The maximum capacity of the dryer is 7 kg.
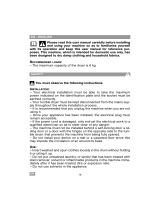
Important: Please read this user manual carefully before installing and using your machine so
as to familiarise yourself with its operation and keep this user manual for reference purposes.
This machine, which is intended for domestic use only, has been designed to dry damp clothing and house-
hold fabrics.
SAFETY
INSTALLATION
— Your electrical installation must be able to take the
maximum power indicated on the identification
plate and the socket must be earthed correctly.
— Your tumble dryer must be kept disconnected
from the mains supply throughout the whole instal-
lation process.
It is recommended that you unplug the machine
when you are not using it.
Once your appliance has been installed, the elec-
trical plug must remain accessible.
If the power cord is damaged, only entrust the
electrical work to a qualified electrician so as to
steer clear of any danger.
The machine must not be installed behind a self-
locking door a sliding door or a door with the hinges
on the opposite side to the tumble dryer, that pre-
vents the machine from being fully opened.
ENVIRONMENT
ENERGY SAVINGS
— Spin your textiles at high speeds; the residual
dampness will be low, as will your energy consump-
tion.
— Place the maximum load in your machine; this will
optimize the energy used. When doing so, comply
with the indications on volume provided in this ins-
truction manual.
— Clean the filter after each drying cycle.
— Clean the condenser twice a month.
— Swich off your tumble dryer at the cycle ends.
1.1 - GENERAL PRESENTATION
(Fig. 1.1)
Control panel
Condensate container
(top or bottom
according to model)
Filter
Condenser gril
Information plate
Adjustable feets
Light
(according to model)
1.2 - APPLIANCES SURROUNDINGS
Leave a gap of at least 1 cm around the device
when you install it to facilitate air circulation.
Do not install your device on a mat or a carpeted
floor since this may impede the circulation of air
around its base.
— If you have installed your device in a small, closed
room a door or window should be left open whilst
the machine is running.
1.3 - L
EVELLING
(Fig. 1.2)
Screw in or screw out one or more of the
adjustable feet to ensure that the machine is
horizontal and doesn't rock, depending on how
level your floor is.
1.4 - B
UILT-IN INSTALLATION
— If you are fitting the appliance underneath a work-
top, you must keep the original laminated top.
For safety reasons, the appliance must never be
operated without a top.
EN - ENGLISH
CHILDRENS SAFETY
Do not let children play with the appliance and
keep pets away from it.
Keep the packaging materials out of children’s
reach (e.g.: plastic bags, polystyrene, etc.) because
they can be dangerous for children: risk of suffoca-
tion.
— This appliance can be used by children aged from
8 years and above and persons with reduced physi-
cal,sensory or mental capabilities or lack of expe-
rience and knowledge if they have been given
supervision or instruction concerning use of the
appliance in a safe way and understand the hazards
involved. Children shall not play with the appliance.
Cleaning and user maintenance shall not be made
by children without supervision.
Important:
You must observe the following instructions:
— Do not use solvents in the appliance.
— Do not put laundry that has been treated with stain remover, solvent or inflammable products in the machine
immediately after it has been treated (fire or explosion risk).
— Substances contained in soiling such as oil, acetone, alcohol, petrol, kerosene, stain removers, turpentine or
wax must be removed before drying in your machine.
— Strictly comply with the care instructions on your laundry.
ENVIRONMENTAL PROTECTION
The appliance’s packaging material is recyclable.
Help recycle it and protect the environment
by dropping it off in the municipal
receptacles provided for this purpose.
Your appliance also contains a great
amount of recyclable material. It is marked
with this label to indicate that the used appliances
should not be mixed with other waste. The
appliance recycling will be done in compliance with
European Directive 2002/96/EC on Waste Electrical
and Electronic Equipment.
Contact your town hall or your retailer for the used
appliance collection points closest to your home.
Reverse and fix the hinge without tightening
the screws completely.
— Refit the door on the hinge .
NOTE:
A power failure cancels the current program. In
this case, therefore, you have to reset all the pro-
gramming operations.
2.1 - P
REPARING YOUR ITEMS
— Close all zippers and snap buttons.
Remove any loose buttons, pins or hook faste-
ners.
— Knot any belts, apron strings, etc.
Empty pockets, in particular lighters and matches.
2.2 - I
NSERTING YOUR ITEMS
— Open the door by pushing
(Fig. 2.1)
.
— Check that the filter is in its housing.
Insert washed and spun clothes loosely in the
drum without folding it or piling it up.
— Close the door.
R
ECOMMENDATIONS:
Do not place any stained laundry in the machine.
As a general rule, stains that have been dried in a
tumble dryer cannot be removed.
Always adhere to the manufacturer's instructions
when using softening products.
22
EN
23
EN
3 - PROGRAMMING
(continued)
4 - REGULAR MAINTENANCE
4.3 - CLEANING THE CONDENSER
The condenser must be cleaned twice a
month.
Unplug the power cable from the socket before
cleaning the condenser.
Clean it as follows:
— Open the grill at the front of the appliance.
— Release the condenser and remove it carefully
(Fig. 4.3.1).
— Remove any fluff from the condenser. Clean it with
water only under the tap
(Fig. 4.3.2).
After cleaning, ensure that none of the tubes are
“blocked” and that the fins are clean.
— Rub it superficially.
— Re-insert the condenser and lock it in place. Close
the grill.
When refitting the condenser, ensure that it
is pushed in firmly right to the back of its
housing when locking it in.
3 - PROGRAMMING
PROGRAMS AUTO
Turn the Time selector to the posi-
tion.
— Choose your laundry by pressing the Laundry
choice
(Fig. 3.2.1):
AUTO
COTTON - : For loads consisting of household
linen, terry towelling and cotton clothes and under-
clothes.
MIXED - : For loads consisting of items of
different types (cotton and hard-wearing synthetic
articles) or made from mixed fibres.
DELICATES - : For laundry that are particularly
temperature-sensitive (e.g. made from acrylic
fibres).
The drying temperature is regulated to suit the type
of textile selected.
Press the Start/Pause” button to start
your program.
The drying time indicator lights switch off one
by one until the end of the drying cycle
(Fig. 3.2.2)
.
A
LTERING PROGRAMMING OR DRYING DURING
OPERATION
Press the “Start/Pausebutton to inter-
rupt drying.
The drying time and choice of textile indicators
flash
(Fig. 3.2.3).
— Select another program.
Press the Start/Pause” button to
resume drying.
Press the Start/Pause” button to start
your program.
The drying time indicator lights switch off one
by one until the end of the drying cycle
(Fig. 3.2.2)
.
A
DDING OR REMOVING AN ITEM DURING DRYING
Press the “Start/Pausebutton to inter-
rupt drying or open the door.
The drying time and the choice of textile indicators
flash
(Fig. 3.2.3).
Insert or remove the item or items and close the
door.
Press the Start/Pause” button to
resume drying.
COOLING CYCLE
All programs finish with a cooling cycle that lasts for
a few minutes to allow the washing to cool gra-
dually.
Do not stop your dryer before this cycle has
finished.
ANTI-CREASING OPTION
The Anti-creasing” option fluffs the textiles every 10
minutes for up to 24 hours, until the door is opened
or the machine is turned off. It begins as soon as the
drying finishes and prevents the clothes from sett-
ling in the machine.
To select this function, press the Anti-creasing”
button
(Fig. 3.2.6)
.
T
ANK FULL WARNING DURING CYCLE
If the tank is full before the end of the drying cycle,
the machine shuts off.
The “Tank Full” light , the drying time and the
choice of textile indicators will start to flash
(Fig.
3.2.7).
— Proceed to empty your condensate container.
— Press the “Start/Pause” button to restart
your program.
C
LEAN CONDENSER WARNING
The “Condenser warning” light will flash from-
time to time to remind you that you should clean the
condenser
(Fig. 3.2.8)
.
Do not forget to do this as soon as possible,
since the warning will disappear when the
next program starts.
3.1 - THE CONTROL PANEL
3.2 - PROGRAMMING A DRYING CYCLE
Your dryer is equipped with a sensor which automatically detects the moment when your laundry is dry.
— You access the automatic dryness detection programs by turning the Time selector to .
— If you wish to adjust the time for the cycle yourself (so that laundry is slightly damp for immediate ironing, for
example, or for extra drying or to dry just a few pieces of laundry) use timed programs with set drying times.
S
TARTING THE APPLIANCE
— Check that the power cable is plugged in, and if the door is properly closed.
AUTO
A C D E FB
SELECT
9h
6h
3h
2h
STOP
1h
10
180
min
140
160
120
100
80
60
50
40
20
30
AUTO
Condensing kg
7
SF-700CB
Class
B
Time selector
Drying time indicators
Laundry choice
Anti-creasing
Delayed start
Start/Pause
TIMER DRYING PROGRAMS
Select the drying time by turning the Time selec-
tor to the desired drying time The indicators
light up according to the time selected.
— Choose your laundry by pressing the Laundry
choice
.
DELAYING A PROGRAMS START
(Fig. 3.2.4)
You can delay the start time by 3, 6 or 9 hrs by
pressing the "Delayed start" button seve-
ral times.
The corresponding “3h, 6h or 9hr” light will flash.
Pressing once more will cancel the "Deferred start"
function.
— Confirm by pressing the Start/Pause” button
. The deferred start indicator is set.
During the delayed start phase, the indicator
changes from 9:00 to 6:00 or from 6:00 to 3:00.
Once the Delayed Start time delay has expired, the
program actually starts.
S
TOPPING THE APPLIANCE
When the drying cycle is finished, only the “STOP”
light comes on to show that the cycle is finished
(Fig. 3.2.5)
.
The “Filter” and “Tank full” lights flash
alternately to remind you that you must clean the fil-
ter and empty the water collection tank after every
drying cycle.
— Turn the Time selector to the “Stop” position
.
— Empty your dryer.
— Clean the filter and empty the condensate contai-
ner (for how to do this, see the “REGULAR MAIN-
TENANCE” section).
NOTE:
— The "Anti-creasing" option remains selected from one program to the next. Just press the button once to des-
elect the option.
4.1 - C
LEANING THE FILTER
This is located in the lower part of your dryer.
Clean it as follows:
Remove it from its housing by pulling it upwards
(Fig. 4.1.1).
Open the filter and clean it by removing the thin
coating of fluff covering it
(Fig. 4.1.2).
— Re-insert it in its housing, pushing it well in.
Do not wash filter with water (Fig. 4.1.3). The
filter must be cleaned after every drying.
4.2 - EMPTYING THE CONDENSATE CONTAINER
This is located at the top or bottom of your
appliance (according to model), and it recovers the
water extracted from your items during drying.
To empty it, release it from its housing by pulling
it towards you
(Fig. 4.2.1).
The condensate container must be emptied
after each drying cycle (Fig. 4.2.2).
— Empty the condensate container if there is a risk
of frost, or if you wish to move or tilt your
appliance.
24
EN
25
EN
6 - TROUBLESHOOTING
Some incidents may arise when you are using your dryer. Here are the points you should check:
7 - INTERVENTIONS
Any work on your appliance must be performed by a Brand-approved qualified professional. When you call,
mention your appliance’s full reference (model, type, serial number). These details are shown on the manufac-
turer’s information plate
(Fig. 1.1).
5.B - STANDARDIZED PROGRAMS
5.A - DRYING TIME
The drying times below are given to you as an indication, because they are function:
— The desired result: dry, damp, etc.
— The ambient temperature (these values correspond to an ambient temperature of 20°C).
— The quality of the prior spin-drying.
For lower spin speeds, the times will be relatively longer.
(For example, for 5kg of normal laundry spun at 500 rpm: 120 to 160 minutes).
4 - REGULAR MAINTENANCE
(continued)
Load I ”Dry cotton” 7 kg .... select “Cotton” - 140 min
Load II ”Ready to iron cotton” 7 kg .... select “Cotton” - 100 min
Load III ”Easy care textiles” 3 kg .... select “Delicates” - 60 min
RECOMMENDED PROGRAMS FOR TESTS TO EN 61121 - DIRECTIVE 95/13/EEC
Fault: Check whether:
The dryer does not start:
- the plug is in the socket.
- the door is properly closed.
- the condenser is correctly locked in place.
- the “Start” key was pressed (if the appliance was
not in pause).
The drying times are too long:
- the filter in the drum is clogged with fluff.
- the laundry has been spun enough beforehand
(500rpm minimum, but spinning at 850rpm provides
better drying times).
- the room temperature is not too high, particularly if
the room is small: if necessary, open the door or
window.
- the condenser is not clogged.
- the air inlets and outlets are unobstructed enough to
ensure correct air circulation.
- the laudry choice selected matches the type of
items in the drum.
The laundry is too damp:
- the filter in the drum is clogged with fluff.
- the type of laundry has been selected correctly or if
the drying time is good enough.
- the condenser is not blocked by fluff.
The laundry is too dry, too creased:
- the drying time selected is too long: the drying time
is better to be too short than too long: this avoids
the laundry becoming too dry and difficult to iron.
The items are unevenly dried:
- the types of textiles in the load are too different (e.g.
sheets together with jeans).
- the laundry has been laid correctly ‘unfolded’ in the
dryer.
- the drum is not overloaded.
The synthetic items are loaded with
static electricity:
- the laundry has been dried too much.
- you have used softener during washing. By using
this product, you can reduce most of the problems
with static electricity.
The “Tank Full” indicator light is lit:
- the condensate container is full: once you have emp-
tied it, re-insert it correctly, pushing it completely
into its housing.
The “Tank Full” indicator light illumi-
nates although the tank is empty:
- the container has been properly inserted: push it in
completely.
- the condenser is tightly locked on the two sides.
4.5 - DIRECT EVACUATION OF WATER CONDEN-
SER
(Top condensate container models only)
To avoid having to empty the collection tank every
time you use the appliance, you have a kit (*) for
removing the water from the condenser directly into
the drain (hose and deflector). To fit this:
Take off the existing pipe and push it inside
the appliance
(Fig. 4.5.1).
Clip the deflector with the top of the pump
(Fig. 4.5.1).
— Connect the hose from the kit to the end
connector on the appliancl
(Fig. 4.5.2).
You can connect the other end of the hose either:
- To a ventilated trap
(Fig. 4.5.3).
- Or a sink trap
(Fig. 4.5.4).
When connecting to a trap, you must remove the fil-
ler plug. Then press home the rubber tip. If neces-
sary, add a clamp connection
(Fig. 4.5.4).
(*) This kit is provided with the appliance or is
available near your After-sales service (according
to model).
— The deflector must necessarily be positioned
before the drain hose connection.
Type of items Load For items spun at Drying cycle time
COTTON -
5 kg 1200 rpm 60 to 80 minutes
3,5 kg 1200 rpm 50 to 60 minutes
MIXED -
5 kg 850 rpm 80 to 100 minutes
2,5 kg 850 rpm 50 to 60 minutes
DELICATES -
3 kg 500 rpm 60 to 80 minutes
1,5 kg 500 rpm 40 to 50 minutes
4.4 - CLEANING THE APPLIANCE
To clean the control panel, the access to the drum
and the casing, use only a sponge or a damp cloth
and some soapy water.
Ensure that there is no fluff accumulating round
the dryer.
Clean the door seal with a damp cloth and the fil-
ter housing with your vacuum cleaner once a year.
You should not use, under any circumstances,
the abrasive powders, the metal or plastic
sponges and the alcohol-based products (Fig. 4.4).
4.6 - CHANGING THE BULB
(according to model)
You can replace the light bulb (type E14-15W/230V)
yourself
(Fig. 1.1)
.
To do this:
Unscrew the glass cover located at the top, inside
the appliance.
— Unscrew the extinguished bulb and replace it
.
Screw on the glass cover tightly.
Important: Unplug the power cord before
changing the bulb. The bulb must be repla-
ced when the appliance is cooled down.
  • Page 1 1
  • Page 2 2
  • Page 3 3
  • Page 4 4
  • Page 5 5
  • Page 6 6
  • Page 7 7
  • Page 8 8
  • Page 9 9
  • Page 10 10
  • Page 11 11
  • Page 12 12
  • Page 13 13
  • Page 14 14
  • Page 15 15
  • Page 16 16
  • Page 17 17
  • Page 18 18
  • Page 19 19
  • Page 20 20
  • Page 21 21
  • Page 22 22
  • Page 23 23
  • Page 24 24
  • Page 25 25
  • Page 26 26
  • Page 27 27
  • Page 28 28
  • Page 29 29
  • Page 30 30
  • Page 31 31
  • Page 32 32
  • Page 33 33

Fagor SF-700CB Operating instructions

Category
Tumble dryers
Type
Operating instructions

Ask a question and I''ll find the answer in the document

Finding information in a document is now easier with AI