Page is loading ...

OL50135AL
OPERATOR’S MANUAL
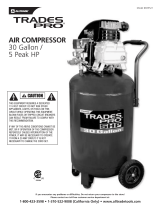
ALUMINUM
TWIN STACK
PORTABLE AIR
COMPRESSOR
To reduce the risk of injury, the user
must read and understand the
Operator’s Manual before using this
product.
!
WARNING:
IN619302AV 10/07

Table of Contents
Section Page
Table of Contents . . . . . . . . . . . . . . . .2
Safety Instructions . . . . . . . . . . . . . . .3
Safety Signal Words . . . . . . . . . . . . .3
Before Using the Air
Compressor . . . . . . . . . . . . . . . . . . . .3
Spraying Precautions . . . . . . . . . . . .5
Breathable Air Warning . . . . . . . . . . .5
Warning Labels . . . . . . . . . . . . . . . . .6
Motor Specifications and
Electrical Requirements . . . . . . . . . .7
Power Supply and Motor
Specifications . . . . . . . . . . . . . . . . . .7
General Electrical Connections . . . . .7
110-120 Volt, 60 Hz Tool
Information . . . . . . . . . . . . . . . . . . . .8
Extension Cords . . . . . . . . . . . . . . . .8
Thermal Overload Protector . . . . . . .9
Glossary of Terms . . . . . . . . . . . . . . .9
Unpacking and Checking
Content . . . . . . . . . . . . . . . . . . . . . . .10
Installation . . . . . . . . . . . . . . . . . . . .10
Section Page
Getting to Know Your Air
Compressor . . . . . . . . . . . . . . . . . . .11
Operating Your Air Compressor . . .13
Moisture in Compressed Air . . . . . .13
Operating Your Air Compressor . . .13
For Trouble-Free Operation . . . . . .13
Maintenance . . . . . . . . . . . . . . . . . . .14
Tank . . . . . . . . . . . . . . . . . . . . . . . . .15
Filter Removal, Inspection, and
Replacement . . . . . . . . . . . . . . . . . .15
Lubrication . . . . . . . . . . . . . . . . . . . .15
Storage . . . . . . . . . . . . . . . . . . . . . .15
Maintenance Schedule . . . . . . . . . .15
Troubleshooting . . . . . . . . . . . . . . . .16
Repair Parts . . . . . . . . . . . . . . . . . . .18
Notes . . . . . . . . . . . . . . . . . . . . . . . . .23
Warranty . . . . . . . . . . . . . . . . . . . . . .24
2

Safety Instructions
This manual contains information that is
very important to know and understand.
This information is provided for SAFETY
and to PREVENT EQUIPMENT PROB-
LEMS. To help recognize this informa-
tion, observe the following symbols.
Safety Signal Words
Danger indicates
an imminently haz-
ardous situation which, if not avoided,
WILL result in death or serious injury.
Warning indicates
a potentially haz-
ardous situation which, if not avoided,
COULD result in death or serious injury.
Caution indicates a
potentially haz-
ardous situation which, if not avoided,
MAY result in minor or moderate injury.
Notice indicates
important informa-
tion, that if not followed, may cause dam-
age to equipment.
NOTICE:
!
CAUTION:
!
WARNING:
!
DANGER:
3
Air compressors are utilized in a variety
of air system applications. Because air
compressors and other components
(material pump, spray gun, filters, lubri-
cations, hoses, etc.) used make up a
high pressure pumping system, the fol-
lowing safety precautions should be
observed at all times. Only persons well
acquainted with these rules of safe oper-
ation should be allowed to use the air
compressor.
1. Read instruction manuals for each
component carefully, before attempt-
ing to assemble, disassemble or
operate your particular system.
2. Wear safety glasses (meeting ANSI
Z87.1 or in Canada CSA Z94.3-99)
and use hearing protection when
operating the pump or unit. Everyday
glasses are not safety glasses.
3. Do not exceed pressure rating of any
component in system.
4. Protect material lines and air lines
from damage or puncture. Keep hose
and power cable away from sharp
objects, chemical spills, oil, solvents,
and wet floors.
5. Never point a spray gun at oneself or
any other person. Accidental dis-
charge may result in serious injury.
6. Check hoses for weak or worn condi-
tion, before each use, making certain
all connections are secure; do not
use if deficiency is found. Notify an
authorized service facility for exami-
nation or repair.
7. Release all pressures within system
slowly; dust and debris may be harmful.
Before Using the Air Compressor
All electrical work should be
done by a qualified (licensed or
certified) electrician. On a prop-
erly wired circuit, the black
wires supply a voltage potential
even when the unit is off.
!
WARNING:
Disconnect power and depres-
surize system before servicing
air compressor! (Turn pressure
regulator knob fully clockwise
after shutting off compressor.)
!
WARNING:

8. Follow all local electrical and safety
codes, as well as the National
Electrical Code (NEC) and the
Occupational Safety and Health Act
(OSHA).
9. Wiring and fuses should follow electri-
cal codes, current capacity, and be
properly grounded.
10. Electric motors must be securely and
adequately grounded. See grounding
instructions and extension cord infor-
mation in this manual.
11. Always disconnect power source
before working on or near a motor, or
its connected load. If power discon-
nect point is out-of-sight, lock it in the
open position and tag to prevent
unexpected application of power.
12. Guard all moving parts; keep visitors
away. Never allow children in work
area.
13. Use only a properly grounded outlet
that will accept a three pronged plug,
and wear shoes to prevent shock
hazards.
14. Be careful when touching exterior of
operating motor; it may be hot
enough to cause injury.
15. Protect power cable from coming in
contact with sharp objects.
16. Clean electrical or electronic equip-
ment with an approved cleaning
agent, such as dry, nonflammable
cleaning solvent.
17. To avoid spontaneous combustion,
discard waste rags into approved
metal waste cans.
18. Never store flammable liquids or
gases in vicinity of compressor.
19. When spraying with solvent of toxic
chemicals, follow instructions provid-
ed by the chemical manufacturer.
20. Spray in a well ventilated area, to
keep fumes from collecting and caus-
ing health and fire hazards.
21. Do not spray in vicinity of open
flames or other places where a spark
can cause ignition. Do not smoke
when spraying paint, insecticides, or
other flammable substances.
22. Use a respirator when spraying.
23. NEVER reset safety valve or pres-
sure switch. Keep safety valve free
from paint and other accumulations.
This provides safety against over
pressure.
24. Do regular maintenance; keep all
nuts, bolts, and screws tight, to be
sure equipment is in safe working
condition.
25. Keep cleaning rags and other flam-
mable waste materials in a tightly
closed metal container and dispose of
later in the proper fashion.
26. Drain tanks of moisture after each
day’s use. If unit will not be used for a
while, it is best to leave drain cock
open until such time as it is to be
used. This will allow moisture to com-
pletely drain out and help prevent
corrosion of inside of tank.
27. Inspect tank yearly for pin holes or
any other imperfections that could
cause it to become unsafe. NEVER
weld or drill holes in air tank.
Safety Instructions (continued)
4

1. Do not smoke when spraying paint,
insecticides, or other flammable sub-
stances.
2. Use a face mask/respira-
tor when spraying and
spray in a well ventilated
area to prevent health and
fire hazards.
3. Do not direct paint or other
sprayed material at the compressor.
Locate compressor as far away from
the spraying area as possible to mini-
mize overspray accumulation on the
compressor.
4. When spraying or cleaning with sol-
vents or toxic chemicals, follow the
instructions provided by the chemical
manufacturer.
5
Spraying Precautions
Do not spray flamma-
ble materials in vicin-
ity of open flame or
near ignition sources including
the compressor unit.
!
WARNING:
Breathable Air Warning
This compressor/pump is not equipped and should not be used “as
is” to supply breathing quality air. For any application of air for
human consumption, the air compressor/pump will need to be fitted
with suitable in-line safety and alarm equipment.This additional
equipment is necessary to properly filter and purify the air to meet
minimal specifications for Grade D breathing as described in
Compressed Gas Association Commodity Specification G 7.1 - 1966,
OSHA 29 CFR 1910. 134, and/or Canadian Standards Associations
(CSA).
DISCLAIMER OF WARRANTIES
In the event the compressor is used for the purpose of breathing air
application and proper in-line safety and alarm equipment is not
simultaneously used, existing warranties shall be voided, and
Campbell Hausfeld disclaims any liability whatsoever for any loss,
personal injury or damage.
!
DANGER:

Safety Instructions (continued)
6
Find and read all warning labels found on
the air compressor shown below
Warning Labels
DRAIN TANK EVERYDAY FOR PROPER
COMPRESSOR OPERATION
RÉSERVOIR DE VIDANGE JOURNALIER
POUR L'EXÉCUTION APPROPRIÉE
DE COMPRESSEUR
DEPÓSITO DE DESAGÜE DIARIO PARA
LA OPERACIÓN APROPIADA
DEL COMPRESSOR
DK812200AV 906
WARNING
AVERTISSEMENT
ADVERTENCIA
DK724100AV 100
0

The A-C motor used on this compressor
is a PSC, permanent split capacitor type,
having the following specification. It is
wired at the factory for operation on
110V-120V AC, 60 Hz service.
Voltage 110-120
Amperes 15
Hertz (Cycles) 60
Phase Single
RPM 3450
Motor Specifications and
Electrical Requirements
7
Power Supply and Motor Specifications
To reduce the risk of electrical
hazards, fire hazards or damage
to the tool, use proper circuit
protection.Your tool is wired at
the factory for operation using
the voltage shown. Connect
tool to a power line with the
appropriate voltage and a 15-
amp branch circuit. Use a 15-
amp time delay type fuse or cir-
cuit breaker. To reduce the risk
of shock or fire, if power cord is
worn or cut, or damaged in any
way, have it replaced immedi-
ately.
!
WARNING:
General Electrical Connections
To reduce the risk of electrocu-
tion:
1. Use only identical replace-
ment parts when servicing.
Servicing should be per-
formed by a qualified techni-
cian.
2. Do not use in rain or where
floor is wet. This too is
intended for indoor residen-
tial use only.
!
DANGER:
Do not permit fingers to touch
the terminals of plug when
installing or removing the plug
to or from the outlet.
!
WARNING:

8
The plug supplied on your tool may not
fit into the outlet you are planning to use.
Your local electrical code may require
slightly different power cord plug connec-
tions. If these differences exist refer to
and make the proper adjustments per
you local code before your tool is
plugged in and turned on.
In the event of a malfunction or break-
down, grounding provides a path of least
resistance for electrical current to reduce
the risk of electric shock. This tool is
equipped with an electric cord having an
equipment-grounding conductor and a
grounding plug, as shown. The plug must
be plugged into a matching outlet that is
properly installed and grounded in accor-
dance with all local codes and ordi-
nances.
Do not modify the plug provided. If it will
not fit the outlet, have the proper outlet
installed by a qualified electrician.
Improper connection of the equipment-
grounding conductor can result in a risk
of electric shock. The conductor with
insulation having an outer surface that is
green with or without yellow stripes is the
equipment-grounding conductor. If repair
or replacement of the electric cord or
plug is necessary, do not connect the
equipment-grounding conductor to a live
terminal.
If the grounding instructions are not com-
pletely understood, or if you are in doubt
as to whether the tool is properly ground-
ed check with a qualified electrician or
service personnel.
Motor Specifications and
Electrical Requirements (continued)
110-120 volt, 60Hz Tool Information
If not properly grounded, this
tool can cause an electrical
shock, particularly when used
in damp locations, in proximity
of plumbing, or out of doors.
!
WARNING:
Grounding Prong
3-Prong Plug
Properly
Grounded
3-Prong
Outlet
Extension Cords
1. The air compressor should be located
where it can be directly plugged into
an outlet. An extension cord should
not be used with this unit.
2. To avoid loss of power and overheat-
ing, additional air hose must be used
to reach work area instead of exten-
sion cords.

9
Thermal Overload Protector
If thermal overload protector shuts motor
OFF frequently look for the following
causes.
1. Low voltage.
2. Wrong gauge wire.
3. Dirty air filter.
4. Lack of proper ventilation.
5. Unit is being used with an extension
cord.
6. Low oil level
See Troubleshooting Chart for corrective
action.
This compressor is equipped
with an automatic reset thermal
overload protector which will
shut off motor if it becomes
overheated.
!
CAUTION:
The motor must be allowed to
cool down before start-up is
possible. The motor will auto-
matically restart without warn-
ing if left plugged into electrical
outlet, and the motor is turned
on.
!
CAUTION:
ASME Safety Valve
A safety valve that automatically releases
the air if the air receiver (tank) pressure
exceeds the preset maximum.
PSI (Pounds per Square Inch)
Measurement of the pressure exerted by
the force of the air. The actual psi output is
measured by a pressure gauge on the com-
pressor
SCFM (Standard Cubic Feet per Minute)
Sometimes called CFM (Cubic Feet per
Minute). Measurement of air volume deliv-
ered by the compressor.
Air Delivery
A combination of psi and SCFM. The air
delivery required by a tool is stated as
(number) SCFM at (number) psi. The com-
bination of these figures determines what
size unit is needed.
Air Tank Capacity
The volume of air stored in the tank and
available for immediate use. A large tank
allows the intermittent use of an air tool
with an air requirement higher than the
compressor’s rated delivery.
Volts or Voltage
A measurement of the force of an electrical
current.
Amps or Amperage
A measure of the electrical force minus the
resistance on an electrical line. Ridgid air
compressors require 15 amps for operation.
Be sure the compressor will operate on an
electrical line with the proper amps. If other
appliances operate on the same line, they
will reduce the available amps. If the
amperage is not adequate, the result will be
blown fuses or tripped circuits.
Regulator
A control that adjusts the line pressure to
the proper amount needed to operate spray
guns and air tools.
Tanks Pressure Gauge
Indicates tank pressure in psi.
Regulated Outlet Gauge
Displays the current line pressures. It is
regulated by the regulator knob.
Cut-in/Cut-off Pressure
Specific psi at which a compressor starts
and stops while refilling the air tank.
Glossary of Terms

10
1. Remove the air compressor from the
carton.
2. Place the compressor on a secure,
level, and stationary work surface and
look it over carefully.
3. Make sure the dipstick is in a plastic
bag secured to the pump.
4. The pump has been filled with the
appropriate amount of oil (250 mL /
8.4 oz) by the factory.
5. Replace the plug with the dipstick
located inside the bag. Check the oil
level using the dipstick.
6. If the oil level is below the “MIN” line,
fill the pump until the oil level reads
between “MIN” and “MAX” lines. (For
oil type and fill directions, see
“Lubrication” section in the manual)
Unpacking and Checking Contents
Do not operate unit if damaged
during shipping, handling or
use. Damage may result in
bursting and cause injury or
property damage.
!
WARNING:
For your own safety, never
operate unit until all assembly
steps are complete and until
you have read and understood
the entire operator’s manual.
!
WARNING:
To reduce the risk of injury, if
any parts are missing, do not
attempt to operate the air com-
pressor until the missing parts
are obtained and installed cor-
rectly.
!
WARNING:
1. Check and tighten all bolts, fittings,
etc., before operating compressor.
2. Make sure compressor is filled to
proper oil level before use.
3. Operate compressor in a ventilated
area so that compressor may be
properly cooled.
4. Compressor should be located where
it can be directly plugged into an out-
let. An extension cord should not be
used with this unit.
5. To avoid loss of power and overheat-
ing, additional air hose must be used
to reach work area instead of exten-
sion cords.
Installation

11
Getting to Know Your Air Compressor
2 Regulated
Outlet Gauge
5 Tank Pressure
Gauge
4 Regulator
Knob
1 Air Storage
Tanks
3 Handle
7 Air Outlet
Fittings
9 Air Filter
(Underneath
shroud)
10 On/Off Switch
11 Tank Drain
Valve
6 Safety Valve
ridgid.com 1-800-474-3443
12 Dipstick
Model/Serial Number Decal
8 Pump

Getting to Know Your Air
Compressor (Continued)
12
1. Air Storage Tanks. The tanks store
air for later use.
2. Regulated Outlet Gauge. This
gauge shows at-a-glance, air
pressure at outlet. Air pressure is
measured in pounds per square
inch (PSI). Most tools have
maximum pressure ratings. Never
exceed the maximum pressure
rating of the tool you are using. Be
sure this gauge reads ZERO before
changing air tools or disconnecting
hose from outlet.
3. Handle. Used to move the com
pressor.
4. Regulator Knob. This knob
controls air pressure to an air
operated tool or paint spray gun.
Turning the knob clockwise
increases air pressure at the outlet.
Turning counterclockwise will lower
air pressure at the outlet. Fully
counterclockwise will shut off the
flow of air completely.
5. Tank Pressure Gauge. Gauge
shows pressure in air receiver indi
cating compressor is building
pressure properly.
6. ASME Safety Valve. This valve
automatically releases air if the tank
pressure exceeds the preset maxi
mum.
7. Air Outlet Fittings. These fittings
are 1/4” universal-style quick
connect fittings and allow rapid tool
changes.
8. Pump. The pump takes in air and
generates the pressurized air in the
air storage tanks.
9. Air Filter. The air filter keeps dirt
and debris from entering the com
pressor pump and reduces com
pressor noise.
10. On/Off Switch. This switch allows
manual control of the compressor.
Note that when the switch is turned
on, the compressor will
automatically start and stop
depending on tank pressure.
11. Tank Drain Valve. The tank drain
valve allows moisture to be
removed from the tank.
12. Dipstick. The dipstick measures
the oil level in the compressor
pump.
Close
Open

1. Read instructions: Carefully read
through this operator’s manual
BEFORE OPERATING the new air
compressor. It contains information
about operation and maintenance of
the unit.
2. Drain tank daily: Depressurize system
prior to draining tank. Open tank
drain valve and drain moisture from
tank. This helps keep oil and mois-
ture out of the compressed air sys-
tem. Be sure to close tank drain valve
tightly before operating compressor.
3. Change air filter: Never run compres-
sor without an air filter nor with a dirty
air filter. Replace with a new filter
when it is dirty.
4. Follow maintenance schedule for
checking and changing the oil.
Operating Your Air Compressor
13
Moisture in compressed air will form into
droplets as it comes from an air com-
pressor pump. When humidity is high or
when a compressor is in continuous use
for an extended period of time, this mois-
ture will collect in the tank. When using a
paint spray or sandblast gun, this water
will be carried from the tank through the
hose, and out of the gun as droplets
mixed with the spray material.
IMPORTANT: This condensation will
cause water spots in a paint job, espe-
cially when spraying other than water
based paints. If sandblasting, it will
cause the sand to cake and clog the gun,
rendering it ineffective.
A filter in the air line, located as near to
the gun as possible, will help eliminate
this moisture.
For Trouble-Free Operation
Moisture in Compressed Air
Make sure the crank case has the proper
oil level. Make sure the tank drain valve
is closed, the regulator knob is turned
fully counterclockwise, and the On/Off
switch is in the OFF position.
Plug compressor into a dedicated 15
Amp (minimum) circuit.
Turn On/Off switch to the ON position.
The compressor will now start building
pressure.
After compressor reaches cut-off pres-
sure, install a hose (with the desired air
tool attached) into the outlet fitting.
Adjust the regulator knob to the desired
pressure.
The compressor is now ready to operate.
Do not over-pressurize any air
tool. Consult air tool instruc-
tions for proper air tool pres-
sure.
!
WARNING:
Operating Your Air Compressor

1. Check compressor for any visible
problems, especially check air filter to
be sure it is clean.
2. Pull ring on safety valve and allow it to
snap back to normal position.
3. Drain moisture from tank daily. Shut
compressor off. Depressurize system
prior to draining tank. Drain moisture
from tank by opening the tank drain
valve underneath the tank.
4. Turn power OFF and clean dust and
dirt from motor, tank, air lines and
pump cooling fins.
NOTE: The air filter located in the filter
slot in the pump head must be checked
and cleaned periodically, more often if
used under very dusty conditions or
when a great deal of fog from spraying is
allowed to circulate near unit.
IMPORTANT: Unit should be located as
far from spraying area as hose will allow
to prevent over-spray from clogging filter.
Maintenance
14
Tank
Drain
Valve
Release all pressure and dis-
connect power before making
any repair.
!
WARNING:
Safety valve must be replaced if
it cannot be actuated or it leaks
air after ring is released.
!
WARNING:
Never attempt to repair or modi-
fy a tank! Welding, drilling or
any other modification will
weaken the tank resulting in
damage from rupture or explo-
sion. Always replace worn,
cracked or damaged tanks.
!
DANGER:
Tank
Drain liquid from tank daily.
NOTICE:
The tank should be carefully inspected at
a minimum of once a year. Look for
cracks forming near the welds. If a crack
is detected, remove pressure from tank
immediately and replace.

1. When not in use, compressor should be
stored in a cool dry place.
2. Tank should be drained of moisture.
3. Hose should be disconnected and hung
open ends down to allow any moisture
to drain.
15
To change a filter, remove the pump/ motor shroud to expose pump. If filter is dirty,
replace.
Filter Removal, Inspection and Replacement
Lubrication
Storage
Operation Daily Weekly Every 3 Months
Check Oil Level
Drain Tank
Check Air Filter
Check Safety Valve
Blow Dirt From Inside Motor
Change Oil
Maintenance Schedule
Oil fill
hole
Drain
Plug
Before plugging in compressor, make sure
the crankcase is filled with 250ml/ 8.4 oz. of
ISO 100 (SAE 30), non-detergent
compressor oil, or Mobil 1 5W30 synthetic.
Use dipstick to check oil-level.
To Drain and replace the oil:
- Place a suitable container underneath
the drain to collect used oil.
- Remove oil drain plug with a 4mm hex
wrench.
- When the used oil has drained, reinstall
the drain plug and tighten using the 4mm
hex wrench.
- Remove the dipstick
- Add 250ml/ 8.4 oz. of ISO 100 (SAE 30),
non-detergent compressor oil, or Mobil 1
5W30 synthetic.
NOTE: Avoid overfilling with oil. Make sure
to check that the oil level is not above MAX
line on the dipstick.
- Re-insert the dipstick.

Troubleshooting
16
For your own safety do not try
and run the air compressor
while troubleshooting.
!
WARNING:
TROUBLE PROBABLE CAUSE REMEDY
Compressor will not
run
Motor hums but can-
not run or runs slow-
ly
Fuses blow/circuit
breaker trips repeat-
edly
1. Unit is plugged into
extension cord
2. No electrical power
3. Blown fuse
4. Breaker open
5. Thermal overload open
6. Pressure switch bad
1. Low voltage
2. Unit is plugged into
extension cord
3. Shorted or open motor
winding
4. Defective check valve or
unloader
1. Incorrect size fuse, circuit
overloaded
2. Unit is plugged into
extension cord
3. Defective check valve or
unloader
1. Remove extension cord
2. Plugged in? Check
fuse/breaker or motor over-
load
3. Replace blown fuse
4. Reset, determining why
problem happened
5. Motor will restart when cool
6. Replace
1. Check with voltmeter
2. Remove extension cord
3. Replace motor
4. Replace or repair
1. Check for proper fuse, use
time-delay fuse.
Disconnect other electrical
appliances from circuit or
operate compressor on its
own branch circuit
2. Remove extension cord
3. Replace or repair

17
TROUBLE PROBABLE CAUSE REMEDY
Thermal overload
protector cuts out
repeatedly
Air tank pressure
drops when com-
pressor shuts off
Excessive moisture
in discharge air
Compressor runs
continuously
Compressor vibrates
Air output lower than
normal
1. Low voltage
2. Clogged air filter
3. Lack of proper ventila-
tion/room temperature
too high
4. Unit is plugged into
extension cord
5. Low oil level
1. Loose connections (fit-
tings, tubing, etc.)
2. Loose drain valve
3. Check valve leaking
1. Excessive water in air
tank
2. High humidity
1. Defective pressure
switch
2. Excessive air usage
Loose mounting bolts
1. Broken inlet valves
2. Intake filter dirty
3. Connections leaking
1. Check with voltmeter
2. Clean filter (see
Maintenance section)
3. Move compressor to well
ventilated area
4. Remove extension cord
5. Add oil to proper level
1. Check all connections with
soap and water solution
and tighten
2. Tighten
3. Disassemble check valve
assembly, clean or replace
Do not disassemble
check valve with air in
tank; bleed tank
1. Drain tank
2. Move to area of less
humidity; use air line filter
1. Replace switch
2. Decrease air usage; com-
pressor not large enough
for a requirement
Tighten
1. Have authorized service
representative repair unit
2. Clean or replace intake fil-
ter
3. Tighten connections
!
DANGER:

Repair Parts
18
To pump
head
To manifold
1
2
19
20
21
22
23
25
26
27
28
29
30
31
32
33
34
3
4
5
6
7
8
9
38, 10, 12
11
12
13
14
15
16
17
35
36
37
24
39
40
18
41
42
(back)

Repair Parts
19
For Repair Parts, Call 1-800-4-RIDGID
Please provide following information:
-Model number
-Serial number (if any)
-Part description and number as shown in parts list
Ref. Catalogue Part
No. Number Number Description Qty
1 24933 HL015300AV Self-tapping HHCS
(M10 x 40) 4
2 N/A Lock washer (metric 8.2) 4
*3 24938 HL167700AV Tee Fitting Assembly 1
4 N/A Phillips head screw (M 4.2 x 10mm) 4
5 24943 HL011100AV Pump head shroud 1
6 N/A Phillips HHCS (M6 x 19mm) 4
7 24948 HL011200AV Motor shroud 1
8 24953 HL300001AV Oil lube pump 1
9 24958 AR057800AV Twinstack tank 1
*10 24963 CV223800AV Check valve 1
11 24968 HL009700AV Hex nut 1
12 24973 HL009800AV Ferrule 2
13 17808 ST185600AV Handle Grip 1
14 — Exhaust tube 1
15 24978 HL015900AV Pipe nipple 1/4” NPT 1
16 24983 HL016000AV Unloader tube (includes nuts & ferrules) 1
*17 24988 CW213300AV Pressure switch (includes pressure 1
switch cover and unloader valve)
18 25118 CW217700AV Unloader Valve 1
*19 17903 CW211700AV Pressure switch cover 1
20 17753 ST209800AV Strain relief screw 1
21 17758 CW209600AV Strain relief 1
22 20388 EC012602AV Cord 1
23 24993 V-215105AV 150 PSI safety valve 1
24 17888 ST022500AV 1/4” - 18 NPT pipe plug 2
25 24998 — Control panel tube (includes tube inserts) 1
26 25003 — Elbow compression fitting (includes nut & ferrule) 2
27 25008 HL015400AV Grommet 1
28 25013 ST192200AV Rubber foot 4
29 17848 ST073276AV Self-tapping HHCS 4
30 N/A Flat washer 4
31 25018 ST192100AV Motor support pad 1
32 N/A Hex nut (8mm) 3
33 17783 ST071626AV Button head torx screw 4
*34 25023 WL024501AV Manifold 1
*35 17873 HF203300AV 1/4” Universal coupler 2
*36 17878 GA016705AV Outlet pressure gauge 1
*37 17773 GA016709AV Tank pressure gauge 1
38 N/A Hex Nut 1
39 17838 WL025800AV Control Panel Bracket 1
40 17813 WL025900AV Roll Bar 1
41 25688 HL029200AV Motorcord clamp 1
42 17913 D-1403 Drain valve 1
* Considered wear items N/A = Standard Hardware Item
REPAIR PARTS KITS
25033 HL029100AV Exhaust tube kit (without check valve)
17858 ST170400AV Control panel tube kit (includes inserts, nuts, ferrules)

Repair Parts
20
1
2
3
4
5
6
7
8
9
14
10
14
12
10
12
13
15
11
16
17
18
19
20
21
22
23
24
25
26
27
28
29
30
31 32
33
34
35
36
37
38
39
40
41
43
42
44
45
46
47
48
/