o
;
p
3
6
1
9
q
w
e
r
t
y
u
i
4
5
7
2
8
7
ENGLISH
INTRODUCTION
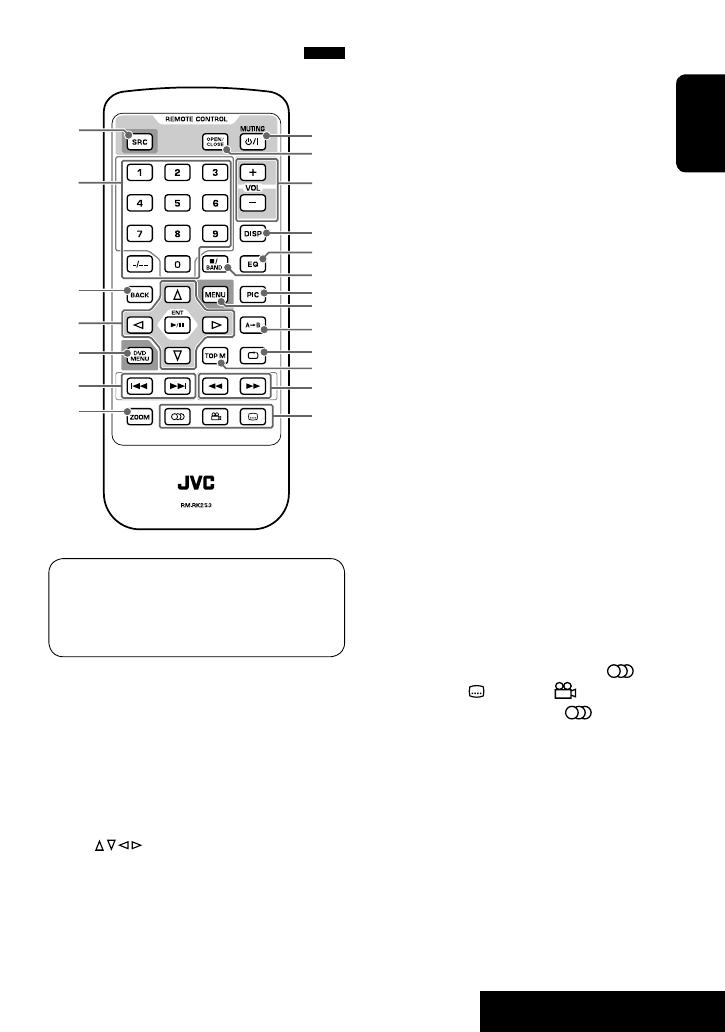
Operations are explained mainly using the touch
panel; however, you can use the buttons on the
unit and remote controller if they have the same or
similar names or marks.
1 Selects the source.
2 • Enters numbers.
• “TUNER”: Selects the preset stations.
• DVD/VCD: Performs title/chapter (track)/time
search.
• DivX/MPEG/JPEG/CD/MP3/WMA, “USB/SD/
iPod”: Selects track.
3 Returns to the previous screen.
4 • : Selects items/options.
• ENT: Confirms the selection/setting.
• “DISC/USB/SD/iPod“: 6: Plays/pauses.
Main elements and features
5 DVD: Displays the disc menu.
6 • “TUNER”: Performs Auto Search.
• “DISC/USB/SD/iPod”: Reverse skip/forward
skip.
7 “DISC/USB/SD“: Enlarges the playback picture.
8 • Turns on the power.
• Mutes the sound if the power is on.*
1
• Turns off the power if press and held.
9 Opens/closes the monitor panel.
p Adjusts the volume level.
q • Changes the information on the display when
the monitor panel is closed.
• “TUNER/DISC/USB/SD/iPod”: Displays the
current station/track information on the
monitor when the monitor is opened.
w*
2
• Displays the audio setting screen.
• Displays the speaker adjustment screen while
enjoying multi-channel surround playback.
e • “TUNER”: Selects the bands.
• “DISC/USB/SD/iPod“: Stops playback.
r*
2
Displays the brightness adjustment bar or
“Picture Menu.”
t*
2
Displays or exits “Main Menu” of the unit.
y “DISC/USB/SD“: Performs A-B Repeat.
u “DISC/USB/SD/iPod”: Selects Repeat Mode.
i • DVD: Displays the disc menu.
• VCD: Turns on/off the PBC function.
o • “TUNER”: Performs Manual Search
• “DISC/USB/SD/iPod”: Reverse search/forward
search
; • DVD Video: Selects audio language ( ),
subtitles ( ), and angle ( ).
• VCD: Selects audio channel ( ).
*
1
Muting is automatically canceled as you change the
source.
*
2
Use these buttons when the monitor panel is opened.
EN01_KD-AV7100_JW.indd 7EN01_KD-AV7100_JW.indd 7 08.7.8 11:22:40 AM08.7.8 11:22:40 AM


