
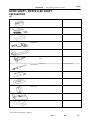
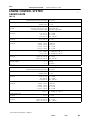
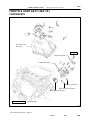
0108G–01
N17080
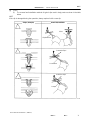
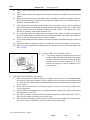
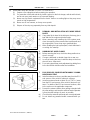
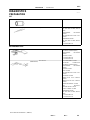
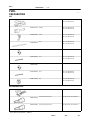
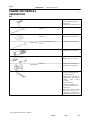
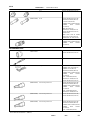
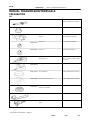
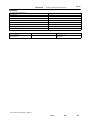
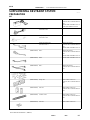
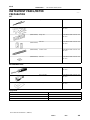
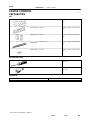
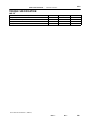
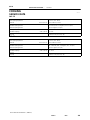
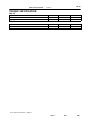
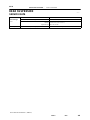
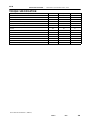
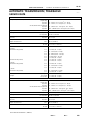
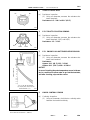
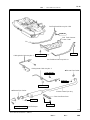
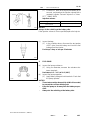
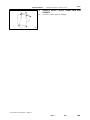
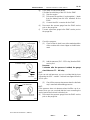
Filler Cap
Float
Reservoir Tank
Grommet
Clip
Slotted Spring Pin
: Specified torque
Non–reusable part
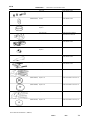
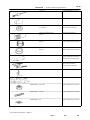
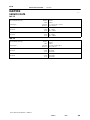
Cylinder
Piston
Push Rod
Washer
Snap Ring
Boot
Gasket
Lock Nut
Clevis Pin
Clevis
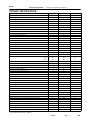
N·m (kgf·cm, ft·lbf)
12 (120, 9)
15 (155, 11)
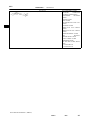
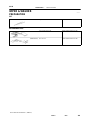
–INTRODUCTION HOW TO USE THIS MANUAL
01–1
1Author: Date:
2002 CAMRY REPAIR MANUAL (RM881U)
HOW TO USE THIS MANUAL
GENERAL INFORMATION
1. GENERAL DESCRIPTION
(a) This manual is made in accordance with SAE J2008.
(b) Generally, repair operations can be separated in the following 3 main processes:
1. Diagnosis
2. Removing and Installing, Replacing, Disassembling, Installing and Checking, Adjusting
3. Final Inspection
(c) This manual explains the 1st process of ”Diagnosis” (placed in the ”Diagnostics” section), the 2nd
pro-
cess of ”Removing and Installing, Replacing, Disassembling, Installing and Checking, Adjusting”, but
the 3rd process of ”Final Inspection” is omitted.
(d) The following essential operations are not written in this manual. However, these operations must be
done in the practical situation.
(1) Operation with a jack or lift
(2) Cleaning of a removed part when necessary
(3) Visual check
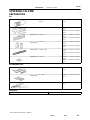
2. INDEX
(a) An alphabetical INDEX is provided as a section on the end of the book to guide you to the item to be
repaired.
3. PREPARATION
(a) Use of special service tools (SST) and special service materials (SSM) may be required, depending
on the repairing condition. Be sure to use SST and SSM when they are required and follow the working
procedure properly. A list of SST and SSM is in the Preparation section of this manual.
4. REPAIR PROCEDURES
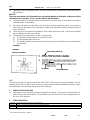
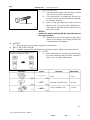
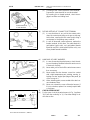
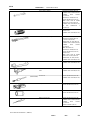
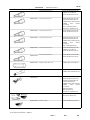
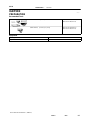
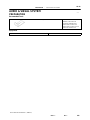
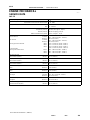
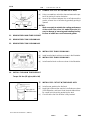
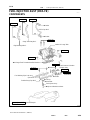
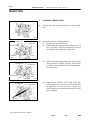
(a) Component drawing is placed under the title when necessary.
(b) Illustrations are placed as ”disassembled parts drawing” so that it enables you to understand the fitting
condition of the components.
(c) Non–reusable parts, grease applied parts, precoated parts and tightening torque are specified in the
components drawing.
Example:

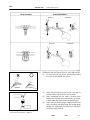
Illustration:
what to do and where
Component part No.
Detailed test: how to perform task
Task heading: what to do
Set part No
Illustration:
what to do and where
Component part No.
Task heading: what to do
Set part No.
D26745
01–2
–INTRODUCTION HOW TO USE THIS MANUAL
2Author: Date:
2002 CAMRY REPAIR MANUAL (RM881U)
(d) Tightening torque, oil applying position, and non–reusable parts are described as important points in
the procedure.
NOTICE:
There are cases where such information can only be indicated by an illustration. In that case, all the
information such as torque, oil, etc. are described in the illustration.
(e) Installing procedure of operation items is performed in the reverse order of the removal, and only the
important points are described.
(f) Only items with points are described in the procedure, and the operational portion and content are
placed using an illustration. In the explanations, details of the operational method, standard value and
notice are placed.
(g) There may be a case where the illustrations of the similar models are used. In that case the details
may be different from the actual vehicle.
(h) The procedures are presented in a step–by–step format:
(1) The illustration shows what to do and where to do it.
(2) The task heading tells what to do.
(3) The detailed text tells how to perform the task and gives other information such as specifications
and warnings.
Example:
HINT:
This format provides an experienced technician with a FAST TRACK to the necessary information. The task
heading can be read at a glance when necessary, and the text below provides detailed information. Impor-
tant specifications and warnings always stand out in bold type.
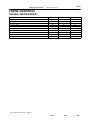
5. SERVICE SPECIFICATIONS
(a) Specifications are presented in bold type throughout the manual. You never have to leave the proce-
dure to look up your specifications. The specifications are also found in the Service Specifications sec-
tion for a quick reference.
6. TERMS DEFINITION
CAUTION Indicate the possibility of injury to you or other people.
NOTICE Indicate the possibility of damage to the components being repaired.
HINT Provide additional information to help you to perform the repair efficiently.

–INTRODUCTION HOW TO USE THIS MANUAL
01–3
3Author: Date:
2002 CAMRY REPAIR MANUAL (RM881U)
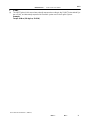
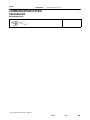
7. SI UNIT
(a) The UNITS given in this manual are primarily expressed according to the SI UNIT (International Sys-
tem of Unit), and alternately expressed in the metric system and in the English System.
Example:
Torque:
30 N⋅m (310 kgf⋅cm, 22 ft⋅lbf)

01041–02
D26605
A
B
D26143
A
D26742
B
01–4
–INTRODUCTION IDENTIFICATION INFORMATION
4Author: Date:
2002 CAMRY REPAIR MANUAL (RM881U)
IDENTIFICATION INFORMATION
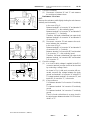
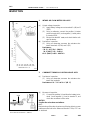
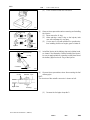
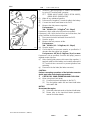
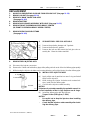
VEHICLE IDENTIFICATION AND SERIAL NUMBERS
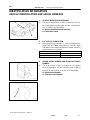
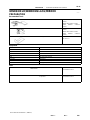
1. VEHICLE IDENTIFICATION NUMBER
(a) The vehicle identification number is stamped on the ve-
hicle identification number plate and the certification la-
bel, as shown in the illustration.
A: Vehicle Identification Number Plate
B: Certification Label
2. FACTORY OF PRODUCTION
(a) World manufacture identifier is used to distinguish be-
tween TMC and TMMK made vehicles. The first 3 digits
and letters of the vehicle identification number shows the
world manufacturer identifier.
WMI *
TMC made JTD
TMMK made 4T1
*: World Manufacturer Identifier
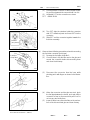
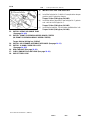
3. ENGINE SERIAL NUMBER AND TRANSAXLE SERIAL
NUMBER
(a) The engine serial number is stamped on the cylinder
block of the engine, and the transaxle serial number is
stamped on the housing, as shown in the illustration.
A: Engine Serial Number
B: Transaxle Serial Number

01042–02
1
2
3
4
6
5
D25016
–INTRODUCTION REPAIR INSTRUCTION
01–5
5Author: Date:
2002 CAMRY REPAIR MANUAL (RM881U)
REPAIR INSTRUCTION
PRECAUTION
1. BASIC REPAIR HINT
(a) HINTS ON OPERATIONS
1 Looks
Always wear a clean uniform.
Hat and safety shoes must be worn.
2 Vehicle protection Set a grill cover, fender cover, seat cover and floor mat before starting the operation.
3 Safe operation
In case of working with 2 or more persons, be sure to check safety of one another.
When working with the engine running, pay attention to the ventilation of the workshop.
In case of operating on a high–temperature parts, rotating, moving and vibrating parts, pay attention to not
burn or injure yourself.
When jacking up the vehicle, be sure to support the specified location with a safety stand.
When lifting up the vehicle, apply a safety equipment.
4
Preparation of tools and
measuring gauge
Before starting operation, prepare a tool stand, SST, gauge, oil, shop rag and parts for replacement.
5
Removal and installation,
disassembly and assem-
bly operations
Diagnose with a thorough understanding of the trouble phenomenon and perform effective operations.
Before removing the parts, check the assembly for general condition, deformation and damage.
When the structure is complicated, take a note or put matchmarks so as not to make mistakes that affect the
function of the parts.
Clean and wash the removed parts if necessary, and assemble them after a thorough check.
6 Removed parts
Place the removed parts in the correct order to avoid mixing up or making them dirty.
As for non–reusable parts such as gasket, O–ring, and self lock nut, change them to new ones following the
instruction of this manual.
Sort out the parts for replacement in a box and show them to the customer.
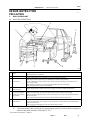
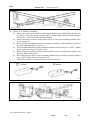
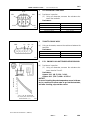
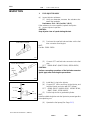
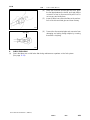
(b) JACKING UP AND SUPPORTING VEHICLE
(1) Care must be taken when jacking up and supporting the vehicle. Be sure to lift and support the
vehicle at the proper locations (See page 01–18).

Z11554
Seal Lock Adhesive
BE1367
Medium Current Fuse and High Current
Fuse Equal Amperage Rating
D27353
V35001
Illustration
Symbol Part Name
Abbreviation
FUSE
MEDIUM CURRENT FUSE
HIGH CURRENT FUSE
FUSE
M–FUSE
H–FUSE
01–6
–INTRODUCTION REPAIR INSTRUCTION
6Author: Date:
2002 CAMRY REPAIR MANUAL (RM881U)
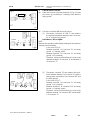
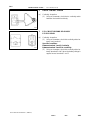
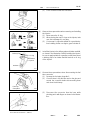
(c) PRECOATED PARTS
(1) Precoated parts are bolts, nuts, etc. that are coated
with a seal lock adhesive at the factory.
(2) If a precoated part is retightened, loosened or
caused to move in any way, it must be recoated with
the specified adhesive.
(3) When reusing precoated parts, clean off the old
adhesive and dry the part with compressed air.
Then apply the specified seal lock adhesive to the
bolt, nut or threads.
NOTICE:
Perform the torque checking with the lower limit value of
the torque tolerance.
(4) Depending on the seal lock agent to apply, there
may be a case where it is necessary to leave it for
a specified time until it hardens.
(d) GASKETS
(1) When necessary, use a sealer on gaskets to prevent leaks.
(e) BOLTS, NUTS AND SCREWS
(1) Carefully observe all the specifications for tightening torques. Always use a torque wrench.
(f) FUSES
(1) When replacing fuses, be sure that a new fuse has
the correct amperage rating. DO NOT exceed the
rating, or use one with a lower rating.

D25786
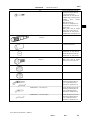
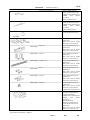
Shape (Example)
Removal/Installation
Clip Remover
Pliers
Screwdriver
Scraper
Protective Tape
Clip
Protective Tape
–INTRODUCTION REPAIR INSTRUCTION
01–7
7Author: Date:
2002 CAMRY REPAIR MANUAL (RM881U)
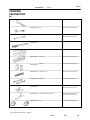
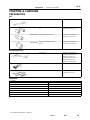
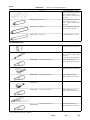
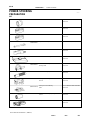
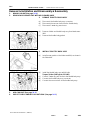
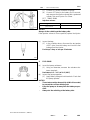
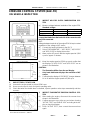
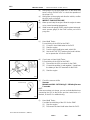
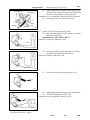
(g) CLIPS
(1) The removal and installation methods of typical clips used in body parts are shown in the table
below.
HINT:
If the clip is damaged during the operation, always replace it with a new clip.

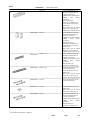
V00012
Shape (Example)
Removal/Installation
Removal
Installation
Removal Installation
D25063
CORRECTWRONG
D25064
01–8
–INTRODUCTION REPAIR INSTRUCTION
8Author: Date:
2002 CAMRY REPAIR MANUAL (RM881U)
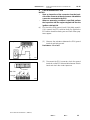
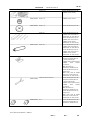
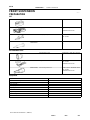
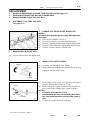
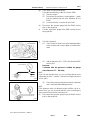
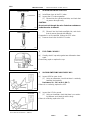
(h) REMOVAL AND INSTALLATION OF VACUUM HOSES
(1) To disconnect vacuum hoses, pull them by holding
the end, not the middle of the hose.
(2) When disconnecting vacuum hoses, use tags to
identify where they should be reconnected.
(3) After completing the job, make a double check
whether the vacuum hoses are properly connected.
A label under the hood shows the proper layout.
(4) When using a vacuum gauge, never force the hose
onto a connector that is too large. Use a step–down
adapter for adjustment. Once the hose has been
stretched, it may leak air.

L1 L2
D02612
L2L1
D01201
–INTRODUCTION REPAIR INSTRUCTION
01–9
9Author: Date:
2002 CAMRY REPAIR MANUAL (RM881U)
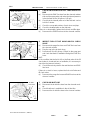
(i) TORQUE WHEN USING TORQUE WRENCH WITH EX-
TENSION TOOL
(1) When a SST or extension tool is combined with the
torque wrench to extend its entire length, if you
tighten until the reading of the torque wrench reach-
es the specified torque value, the actual torque be-
comes excessive.
(2) In this manual, only the specified torque is de-
scribed. In case of using SST or extension tool, cal-
culate the reading of the torque wrench by the fol-
lowing formula.
(3) Formula T’=T x L2/(L1 + L2)
T’ Reading of torque wrench {N⋅m (kgf⋅cm, ft⋅lbf)}
T Torque {N⋅m (kgf⋅cm, ft⋅lbf)}
L1 Length of SST or extension tool (cm)
L2 Length of torque wrench (cm)
2. FOR VEHICLES EQUIPPED WITH SRS AIRBAG AND SEAT BELT PRETENSIONER
HINT:
CAMRY is equipped with an SRS (Supplemental Restraint System), such as the driver airbag, front passen-
ger airbag, side airbag, curtain shield airbag and seat belt pretensioner.
Failure to carry out the service operations in the correct sequence could cause the supplemental restraint
system to unexpectedly deploy during servicing. It may lead to a serious accident.
Furthermore, if a mistake is made in servicing the supplemental restraint system, it is possible that the SRS
will fail to operate when required. Before servicing (including removal or installation of parts, inspection or
replacement), be sure to read the following items carefully. Then follow the correct procedure described in
this manual.
(a) GENERAL NOTICE
(1) Malfunction symptoms of the supplemental restraint system are difficult to confirm, so the diag-
nostic trouble codes become the most important source of information when troubleshooting.
When troubleshooting the supplemental restraint system, always check the diagnostic trouble
codes before disconnecting the battery (See page 05–690).
(2) Work must be started after 90 seconds from the time the ignition switch is turned to the ”LOCK”
position and the negative (–) terminal cable is disconnected from the battery.
(The supplemental restraint system is equipped with a back–up power source, so, if work is
started within 90 seconds after disconnecting the negative (–) terminal cable from the battery,
the SRS may deploy.)
When the negative (–) terminal cable is disconnected from the battery, memory of the clock and
audio systems will be cancelled. So, before starting work, make a record of the memorized con-
tents in each memory system. Then, when work is finished, reset the clock and audio systems
as before. To avoid erasing the memory in each memory system, never use a back–up power
supply from another battery.
(3) Even in case of a minor collision where the SRS does not deploy, the horn button assembly,
instrument panel passenger airbag assembly, front seat airbag assembly, curtain shield airbag
assembly and seat belt pretensioner should be inspected (See pages 60–17, 60–34, 60–44,
60–50 and 61–9).

D26743
Mark
01–10
–INTRODUCTION REPAIR INSTRUCTION
10Author: Date:
2002 CAMRY REPAIR MANUAL (RM881U)
(4) Never use SRS related parts from another vehicle. When replacing parts, replace them with new
parts.
(5) Before repairs, remove the airbag sensor if shocks are likely to be applied to the sensor during
repairs.
(6) Never disassemble and repair the airbag sensor assembly, horn button assembly, instrument
panel passenger airbag assembly, front seat airbag assembly and the curtain shield airbag as-
sembly or seat belt pretensioner.
(7) If the airbag sensor assembly, the side airbag sensor assembly, the horn button assembly, the
instrument panel passenger airbag assembly, the front seat airbag assembly or the curtain shield
airbag assembly have been dropped, or if there are cracks, dents or other defects in the case,
bracket or connector, replace them with new ones.
(8) Do not directly expose the airbag sensor assembly, the horn button assembly, the instrument
panel passenger airbag assembly, the front seat airbag assembly, the curtain shield airbag as-
sembly or the seat belt pretensioner to hot air or flames.
(9) Use a volt/ohmmeter with high impedance (10 kΩ/V minimum) for troubleshooting of an electrical
circuit.
(10) Information labels are attached to the SRS components. Follow the instructions on the notices.
(11) After work on the supplemental restraint system is completed, check the SRS warning light (See
page 05–690).
(b) SPIRAL CABLE (in Combination Switch)
(1) The steering wheel must be fitted correctly to the
steering column with the spiral cable at the neutral
position, otherwise cable disconnection and other
troubles may occur. Refer to page 60–25 on this
manual concerning the correct installation of the
steering wheel.
(c) HORN BUTTON ASSEMBLY (with Airbag)
(1) When removing the horn button assembly or handling a new horn button, it should be placed with
the pad top surface facing upward. Placing it with the pad surface facing downward may lead
to a serious accident if the airbag accedentally inflates. Also, do not place the horn button on top
of one another.
(2) Never measure the resistance of the airbag squib (This may cause the airbag to inflate, which
is very dangerous).
(3) Grease should not be applied to the horn button assembly, and the pad should not be cleaned
with detergents of any kinds.
(4) Store the horn button assembly where the ambient temperature remains below 93°C (200°F),
without high humidity and away from electrical noise.
(5) When using electric welding, first disconnect the airbag connector (2 yellow pins) under the steer-
ing column near the combination switch connector before starting work.

D26599
Example:
CORRECT
WRONG
Z13950
Example:
D26600
Example:
CORRECT
WRONG
–INTRODUCTION REPAIR INSTRUCTION
01–11
11Author: Date:
2002 CAMRY REPAIR MANUAL (RM881U)
(6) When disposing of the vehicle or the horn button assembly alone, the airbag should be deployed
using an SST before disposal (See page 60–17).
Perform the operation in a safe place away from electrical noise.
(d) INSTRUMENT PANEL PASSENGER AIRBAG ASSEMBLY
(1) Always store a removed or new instrument panel passenger airbag assembly with the airbag
inflation direction facing upward. Placing the airbag assembly with the airbag inflation direction
facing downward could cause a serious accident if the airbag inflates.
(2) Never measure the resistance of the airbag squib (This may cause the airbag to inflate, which
is very dangerous).
(3) Grease should not be applied to the instrument panel passenger airbag assembly, and the airbag
door should not be cleaned with detergents of any kind.
(4) Store the airbag assembly where the ambient temperature remains below 93°C (200°F), without
high humidity and away from electrical noise.
(5) When using electric welding, first disconnect the airbag connector (2 yellow pins) installed on the
assembly before starting work.
(6) When disposing of a vehicle or the airbag assembly alone, the airbag should be deployed using
an SST before disposal (See page 60–34).
Perform the operation in a safe place away from electrical noise.

Z13951
Example:
D26601
Example:
CORRECT
WRONG
B01546
Example:
01–12
–INTRODUCTION REPAIR INSTRUCTION
12Author: Date:
2002 CAMRY REPAIR MANUAL (RM881U)
(e) FRONT SEAT AIRBAG ASSEMBLY
(1) Always store a removed or new front seat airbag assembly with the airbag inflation direction fac-
ing upward. Placing the airbag assembly with the airbag inflation direction facing downward
could cause a serious accident if the airbag inflates.
(2) Never measure the resistance of the airbag squib (This may cause the airbag to inflate, which
is very dangerous).
(3) Grease should not be applied to the front seat airbag assembly, and the airbag door should not
be cleaned with detergents of any kind.
(4) Store the airbag assembly where the ambient temperature remains below 93°C (200° F), without
high humidity and away from electrical noise.
(5) When using electric welding, first disconnect the airbag connector (2 yellow pins) installed on the
assembly before starting work.
(6) When disposing of a vehicle or the side airbag assembly alone, the airbag should be deployed
using an SST before disposal (See page 60–50).
Perform the operation in a safe place away from electrical noise.

D26602
Example:
CORRECT
WRONG
Clear Plastic Bag
D26603
Example:
–INTRODUCTION REPAIR INSTRUCTION
01–13
13Author: Date:
2002 CAMRY REPAIR MANUAL (RM881U)
(f) CURTAIN SHIELD AIRBAG ASSEMBLY
(1) Always store the removed or new curtain shield airbag assembly in a clear plastic bag, and keep
it in a safe place.
NOTICE:
Protection bag is not re–useable.
CAUTION:
Never disassemble the curtain shield airbag assembly.
(2) Never measure the resistance of the airbag squib (This may cause the airbag to inflate, which
is very dangerous).
(3) Grease should not be attached to the curtain shield airbag assembly, and the surface should not
be cleared with detergents of any kind.
(4) Store the airbag assembly where the ambient temperature remains below 93 °C (200 °F), with-
out high humidity and away from electrical noise.
(5) When using electric welding, first disconnect the airbag connector (2 yellow 2 pins) into the instru-
ment panel before starting work.
(6) When disposing of a vehicle or the curtain shield airbag assembly alone, the airbag should be
deployed using an SST before disposal (See page 60–44). Perform the operation in a safe place
away from electrical noise.

D26744
Example:
01–14
–INTRODUCTION REPAIR INSTRUCTION
14Author: Date:
2002 CAMRY REPAIR MANUAL (RM881U)
(g) SEAT BELT PRETENSIONER
(1) Never measure the resistance of the seat belt pretensioner (This may cause the seat belt preten-
sioner to activate, which is very dangerous).
(2) Never disassemble the seat belt pretensioner.
(3) Never install the seat belt pretensioner to another vehicle.
(4) Store the seat belt pretensioner where the ambient temperature remains below 80°C (176°F)
without high humidity and away from electrical noise.
(5) When using electric welding, first disconnect the connector (2 yellow pins) before starting work.
(6) When disposing of a vehicle or the seat belt pretensioner alone, the seat belt pretensioner should
be activated before disposal (See page 61–9). Perform the operation in a safe place away from
electrical noise.
(7) The seat belt pretensioner is hot after activation, so let it cool down sufficiently before disposal.
Never apply water to cool down the seat belt pretensioner.
(8) Oil or water should not be put on the front seat outer belt, and the front seat outer belt should
not be cleaned with detergents of any kind.
(h) AIRBAG SENSOR ASSEMBLY
(1) Never reuse the airbag sensor assembly involved in a collision where the SRS has deployed.
(2) The connectors to the airbag sensor assembly should be connected or disconnected with the
sensor mounted on the floor. If the connectors are connected or disconnected while the airbag
sensor assembly is not mounted to the floor, it could cause an undesired ignition of the supple-
mental restraint system.
(3) Work must be started after 90 seconds from the time the ignition switch is turned to the ”LOCK”
position and the negative (–) terminal cable is disconnected from the battery, even if only loosen-
ing the set bolts of the airbag sensor assembly.
(i) WIRE HARNESS AND CONNECTOR
(1) The SRS wire harness is integrated with the instrument panel wire harness assembly. All the con-
nectors in the system are in a standard yellow color. If the SRS wire harness becomes discon-
nected or the connector becomes broken due to an accident, etc., repair or replace it.

D25080
Negative (–)
Terminal
D01556
WRONG
–INTRODUCTION REPAIR INSTRUCTION
01–15
15Author: Date:
2002 CAMRY REPAIR MANUAL (RM881U)
3. ELECTRONIC CONTROL
(a) REMOVAL AND INSTALLATION OF BATTERY TERMI-
NAL
(1) Before performing electrical work, disconnect the
battery negative (–) terminal cable beforehand so
as to prevent burnt–out damage by short.
(2) When disconnecting and installing the terminal
cable, turn the ignition switch and lighting switch
OFF, and loosen the terminal nut completely. Per-
form these operations without twisting or prying the
terminal.
(3) When the battery terminal is removed, all the me-
mories of the clock, radio, DTCs, etc. will be erased.
So before removing it, check them and note them
down.
(4) When the battery terminal is disconnected, the slid-
ing roof position memory is erased.
Make sure to reset the sliding roof zero point
See
page 74–7
.
(b) HANDLING OF ELECTRONIC PARTS
(1) Do not open the cover or case of the ECU unless
absolutely necessary (If the IC terminals are
touched, the IC may be destroyed by static electric-
ity).
(2) To disconnect electronic connectors, pull the con-
nector itself, not the wires.
(3) Be careful not to drop electronic components, such
as sensors or relays. If they are dropped on a hard
floor, they should be replaced and not be reused.
(4) When cleaning the engine with steam, protect the
electronic components, air filter and emission–re-
lated components from water.
(5) Never use an impact wrench to remove or install
temperature switches or temperature sensors.
(6) When checking the continuity at the wire connector,
insert the tester probe carefully to prevent terminals
from bending.
4. REMOVAL AND INSTALLATION OF FUEL CONTROL PARTS
(a) PLACE FOR REMOVING AND INSTALLING OF FUEL SYSTEM PARTS
(1) Work in a place with good air ventilation and without anything flammable such as welder, grinder,
drill, electric motor or stove in the surroundings.
(2) Never work in a place such as a pit or nearby a pit, as there is a possibility that vaporized fuel
is filled in those places.

D01563
D25081
Spring Type Clamp
Clamp Track
D20025
01–16
–INTRODUCTION REPAIR INSTRUCTION
16Author: Date:
2002 CAMRY REPAIR MANUAL (RM881U)
(b) REMOVING AND INSTALLING OF FUEL SYSTEM PARTS
(1) Prepare a fire extinguisher before starting the operation.
(2) For prevention of the static electricity, install a ground on the fuel changer, vehicle and fuel tank,
and do not spray much water so as to prevent slipping.
(3) Never use any electric equipment like an electric motor or a working light as they may cause
sparks or high temperature.
(4) Never use an iron hammer, as it may cause sparks.
(5) Dispose of the shop rag separately from any fuel deposit.
5. REMOVAL AND INSTALLATION OF ENGINE INTAKE
PARTS
(a) If any metal tip is mixed in the inlet pass, that may give a
bad effect to the engine and turbocharger.
(b) When removing and installing the inlet system parts,
close the opening of the removed inlet system parts and
the engine with a clean shop rag or gummed tape.
(c) When installing the inlet system parts, check that there is
no mixing of a metal tip.
6. HANDLING OF HOSE CLAMPS
(a) Before removing the hose, check the clamp position to re-
store it securely.
(b) Change a deformed or dented clamp into a new one.
(c) In case of reusing the hose, install the clamp on the hose
where it has a clamp track.
(d) For a spring type clamp, make adjustment by adding force
to the arrow mark direction after the installation.
7. FOR VEHICLES EQUIPPED WITH MOBILE COMMU-
NICATION SYSTEM
(a) Install an antenna as far as possible away from the ECU
and sensors of the vehicle’s electronic systems.
(b) Install an antenna feeder at least 20 cm (7.87 in.) away
from the ECU and sensors of the vehicle’s electronic sys-
tems. For details of the ECU and sensors locations, refer
to the section on the applicable component.
(c) Prevent the antenna feeder from getting entangled with
the other wirings, and keep the antenna feeder separate-
ly from the other wirings as much as possible.
(d) Check that the antenna and feeder are correctly adjusted.
(e) Do not install any powerful mobile communication sys-
tem.

CG
DLC3
TS
D25497
–INTRODUCTION REPAIR INSTRUCTION
01–17
17Author: Date:
2002 CAMRY REPAIR MANUAL (RM881U)
8. FOR VEHICLES EQUIPPED WITH TRACTION CONTROL (TRAC) SYSTEM
(a) NOTICES WHEN USING 2–WHEEL DRUM TESTER
(1) When using a 2–wheel drum tester such as a speedometer tester, a combination tester of
speedometer and brake, chassis dynamometer or else, always turn the TRAC system off via the
TRAC OFF switch before measurement.
NOTICE:
TRAC system OFF condition can be confirmed by the indication, ”TRAC OFF” of the warning light
in the combination meter.
9. FOR VEHICLES EQUIPPED WITH VEHICLE SKID
CONTROL (VSC) SYSTEM
(a) NOTICES WHEN USING DRUM TESTER
(1) When using a drum tester, be sure to start the en-
gine with the ignition OFF, and connect SST to the
terminals TS and CG of the DLC3 before measure-
ment in order to prohibit the VSC operation.
SST 09843–18040
NOTICE:
Confirm that the VSC warning light blinks.
VSC system will be reset when the engine is re-
started.
Fasten the vehicle with lock chains.
(b) NOTICES OF RELATED OPERATIONS TO VSC
(1) Do not carry out unnecessary installation and re-
moval, because it might disorder the adjustment of
related parts to VSC.
(2) Be sure to carry out the preparation for operation
and the confirmation of operation completion, in ac-
cordance with the instruction of the text, when the
related operations to VSC are performed.
10. FOR VEHICLES EQUIPPED WITH CATALYTIC CONVERTER
CAUTION:
If large amount of unburned gasoline flows into the converter, it may cause overheating and a fire
hazard. To prevent this, observe the following precautions.
(a) Use only unleaded gasoline.
(b) Avoid prolonged idling.
Avoid running the engine at idle speed for more than 20 minutes.
(c) Avoid a spark jump test.
(1) Perform a spark jump test only when absolutely necessary. Perform this test as rapidly as pos-
sible.
(2) While testing, never race the engine.
(d) Avoid a prolonged engine compression measurement.
Engine compression measurements must be performed as rapidly as possible.
(e) Do not run the engine when the fuel tank is nearly empty. This may cause the engine to misfire and
create an extra load on the converter.

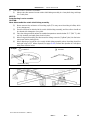
01043–02
D25082
Rubber Attachment
D26604
: SUPPORT POSITION,
PANTOGRAPH JACK POSITION
: CENTER OF VEHICLE GRAVITY
(unload condition)
: JACK POSITION
470 mm (18.50 in.)
Front Side Notch
01–18
–INTRODUCTION REPAIR INSTRUCTION
18Author: Date:
2002 CAMRY REPAIR MANUAL (RM881U)
VEHICLE LIFT AND SUPPORT LOCATIONS
1. NOTICE ABOUT VEHICLE CONDITION WHEN JACKING UP
(a) As a rule, the vehicle must be unloaded when jacking up. Never jack up or lift up the vehicle loaded
with things of heavy weight.
(b) When removing any parts of heavy weight like the engine and transmission, the center of gravity of
the vehicle moves. Place a balance weight so as to keep it from rolling, or hold the jacking support
location using the mission jack.
2. NOTICE FOR USING 4 POST LIFT
(a) Follow the instruction manual for a safety operation.
(b) Do not damage tires or wheels with a free wheel beam.
(c) Using a wheel stopper, fix the vehicle.
3. NOTICE FOR USING JACK AND SAFETY STAND
(a) Work in the flat place using a wheel stopper at all times.
(b) Use a safety stand with a rubber attachment, as shown
in the illustration.
(c) Support the specified location with the jack and safety
stand accurately.
(d) When jacking up the front wheels, release the parking
brake and place wheel stoppers only behind the rear
wheels. When jacking up the rear wheels, place wheel
stoppers only in front of the front wheels.
(e) Do not work or leave the vehicle supported only by a jack.
Be sure to support the vehicle with a safety stand.
(f) When jacking up only the front wheels or only the rear wheels, place wheel stoppers to both sides of
the wheels that contact ground.
(g) When jacking down the vehicle with its front wheels jacked up, release the parking brake and place
wheel stoppers only in front of the rear wheels. When jacking down the vehicle with its rear wheels
jacked up, place wheel stoppers only behind the front wheels.

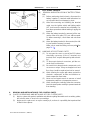
D25021
Swing Arm Type Lift
Plate Type Lift
Center of Lift
: CENTER OF VEHICLE
GRAVITY (unload condition)
Rubber Attachment
Attachment
B
A
L
Attachment Dimensions
85 mm (3.35 in.)
200 mm (7.87 in.)
100 mm (3.94 in.)
70 mm
(2.76 in.)
C
–INTRODUCTION REPAIR INSTRUCTION
01–19
19Author: Date:
2002 CAMRY REPAIR MANUAL (RM881U)
4. NOTICE FOR USING SWING ARM TYPE LIFT
(a) Follow the instruction manual of the lift for a safe operation.
(b) Use a cradle with a rubber attachment, as shown in the illustration.
(c) Set in the vehicle so as to make its center of gravity as close as possible to the center of the lift. (”L”
becomes short.)
(d) place the vehicle horizontally by adjusting the height of the cradle, and match the groove of the cradle
and the safety stand support location accurately.
(e) Be sure to lock the swing arm during the operation.
(f) Lift the vehicle up until the tires float, and shake the vehicle to make sure that the vehicle is stable.
5. NOTICE FOR USING PLATE TYPE LIFT
(a) Follow the instruction manual of the lift for a safe operation.
(b) Use a plate lift attachment.
(c) Be sure to set the vehicle to the specified position.
Right and left set position Place the vehicle over the center of the lift.
Front and rear set position
Align the cushion gum ends of the plate with the attachment lower ends (A and C).
Align the attachment upper end (B) with the rocker flange front side notch.
(d) Lift the vehicle up until the tires float a bit, and shake the vehicle to make sure that the vehicle is stable.

01044–02
01–20
–INTRODUCTION HOW TO TROUBLESHOOT ECU CONTROLLED
SYSTEMS
20Author: Date:
2002 CAMRY REPAIR MANUAL (RM881U)
HOW TO TROUBLESHOOT ECU CONTROLLED SYSTEMS
GENERAL INFORMATION
A large number of ECU controlled systems are used in CAMRY. In general, the ECU controlled system is
considered to be a very intricate system requiring high level of technical knowledge and expert skill to trou-
bleshoot. The fact is, however, that if you proceed to inspect the circuits one by one, troubleshooting of these
systems is not complex. If you have adequate understanding of the system and basic knowledge of electric-
ity, accurate diagnosis and necessary repair can be performed to locate and fix the problem. This manual
is designed through emphasis of the above standpoint to help service technicians perform an accurate and
effective troubleshooting, and is compiled for the following major ECU controlled systems.
The troubleshooting procedure and how to make use of it are described on the following pages.
System Page
1. SFI System (2AZ–FE) 05–1
2. SFI System (1MZ–FE) 05–173
3. ABS with EBD System (BOSCH made) 05–360
4. ABS with EBD System (DENSO made) 05–401
5. ABS with EBD & BA & TRAC & VSC System 05–448
6. Electronic Controlled Automatic Transmission [ECT] 05–548
7. Air Conditioning System 05–616
8. Supplemental Restraint System 05–687
9. Lighting System 05–896
10.Audio System 05–928
11.Navigation System 05–991
12.Combination Meter 05–1070
13.Power Door Lock Control System 05–1132
14.Wireless Door Lock Control System 05–1148
15.Engine Immobiliser System 05–1165
16.Theft Deterrent System 05–1182
17.Body Multiplex Communication System 05–1196
18.Cruise Control System 05–1209
19.Power Window Control System 05–1239
FOR USING OBDII SCAN TOOL OR HAND–HELD TESTER
HINT:
Before using the scan tool or tester, the scan tool’s instruction book or tester’s operator manual should
be read thoroughly.
If the scan tool or tester cannot communicate with the ECU controlled systems when you have con-
nected the cable of the tester to the DLC3 with the ignition switch and tester turned ON, there is a prob-
lem on the vehicle side or tester side.
(1) If the communication is normal when the tester is connected to another vehicle, inspect the diag-
nosis data link line (Busline) or ECU power circuit of the vehicle.
(2) If the communication is still impossible when the tester is connected to another vehicle, the prob-
lem is probably in the tester itself, so perform the Self Test procedures outlined in the Tester Oper-
ator’s Manual.
Page is loading ...
Page is loading ...
Page is loading ...
Page is loading ...
Page is loading ...
Page is loading ...
Page is loading ...
Page is loading ...
Page is loading ...
Page is loading ...
Page is loading ...
Page is loading ...
Page is loading ...
Page is loading ...
Page is loading ...
Page is loading ...
Page is loading ...
Page is loading ...
Page is loading ...
Page is loading ...
Page is loading ...
Page is loading ...
Page is loading ...
Page is loading ...
Page is loading ...
Page is loading ...
Page is loading ...
Page is loading ...
Page is loading ...
Page is loading ...
Page is loading ...
Page is loading ...
Page is loading ...
Page is loading ...
Page is loading ...
Page is loading ...
Page is loading ...
Page is loading ...
Page is loading ...
Page is loading ...
Page is loading ...
Page is loading ...
Page is loading ...
Page is loading ...
Page is loading ...
Page is loading ...
Page is loading ...
Page is loading ...
Page is loading ...
Page is loading ...
Page is loading ...
Page is loading ...
Page is loading ...
Page is loading ...
Page is loading ...
Page is loading ...
Page is loading ...
Page is loading ...
Page is loading ...
Page is loading ...
Page is loading ...
Page is loading ...
Page is loading ...
Page is loading ...
Page is loading ...
Page is loading ...
Page is loading ...
Page is loading ...
Page is loading ...
Page is loading ...
Page is loading ...
Page is loading ...
Page is loading ...
Page is loading ...
Page is loading ...
Page is loading ...
Page is loading ...
Page is loading ...
Page is loading ...
Page is loading ...
Page is loading ...
Page is loading ...
Page is loading ...
Page is loading ...
Page is loading ...
Page is loading ...
Page is loading ...
Page is loading ...
Page is loading ...
Page is loading ...
Page is loading ...
Page is loading ...
Page is loading ...
Page is loading ...
Page is loading ...
Page is loading ...
Page is loading ...
Page is loading ...
Page is loading ...
Page is loading ...
Page is loading ...
Page is loading ...
Page is loading ...
Page is loading ...
Page is loading ...
Page is loading ...
Page is loading ...
Page is loading ...
Page is loading ...
Page is loading ...
Page is loading ...
Page is loading ...
Page is loading ...
Page is loading ...
Page is loading ...
Page is loading ...
Page is loading ...
Page is loading ...
Page is loading ...
Page is loading ...
Page is loading ...
Page is loading ...
Page is loading ...
Page is loading ...
Page is loading ...
Page is loading ...
Page is loading ...
Page is loading ...
Page is loading ...
Page is loading ...
Page is loading ...
Page is loading ...
Page is loading ...
Page is loading ...
Page is loading ...
Page is loading ...
Page is loading ...
Page is loading ...
Page is loading ...
Page is loading ...
Page is loading ...
Page is loading ...
Page is loading ...
Page is loading ...
Page is loading ...
Page is loading ...
Page is loading ...
Page is loading ...
Page is loading ...
Page is loading ...
Page is loading ...
Page is loading ...
Page is loading ...
Page is loading ...
Page is loading ...
Page is loading ...
Page is loading ...
Page is loading ...
Page is loading ...
Page is loading ...
Page is loading ...
Page is loading ...
Page is loading ...
Page is loading ...
Page is loading ...
Page is loading ...
Page is loading ...
Page is loading ...
Page is loading ...
Page is loading ...
Page is loading ...
Page is loading ...
Page is loading ...
Page is loading ...
Page is loading ...
Page is loading ...
Page is loading ...
Page is loading ...
Page is loading ...
Page is loading ...
Page is loading ...
Page is loading ...
Page is loading ...
Page is loading ...
Page is loading ...
Page is loading ...
Page is loading ...
Page is loading ...
Page is loading ...
Page is loading ...
Page is loading ...
Page is loading ...
Page is loading ...
Page is loading ...
Page is loading ...
Page is loading ...
Page is loading ...
Page is loading ...
Page is loading ...
Page is loading ...
Page is loading ...
Page is loading ...
Page is loading ...
Page is loading ...
Page is loading ...
Page is loading ...
Page is loading ...
Page is loading ...
Page is loading ...
Page is loading ...
Page is loading ...
Page is loading ...
Page is loading ...
Page is loading ...
Page is loading ...
Page is loading ...
Page is loading ...
Page is loading ...
Page is loading ...
Page is loading ...
Page is loading ...
Page is loading ...
Page is loading ...
Page is loading ...
Page is loading ...
Page is loading ...
Page is loading ...
Page is loading ...
Page is loading ...
Page is loading ...
Page is loading ...
Page is loading ...
Page is loading ...
Page is loading ...
Page is loading ...
Page is loading ...
Page is loading ...
Page is loading ...
Page is loading ...
Page is loading ...
Page is loading ...
Page is loading ...
Page is loading ...
Page is loading ...
Page is loading ...
Page is loading ...
Page is loading ...
Page is loading ...
Page is loading ...
Page is loading ...
Page is loading ...
Page is loading ...
Page is loading ...
Page is loading ...
Page is loading ...
Page is loading ...
Page is loading ...
Page is loading ...
Page is loading ...
Page is loading ...
Page is loading ...
Page is loading ...
Page is loading ...
Page is loading ...
Page is loading ...
Page is loading ...
Page is loading ...
Page is loading ...
Page is loading ...
Page is loading ...
Page is loading ...
Page is loading ...
Page is loading ...
Page is loading ...
Page is loading ...
Page is loading ...
Page is loading ...
Page is loading ...
Page is loading ...
Page is loading ...
Page is loading ...
Page is loading ...
Page is loading ...
Page is loading ...
Page is loading ...
Page is loading ...
Page is loading ...
Page is loading ...
Page is loading ...
Page is loading ...
Page is loading ...
Page is loading ...
Page is loading ...
Page is loading ...
Page is loading ...
Page is loading ...
Page is loading ...
Page is loading ...
Page is loading ...
Page is loading ...
Page is loading ...
Page is loading ...
Page is loading ...
Page is loading ...
Page is loading ...
Page is loading ...
Page is loading ...
Page is loading ...
Page is loading ...
Page is loading ...
Page is loading ...
Page is loading ...
Page is loading ...
Page is loading ...
Page is loading ...
Page is loading ...
Page is loading ...
Page is loading ...
Page is loading ...
Page is loading ...
Page is loading ...
Page is loading ...
Page is loading ...
Page is loading ...
Page is loading ...
Page is loading ...
Page is loading ...
Page is loading ...
Page is loading ...
Page is loading ...
Page is loading ...
Page is loading ...
Page is loading ...
Page is loading ...
Page is loading ...
Page is loading ...
Page is loading ...
Page is loading ...
Page is loading ...
Page is loading ...
Page is loading ...
Page is loading ...
Page is loading ...
Page is loading ...
Page is loading ...
Page is loading ...
Page is loading ...
Page is loading ...
Page is loading ...
Page is loading ...
Page is loading ...
Page is loading ...
Page is loading ...
Page is loading ...
Page is loading ...
Page is loading ...
Page is loading ...
Page is loading ...
Page is loading ...
Page is loading ...
Page is loading ...
Page is loading ...
Page is loading ...
Page is loading ...
Page is loading ...
Page is loading ...
Page is loading ...
Page is loading ...
Page is loading ...
Page is loading ...
Page is loading ...
Page is loading ...
Page is loading ...
Page is loading ...
Page is loading ...
Page is loading ...
Page is loading ...
Page is loading ...
Page is loading ...
Page is loading ...
Page is loading ...
Page is loading ...
Page is loading ...
Page is loading ...
Page is loading ...
Page is loading ...
Page is loading ...
Page is loading ...
Page is loading ...
Page is loading ...
Page is loading ...
Page is loading ...
Page is loading ...
Page is loading ...
Page is loading ...
Page is loading ...
Page is loading ...
Page is loading ...
Page is loading ...
Page is loading ...
Page is loading ...
Page is loading ...
Page is loading ...
Page is loading ...
Page is loading ...
Page is loading ...
Page is loading ...
Page is loading ...
Page is loading ...
Page is loading ...
Page is loading ...
Page is loading ...
Page is loading ...
Page is loading ...
Page is loading ...
Page is loading ...
Page is loading ...
Page is loading ...
Page is loading ...
Page is loading ...
Page is loading ...
Page is loading ...
Page is loading ...
Page is loading ...
Page is loading ...
Page is loading ...
Page is loading ...
Page is loading ...
Page is loading ...
Page is loading ...
Page is loading ...
Page is loading ...
Page is loading ...
Page is loading ...
Page is loading ...
Page is loading ...
Page is loading ...
Page is loading ...
Page is loading ...
Page is loading ...
Page is loading ...
Page is loading ...
Page is loading ...
Page is loading ...
Page is loading ...
Page is loading ...
Page is loading ...
Page is loading ...
Page is loading ...
Page is loading ...
Page is loading ...
Page is loading ...
Page is loading ...
Page is loading ...
Page is loading ...
Page is loading ...
Page is loading ...
Page is loading ...
Page is loading ...
Page is loading ...
Page is loading ...
Page is loading ...
Page is loading ...
Page is loading ...
Page is loading ...
Page is loading ...
Page is loading ...
Page is loading ...
Page is loading ...
Page is loading ...
Page is loading ...
Page is loading ...
Page is loading ...
Page is loading ...
Page is loading ...
Page is loading ...
Page is loading ...
Page is loading ...
Page is loading ...
Page is loading ...
Page is loading ...
Page is loading ...
Page is loading ...
Page is loading ...
Page is loading ...
Page is loading ...
Page is loading ...
Page is loading ...
Page is loading ...
Page is loading ...
Page is loading ...
Page is loading ...
Page is loading ...
Page is loading ...
Page is loading ...
Page is loading ...
Page is loading ...
Page is loading ...
Page is loading ...
Page is loading ...
Page is loading ...
Page is loading ...
Page is loading ...
Page is loading ...
Page is loading ...
Page is loading ...
Page is loading ...
Page is loading ...
Page is loading ...
Page is loading ...
Page is loading ...
Page is loading ...
Page is loading ...
Page is loading ...
Page is loading ...
Page is loading ...
Page is loading ...
Page is loading ...
Page is loading ...
Page is loading ...
Page is loading ...
Page is loading ...
Page is loading ...
Page is loading ...
Page is loading ...
Page is loading ...
Page is loading ...
Page is loading ...
Page is loading ...
Page is loading ...
Page is loading ...
Page is loading ...
Page is loading ...
Page is loading ...
Page is loading ...
Page is loading ...
Page is loading ...
Page is loading ...
Page is loading ...
Page is loading ...
Page is loading ...
Page is loading ...
Page is loading ...
Page is loading ...
Page is loading ...
Page is loading ...
Page is loading ...
Page is loading ...
Page is loading ...
Page is loading ...
Page is loading ...
Page is loading ...
Page is loading ...
Page is loading ...
Page is loading ...
Page is loading ...
Page is loading ...
Page is loading ...
Page is loading ...
Page is loading ...
Page is loading ...
Page is loading ...
Page is loading ...
Page is loading ...
Page is loading ...
Page is loading ...
Page is loading ...
Page is loading ...
Page is loading ...
Page is loading ...
Page is loading ...
Page is loading ...
Page is loading ...
Page is loading ...
Page is loading ...
Page is loading ...
Page is loading ...
Page is loading ...
Page is loading ...
Page is loading ...
Page is loading ...
Page is loading ...
Page is loading ...
Page is loading ...
Page is loading ...
Page is loading ...
Page is loading ...
Page is loading ...
Page is loading ...
Page is loading ...
Page is loading ...
Page is loading ...
Page is loading ...
Page is loading ...
Page is loading ...
Page is loading ...
Page is loading ...
Page is loading ...
Page is loading ...
Page is loading ...
Page is loading ...
Page is loading ...
Page is loading ...
Page is loading ...
Page is loading ...
Page is loading ...
Page is loading ...
Page is loading ...
Page is loading ...
Page is loading ...
Page is loading ...
Page is loading ...
Page is loading ...
Page is loading ...
Page is loading ...
Page is loading ...
Page is loading ...
Page is loading ...
Page is loading ...
Page is loading ...
Page is loading ...
Page is loading ...
Page is loading ...
Page is loading ...
Page is loading ...
Page is loading ...
Page is loading ...
Page is loading ...
Page is loading ...
Page is loading ...
Page is loading ...
Page is loading ...
Page is loading ...
Page is loading ...
Page is loading ...
Page is loading ...
Page is loading ...
Page is loading ...
Page is loading ...
Page is loading ...
Page is loading ...
Page is loading ...
Page is loading ...
Page is loading ...
Page is loading ...
Page is loading ...
Page is loading ...
Page is loading ...
Page is loading ...
Page is loading ...
Page is loading ...
Page is loading ...
Page is loading ...
Page is loading ...
Page is loading ...
Page is loading ...
Page is loading ...
Page is loading ...
Page is loading ...
Page is loading ...
Page is loading ...
Page is loading ...
Page is loading ...
Page is loading ...
Page is loading ...
Page is loading ...
Page is loading ...
Page is loading ...
Page is loading ...
Page is loading ...
Page is loading ...
Page is loading ...
Page is loading ...
Page is loading ...
Page is loading ...
Page is loading ...
Page is loading ...
Page is loading ...
Page is loading ...
Page is loading ...
Page is loading ...
Page is loading ...
Page is loading ...
Page is loading ...
Page is loading ...
Page is loading ...
Page is loading ...
Page is loading ...
Page is loading ...
Page is loading ...
Page is loading ...
Page is loading ...
Page is loading ...
Page is loading ...
Page is loading ...
Page is loading ...
Page is loading ...
Page is loading ...
Page is loading ...
Page is loading ...
Page is loading ...
Page is loading ...
Page is loading ...
Page is loading ...
Page is loading ...
Page is loading ...
Page is loading ...
Page is loading ...
Page is loading ...
Page is loading ...
Page is loading ...
Page is loading ...
Page is loading ...
Page is loading ...
Page is loading ...
Page is loading ...
Page is loading ...
Page is loading ...
Page is loading ...
Page is loading ...
Page is loading ...
Page is loading ...
Page is loading ...
Page is loading ...
Page is loading ...
Page is loading ...
Page is loading ...
Page is loading ...
Page is loading ...
Page is loading ...
Page is loading ...
Page is loading ...
Page is loading ...
Page is loading ...
Page is loading ...
Page is loading ...
Page is loading ...
Page is loading ...
Page is loading ...
Page is loading ...
Page is loading ...
Page is loading ...
Page is loading ...
Page is loading ...
Page is loading ...
Page is loading ...
Page is loading ...
Page is loading ...
Page is loading ...
Page is loading ...
Page is loading ...
Page is loading ...
Page is loading ...
Page is loading ...
Page is loading ...
Page is loading ...
Page is loading ...
Page is loading ...
Page is loading ...
Page is loading ...
Page is loading ...
Page is loading ...
Page is loading ...
Page is loading ...
Page is loading ...
Page is loading ...
Page is loading ...
Page is loading ...
Page is loading ...
Page is loading ...
Page is loading ...
Page is loading ...
Page is loading ...
Page is loading ...
Page is loading ...
Page is loading ...
Page is loading ...
Page is loading ...
Page is loading ...
Page is loading ...
Page is loading ...
Page is loading ...
Page is loading ...
Page is loading ...
Page is loading ...
Page is loading ...
Page is loading ...
Page is loading ...
Page is loading ...
Page is loading ...
Page is loading ...
Page is loading ...
Page is loading ...
Page is loading ...
Page is loading ...
Page is loading ...
Page is loading ...
Page is loading ...
Page is loading ...
Page is loading ...
Page is loading ...
Page is loading ...
Page is loading ...
Page is loading ...
Page is loading ...
Page is loading ...
Page is loading ...
Page is loading ...
Page is loading ...
Page is loading ...
Page is loading ...
Page is loading ...
Page is loading ...
Page is loading ...
Page is loading ...
Page is loading ...
Page is loading ...
Page is loading ...
Page is loading ...
Page is loading ...
Page is loading ...
Page is loading ...
Page is loading ...
Page is loading ...
Page is loading ...
Page is loading ...
Page is loading ...
Page is loading ...
Page is loading ...
Page is loading ...
Page is loading ...
Page is loading ...
Page is loading ...
Page is loading ...
Page is loading ...
Page is loading ...
Page is loading ...
Page is loading ...
Page is loading ...
Page is loading ...
Page is loading ...
Page is loading ...
Page is loading ...
Page is loading ...
Page is loading ...
Page is loading ...
Page is loading ...
Page is loading ...
Page is loading ...
Page is loading ...
Page is loading ...
Page is loading ...
Page is loading ...
Page is loading ...
Page is loading ...
Page is loading ...
Page is loading ...
Page is loading ...
Page is loading ...
Page is loading ...
Page is loading ...
Page is loading ...
Page is loading ...
Page is loading ...
Page is loading ...
Page is loading ...
Page is loading ...
Page is loading ...
Page is loading ...
Page is loading ...
Page is loading ...
Page is loading ...
Page is loading ...
Page is loading ...
Page is loading ...
Page is loading ...
Page is loading ...
Page is loading ...
Page is loading ...
Page is loading ...
Page is loading ...
Page is loading ...
Page is loading ...
Page is loading ...
Page is loading ...
Page is loading ...
Page is loading ...
Page is loading ...
Page is loading ...
Page is loading ...
Page is loading ...
Page is loading ...
Page is loading ...
Page is loading ...
Page is loading ...
Page is loading ...
Page is loading ...
Page is loading ...
Page is loading ...
Page is loading ...
Page is loading ...
Page is loading ...
Page is loading ...
Page is loading ...
Page is loading ...
Page is loading ...
Page is loading ...
Page is loading ...
Page is loading ...
Page is loading ...
Page is loading ...
Page is loading ...
Page is loading ...
Page is loading ...
Page is loading ...
Page is loading ...
Page is loading ...
Page is loading ...
Page is loading ...
Page is loading ...
Page is loading ...
Page is loading ...
Page is loading ...
Page is loading ...
Page is loading ...
Page is loading ...
Page is loading ...
Page is loading ...
Page is loading ...
Page is loading ...
Page is loading ...
Page is loading ...
Page is loading ...
Page is loading ...
Page is loading ...
Page is loading ...
Page is loading ...
Page is loading ...
Page is loading ...
Page is loading ...
Page is loading ...
Page is loading ...
Page is loading ...
Page is loading ...
Page is loading ...
Page is loading ...
Page is loading ...
Page is loading ...
Page is loading ...
Page is loading ...
Page is loading ...
Page is loading ...
Page is loading ...
Page is loading ...
Page is loading ...
Page is loading ...
Page is loading ...
Page is loading ...
Page is loading ...
Page is loading ...
Page is loading ...
Page is loading ...
Page is loading ...
Page is loading ...
Page is loading ...
Page is loading ...
Page is loading ...
Page is loading ...
Page is loading ...
Page is loading ...
Page is loading ...
Page is loading ...
Page is loading ...
Page is loading ...
Page is loading ...
Page is loading ...
Page is loading ...
Page is loading ...
Page is loading ...
Page is loading ...
Page is loading ...
Page is loading ...
Page is loading ...
Page is loading ...
Page is loading ...
Page is loading ...
Page is loading ...
Page is loading ...
Page is loading ...
Page is loading ...
Page is loading ...
Page is loading ...
Page is loading ...
Page is loading ...
Page is loading ...
Page is loading ...
Page is loading ...
Page is loading ...
Page is loading ...
Page is loading ...
Page is loading ...
Page is loading ...
Page is loading ...
Page is loading ...
Page is loading ...
Page is loading ...
Page is loading ...
Page is loading ...
Page is loading ...
Page is loading ...
Page is loading ...
Page is loading ...
Page is loading ...
Page is loading ...
Page is loading ...
Page is loading ...
Page is loading ...
Page is loading ...
Page is loading ...
Page is loading ...
Page is loading ...
Page is loading ...
Page is loading ...
Page is loading ...
Page is loading ...
Page is loading ...
Page is loading ...
Page is loading ...
Page is loading ...
Page is loading ...
Page is loading ...
Page is loading ...
Page is loading ...
Page is loading ...
Page is loading ...
Page is loading ...
Page is loading ...
Page is loading ...
Page is loading ...
Page is loading ...
Page is loading ...
Page is loading ...
Page is loading ...
Page is loading ...
Page is loading ...
Page is loading ...
Page is loading ...
Page is loading ...
Page is loading ...
Page is loading ...
Page is loading ...
Page is loading ...
Page is loading ...
Page is loading ...
Page is loading ...
Page is loading ...
Page is loading ...
Page is loading ...
Page is loading ...
Page is loading ...
Page is loading ...
Page is loading ...
Page is loading ...
Page is loading ...
Page is loading ...
Page is loading ...
Page is loading ...
Page is loading ...
Page is loading ...
Page is loading ...
Page is loading ...
Page is loading ...
Page is loading ...
Page is loading ...
Page is loading ...
Page is loading ...
Page is loading ...
Page is loading ...
Page is loading ...
Page is loading ...
Page is loading ...
Page is loading ...
Page is loading ...
Page is loading ...
Page is loading ...
Page is loading ...
Page is loading ...
Page is loading ...
Page is loading ...
Page is loading ...
Page is loading ...
Page is loading ...
Page is loading ...
Page is loading ...
Page is loading ...
Page is loading ...
Page is loading ...
Page is loading ...
Page is loading ...
Page is loading ...
Page is loading ...
Page is loading ...
Page is loading ...
Page is loading ...
Page is loading ...
Page is loading ...
Page is loading ...
Page is loading ...
Page is loading ...
Page is loading ...
Page is loading ...
Page is loading ...
Page is loading ...
Page is loading ...
Page is loading ...
Page is loading ...
Page is loading ...
Page is loading ...
Page is loading ...
Page is loading ...
Page is loading ...
Page is loading ...
Page is loading ...
Page is loading ...
Page is loading ...
Page is loading ...
Page is loading ...
Page is loading ...
Page is loading ...
Page is loading ...
Page is loading ...
Page is loading ...
Page is loading ...
Page is loading ...
Page is loading ...
Page is loading ...
Page is loading ...
Page is loading ...
Page is loading ...
Page is loading ...
Page is loading ...
Page is loading ...
Page is loading ...
Page is loading ...
Page is loading ...
Page is loading ...
Page is loading ...
Page is loading ...
Page is loading ...
Page is loading ...
Page is loading ...
Page is loading ...
Page is loading ...
Page is loading ...
Page is loading ...
Page is loading ...
Page is loading ...
Page is loading ...
Page is loading ...
Page is loading ...
Page is loading ...
Page is loading ...
Page is loading ...
Page is loading ...
Page is loading ...
Page is loading ...
Page is loading ...
Page is loading ...
Page is loading ...
Page is loading ...
Page is loading ...
Page is loading ...
Page is loading ...
Page is loading ...
Page is loading ...
Page is loading ...
Page is loading ...
Page is loading ...
Page is loading ...
Page is loading ...
Page is loading ...
Page is loading ...
Page is loading ...
Page is loading ...
Page is loading ...
Page is loading ...
Page is loading ...
Page is loading ...
Page is loading ...
Page is loading ...
Page is loading ...
Page is loading ...
Page is loading ...
Page is loading ...
Page is loading ...
Page is loading ...
Page is loading ...
Page is loading ...
Page is loading ...
Page is loading ...
Page is loading ...
Page is loading ...
Page is loading ...
Page is loading ...
Page is loading ...
Page is loading ...
Page is loading ...
Page is loading ...
Page is loading ...
Page is loading ...
Page is loading ...
Page is loading ...
Page is loading ...
Page is loading ...
Page is loading ...
Page is loading ...
Page is loading ...
Page is loading ...
Page is loading ...
Page is loading ...
Page is loading ...
Page is loading ...
Page is loading ...
Page is loading ...
Page is loading ...
Page is loading ...
Page is loading ...
Page is loading ...
Page is loading ...
Page is loading ...
Page is loading ...
Page is loading ...
Page is loading ...
Page is loading ...
Page is loading ...
Page is loading ...
Page is loading ...
Page is loading ...
Page is loading ...
Page is loading ...
Page is loading ...
Page is loading ...
Page is loading ...
Page is loading ...
Page is loading ...
Page is loading ...
Page is loading ...
Page is loading ...
Page is loading ...
Page is loading ...
Page is loading ...
Page is loading ...
Page is loading ...
Page is loading ...
Page is loading ...
Page is loading ...
Page is loading ...
Page is loading ...
Page is loading ...
Page is loading ...
Page is loading ...
Page is loading ...
Page is loading ...
-
 1
1
-
 2
2
-
 3
3
-
 4
4
-
 5
5
-
 6
6
-
 7
7
-
 8
8
-
 9
9
-
 10
10
-
 11
11
-
 12
12
-
 13
13
-
 14
14
-
 15
15
-
 16
16
-
 17
17
-
 18
18
-
 19
19
-
 20
20
-
 21
21
-
 22
22
-
 23
23
-
 24
24
-
 25
25
-
 26
26
-
 27
27
-
 28
28
-
 29
29
-
 30
30
-
 31
31
-
 32
32
-
 33
33
-
 34
34
-
 35
35
-
 36
36
-
 37
37
-
 38
38
-
 39
39
-
 40
40
-
 41
41
-
 42
42
-
 43
43
-
 44
44
-
 45
45
-
 46
46
-
 47
47
-
 48
48
-
 49
49
-
 50
50
-
 51
51
-
 52
52
-
 53
53
-
 54
54
-
 55
55
-
 56
56
-
 57
57
-
 58
58
-
 59
59
-
 60
60
-
 61
61
-
 62
62
-
 63
63
-
 64
64
-
 65
65
-
 66
66
-
 67
67
-
 68
68
-
 69
69
-
 70
70
-
 71
71
-
 72
72
-
 73
73
-
 74
74
-
 75
75
-
 76
76
-
 77
77
-
 78
78
-
 79
79
-
 80
80
-
 81
81
-
 82
82
-
 83
83
-
 84
84
-
 85
85
-
 86
86
-
 87
87
-
 88
88
-
 89
89
-
 90
90
-
 91
91
-
 92
92
-
 93
93
-
 94
94
-
 95
95
-
 96
96
-
 97
97
-
 98
98
-
 99
99
-
 100
100
-
 101
101
-
 102
102
-
 103
103
-
 104
104
-
 105
105
-
 106
106
-
 107
107
-
 108
108
-
 109
109
-
 110
110
-
 111
111
-
 112
112
-
 113
113
-
 114
114
-
 115
115
-
 116
116
-
 117
117
-
 118
118
-
 119
119
-
 120
120
-
 121
121
-
 122
122
-
 123
123
-
 124
124
-
 125
125
-
 126
126
-
 127
127
-
 128
128
-
 129
129
-
 130
130
-
 131
131
-
 132
132
-
 133
133
-
 134
134
-
 135
135
-
 136
136
-
 137
137
-
 138
138
-
 139
139
-
 140
140
-
 141
141
-
 142
142
-
 143
143
-
 144
144
-
 145
145
-
 146
146
-
 147
147
-
 148
148
-
 149
149
-
 150
150
-
 151
151
-
 152
152
-
 153
153
-
 154
154
-
 155
155
-
 156
156
-
 157
157
-
 158
158
-
 159
159
-
 160
160
-
 161
161
-
 162
162
-
 163
163
-
 164
164
-
 165
165
-
 166
166
-
 167
167
-
 168
168
-
 169
169
-
 170
170
-
 171
171
-
 172
172
-
 173
173
-
 174
174
-
 175
175
-
 176
176
-
 177
177
-
 178
178
-
 179
179
-
 180
180
-
 181
181
-
 182
182
-
 183
183
-
 184
184
-
 185
185
-
 186
186
-
 187
187
-
 188
188
-
 189
189
-
 190
190
-
 191
191
-
 192
192
-
 193
193
-
 194
194
-
 195
195
-
 196
196
-
 197
197
-
 198
198
-
 199
199
-
 200
200
-
 201
201
-
 202
202
-
 203
203
-
 204
204
-
 205
205
-
 206
206
-
 207
207
-
 208
208
-
 209
209
-
 210
210
-
 211
211
-
 212
212
-
 213
213
-
 214
214
-
 215
215
-
 216
216
-
 217
217
-
 218
218
-
 219
219
-
 220
220
-
 221
221
-
 222
222
-
 223
223
-
 224
224
-
 225
225
-
 226
226
-
 227
227
-
 228
228
-
 229
229
-
 230
230
-
 231
231
-
 232
232
-
 233
233
-
 234
234
-
 235
235
-
 236
236
-
 237
237
-
 238
238
-
 239
239
-
 240
240
-
 241
241
-
 242
242
-
 243
243
-
 244
244
-
 245
245
-
 246
246
-
 247
247
-
 248
248
-
 249
249
-
 250
250
-
 251
251
-
 252
252
-
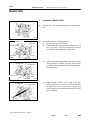 253
253
-
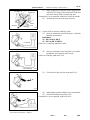 254
254
-
 255
255
-
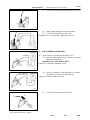 256
256
-
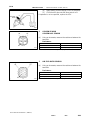 257
257
-
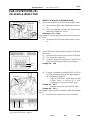 258
258
-
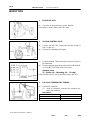 259
259
-
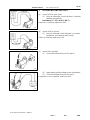 260
260
-
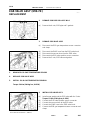 261
261
-
 262
262
-
 263
263
-
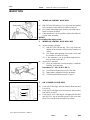 264
264
-
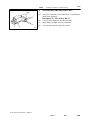 265
265
-
 266
266
-
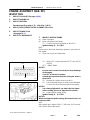 267
267
-
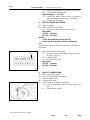 268
268
-
 269
269
-
 270
270
-
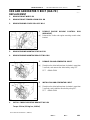 271
271
-
 272
272
-
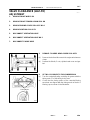 273
273
-
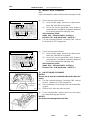 274
274
-
 275
275
-
 276
276
-
 277
277
-
 278
278
-
 279
279
-
 280
280
-
 281
281
-
 282
282
-
 283
283
-
 284
284
-
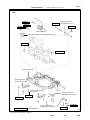 285
285
-
 286
286
-
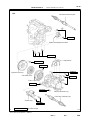 287
287
-
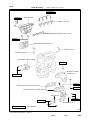 288
288
-
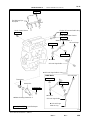 289
289
-
 290
290
-
 291
291
-
 292
292
-
 293
293
-
 294
294
-
 295
295
-
 296
296
-
 297
297
-
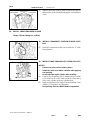 298
298
-
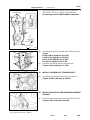 299
299
-
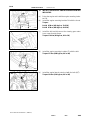 300
300
-
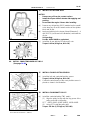 301
301
-
 302
302
-
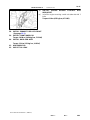 303
303
-
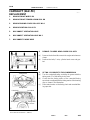 304
304
-
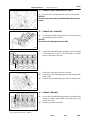 305
305
-
 306
306
-
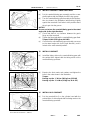 307
307
-
 308
308
-
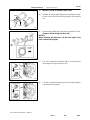 309
309
-
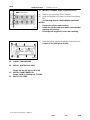 310
310
-
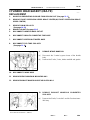 311
311
-
 312
312
-
 313
313
-
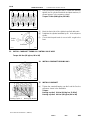 314
314
-
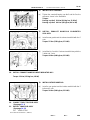 315
315
-
 316
316
-
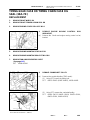 317
317
-
 318
318
-
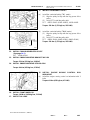 319
319
-
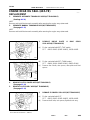 320
320
-
 321
321
-
 322
322
-
 323
323
-
 324
324
-
 325
325
-
 326
326
-
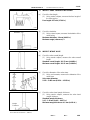 327
327
-
 328
328
-
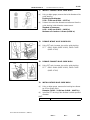 329
329
-
 330
330
-
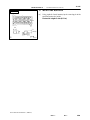 331
331
-
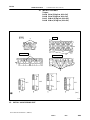 332
332
-
 333
333
-
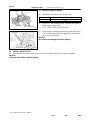 334
334
-
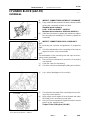 335
335
-
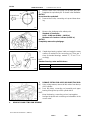 336
336
-
 337
337
-
 338
338
-
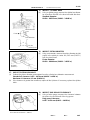 339
339
-
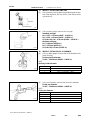 340
340
-
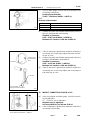 341
341
-
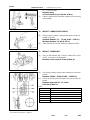 342
342
-
 343
343
-
 344
344
-
 345
345
-
 346
346
-
 347
347
-
 348
348
-
 349
349
-
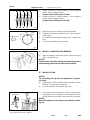 350
350
-
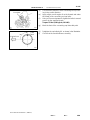 351
351
-
 352
352
-
 353
353
-
 354
354
-
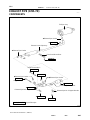 355
355
-
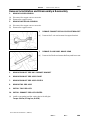 356
356
-
 357
357
-
 358
358
-
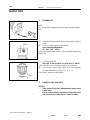 359
359
-
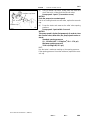 360
360
-
 361
361
-
 362
362
-
 363
363
-
 364
364
-
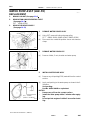 365
365
-
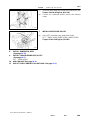 366
366
-
 367
367
-
 368
368
-
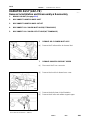 369
369
-
 370
370
-
 371
371
-
 372
372
-
 373
373
-
 374
374
-
 375
375
-
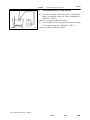 376
376
-
 377
377
-
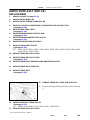 378
378
-
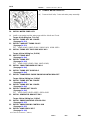 379
379
-
 380
380
-
 381
381
-
 382
382
-
 383
383
-
 384
384
-
 385
385
-
 386
386
-
 387
387
-
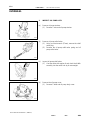 388
388
-
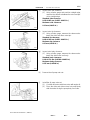 389
389
-
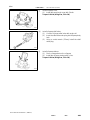 390
390
-
 391
391
-
 392
392
-
 393
393
-
 394
394
-
 395
395
-
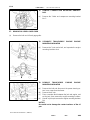 396
396
-
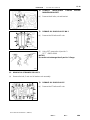 397
397
-
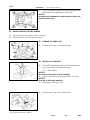 398
398
-
 399
399
-
 400
400
-
 401
401
-
 402
402
-
 403
403
-
 404
404
-
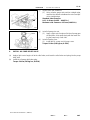 405
405
-
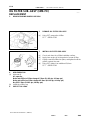 406
406
-
 407
407
-
 408
408
-
 409
409
-
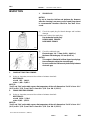 410
410
-
 411
411
-
 412
412
-
 413
413
-
 414
414
-
 415
415
-
 416
416
-
 417
417
-
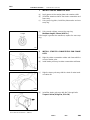 418
418
-
 419
419
-
 420
420
-
 421
421
-
 422
422
-
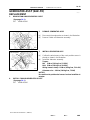 423
423
-
 424
424
-
 425
425
-
 426
426
-
 427
427
-
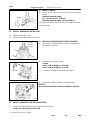 428
428
-
 429
429
-
 430
430
-
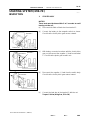 431
431
-
 432
432
-
 433
433
-
 434
434
-
 435
435
-
 436
436
-
 437
437
-
 438
438
-
 439
439
-
 440
440
-
 441
441
-
 442
442
-
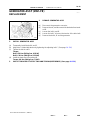 443
443
-
 444
444
-
 445
445
-
 446
446
-
 447
447
-
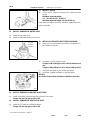 448
448
-
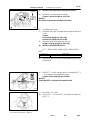 449
449
-
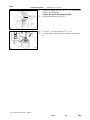 450
450
-
 451
451
-
 452
452
-
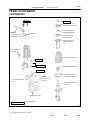 453
453
-
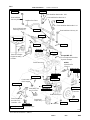 454
454
-
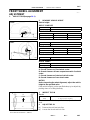 455
455
-
 456
456
-
 457
457
-
 458
458
-
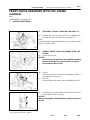 459
459
-
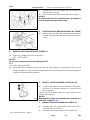 460
460
-
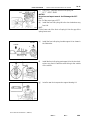 461
461
-
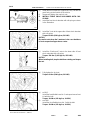 462
462
-
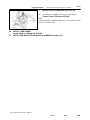 463
463
-
 464
464
-
 465
465
-
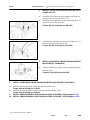 466
466
-
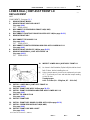 467
467
-
 468
468
-
 469
469
-
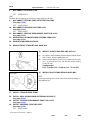 470
470
-
 471
471
-
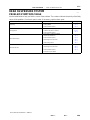 472
472
-
 473
473
-
 474
474
-
 475
475
-
 476
476
-
 477
477
-
 478
478
-
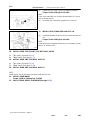 479
479
-
 480
480
-
 481
481
-
 482
482
-
 483
483
-
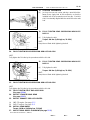 484
484
-
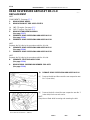 485
485
-
 486
486
-
 487
487
-
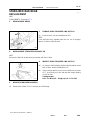 488
488
-
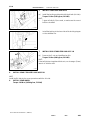 489
489
-
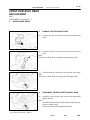 490
490
-
 491
491
-
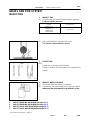 492
492
-
 493
493
-
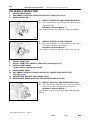 494
494
-
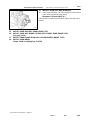 495
495
-
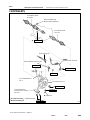 496
496
-
 497
497
-
 498
498
-
 499
499
-
 500
500
-
 501
501
-
 502
502
-
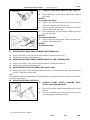 503
503
-
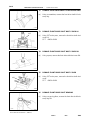 504
504
-
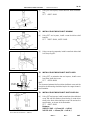 505
505
-
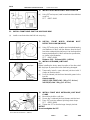 506
506
-
 507
507
-
 508
508
-
 509
509
-
 510
510
-
 511
511
-
 512
512
-
 513
513
-
 514
514
-
 515
515
-
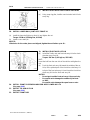 516
516
-
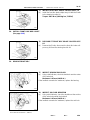 517
517
-
 518
518
-
 519
519
-
 520
520
-
 521
521
-
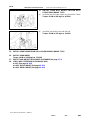 522
522
-
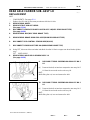 523
523
-
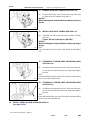 524
524
-
 525
525
-
 526
526
-
 527
527
-
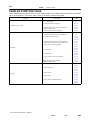 528
528
-
 529
529
-
 530
530
-
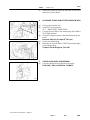 531
531
-
 532
532
-
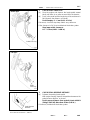 533
533
-
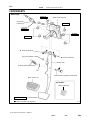 534
534
-
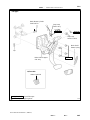 535
535
-
 536
536
-
 537
537
-
 538
538
-
 539
539
-
 540
540
-
 541
541
-
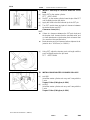 542
542
-
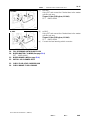 543
543
-
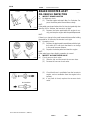 544
544
-
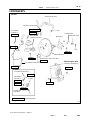 545
545
-
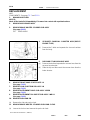 546
546
-
 547
547
-
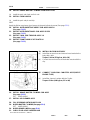 548
548
-
 549
549
-
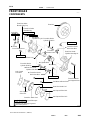 550
550
-
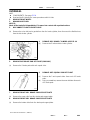 551
551
-
 552
552
-
 553
553
-
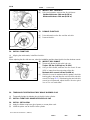 554
554
-
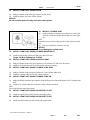 555
555
-
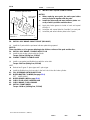 556
556
-
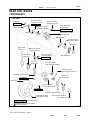 557
557
-
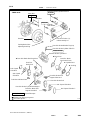 558
558
-
 559
559
-
 560
560
-
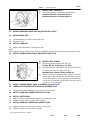 561
561
-
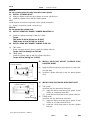 562
562
-
 563
563
-
 564
564
-
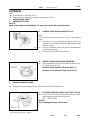 565
565
-
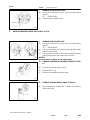 566
566
-
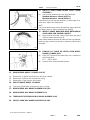 567
567
-
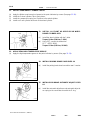 568
568
-
 569
569
-
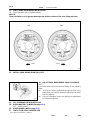 570
570
-
 571
571
-
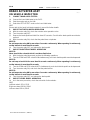 572
572
-
 573
573
-
 574
574
-
 575
575
-
 576
576
-
 577
577
-
 578
578
-
 579
579
-
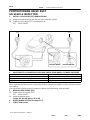 580
580
-
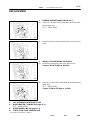 581
581
-
 582
582
-
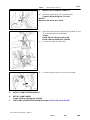 583
583
-
 584
584
-
 585
585
-
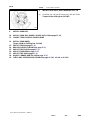 586
586
-
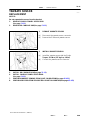 587
587
-
 588
588
-
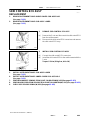 589
589
-
 590
590
-
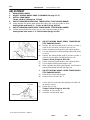 591
591
-
 592
592
-
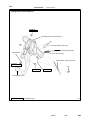 593
593
-
 594
594
-
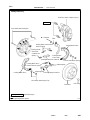 595
595
-
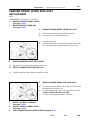 596
596
-
 597
597
-
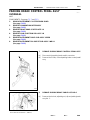 598
598
-
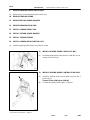 599
599
-
 600
600
-
 601
601
-
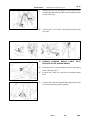 602
602
-
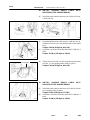 603
603
-
 604
604
-
 605
605
-
 606
606
-
 607
607
-
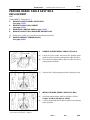 608
608
-
 609
609
-
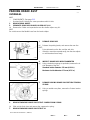 610
610
-
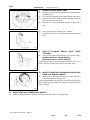 611
611
-
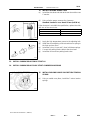 612
612
-
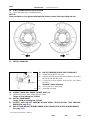 613
613
-
 614
614
-
 615
615
-
 616
616
-
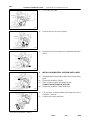 617
617
-
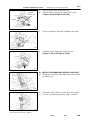 618
618
-
 619
619
-
 620
620
-
 621
621
-
 622
622
-
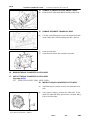 623
623
-
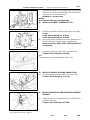 624
624
-
 625
625
-
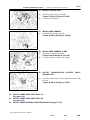 626
626
-
 627
627
-
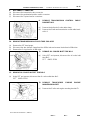 628
628
-
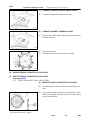 629
629
-
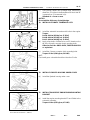 630
630
-
 631
631
-
 632
632
-
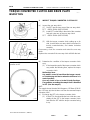 633
633
-
 634
634
-
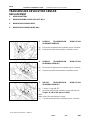 635
635
-
 636
636
-
 637
637
-
 638
638
-
 639
639
-
 640
640
-
 641
641
-
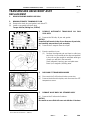 642
642
-
 643
643
-
 644
644
-
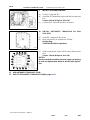 645
645
-
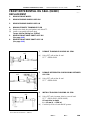 646
646
-
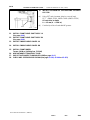 647
647
-
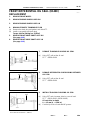 648
648
-
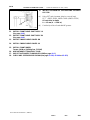 649
649
-
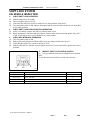 650
650
-
 651
651
-
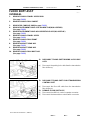 652
652
-
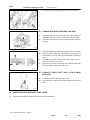 653
653
-
 654
654
-
 655
655
-
 656
656
-
 657
657
-
 658
658
-
 659
659
-
 660
660
-
 661
661
-
 662
662
-
 663
663
-
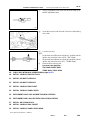 664
664
-
 665
665
-
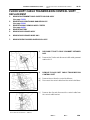 666
666
-
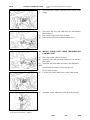 667
667
-
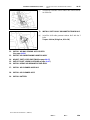 668
668
-
 669
669
-
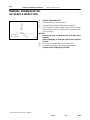 670
670
-
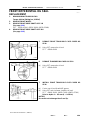 671
671
-
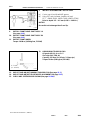 672
672
-
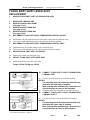 673
673
-
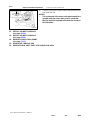 674
674
-
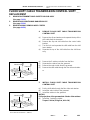 675
675
-
 676
676
-
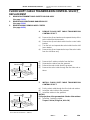 677
677
-
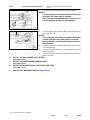 678
678
-
 679
679
-
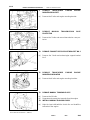 680
680
-
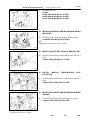 681
681
-
 682
682
-
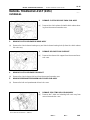 683
683
-
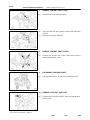 684
684
-
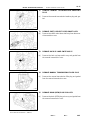 685
685
-
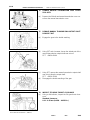 686
686
-
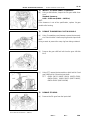 687
687
-
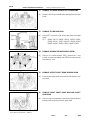 688
688
-
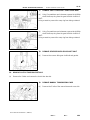 689
689
-
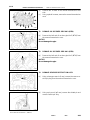 690
690
-
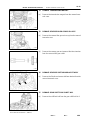 691
691
-
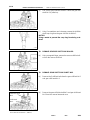 692
692
-
 693
693
-
 694
694
-
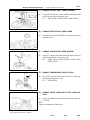 695
695
-
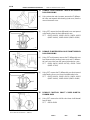 696
696
-
 697
697
-
 698
698
-
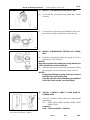 699
699
-
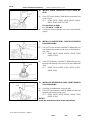 700
700
-
 701
701
-
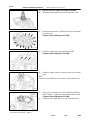 702
702
-
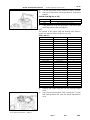 703
703
-
 704
704
-
 705
705
-
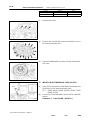 706
706
-
 707
707
-
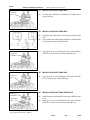 708
708
-
 709
709
-
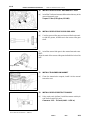 710
710
-
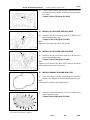 711
711
-
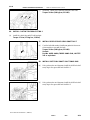 712
712
-
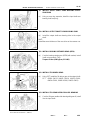 713
713
-
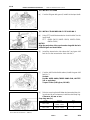 714
714
-
 715
715
-
 716
716
-
 717
717
-
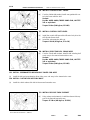 718
718
-
 719
719
-
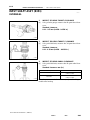 720
720
-
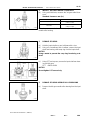 721
721
-
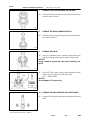 722
722
-
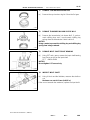 723
723
-
 724
724
-
 725
725
-
 726
726
-
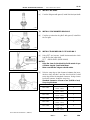 727
727
-
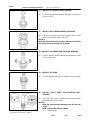 728
728
-
 729
729
-
 730
730
-
 731
731
-
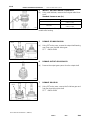 732
732
-
 733
733
-
 734
734
-
 735
735
-
 736
736
-
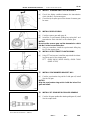 737
737
-
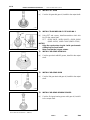 738
738
-
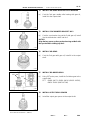 739
739
-
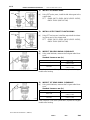 740
740
-
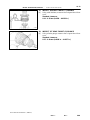 741
741
-
 742
742
-
 743
743
-
 744
744
-
 745
745
-
 746
746
-
 747
747
-
 748
748
-
 749
749
-
 750
750
-
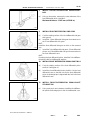 751
751
-
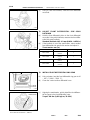 752
752
-
 753
753
-
 754
754
-
 755
755
-
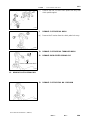 756
756
-
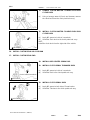 757
757
-
 758
758
-
 759
759
-
 760
760
-
 761
761
-
 762
762
-
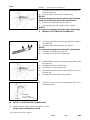 763
763
-
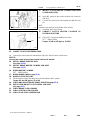 764
764
-
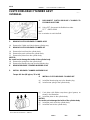 765
765
-
 766
766
-
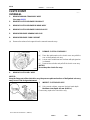 767
767
-
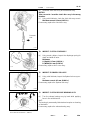 768
768
-
 769
769
-
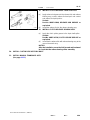 770
770
-
 771
771
-
 772
772
-
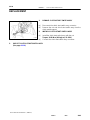 773
773
-
 774
774
-
 775
775
-
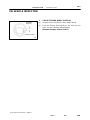 776
776
-
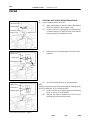 777
777
-
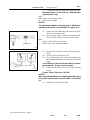 778
778
-
 779
779
-
 780
780
-
 781
781
-
 782
782
-
 783
783
-
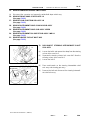 784
784
-
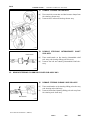 785
785
-
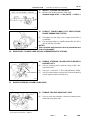 786
786
-
 787
787
-
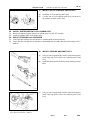 788
788
-
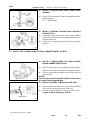 789
789
-
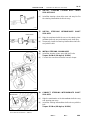 790
790
-
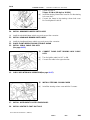 791
791
-
 792
792
-
 793
793
-
 794
794
-
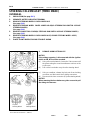 795
795
-
 796
796
-
 797
797
-
 798
798
-
 799
799
-
 800
800
-
 801
801
-
 802
802
-
 803
803
-
 804
804
-
 805
805
-
 806
806
-
 807
807
-
 808
808
-
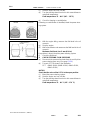 809
809
-
 810
810
-
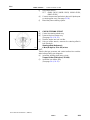 811
811
-
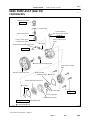 812
812
-
 813
813
-
 814
814
-
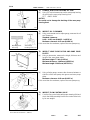 815
815
-
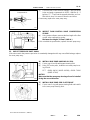 816
816
-
 817
817
-
 818
818
-
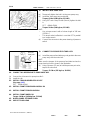 819
819
-
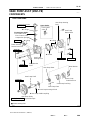 820
820
-
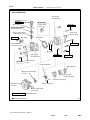 821
821
-
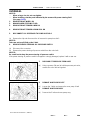 822
822
-
 823
823
-
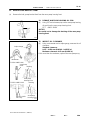 824
824
-
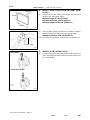 825
825
-
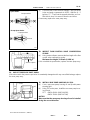 826
826
-
 827
827
-
 828
828
-
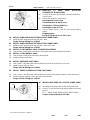 829
829
-
 830
830
-
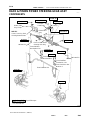 831
831
-
 832
832
-
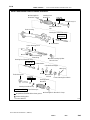 833
833
-
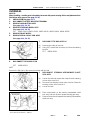 834
834
-
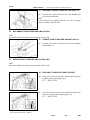 835
835
-
 836
836
-
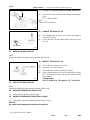 837
837
-
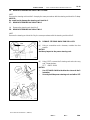 838
838
-
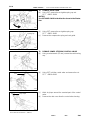 839
839
-
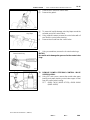 840
840
-
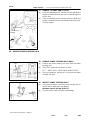 841
841
-
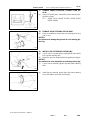 842
842
-
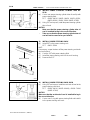 843
843
-
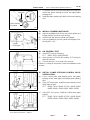 844
844
-
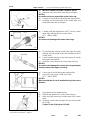 845
845
-
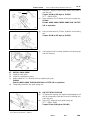 846
846
-
 847
847
-
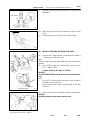 848
848
-
 849
849
-
 850
850
-
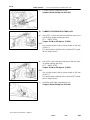 851
851
-
 852
852
-
 853
853
-
 854
854
-
 855
855
-
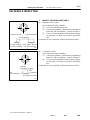 856
856
-
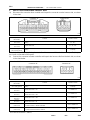 857
857
-
 858
858
-
 859
859
-
 860
860
-
 861
861
-
 862
862
-
 863
863
-
 864
864
-
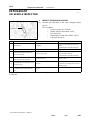 865
865
-
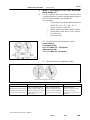 866
866
-
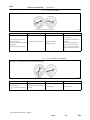 867
867
-
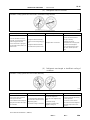 868
868
-
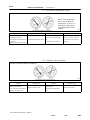 869
869
-
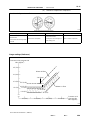 870
870
-
 871
871
-
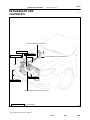 872
872
-
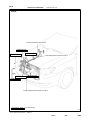 873
873
-
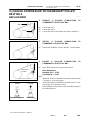 874
874
-
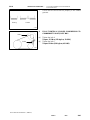 875
875
-
 876
876
-
 877
877
-
 878
878
-
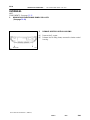 879
879
-
 880
880
-
 881
881
-
 882
882
-
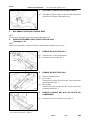 883
883
-
 884
884
-
 885
885
-
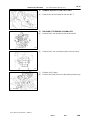 886
886
-
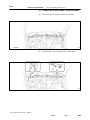 887
887
-
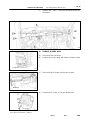 888
888
-
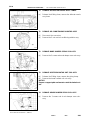 889
889
-
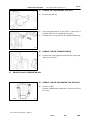 890
890
-
 891
891
-
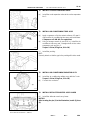 892
892
-
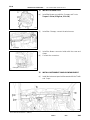 893
893
-
 894
894
-
 895
895
-
 896
896
-
 897
897
-
 898
898
-
 899
899
-
 900
900
-
 901
901
-
 902
902
-
 903
903
-
 904
904
-
 905
905
-
 906
906
-
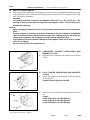 907
907
-
 908
908
-
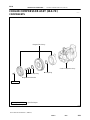 909
909
-
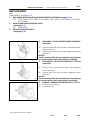 910
910
-
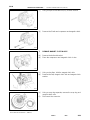 911
911
-
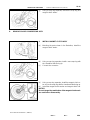 912
912
-
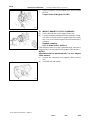 913
913
-
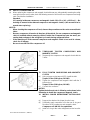 914
914
-
 915
915
-
 916
916
-
 917
917
-
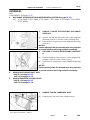 918
918
-
 919
919
-
 920
920
-
 921
921
-
 922
922
-
 923
923
-
 924
924
-
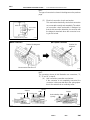 925
925
-
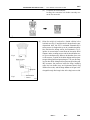 926
926
-
 927
927
-
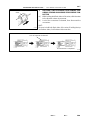 928
928
-
 929
929
-
 930
930
-
 931
931
-
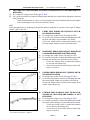 932
932
-
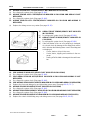 933
933
-
 934
934
-
 935
935
-
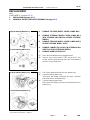 936
936
-
 937
937
-
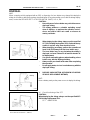 938
938
-
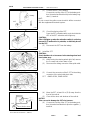 939
939
-
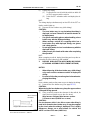 940
940
-
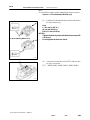 941
941
-
 942
942
-
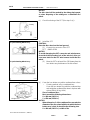 943
943
-
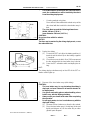 944
944
-
 945
945
-
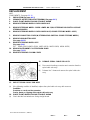 946
946
-
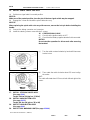 947
947
-
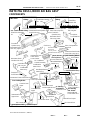 948
948
-
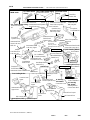 949
949
-
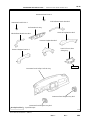 950
950
-
 951
951
-
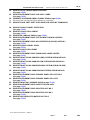 952
952
-
 953
953
-
 954
954
-
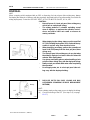 955
955
-
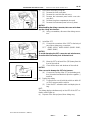 956
956
-
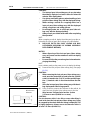 957
957
-
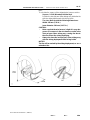 958
958
-
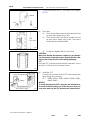 959
959
-
 960
960
-
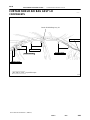 961
961
-
 962
962
-
 963
963
-
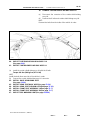 964
964
-
 965
965
-
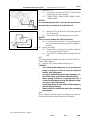 966
966
-
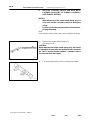 967
967
-
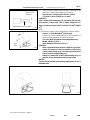 968
968
-
 969
969
-
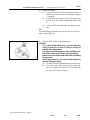 970
970
-
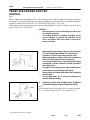 971
971
-
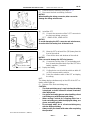 972
972
-
 973
973
-
 974
974
-
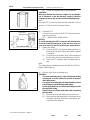 975
975
-
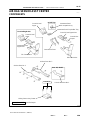 976
976
-
 977
977
-
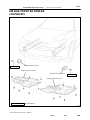 978
978
-
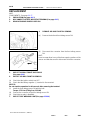 979
979
-
 980
980
-
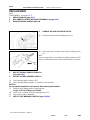 981
981
-
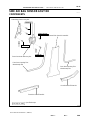 982
982
-
 983
983
-
 984
984
-
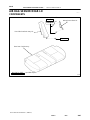 985
985
-
 986
986
-
 987
987
-
 988
988
-
 989
989
-
 990
990
-
 991
991
-
 992
992
-
 993
993
-
 994
994
-
 995
995
-
 996
996
-
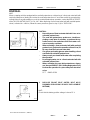 997
997
-
 998
998
-
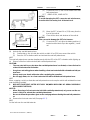 999
999
-
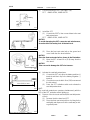 1000
1000
-
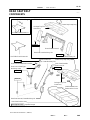 1001
1001
-
 1002
1002
-
 1003
1003
-
 1004
1004
-
 1005
1005
-
 1006
1006
-
 1007
1007
-
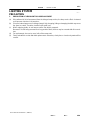 1008
1008
-
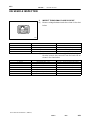 1009
1009
-
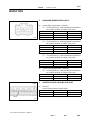 1010
1010
-
 1011
1011
-
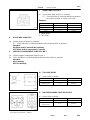 1012
1012
-
 1013
1013
-
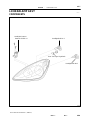 1014
1014
-
 1015
1015
-
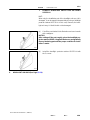 1016
1016
-
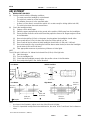 1017
1017
-
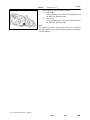 1018
1018
-
 1019
1019
-
 1020
1020
-
 1021
1021
-
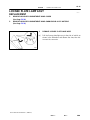 1022
1022
-
 1023
1023
-
 1024
1024
-
 1025
1025
-
 1026
1026
-
 1027
1027
-
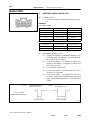 1028
1028
-
 1029
1029
-
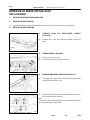 1030
1030
-
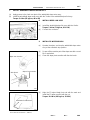 1031
1031
-
 1032
1032
-
 1033
1033
-
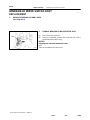 1034
1034
-
 1035
1035
-
 1036
1036
-
 1037
1037
-
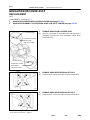 1038
1038
-
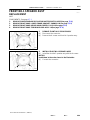 1039
1039
-
 1040
1040
-
 1041
1041
-
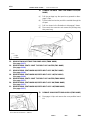 1042
1042
-
 1043
1043
-
 1044
1044
-
 1045
1045
-
 1046
1046
-
 1047
1047
-
 1048
1048
-
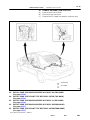 1049
1049
-
 1050
1050
-
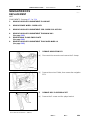 1051
1051
-
 1052
1052
-
 1053
1053
-
 1054
1054
-
 1055
1055
-
 1056
1056
-
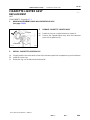 1057
1057
-
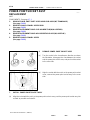 1058
1058
-
 1059
1059
-
 1060
1060
-
 1061
1061
-
 1062
1062
-
 1063
1063
-
 1064
1064
-
 1065
1065
-
 1066
1066
-
 1067
1067
-
 1068
1068
-
 1069
1069
-
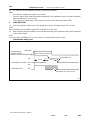 1070
1070
-
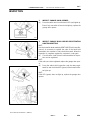 1071
1071
-
 1072
1072
-
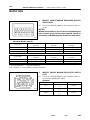 1073
1073
-
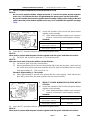 1074
1074
-
 1075
1075
-
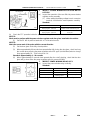 1076
1076
-
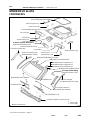 1077
1077
-
 1078
1078
-
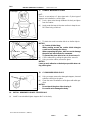 1079
1079
-
 1080
1080
-
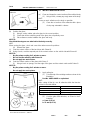 1081
1081
-
 1082
1082
-
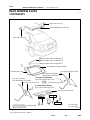 1083
1083
-
 1084
1084
-
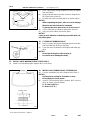 1085
1085
-
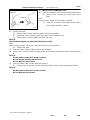 1086
1086
-
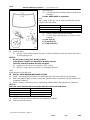 1087
1087
-
 1088
1088
-
 1089
1089
-
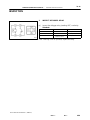 1090
1090
-
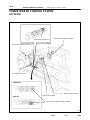 1091
1091
-
 1092
1092
-
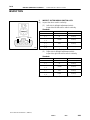 1093
1093
-
 1094
1094
-
 1095
1095
-
 1096
1096
-
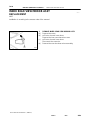 1097
1097
-
 1098
1098
-
 1099
1099
-
 1100
1100
-
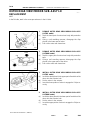 1101
1101
-
 1102
1102
-
 1103
1103
-
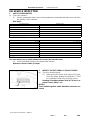 1104
1104
-
 1105
1105
-
 1106
1106
-
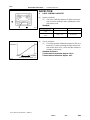 1107
1107
-
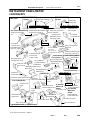 1108
1108
-
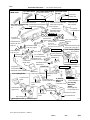 1109
1109
-
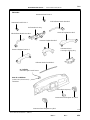 1110
1110
-
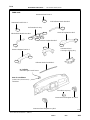 1111
1111
-
 1112
1112
-
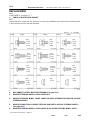 1113
1113
-
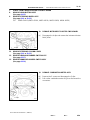 1114
1114
-
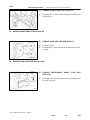 1115
1115
-
 1116
1116
-
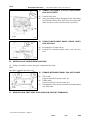 1117
1117
-
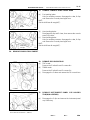 1118
1118
-
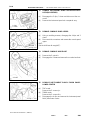 1119
1119
-
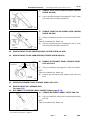 1120
1120
-
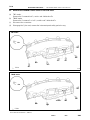 1121
1121
-
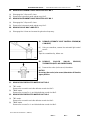 1122
1122
-
 1123
1123
-
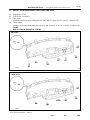 1124
1124
-
 1125
1125
-
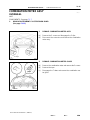 1126
1126
-
 1127
1127
-
 1128
1128
-
 1129
1129
-
 1130
1130
-
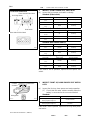 1131
1131
-
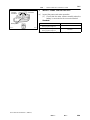 1132
1132
-
 1133
1133
-
 1134
1134
-
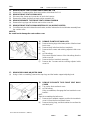 1135
1135
-
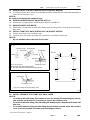 1136
1136
-
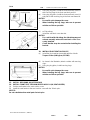 1137
1137
-
 1138
1138
-
 1139
1139
-
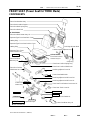 1140
1140
-
 1141
1141
-
 1142
1142
-
 1143
1143
-
 1144
1144
-
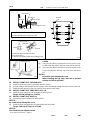 1145
1145
-
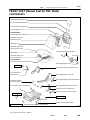 1146
1146
-
 1147
1147
-
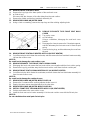 1148
1148
-
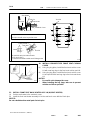 1149
1149
-
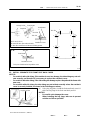 1150
1150
-
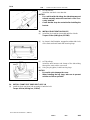 1151
1151
-
 1152
1152
-
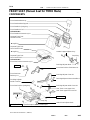 1153
1153
-
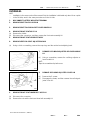 1154
1154
-
 1155
1155
-
 1156
1156
-
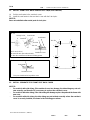 1157
1157
-
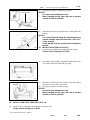 1158
1158
-
 1159
1159
-
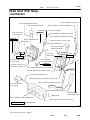 1160
1160
-
 1161
1161
-
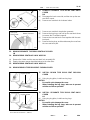 1162
1162
-
 1163
1163
-
 1164
1164
-
 1165
1165
-
 1166
1166
-
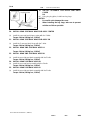 1167
1167
-
 1168
1168
-
 1169
1169
-
 1170
1170
-
 1171
1171
-
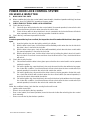 1172
1172
-
 1173
1173
-
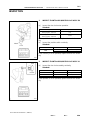 1174
1174
-
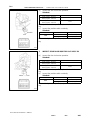 1175
1175
-
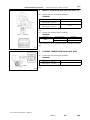 1176
1176
-
 1177
1177
-
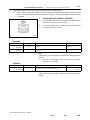 1178
1178
-
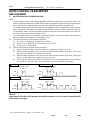 1179
1179
-
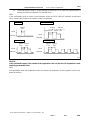 1180
1180
-
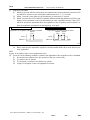 1181
1181
-
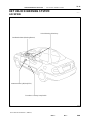 1182
1182
-
 1183
1183
-
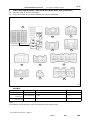 1184
1184
-
 1185
1185
-
 1186
1186
-
 1187
1187
-
 1188
1188
-
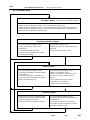 1189
1189
-
 1190
1190
-
 1191
1191
-
 1192
1192
-
 1193
1193
-
 1194
1194
-
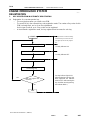 1195
1195
-
 1196
1196
-
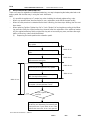 1197
1197
-
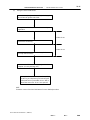 1198
1198
-
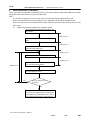 1199
1199
-
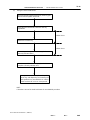 1200
1200
-
 1201
1201
-
 1202
1202
-
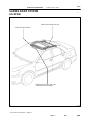 1203
1203
-
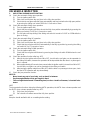 1204
1204
-
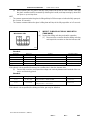 1205
1205
-
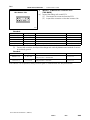 1206
1206
-
 1207
1207
-
 1208
1208
-
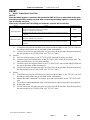 1209
1209
-
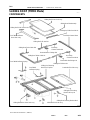 1210
1210
-
 1211
1211
-
 1212
1212
-
 1213
1213
-
 1214
1214
-
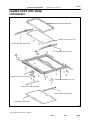 1215
1215
-
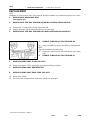 1216
1216
-
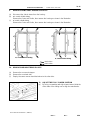 1217
1217
-
 1218
1218
-
 1219
1219
-
 1220
1220
-
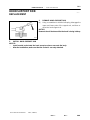 1221
1221
-
 1222
1222
-
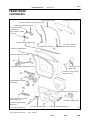 1223
1223
-
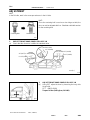 1224
1224
-
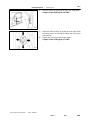 1225
1225
-
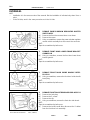 1226
1226
-
 1227
1227
-
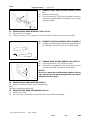 1228
1228
-
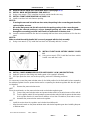 1229
1229
-
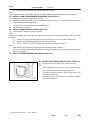 1230
1230
-
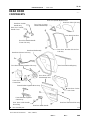 1231
1231
-
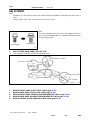 1232
1232
-
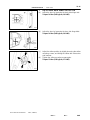 1233
1233
-
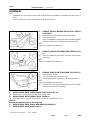 1234
1234
-
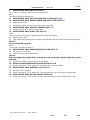 1235
1235
-
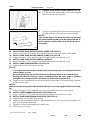 1236
1236
-
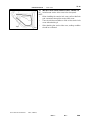 1237
1237
-
 1238
1238
-
 1239
1239
-
 1240
1240
-
 1241
1241
-
 1242
1242
-
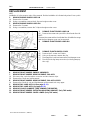 1243
1243
-
 1244
1244
-
 1245
1245
-
 1246
1246
-
 1247
1247
-
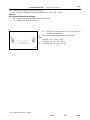 1248
1248
-
 1249
1249
-
 1250
1250
-
 1251
1251
-
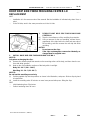 1252
1252
-
 1253
1253
-
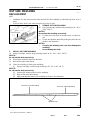 1254
1254
-
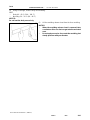 1255
1255
-
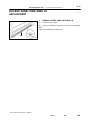 1256
1256
-
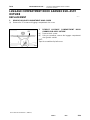 1257
1257
-
 1258
1258
-
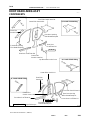 1259
1259
-
 1260
1260
-
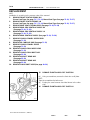 1261
1261
-
 1262
1262
-
 1263
1263
-
 1264
1264
-
 1265
1265
-
 1266
1266
-
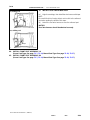 1267
1267
-
 1268
1268
-
 1269
1269
-
 1270
1270
-
 1271
1271
-
 1272
1272
-
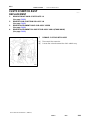 1273
1273
-
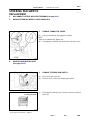 1274
1274
-
 1275
1275
-
 1276
1276
-
 1277
1277
-
 1278
1278
-
 1279
1279
-
 1280
1280
-
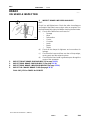 1281
1281
-
 1282
1282
-
 1283
1283


Ask a question and I''ll find the answer in the document
Finding information in a document is now easier with AI
Related papers
Other documents
-
Hyundai Coupe (2003-2008) Workshop Manual
-
West Marine 1193119 Owner's manual
-
Wyndham Collection WCV252572DWHCMUNSMED Operating instructions
-
 JHS A019-8KR/A User guide
-
 VHC Brands 51128 Installation guide
-
Rod Desyne DP100-Bay-2 Installation guide
-
 Rugged Ridge 18475.02 Installation guide
-
-
Mazda 2010 3 L4-2.5L Installation guide
-
 Great Wall Voleex C30 Workshop Manual


