Page is loading ...

Version
V1.3 0323
Everything you need
for your 60cm 5 Function
Built-in Oven is in this
User Manual
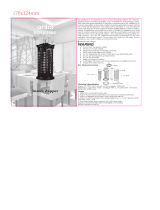
Model/s
EO605TB

User Manual
2
Welcome
Congratulations on purchasing your new Built-in Oven. The Esatto brand is
proudly distributed within Australia by Residentia Group Pty Ltd.
Please refer to the warranty card at the rear of this manual for information
regarding your product’s parts and labour warranty, or visit us online at:
www.residentia.group
At Residentia Group, we are customer obsessed and our Support Team are there
to ensure you get the most out of your appliance. Should you want to learn more
about your new oven, it's features or importantly taking care of the appliance,
our Support Team are here to help.
You can use our online Support Centre at anytime by visiting:
http://support.residentiagroup.com.au
Or you can contact us via phone by dialing: 1300 11 HELP (4357).
It is important that you read through the following use and care manual
thoroughly to familiarise yourself with the installation and operation
requirements of your appliance to ensure optimum performance.
Again, thank you for choosing an Esatto appliance and we look forward
to being of service to you.
Kind Regards,
The Residentia Team
Residenti roup
—
Head Office
165 Barkly Avenue
Burnley, Victoria
Australia 3121
—
ACN
600 546 656
—
Online
residentia.group
www.esatto.house
@esatto.house
—
Postage
PO Box 5177
Burnley, Victoria
Australia 3121
—
Telephone
1300 11 4357
www.esatto.house

esatto.house
3
Pge 2
Welcome
Pge 4
Sfety Instructions
Pge 7
Instlltion
Instructions
Pge 8
Your Built-in Oven
Pge 9
Opertion
Instructions
Pge 13
Mintennce
Clening
Pge 14
Troubleshooting
Pge 15
Your Receipt
Contents
Pge 15
Purchse Detils
Pge 16
Wrrnty

User Manual
4
IMPORTANT SAFETY INSTRUCTIONS
READ CAREFULLY AND KEEP
FOR FUTURE REFERENCE
Read this manual thoroughly before rst use,
even if you are familiar with this type of product.
The safety precautions enclosed herein reduce
the risk of re, electric shock and injury when
correctly adhered to. Make sure you understand
all instructions and warnings.
Keep the manual in a safe place for future
reference, along with the completed warranty
card and purchase receipt. If you sell or transfer
ownership of this product, pass on these
instructions to the new owner.
Always follow basic safety precautions and
accident prevention measures when using an
electrical appliance. The following statements you
will see in this booklet have these meanings:
WARNING: Indicting informtion concerning
your personl sfety.
CAUTION: Indicting informtion on how to
void dmging the pplince or cbinetry.
IMPORTANT: Indicting tips nd informtion
bout use of the pplince.
USAGE CONDITIONS AND RESTRICTIONS
• Domestic use only: This appliance is intended
for indoor household use only. It is not intended
for commercial, industrial or outdoor use. It is not
intended for use in a recreational vehicle.
• Purpose: Do not use this appliance for anything
other than its intended purpose. Other uses are
not recommended and may cause re, electric
shock or personal injury.
• Attchments: The use of attachments is not
recommended by the appliance manufacturer
and distributor as they may be hazardous.
• Improper use: Damage due to improper use,
or repairs made by unqualied personnel will
void your warranty. We assume no liability
for any eventual damages caused by misuse
of the product or noncompliance with these
instructions.
BEFORE USING YOUR APPLIANCE
This manual explains the proper use of your new
Esatto oven. Please read this manual carefully
before using the product. This manual should be
kept in a safe place for handy reference.
This oven is a domestic appliance which has been
manufactured and tested to comply with Australian
and New Zealand Standards.
This oven must only be installed in accordance with
the instructions provided. Incorrect installation may
cause harm to persons, damage property and void
the product’s warranty.
Read the following carefully to avoid damage
or injury.
IMPORTANT: Check for any damage or marks.
If you nd the appliance is damaged or marked,
you must report it within 7 days if you wish to claim
for damage/ marks under the manufacturer’s
warranty. This does not aect your statutory rights.
SAFETY INSTRUCTIONS
• Before the installation and use of the appliance,
carefully read the supplied instructions.
• The manufacturer is not responsible if an
incorrect installation and use causes injuries and
damages.
• Always keep the instructions with your appliance
for future reference.
• Do not use the oven unless you are wearing
something on your feet. Do not touch the oven
with wet or damp hands or feet.
• Some parts of appliance may keep its heat for a
long time; it is required to wait for it to cool down
before touching onto the points that are exposed
to the heat directly.
• If you will not use the appliance for a long time, it
is advised to turn the plug o.
WARNING: To prevent any damages to your and
others’ life or property, you have to follow the
safety notes.
WARNING: Caution, risk of re!
Sfety Instructions

esatto.house
5
CHILDREN VULNERABLE PEOPLE SAFETY
WARNING: Risk of suocation, injury
or permanent disability.
• This appliance can be used by children aged
from 8 years and above and persons with
reduced physical, sensory or mental capabilities
or lack of experience and knowledge if they have
been given supervision or instruction for the
operation of the appliance by a person who is
responsible for their safety.
• Do not let children play with the appliance.
• Keep all packaging away from children.
• Keep all detergents away from children.
• Keep children and pets away from the appliance
door when it is open.
• Do not allow children to go near the oven when it
is operating, especially when the grill is on.
• Cleaning and user maintenance shall not be
made by children without supervision.
BEFORE INSTALLATION
• Remove all the packaging.
• Do not install or use a damaged appliance.
• Always move the appliance cautiously. Do not
use the machine door or the handle of oven, to
lift the appliance.
• When the oven is rst switched on, it may give o
an unpleasant smell. This is due to the bonding
agent used for the insulating panels within the
oven. Please run the new empty oven with the
conventional cooking function, 250 °C for 90
minutes to clean oil impurities inside the cavity.
• During the rst time use, it is completely normal
that the oven will show slight signs of smoke and
unpleasant odours. Please wait for the smell to
clear before putting food into the oven.
• Please use this product under the open
environment.
• The appliance and its accessible parts become
hot during use. Care should be taken to avoid
touching heating elements.
• If the surface is cracked, switch o the appliance
to avoid the possibility of electric shock.
• During use, the appliance becomes very hot.
Care should be taken to avoid touching heating
elements inside the oven.
• Ensure that the appliance is switched o before
replacing the oven lamp to avoid the possibility of
electric shock.
• The means for disconnection must be
incorporated in the xed wiring in accordance
with the wiring specications.
• Accessible parts may become hot during use.
• An all-pole disconnection means must be
incorporated in the xed wiring in accordance
with the wiring rules.
• The appliance must be installed by an authorised
technician and put into use. The manufacturer
is not responsible for any damage that might
be caused by defective placement, and
installation by unauthorised personnel.
Please contact 1300 11 HELP (4357) to arrange
an authorised technician.
ELECTRICAL CONNECTION
CAUTION: Risk of re and electrical shock!
• The appliance must be earthed.
• Make sure that the electrical information on the
rating plate agrees with the power supply. If not,
contact an electrician.
• Always use a correctly installed shockproof
socket.
• Do not use any multi-plug adapters or extension
cables.
• Connect the mains plug to the mains socket
only at the end of the installation. Make sure
that there is access to the mains plug after the
installation. Do not connect the appliance plug
with a power connection board.
• Do not pull the mains cable to disconnect the
appliance. Always pull the mains plug.
• Do not touch the mains cable or the mains plug
with wet hands.
WARNING: If the supply cord is damaged, it must
be replaced by the manufacturer or its service
agent or similarly qualied person in order to avoid
a hazard.
WARNING: All electrical work must be done in
accordance with local and national electrical
codes as applicable and should be undertaken by
licenced and qualied persons only. Failure to follow
these instructions can result in death, re
or electrical shock.

User Manual
6
Sfety Instructions (Continued)
APPLIANCE USE
WARNING: Risk of re, explosion, electric shock or
damage to the appliance.
• Use this appliance in a household only.
• Do not change the specication of this oven.
• Do not sit or stand on the open door.
• Please do not close the machine door with
excessive force
• When the door or drawer of oven is open do not
leave anything on it, you may unbalance your
appliance or break the door.
• The appliances are not intended to be operated
by means of an external timer or separate
remote control system.
• The instructions for ovens that have shelves shall
include details indicating the correct installations
of the shelves.
CARE CLEANING
CAUTION: Risk of injury or damage to the oven.
• Before maintenance, deactivate the appliance
and disconnect the mains plug.
• Do not use a steam cleaner on the appliance.
• Clean the appliance with a moist soft cloth.
Only use neutral detergents. Do not use abrasive
products, abrasive cleaning pads, solvents or
metal objects.
• Do not use harsh abrasive cleaners or sharp
metal scrapers to clean the oven door glass since
they can scratch the surface, which may result in
shattering of the glass.
UNPACKING
During transportation, protective packaging was
used to protect the appliance against any damage.
After unpacking, please dispose of all elements of
packaging in a way that will not cause damage to
the environment.
All materials used for packaging the appliance are
environmentally friendly; they are
100% recyclable and are marked with the
appropriate symbol.
CAUTION: During unpacking, the packaging
materials (polythene bags, polystyrene pieces, etc.)
should be kept out of reach of children.
DISPOSAL OF THE APPLIANCE
• Disconnect the appliance
from the mains supply.
• Cut o the mains cable
and discard it.
• Remove the door catch to prevent children and
pets to get closed in the appliance.
Old appliances should not simply be disposed
of with normal household waste and should be
delivered to a collection and recycling centre for
electric and electronic equipment. A symbol shown
on the product, the instruction manual or the
packaging shows that it is suitable for recycling.
Materials used inside the appliance are recyclable
and are labelled with information concerning this.
By recycling materials or other parts from used
devices you are making a signicant contribution to
the protection of our environment.
Information on appropriate disposal centres for
used devices can be provided by your local authority.
DECLARATION OF COMPLIANCE
When you have unpacked the oven, make sure that
it has not been damaged in any way. If you have any
doubts at all, do not use it: contact a professionally
qualied person. Keep packing materials such as
plastic bags, polystyrene, or nails out of the reach
of children because these are dangerous to children.

esatto.house
7
DISPOSAL OF THE APPLIANCE
Fit the oven into the space provided in the kitchen unit; it may be tted underneath a work
top or into an upright cupboard. Fix the oven in position by screwing into place, using the two
xing holes in the frame. To locate the xing holes, open the oven door and look inside. To allow
adequate ventilation, the measurements and distances adhered to when xing the oven.
IMPORTANT: If the oven is to work properly, the kitchen housing must be suitable. The panels of the
kitchen unit that are next to the oven must be made of a heat resistant material. Ensure that the glues
of units that are made of veneered wood can withstand temperatures of at least 120º C. Plastics or
glues that cannot withstand such temperatures will melt and deform the unit, once the oven has
been lodged inside the units, electrical parts must be completely insulated. This is a legal safety
requirement. All guards must be rmly xed into place so that it is impossible to remove them
without using special tools. Remove the back of the kitchen unit to ensure an adequate current
of air circulates around the oven. The hob must have a rear gap of at least 45mm.
Note:
• The cavity is not to include the power switch or socket.
• The oven & cabinet dimensions are in millimetres (mm)
SECURING THE OVEN TO THE CABINET
1. Fit oven into the cabinet recess.
2. Open the oven door and determine the location of the mounting screw holes.
3. Fix the oven to the cabinet with two screws..
CONNECTION OF THE OVEN
Instlltion Instructions
12
NOTE: The number of accessories included depends on the particular appliance purchased.
INSTALLATION
Remark:
1.Only plus deviations are admissible for all dimension.
2.The cabinet is not include the power switch or socket.
CONNECTION OF THE OVEN
L
N
VENTILATING OPENINGS
When cooking is finished or in pause state or in waiting state, if the oven's center temperature is
over 75 degree, the cooling fan will continue working for 15 minutes. Or when the oven's center
temperature becomes lower than 75 degree, the cooling fan will stop in advance.
Ventilating openings
555
20
595
595
560
560
min.560
606
600
80
250
100
NOTE: The number of accessories included depends on the particular appliance purchased.
INSTALLATION
570
min. 560
606
600
80
250
100
Remark:
1.Only plus deviations are admissible for all dimension.
2.The cabinet is not include the power switch or socket.
VENTILATING OPENINGS
CONNECTION OF THE OVEN
Ventilating openings
L
N
When cooking is finished, if the temperature of ventilating openings is over 70 degree, the cooling
fan will continue working. The cooling fan will not stop working until the temperature becomes
lower than 60 degree.
555
20
595
595
560
9
11
BULB REPLACEMENT
For replacement, process as follows:
1> Disconnect power from the mains outlet or switch off the circuit breaker of the unit's mains outlet.
2> Unscrew the glass lamp cover by turning it counter-clockwise (note, it may be stiff) and replace
the bulb with a new one of the same type.
3> Screw the glass lamp cover back in place.
NOTE: Only use 25-40W/220V-240V , T300°C halogen lamps.
SHELF PLACEMENT WARNING:
OR
To ensure the oven shelves operate safely, correct placement of the shelves between the side
rail is imperative. Shelves and the pan only can be used between the first and fifth layers.
The shelves should use with the right direction, it will ensure that during careful removal of the
shelf or tray, hot food items should not slide out.
SECURING THE OVEN TO THE CABINET
1. Fit oven into the cabinet recess.
2. Open the oven door and determine the location of the mounting
screw holes.
3. Fix the oven to the cabinet with two screws.

User Manual
8
Your Built-in Oven
CONTROL PANEL
1. Function Knob
2. Display Screen
3. Temperature Knob
4. Decrease Button
5. Function Button
6. Increase Button
7. Preheat Indicator
ACCESSORIES
Your Esatto Built-in Oven is supplied with:
• 2 × Wire Shelves
For grill, dishes, cake pan with items for roasting and grilling
• 2 × Slider brckets
These shelf support rails on the right and left sides of the oven can be removed.
Dishes and tray can be placed on the oven base, using the Grill & Max Grill
and Fan functions.
• 1 × Bking Try
For cooking large quantities of food such as cakes, pastries, frozen food etc,
or for collecting fat/spillage and meat juices.
SHELF PLACEMENT
To ensure the oven shelves operate safely, correct placement of the shelves between the
side rail is imperative. Shelves and the pan only can be used between the rst and fth
layers. The shelves should use with the right direction, it will ensure that during careful
removal of the shelf or tray, hot food items should not slide out.
TECHNICAL SPECIFICATIONS
Model EO605TB
Gross Volume: 80L
Product Dimensions (W × D × H): 595 × 575 × 595mm
Weight (Net/Gross): 31kg / 34kg
Rated Voltage 220-240V~
Rated Frequency 50Hz-60Hz
Rated Power 2.1kW
No. of Functions 5
Note: The images in this user manual are for reference only. Your appliance may appear dierently.
All text and icons: Pantone Cool Gray 5C
65M90D2 9H(澳洲5功能)美的版控盒丝印-玻璃 65M90M1-04010-24
4
R2
* 593 0.5
* 255 0.5
45
* 117 0.5
* 58.5 0.5
* 33.5 0.3
15.5
2- 37.5
4-R4
75
18
3-
65M90M1-04010 (24)
25.6
29.4
Visual with 42mm knobs in place:
F
F
ºC
50
100
150
200
250
ºC
50
100
150
200
250
5 6 74
1 32
BULB REPLACEMENT
For replacement, process as follows:
1> Disconnect power from the mains outlet or switch off the circuit breaker of the unit's mains outlet.
2> Unscrew the glass lamp cover by turning it counter-clockwise (note, it may be stiff) and replace
the bulb with a new one of the same type.
3> Screw the glass lamp cover back in place.
NOTE: Only use 25-40W/220V-240V, T300°C halogen lamps.
SHELF PLACEMENT WARNING:
SECURING THE OVEN TO THE CABINET
1. Fit oven into the cabinet recess.
2. Open the oven door.
3. Secure the oven to the kitchen cabinet with two
distance holders " A " which fit the holes in the
oven frame and fit the two screws " B ".
To ensure the oven shelves operate safely, correct placement of the shelves between the side rail
is imperative. Shelves and the pan only can be used between the first and fifth layers.
The shelves should be used with the right direction, it will ensure that during careful removal of the
shelf or tray, hot food items should not slide out.
OR
8

esatto.house
9
Operting Instructions
OVEN FUNCTIONS
SYMBOL FUNCTION DESCRIPTION
Grill: This cooking method is for everyday grilling, utilising only the inner grill element only,
which directs heat downwards onto the food.
Grill Fn: Utlising the inner grill element along with the fan, is suitable for grilling a large
amount of cooking.
Convection: Heat from the rear heating element circulated around the cavity by the fan. It is
faster and economical than the conventional mode. This function also helps food cook faster
whilst also reducing hot and cool spots and helping dishes on every shelf cook more evenly.
Defrost: The circulation of air at room temperature enables quicker thawing of frozen
food (without the use of any heating elements). It is a gentle but quick way to speed up the
defrosting time and thawing of ready-made dishes, cream-lled produce, etc.
Oven Light: This function enables the user to observe the progress of cooking without
opening the door. The oven lamp will light for all cooking functions.
BEFORE FIRST USE
• Before using the oven for the rst time, read this manual thoroughly, even if you are familiar with this
type of appliance. Pay particular attention to the safety instructions, installation instructions and
operating instructions.
• After the appliance has been properly installed, and before rst use, you should burn o any dust,
oil or other remnants that may have been left inside the cavity from the manufacturing process or
transportation. Please run the new empty oven with the conventional cooking function at 250º C for
at least 90 minutes.
• When rst connected, the display screen will show “ 12.30 ”. A beep will sound and the “ 12 ” and “ . ” will
ash, prompting you to set the correct time of day before using the oven. Please note: This is a 24 hour
clock, for example 2pm shown as 14.00. Ensure the correct time of the day is set before using the oven.
VENTILATION
When cooking is nished, or in a paused
or standby state, and if the oven cavity
temperature is over 75 degrees, the
cooling fan will operate for 15 minutes
or until the oven cavity temperature
become lower than 75 degrees.
USING YOUR BUILTIN OVEN
• Your oven is a re risk if the cooking time is not set or if the time is set too long.
It is important to keep close supervision when the oven is in operation.
• Set functions by turning the function knob to desired option.
• The oven will automatically start cooking after function, time and temperature are set.
• To set the time of the cooking, press the “ ” function button and use the “ + ” and “ - ” buttons to set
your desired setting. After the cooking time is up, the unit will make an audible sound as the oven stops.
• Set the temperature by turning the temperature knob. If the unit is not in use, always set the knobs to
the “ ● ” o position.
NOTE: The number of accessories included depends on the particular appliance purchased.
INSTALLATION
570
min. 560
606
600
80
250
100
Remark:
1.Only plus deviations are admissible for all dimension.
2.The cabinet is not include the power switch or socket.
VENTILATING OPENINGS
CONNECTION OF THE OVEN
Ventilating openings
L
N
When cooking is finished, if the temperature of ventilating openings is over 70 degree, the cooling
fan will continue working. The cooling fan will not stop working until the temperature becomes
lower than 60 degree.
555
20
595
595
560
9
VENTILATION OPENINGS

User Manual
10
Operting Instructions (Continued)
SETTING THE CLOCK
1. Press the “ + ” and “ - ” button to adjust the hour.
2. Press the “ ” function button to conrm the hour.
3. Press the “ + ” and “ - ” buttons to adjust the minute.
4. Press the “ ” function button to conrm the minute.
5. The oven will now be in standby mode.
Note: If the display does not ash, press the “ + ” and “ - ” buttons at the same time for more
than 3 seconds, and repeat the above steps.
SELECTING THE OVEN OPERATION MODE
When the oven is in standby mode (not in use), press the Function button for 5 seconds.
The oven will enter Manual mode and the symbol “ ” will display on the screen continuously.
1. Turn the Function knob and Temperature knobs to desired settings.
2. From Manual mode, press the “ ” function button to cycle through the other oven
operation modes. The sequence of the operation modes are Manual mode, Minute minder,
Duration (Dur) and End.
Note:
• The oven will turn on after you select the Manual Cooking mode, Minute Minder mode,
Cooking Duration mode (Dur) or Cooking End mode.
• You can turn the oven o automatically by using the Cooking Duration mode (Dur) or
Cooking End mode.
• After you have nished cooking in Manual mode or Minute minder, to return to standby
mode, turn the Function knob and Temperature knob to the “ ● ” o position,
and then press the Function button and “ + ” buttons for 5 seconds.
• After selecting an oven operation mode, you may change the cooking function or adjust
the cooking temperature if required.
MANUAL COOKING MODE
In manual cooking mode, the cooking duration is controlled by the user. Only the time of day
and the symbol “ ” are displayed on the screen.
Note: When the oven is in manual cooking mode, after 5 hours of inactive use, the timer will
ash once per second to warn you that the oven will be entering standby mode. After 10 hours
of inactive use, the oven will enter standby mode to ensure the oven is not left on accidentally.
If the timer is ashing in manual cooking mode, you can press any button to reset the timer
if you intend to continue using the oven. Alternatively, press the “ ” function and “ + ” buttons
together for more than 3 seconds to enter standby mode if the oven will no longer be used.
MINUTE MINDER MODE
You can set a period of time using the minute minder function, and an alarm will sound when
that time has elapsed.
1. Turn the Function knob and Temperature knob to desired settings.
2. Press the “ ” function button to select the Minute minder function.
The relevant “ ” “ . ” symbol will ash.
3. Use the “ + ” and “ - ” buttons to adjust minute minder. (Refer to the instructions for setting
the correct time of day.) Press the “ ” function button to conrm, the “ ” symbol will

esatto.house
11
begin to display continuously. When the “ ” symbol begins to display continuously,
the minute minder time is set.
4. Once the countdown period has elapsed, the timer will sound an alarm and the “ ”
symbol begins to ash on the screen. Press any button for 3 seconds to silence the alarm
and the “ ”symbol disappears on the screen. The minute minder alarm is for warning
purposes only.
5. If you no longer require the oven, press the “ ” function button and “ + ” together
for 5 seconds to enter standby mode.
COOKING DURATION MODE
(Semi-Automtic Progrmming)
This function can be used for cooking for a set time duration. The maximum cooking period is
10 hours. The oven will no longer continue to heat once the countdown period has elapsed.
1. Turn the Function knob and Temperature knob to desired settings.
2. Press the “ ” function button until you see “ Dur ” shown on the display screen to select
the Cooking Duration mode.
3. Use “ + ” and “ - ” buttons to adjust cooking period for the food you wish to cook
(Refer to the instructions for setting the correct time of day). Press the “ ” function
button to conrm. The day’s time will appear on the screen along with the symbols “ A ”
and “ ”. The oven will begin to operate .
4. At the completion of the set duration, an alarm will sound, the oven will stop and
the symbol “ A ” will begin to ash on the screen. Bring the Function knob and oven
temperature knob to the “ ● ” o position and press any button for 3 seconds to stop
the alarm.
Press the “ ” function button for 5 seconds set the oven to Manual mode again
to continued using the oven.
5. If you no longer require the oven, press the “ ” function button and “ + ” together
for 5 seconds to enter standby mode.
COOKING END MODE
(Semi-Automtic Progrmming)
This function is used to cook according to the desired nishing time by selecting a point
in time (the time of day) at which you want the oven to switch o.
1. Turn the Function knob and Temperature knob to desired settings.
2. Press the “ ” function button until you see “ End ” on the display screen.
3. Use the “ + ” and “ - ” buttons to adjust the completion time.
(Refer to the instructions for setting the correct time of day.)
4. Press the “ ” function button to conrm, the day’s time will appear on the screen and
the symbols “A” and “ ” will display on the screen. The oven will also start to operate.
5. At the completion of the set duration, an alarm will sound, the oven will stop and the
symbol “ A ” will begin to ash on the screen. To stop the alarm, turn the Function knob and
oven temperature knob to the “ ● ” o position and press any button for 3 seconds.
6. If you no longer require the oven, press the “ ” function button and “ + ” together for
5 seconds to enter standby mode.

User Manual
12
COOKING FUNCTION NOTES:
• When setting the time of each function, long press on “ + ” or “ - ” for 5 seconds, the time
will progressively and rapidly increase or decrease.
• When setting either of the time functions, if there is none operation for 5 minutes then it
will return to manual mode.
• When setting either of the time functions, pressing on the “ ” function button for more
than 3 seconds can cancel current setting and enter manual mode.
• During time function setting, pressing on “ + ” and “ ” function buttons for 5 seconds,
a beep sounds it can cancel the current time function setting and enter standby mode.
Operting Instructions (Continued)

esatto.house
13
PRIOR TO CLEANING YOUR OVEN
WARNING:
• Before any maintenance and cleaning, turn o
the appliance and disconnect the power.
• Set all controls in the OFF position.
• Wait until the inside of the unit is not hot but only
slightly warm—cleaning is easier than
when warm.
• Clean the surface of the unit with a damp cloth,
soft brush or ne sponge and then
wipe dry.
• In case of heavy soiling, use hot water with non-
abrasive cleaning product.
• For cleaning the oven door glass, do not use
abrasive cleaners or sharp metal scrapers,
as these can scratch the surface or lead to the
glass being damaged.
• Never leave acidic substances (lemon juice,
vinegar) on stainless steel parts.
• Do not use a high pressure cleaner for cleaning
the unit.
• The baking tray and wire shelving may be
washed in mild detergent.
BULB REPLACEMENT
For replacement, follow the below process:
1. Disconnect power from the mains outlet or
switch o the circuit breaker of the unit’s mains
outlet.
2. Unscrew the glass lamp cover by turning
it counter-clockwise (note, it may be sti)
and replace the bulb with a new one of the
same type.
3. Screw the glass lamp cover back in place.
NOTE:
Only use 25W/230V , T300°C halogen lamps.
REMOVING THE OVEN DOOR INNER GLASS
The removable door allows for full access to the
entire interior of the oven for easier and quicker
maintenance. Follow these instructions carefully
if you wish to remove the over door.
1. To remove the door, open the door to the
maximum angle. Then pull the buckle at
the door hinges backward.
2. Close the door to an angle approximately 30°.
Hold the door with one hand on each side. Lift up
and slowly pull the door out from the oven.
3. Open the door rotation bracket assembly,
refer to image on the right.
4. Lift up the door outer glass and pull it out.
5. Then take the door middle glass out using the
same method as step 4.
6. When cleaning is completed, reverse the
above procedures to return the door to its
original position.
WARNING:
• Do not forcefully pull out the door or glass to
prevent breaking the glass during dismantling.
• The hinge springs could become loose
and cause personal injury.
• Do not lift or carry the oven door
by the door handle.
Mintennce Clening
BULB REPLACEMENT
For replacement, process as follows:
1> Disconnect power from the mains outlet or switch off the circuit breaker of the unit's mains outlet.
2> Unscrew the glass lamp cover by turning it counter-clockwise (note, it may be stiff) and replace
the bulb with a new one of the same type.
3> Screw the glass lamp cover back in place.
NOTE: Only use 25-40W/220V-240V, T300°C halogen lamps.
SHELF PLACEMENT WARNING:
SECURING THE OVEN TO THE CABINET
1. Fit oven into the cabinet recess.
2. Open the oven door.
3. Secure the oven to the kitchen cabinet with two
distance holders " A " which fit the holes in the
oven frame and fit the two screws " B ".
To ensure the oven shelves operate safely, correct placement of the shelves between the side rail
is imperative. Shelves and the pan only can be used between the first and fifth layers.
The shelves should be used with the right direction, it will ensure that during careful removal of the
shelf or tray, hot food items should not slide out.
OR
8
esatto.house13
PRIOR TO CLEANING YOUR OVEN
WARNING:
• Before ny mintennce nd clening, turn o
the pplince nd disconnect the power.
• Set ll controls in the OFF position.
• Wit until the inside of the unit is not hot but only
slightly wrm—clening is esier thn
when wrm.
• Clen the surfce of the unit with dmp cloth,
soft brush or ne sponge nd then
wipe dry.
• In cse of hevy soiling, use hot wter with non-
brsive clening product.
• For clening the oven door glss, do not use
brsive cleners or shrp metl scrpers,
s these cn scrtch the surfce or led to the
glss being dmged.
• Never leve cidic substnces (lemon juice,
vinegr) on stinless steel prts.
• Do not use high pressure clener for clening
the unit.
• The bking try nd wire shelving my be
wshed in mild detergent.
BULB REPLACEMENT
For replacement, follow the below process:
1. Disconnect power from the mins outlet or
switch o the circuit breker of the unit’s mins
outlet.
2. Unscrew the glss lmp cover by turning it
counter-clockwise (note, it my be sti) nd
replce the bulb with new one of the sme
type.
3. Screw the glss lmp cover bck in plce.
NOTE: Only use 25W/230V , T300°C
halogen lamps.
REMOVING THE OVEN DOOR & INNER GLASS
The removable door allows for full access to the
entire interior of the oven for easier and quicker
maintenance. Follow these instructions carefully if
you wish to remove the over door.
WARNING:
•
•
•
Maintenance & Cleaning
OVEN (OPTIONAL)
1.
2.
3.
4.
5.
6.
7.
(Figure 3)
(Figure 4)
in
OVEN (OPTIONAL)
1.
2.
3.
4.
5.
6.
7.
(Figure 2)
(Figure 3)
(Figure 4)
in
OVEN (OPTIONAL)
Removable door allows full access to entire interior
1.
2.
3.
4.
5.
6.
7.
(Figure 2)
(Figure 3)
(Figure 4)
in
OVEN (OPTIONAL)
1.
2.
3.
4.
5.
6.
7.
(Figure 2)
(Figure 3)
(Figure 4)
in
10
OVEN (OPTIONAL)
1.
2.
3.
4.
5.
6.
7.
(Figure 2)
(Figure 3)
(Figure 4)
in
10
OVEN (OPTIONAL)
1.
2.
3.
4.
5.
6.
7.
(Figure 1)
(Figure 3)
(Figure 4)
in
BULB REPLACEMENT
For replacement, process as follows:
1> Disconnect power from the mains outlet or switch off the circuit breaker of the unit's mains outlet.
2> Unscrew the glass lamp cover by turning it counter-clockwise (note, it may be stiff) and replace
the bulb with a new one of the same type.
3> Screw the glass lamp cover back in place.
NOTE: Only use 25-40W/220V-240V, T300°C halogen lamps.
SHELF PLACEMENT WARNING:
SECURING THE OVEN TO THE CABINET
1. Fit oven into the cabinet recess.
2. Open the oven door.
3. Secure the oven to the kitchen cabinet with two
distance holders " A " which fit the holes in the
oven frame and fit the two screws " B ".
is imperative. Shelves and the pan only can be used between the first and fifth layers.
The shelves should be used with the right direction,
shelf or tray, hot food items should not slide out.
OR
8
30˚
1. To remove the door, open the
door to the maximum angle.
Then pull the buckle at the
2. Close the door to an angle
approximately 30°. Hold the
3. Open the door rotation
bracket assembly, refer the
action in the following picture.
4. Lift up the door outer glass
and pull it out, then take the
door middle glass out in the
same way.
Don't forcibly pulled out the door and
prevent the glass breakage during the
dismantling process.
The hinge springs could loose, causing
personal injury.
Do not lift or carry the oven door by
the door handle.
door hinge backward.
door with one hand on each side.
Lift up and slowly pull the door
out from the oven.

User Manual
14
OPERATION IN CASE OF EMERGENCY
In the event of an emergency you should:
• Set all controls in the OFF position and disconnect the power.
• Call After Sales Support on 1300 11 4357 or email support@residentiagroup.com.au
Some minor faults can be fixed by referring to the instructions given in the table below.
IMPORTANT: If your appliance appears to be operating incorrectly, then you should disconnect it
from your electrical supply and then contact After Sales Support.
WARNING: Do not attempt to repair the oven yourself.
Please note that if an service agent is asked to attend whilst the product is under warranty and finds that
the problem is not the result of an appliance fault, then you may be liable for the cost of the call out charge.
The appliance must be accessible for the service agent to perform any necessary repair.
If your appliance is installed in such a way that a service agent is concerned that damage will be caused to
the appliance or your kitchen, then they will not complete a repair.
Please refer to the conditions of that appear on the warranty section at the rear of this user manual.
ISSUE POSSIBLE CAUSE COMMON RESOLUTIONS
The oven is not
powering on.
Break in power
supply.
Check the household fuse box for any blown fuses
and replace as necessary. Also ensure that a safety
switch hasn’t tripped.
The oven light
is not working.
The light globe is
loose or has blown.
When the oven has cooled and is switched o,
remove the globe cover and ensure that the globe
is tightly secured.
If blown, refer to the Cleaning and Maintenance
section under Bulb Replacement.
The oven is burning the
top of my dish whilst the
underside is under-done.
Not enough heat
from the bottom
of the oven.
Try using the Conventional cooking functions.
Try lowering the temperature.
Try using a lower shelf position.
The oven is burning
the underside of my
dish whilst the top
is under cooked.
Excessive heat
from the bottom
of the oven.
Try using the Conventional cooking functions.
Try lowering the temperature.
Try using a higher shelf position.
The oven is burning the
outside of my dish whilst
the inside is under-done.
Temperature is set
too high.
Lower the oven temperature and increase the
cooking duration.
The outside of my dish
is too dry even though it
looks cooked.
Temperature is set
too low.
Increase the oven temperature and decrease the
cooking duration.
If you need assistance, please contact our After Sales support centre on 1300 11 43 57 or email
Troubleshooting

esatto.house
15
Attch your receipt to this pge
Purchse Detils
For your records, please record details of your purchase below and staple your receipt to this page.
Your serial number can be found on the rating plate of your Built-in Oven.
STORE DETAILS
STORE NAME
|
ADDRESS
|
TELEPHONE
|
PURCHASE DATE
|
PRODUCT DETAILS
MODEL NO.
|
SERIAL NO.*
|

User Manual
16
WARRANTY TERMS AND CONDITIONS
BUILTIN OVENS
This document sets out the terms and conditions of the
product warranties for Residentia Group Appliances. It is
an important document. Please keep it with your proof of
purchase documents in a safe place for future reference
should you require service for your Appliance.
1. IN THIS WARRANTY
(a) ‘acceptable quality’ as referred to in clause 10 of
this warranty has the same meaning referred to in
the ACL;
(b) ‘ACL’ means Trade Practices Amendment (Australian
Consumer Law) Act (No.2) 2010;
(c) ‘Appliance’ means any Residentia Group product
purchased by you accompanied by this document;
(d) ‘ASR’ means Residentia Group authorised service
representative;
(e) ‘Residentia Group’ means Residentia Group Pty Ltd
of 165 Barkly Ave, Burnley VIC 3121, ACN 600 546
656 in respect of Appliances purchased in Australia;
(f ) ‘major failure’ as referred to in clause 10 of this
warranty has the same meaning referred to in the
ACL and includes a situation when an Appliance
cannot be repaired or it is uneconomic for Residentia
Group, at its discretion, to repair an Appliance during
the Warranty Period;
(g) ‘Warranty Period’ means:
(i) where the Appliance is used for personal,
domestic or household use (i.e. normal
single family use) as set out in the instruction
manual, the Appliance is warranted against
manufacturing defects for 24 months, following
the date of original purchase of the Appliance;
(h) ‘you’ means the purchaser of the Appliance not
having purchased the Appliance for re-sale, and
‘your’ has a corresponding meaning.
2. This warranty only applies to Appliances purchased
and used in Australia and is in addition to (and does
not exclude, restrict, or modify in any way) any
non-excludable statutory warranties in Australia.
3. During the Warranty Period Residentia Group or
its ASR will, at no extra charge if your Appliance
is readily accessible for service, without special
equipment and subject to these terms and conditions,
repair or replace any parts which it considers to
be defective. Residentia Group or its ASR may use
remanufactured parts to repair your Appliance. You
agree that any replaced Appliances or parts become
the property of Residentia Group. This warranty does
not apply to light globes, batteries, lters, seals or
similar perishable parts.
4. Parts and Appliances not supplied by Residentia
Group are not covered by this warranty.
Wrrnty
— THIS WARRANTY IS VALID IN AUSTRALIA ONLY —

esatto.house
17
5. You will bear the cost of transportation, travel and
delivery of the Appliance to and from Residentia
Group or its ASR. If you reside outside of the service
area, you will bear the cost of:
(a) travel of an authorised representative;
(b) transportation and delivery of the Appliance to and
from Residentia Group or its ASR, in all instances,
unless the Appliance is transported by Residentia
Group or its ASR, the Appliance is transported at
the owner’s cost and risk while in transit to and from
Residentia Group or its ASR.
6. Proof of purchase is required before you can make
a claim under this warranty.
7. You may not make a claim under this warranty unless
the defect claimed is due to faulty or defective parts
or workmanship. Residentia Group is not liable in the
following situations (which are not exhaustive):
(a) the Appliance is damaged by:
(i) accident
(ii) misuse or abuse, including failure to properly
maintain or service
(iii) normal wear and tear
(iv) power surges, electrical storm damage or
incorrect power supply
(v) incomplete or improper installation
(vi) incorrect, improper or inappropriate operation
(vii) insect or vermin infestation
(viii) failure to comply with any additional
instructions supplied with the Appliance;
(b) the Appliance is modied without authority from
Residentia Group in writing;
(c) the Appliance’s serial number or warranty seal has
been removed or defaced;
(d) the Appliance was serviced or repaired by anyone
other than Residentia Group, an authorised repairer
or ASR.
8. This warranty, the contract to which it relates and the
relationship between you and Residentia Group are
governed by the law applicable where the Appliance
was purchased.
9. To the extent permitted by law, Residentia Group
excludes all warranties and liabilities (other than as
contained in this document) including liability for
any loss or damage whether direct or indirect arising
from your purchase, use or non use of the Appliance.
10. For Appliances and services provided by Residentia
Group in Australia, the Appliances come with a
guarantee by Residentia Group that cannot be
excluded under the Australian Consumer Law.
You are entitled to a replacement or refund for a
major failure and for compensation for any other
reasonably foreseeable loss or damage. You are also
entitled to have the Appliance repaired or replaced
if the Appliance fails to be of acceptable quality and
the failure does not amount to a major failure. The
benets to you given by this warranty are in addition
to your other rights and remedies under a law in
relation to the Appliances or services to which the
warranty relates.
11. At all times during the Warranty Period, Residentia
Group shall, at its discretion, determine whether
repair, replacement or refund will apply if an
Appliance has a valid warranty claim applicable to it.
12. Missing parts are not covered by warranty.
Residentia Group reserves the right to assess each
request for missing parts in a case by case basis.
Any parts that are not reported missing in the rst
week after purchase will not provide free of charge.
13. To enquire about claiming under this warranty,
please follow these steps:
(a) carefully check the operating instructions,
user manual and the terms of this warranty;
(b) have the model and serial number
of the Appliance available;
(c) have the proof of purchase (e.g. an invoice) available;
(d) telephone the numbers shown below.
14. You accept that if you make a warranty claim,
Residentia Group and its ASR may exchange
information in relation to you to enable Residentia
Group to meet its obligations under this warranty.
IMPORTANT
Before calling for service, please ensure that the steps
in point 13 have been followed.
CONTACT SERVICE
→ Service: 1300 11 HELP (4357)
Our goods come with guarantees that cannot be excluded under the Australian Consumer Law.
You are entitled to a replacement or refund for a major failure and for compensation for any other
reasonably foreseeable loss or damage. You are also entitled to have the goods repaired or replaced
if the goods fail to be of acceptable quality and the failure does not amount to a major failure.
The Australian Consumer Law requires the
inclusion of the following statement with
this warranty:
— THIS WARRANTY IS VALID IN AUSTRALIA ONLY —

User Manual
18
— THIS WARRANTY IS VALID IN NEW ZEALAND ONLY —
NEW ZEALAND WARRANTY TERMS CONDITIONS
BUILTIN OVENS
To help care for your investment, be sure to register your
appliance online. Registration will help you if you need to
arrange service in the future, and serves as a record of your
purchase—including critical information like model number
and serial number – that you can refer to at any time.
Simply visit the below website, or ask your retailer
for help: www.esatto.house/nz/registration
WARRANTY
These products are covered by a warranty for a period
of 24 months from the date of purchase, subject to the
following conditions*. The warranty covers rectication
free of charge of any fault arising from defective materials
or components, or faulty workmanship or assembly.
* The conditions above mentioned are:
1. That the purchaser carefully follows all instructions
packed with the product;
2. That the purchaser and/or installer carefully follows
the installation instructions provided and complies
with electrical wiring regulations, gas and/or plumbing
codes;
3. That the purchaser carefully follows instructions
provided in the owner’s handbook relating to the
proper use and care of the product and does not use
the product for any purpose other than the domestic
use for which it has been designed;
4. Commercial use of the product for professional or
industrial purposes will void this warranty.;
5. That the product was purchased and installed in
New Zealand;
6. That this warranty does not extend to:
a) optional glass lids for hobs apart from claims which
relate to mechanical or physical damage thereof at
the date of purchase;
b) ‘consumable’ parts such as light bulbs or lters;
c) damage to ceramic glass caused by liquid or solid
spill-overs, lack of maintenance, or impact;
d) damage to surface coatings caused by cleaning or
maintenance using products not recommended by
the owner’s handbook;
e) defects caused by normal wear and tear,
accident, negligence, alteration, misuse
or incorrect installations;
f) a product dismantled, repaired or serviced by any
serviceman other than an authorised service agent;
g) a product not in possession of the original
purchaser;
h) damage caused by power outages or surges
i) damage caused by pests
(eg. rats, cockroaches etc.)
7. That if the product is a freestanding microwave oven
or small appliance it must be returned to the dealer/
retailer for servicing. These products, unless stated
otherwise, have a 12 month warranty from original
date of purchase with 24 months on the microwave
magnetron; Waste disposers have a 12 month warranty.
8. The provision of service under this warranty is limited
by a 25km boundary from the retailer where the
product was purchased except for microwaves. Such
travelling outside of these limits will incur commercial
cost to be paid by you, regulated by the number of
kilometres travelled beyond the 25km limit (50km
return trip). Microwaves are to be delivered to the
nearest authorised service agent by the customer.
Please refer to your user manual for any further conditions
that may apply to your specic model.
Nothing herein contained shall be construed in any way
as excluding or limiting your rights under the Consumer
Guarantees Acts 1993.
For Service please visit www.applico.co.nz/service or
contact the dealer/retailer from whom you purchased the
product from or call the 0800 number listed below. If you
are unable to establish the date of purchase, or the fault is
not covered by this warranty, or if the product is found to
be in working order, you will be required to bear all service
call charges.
Registration of this warranty constitutes acceptance of the
terms and conditions of this warranty.
Should you require any assistance, please call Customer
Services on 0800 763 448.
Distributed by Applico Ltd. www.applico.co.nz July 2019
After registering your appliance online, we recommend you
ll out the below information for your reference and keep
this warranty card in a safe place.
Wrrnty (NZ)

esatto.house
19
This pge is intentionlly blnk.
But if you wnt to drw something, mke notes or even write
recipe, it’s ll yours!

A RESIDENTIA
GROUP INITIATIVE
everything
you need
/